
Long before glassblowing was invented, ancient artisans were melting glass and pouring it into molds. This timeless technique, known as glass casting, has been used for centuries to create everything from simple beads to intricate vessels. Today, artists continue this tradition, but with the advantage of modern kilns and high-quality materials that offer incredible control and consistency. It’s a beautiful blend of ancient art and contemporary craft. This guide will connect you to that rich history by teaching you the fundamentals. We’ll cover the different casting methods, the essential equipment for a modern studio, and the step-by-step process to create your own cast glass art.
Glass casting is the process of designing unique glass sculptures with the help of mold and kiln. It is a difficult, time-intensive process that requires some specialist tools. In this blog, we’ll guide you through the process of casting and how to get started. We’ll explain:
- What Is Glass Casting?
- Common Glass Casting Techniques
- Glass Casting Equipment
- How to Cast Glass
What is Glass Casting?
Glass casting is a technique of shaping glass objects. The process starts with melting glass—glass frit, glass powder, glass stingers/noodles, so on—to the point where it becomes soft and malleable. Pour this liquid glass into a predefined shape by using a mold. This mold could be made of sand, graphite, metal, or any other object. Fill the mold and wait for it to cool down where it solidifies. Remove the solidified glass structure from the mold. Use grinding/polishing tools to get the final glass sculpture.
A Brief History of Glass Casting
While it might seem like a modern technique, glass casting is an ancient art form with a rich history. It’s one of the oldest methods for creating glass objects, predating glassblowing by more than a thousand years. The core principle has remained the same for centuries: melt glass until it’s liquid, pour it into a mold, and let it cool into a solid shape. Understanding its origins gives you a deeper appreciation for the process and connects your work to a long line of artisans who have been shaping glass in this way for millennia. From ancient Egyptians to Roman innovators, artists have continuously refined casting to create both functional and beautiful pieces.
Ancient Origins
The earliest evidence of glass casting dates back to around 1500 BCE in Ancient Egypt and Mesopotamia. Early artisans discovered that by heating a mixture of sand, soda, and lime, they could create a new material—glass. They would then pour this molten substance into simple, open-faced molds made of clay or sand to create beads, amulets, and small vessels. This method allowed for the creation of durable, colorful objects that were highly prized. It was a revolutionary technique that laid the groundwork for all future glass art, establishing the fundamental process of using a mold to give glass a specific, repeatable form.
Roman Innovations
The Romans took glass casting to a new level of sophistication. They developed more complex techniques, including the use of multi-part molds that allowed them to create more intricate and detailed objects like plates and bowls. They primarily used two methods: frit casting, where they packed crushed glass into a mold before firing, and pouring molten glass directly from a crucible. Crucially, the Romans also perfected the process of annealing—slowly cooling the glass in a controlled environment. This step is essential for relieving internal stress in the glass, preventing it from cracking or shattering as it cools. This innovation made cast glass objects much more durable and reliable.
Why Choose Glass Casting?
With so many ways to work with glass, you might wonder what makes casting a great choice for your next project. Casting offers a unique level of control and precision that sets it apart from other methods, like glassblowing or fusing. It’s the ideal technique when you want to create solid, sculptural forms with specific details, textures, and substantial thickness. Whether you’re aiming for a complex abstract sculpture or a simple, elegant bowl, casting gives you the power to bring a precise vision to life. It’s a process that rewards patience and planning with stunning, durable results that are impossible to achieve any other way.
Glass Casting vs. Glassblowing
The main difference between casting and glassblowing comes down to control versus spontaneity. Glassblowing is a dynamic process that involves shaping a bubble of molten glass on the end of a blowpipe, resulting in hollow, fluid forms. It’s fast-paced and relies heavily on rhythm and movement. In contrast, glass casting is a more deliberate and methodical process. You create a specific shape by filling a mold with glass, which gives you incredible control over the final form, thickness, and texture. This makes casting perfect for creating solid, sculptural pieces and replicating intricate designs that would be impossible to achieve with a blowpipe.
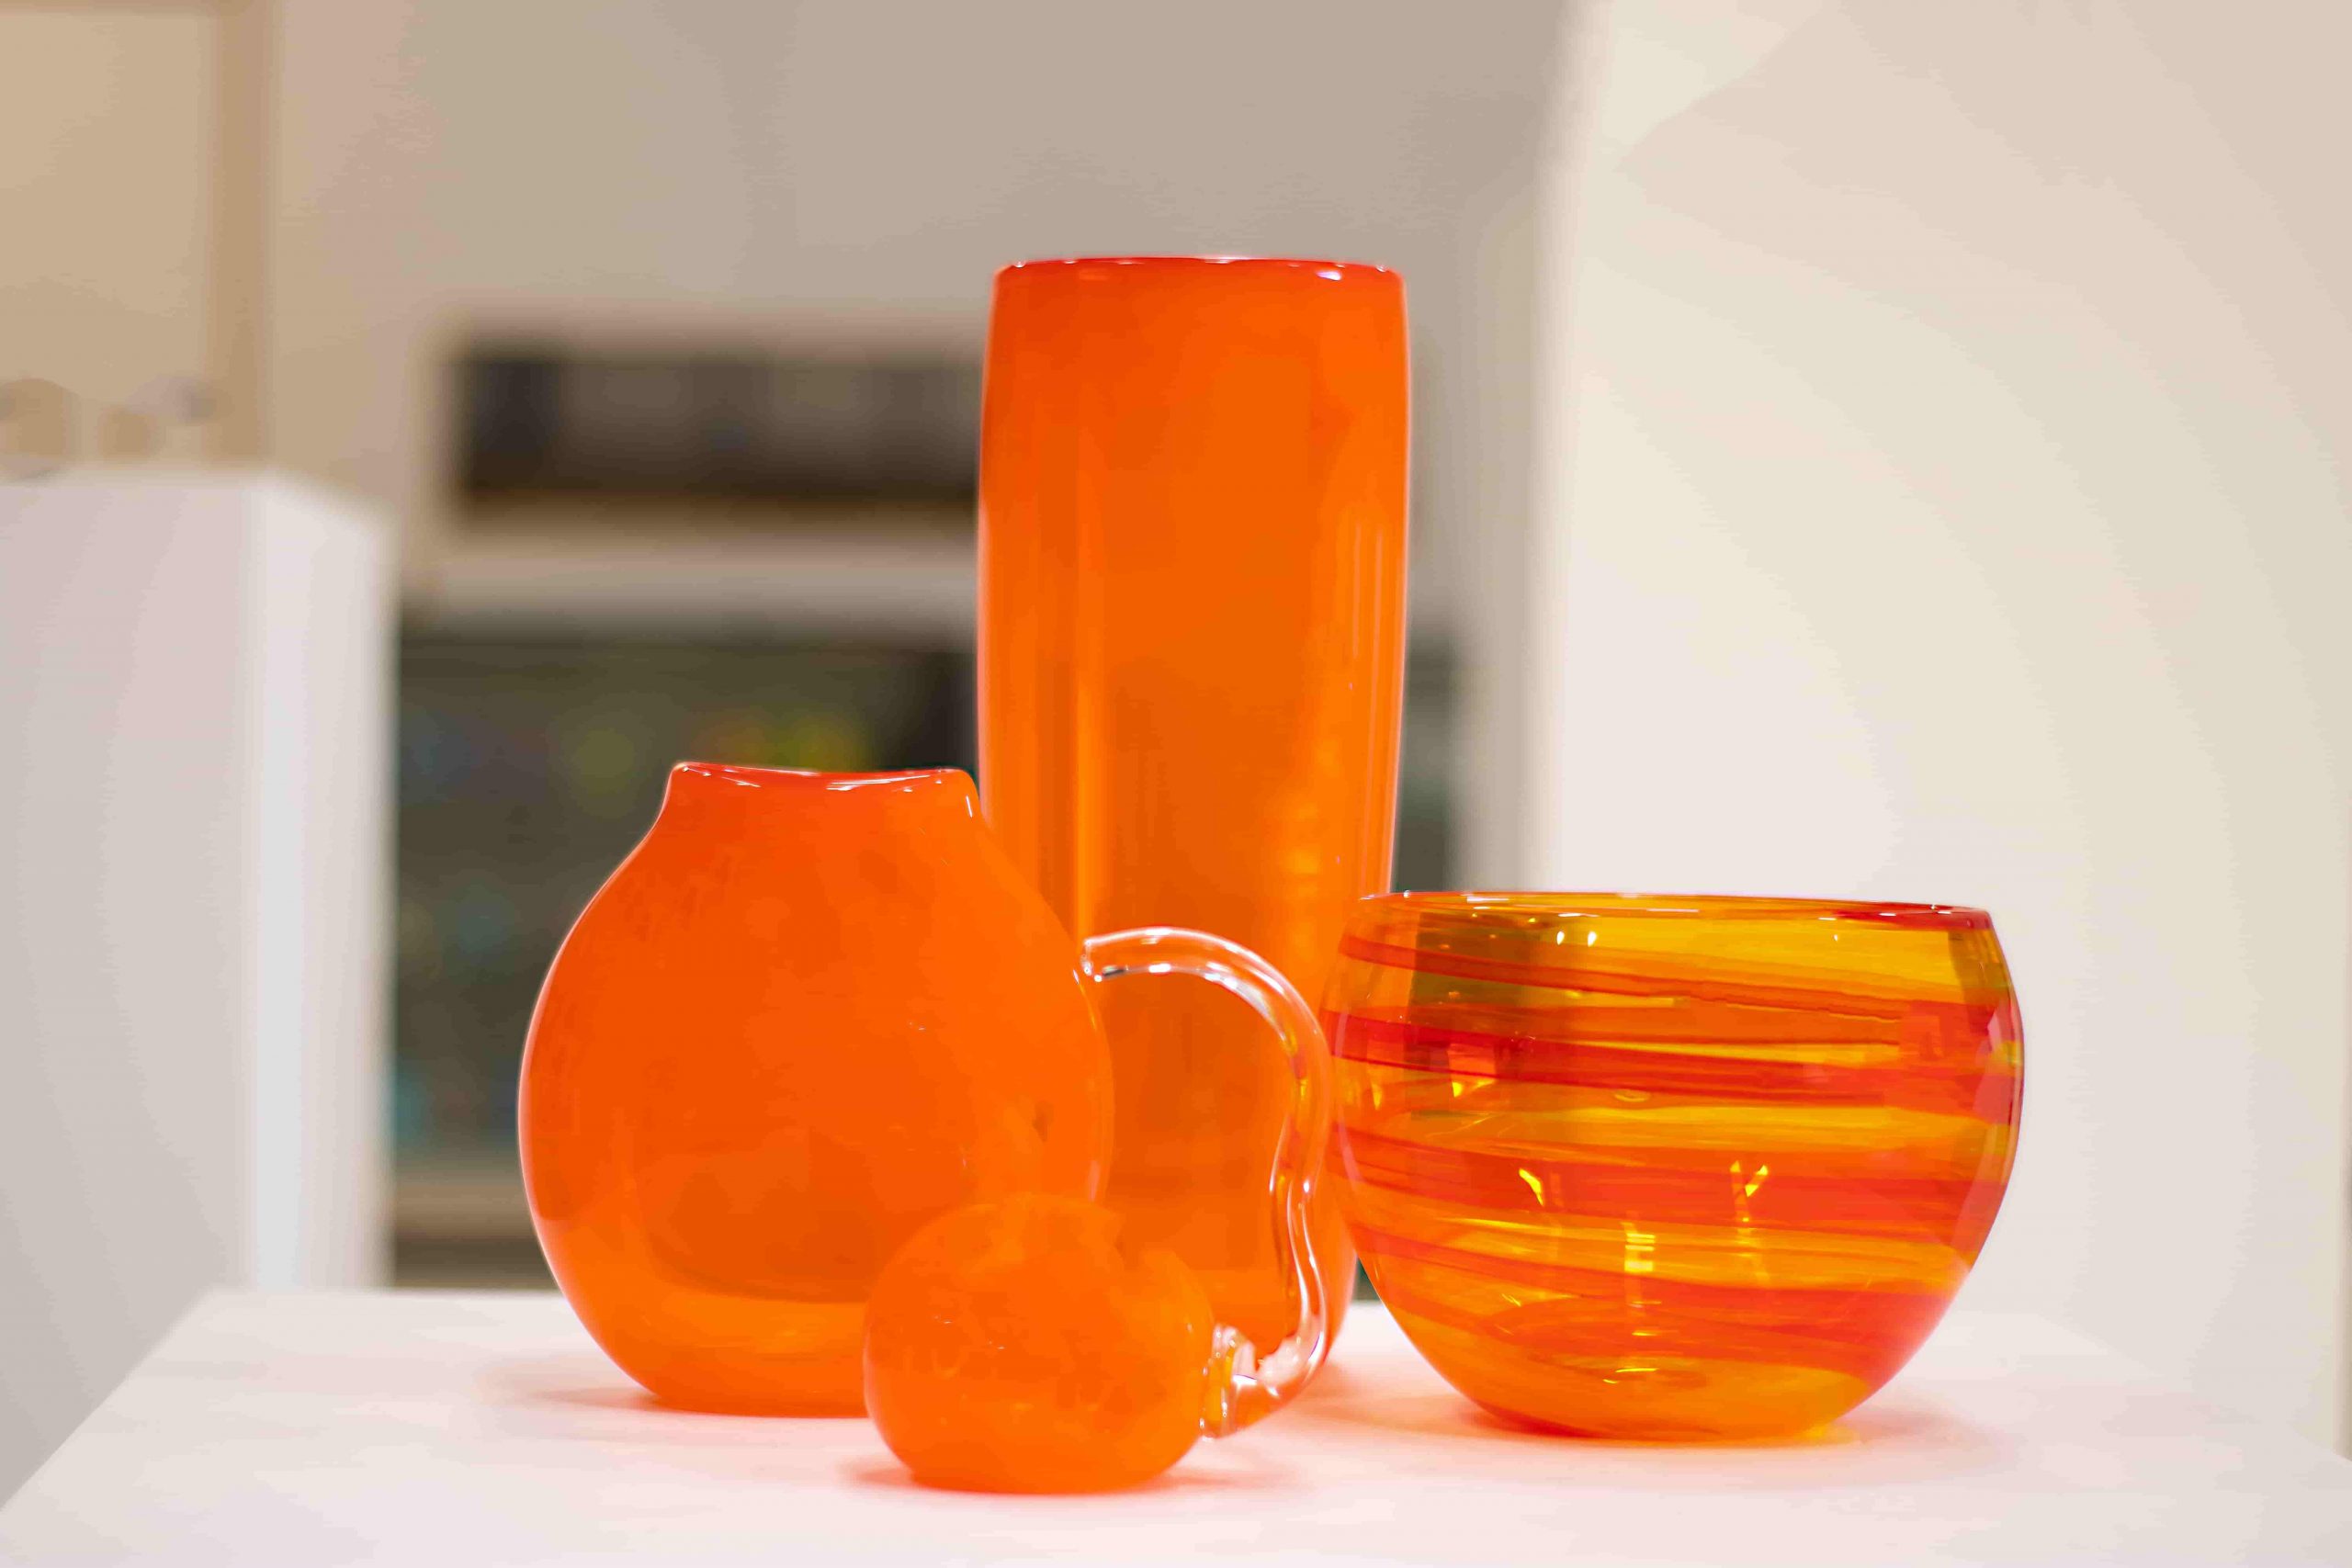
Applications of Cast Glass
The versatility of glass casting allows artists to create an incredible range of objects, from small decorative items to large-scale architectural installations. Many artists use this technique to produce stunning sculptures, paperweights, and detailed figurines. It’s also a popular method for creating custom functional art, such as unique bowls, platters, and even furniture components like tabletops or drawer pulls. Beyond the studio, cast glass is used in commercial applications for custom lighting fixtures and architectural elements. Whether you’re working with COE90 glass for a colorful sculpture or creating subtle, textured tiles, casting opens up a world of creative possibilities.
Common Glass Casting Techniques
There are multiple glass casting techniques to create a unique glass work of art:
Graphite Casting
Available in a variety of shapes and designs, graphite mold can withstand high temperatures and help you achieve a higher degree of dimensional accuracy and tolerances.
The Annealing Process for Graphite Molds
Think of annealing as a crucial de-stressing phase for your glass. After you’ve melted glass into your graphite mold, it needs to cool down in a very controlled way. If it cools too quickly, invisible stresses build up inside the glass, which can cause it to crack unexpectedly—sometimes hours or even days later. The annealing process prevents this by holding the glass at a specific temperature to stabilize it, then slowly ramping down the temperature inside the kiln. The exact annealing schedule depends on the type of glass you’re using; for instance, COE90 glass will have a different temperature and hold time than COE96 glass. This slow, steady cooling relieves internal stress and ensures your finished piece is strong and durable. It’s a step that requires patience, but it’s absolutely essential for a successful casting.
Pate De Verre
It is a French team that refers to using a glass plate to design desired glass shape. The process involves the mixing of colorants, enamels, gum arabic, and water and combined with minuscule glass pieces.
The “Glass Paste” Method
Pâte de verre, which literally means “glass paste” in French, is a fantastic casting method for creating pieces with incredible texture and rich color. You’ll start by mixing finely crushed glass with a binding agent (gum arabic and water work well) and any colorants you want to use. This creates a thick paste that you carefully apply to the inside of your mold. You have a lot of flexibility here, as you can use many different types of molds, from simple plaster forms to more complex high-temp options for detailed designs.
After filling the mold, you’ll fire it in a kiln. The goal is to heat the glass just enough for the particles to fuse together, not to melt it completely. This is how you capture all those beautiful, intricate details from the mold’s surface. One of the best parts of this technique is the artistic freedom it gives you; you can create hollow objects and play with different wall thicknesses. Just remember to let your piece cool down slowly to prevent stress cracks. It’s a process that requires some patience, but the stunning, sculptural results are absolutely worth it.
Kiln Casting
 Kiln casting is the process of placing cold glass pieces into, through, or over the kiln casting mold inside a kiln. Heat it to a temperature where the glass becomes liquid and takes the required shape.
The In-Kiln Melting Process
The in-kiln melting process is where your solid glass transforms into a liquid that fills your mold. It starts with preparing your mold, which can be made from plaster, graphite, or another material built to handle high temperatures. Once it’s ready, you fill it with your glass of choice—crushed glass, also known as frit, is a popular option. Then, it’s time to turn up the heat. Your kiln will need to reach temperatures over 1600°F (around 870°C) for the glass to melt and flow properly. It’s important to monitor your temperatures carefully, as overheating can cause devitrification, which creates an unattractive, crystalline texture on the glass surface.
After the glass has completely melted and filled every part of your mold, the next step is just as critical: cooling it down. You can’t just turn the kiln off and walk away. The glass needs to go through a slow, controlled cooling process called annealing. This step is essential for relieving internal stress within the glass. If it cools too quickly, it can experience thermal shock and crack or even shatter. According to experts at Polytek Development Corp, this slow cooling can take anywhere from one to two days, depending on the thickness of your piece. This careful process is what ensures your beautiful creation comes out of the kiln in one piece.
Sand Casting
Sand casting art is one of the most common and economical processes to cast glass. It involved placing or craving a design into the sand to create a mold. Then, pour hot liquid glass into the molds and wait for it to cool down.
Using Binders and Color in Sand Molds
To get your sand to hold a detailed shape, you need to add a binder. Plain, dry sand won’t maintain its form on its own, so artists typically mix it with a small amount of bentonite clay and water. This creates a firm, damp material that holds its shape perfectly when you press objects into it or carve your own designs. Once your mold is ready, you can introduce color by sprinkling colored glass powders or small chips of frit onto the surface before casting. As you pour the hot, molten glass, it picks up this color and fuses it into the outer layer of your final piece. This technique gives you incredible control over the final look, allowing for beautiful surface designs and color gradients directly in the mold.
Lost Wax Casting
This technique requires a mold that is surrounded by a sacrificial wax model. During the process, the wax is melted out and replaced by molten glass. This type of casting is the best for creating detailed glass structures. Important Note: There are a number of molds available in the marling to choose from. Also, you can make your own glass mold from silica, plaster, or any other material.
Open-Faced Molding
Open-faced molding is another popular technique, especially for artists who want to create pieces with a lot of detail. This method uses a two-part mold that allows you to achieve really complex and intricate designs in your final glass piece. Think of it as creating a detailed impression that the molten glass will fill. Because the top is open, it gives you a bit more control and visibility during the process. It’s a fantastic way to produce sculptures with sharp lines and defined features. You can find a variety of molds designed for this technique, or even create your own to bring a truly unique vision to life.
Choosing the Right Glass for Casting
Once you have a handle on the techniques, the next big decision is choosing your glass. This step is just as important as the casting method itself, as the type of glass you select will directly influence the final appearance, color, and texture of your artwork. Different glasses have different properties, and understanding them will help you achieve your desired outcome. For example, some glass melts more predictably, while other types can introduce interesting, unexpected effects. Taking the time to select the right material ensures that the vision you have in your head is the one that comes out of the kiln.
Thinking about your project’s goals will guide your choice. Are you looking for crystal-clear transparency or a piece with rich, layered colors? Do you need absolute consistency, or are you open to the unique character that comes from less predictable materials? We’ll look at a few common options, from specialized fusing glass to everyday recycled materials, to help you figure out what will work best for your project. We will also explore how the form of the glass, whether it’s a solid billet or fine frit, plays a crucial role in the final texture and clarity of your sculpture.
Types of Glass
When you’re starting out, the glass options can feel a bit overwhelming. But it really boils down to a few main categories, each with its own strengths. The most common choices for kiln casting are fusing glass, recycled glass, and crystal glass. Fusing glass is manufactured for consistency, making it a reliable choice for predictable results. Recycled glass is a more sustainable and often economical option that can add a unique character to your work. Crystal glass is the go-to for artists seeking exceptional clarity and brilliance. Let’s break down each one so you can choose with confidence for your next project.
Fusing Glass (COE90 and COE96)
Fusing glass is specifically designed for kiln work, which makes it an ideal choice for casting. It’s formulated to melt evenly and predictably, which is exactly what you want when you’re trying to fill a mold perfectly. This type of glass is great for layering to create depth and rich color blends. You’ll often see it labeled with a COE, or Coefficient of Expansion, which measures how much the glass expands and contracts when heated and cooled. It’s critical to use glass with the same COE in a single project to prevent cracking. The two most common types you’ll find are COE90 and COE96 glass.
Recycled Glass
Using recycled glass is a wonderful, eco-friendly option that can also be easier on your wallet. Think old bottles, jars, or window panes. This approach can lead to beautiful, one-of-a-kind results, as the exact composition of the glass can vary. However, it’s important to know that recycled glass often requires more prep work. You’ll need to clean it thoroughly to remove any labels or residue. You may also need to do some test melts to understand how it will behave in the kiln, as its melting properties can be less predictable than manufactured art glass. This extra effort is often rewarded with a truly unique piece with a great story.
Crystal Glass
If you’re aiming to create a high-end art piece with stunning clarity and sparkle, crystal glass is an excellent choice. Often used for fine sculptures and decorative objects, crystal is prized for its brilliance and ability to refract light. This clarity can make your final piece look incredibly polished and professional, enhancing its overall aesthetic appeal. While it can be more expensive, the investment is often worth it for artists who want to create gallery-quality work that truly stands out. Its pristine nature provides a perfect canvas for capturing light and form in your detailed sculptures.
Glass Form: Billets vs. Frit
Beyond the type of glass, you’ll also need to choose its form. The two most common forms for casting are billets and frit. A billet is a solid, chunky block of glass, while frit consists of small, crushed glass granules. Your choice here can significantly change the outcome of your piece. Billets are known for producing a clearer final product with fewer trapped air bubbles, making them perfect for smooth, transparent sculptures. Frit, on the other hand, is fantastic for creating texture and complex color variations. You can layer different colors of frit to achieve a painterly effect in your casting.
Equipment Needed for Glass Casting
Workspace Requirements
Ventilation and Safety
Before you start melting glass, it’s essential to set up a safe and functional workspace. Your first priority should always be personal protective equipment (PPE). Think of safety glasses, heat-resistant gloves, and a good quality respirator or mask as your studio uniform—don’t work without them. The process of working with glass and high temperatures demands respect, so protecting yourself is the most important step. It’s also critical to read and understand all the manufacturer’s instructions that come with your kiln, as each model has unique requirements for safe operation.
Proper ventilation is another non-negotiable element of your workspace. The casting process can release fumes and heat, so you need a reliable way to keep the air clean. An exhaust fan is an excellent tool for pulling these fumes out of your studio. If you’re setting up a studio at home, try to keep it separate from your main living areas to control dust and fumes. Beyond ventilation, an organized space with good lighting and a heat-resistant work surface will not only keep you safer but will also help you create better work by allowing you to see and manage your materials effectively.
Safety Equipment
Safety equipment is highly important to protect yourself during the glass casting process. Below-mentioned is the required safety equipment:
- Heavy-duty apron
- Face shield
- Heat-resistant gloves
- Respirator
- Sleeves protective
- Infrared safety glasses
and more.
High-Quality Casting Wax
Wax is required to create your design before designing a mold around it. Heat gun, soldering iron, and texturing tools are also required to shape the wax according to your needs. Important Note: You can use dental tools to effectively carve and sculpt designs.
Casting Molds
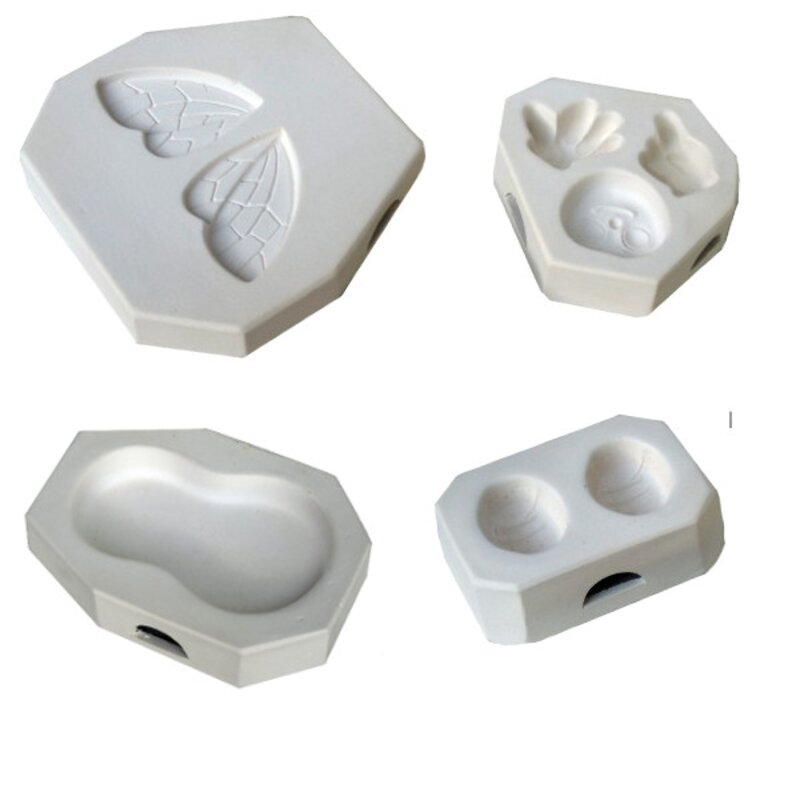 You can buy the required casting mold or create your own using a combination of silica and plaster. Mix equal parts of silica and plaster by slowly adding water until it gets a consistency similar to heavy cream.
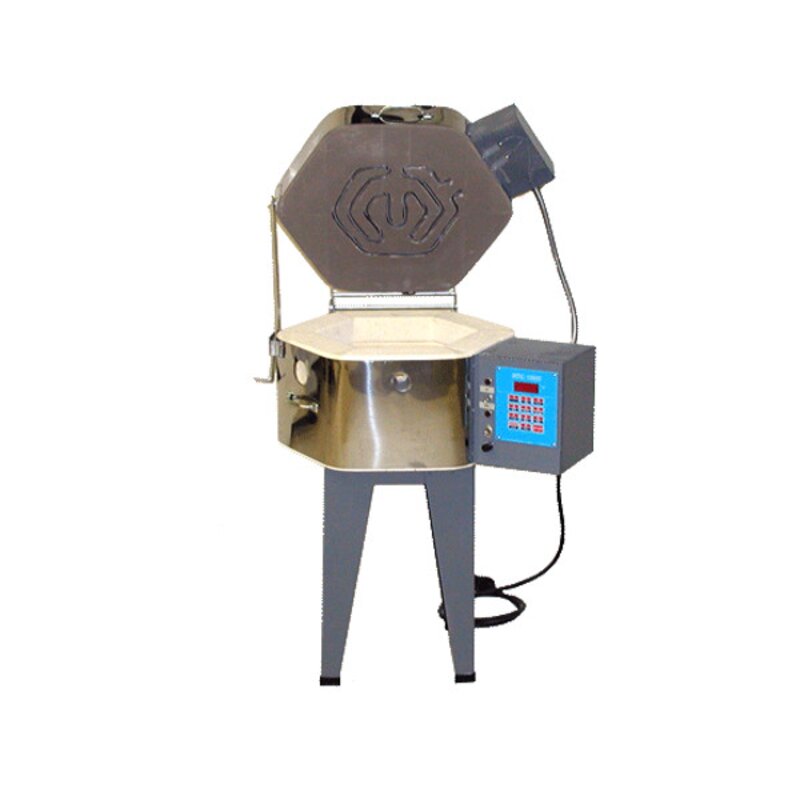
Kiln
Choose a high-quality kiln large enough to carry your casing mold. If you are making a kiln for glass casting, make sure your kiln can withstand high temperatures.
Temperature and Programming Needs
A good kiln for casting does more than just get incredibly hot; its real value is in precise temperature control over long periods. To get glass to flow into every detail of a mold, you need to reach temperatures around 1500–1600°F. But heating is only half the battle. The cooling process, known as annealing, is where your piece gains its strength and stability. This is where your kiln’s programming capabilities are essential. You must cool the glass very slowly through specific temperature ranges to relieve internal stress, and rushing this step almost guarantees a cracked piece. A reliable kiln with a digital controller is a must-have, allowing you to program a multi-step firing schedule that ensures your sculpture cools down safely over several days.
Wallpaper Steamer
A wallpaper steamer is required to melt the wax out of your casting mold.
Weighing Scale
A weighing scale is essential to calculate how much glass you will need according to your glass casting project.
Cold Working Tools
It is also essential to grab some cold working tools—belt sander and grinder—to polish and finish your piece in the final stage of the glass casting process.
9 Easy Steps of Casting Glass
1. Design your Glass Piece
The first step of casting glass involves drawing your idea and then shaping it using material such as wax or clay. Always keep size limitations in your mind because a glass sculpture with 1 inch of thickness approximately takes a day in the kiln. The firing time for thicker pieces can stretch up to weeks. For 3D glass models, using wax—beeswax, paraffin, and microcrystalline—is one of the best options. Make sure to attach a wax reservoir to your glass model for making it easy for the glass to flow through.
Creating Multiples with Rubber Molds
If you plan on creating more than one copy of a piece, using a rubber mold is an incredibly efficient technique. The process starts by making a flexible rubber mold of your original model, which excels at capturing intricate details for faithful reproductions. Once the rubber mold is ready, you can pour molten wax into it to create perfect wax copies. Because the mold is flexible, you can easily remove the wax models without damage, allowing you to reuse the mold over and over. These wax replicas are then used in the lost wax casting process. Each copy serves as the positive for creating a new casting mold, which is then filled with glass in the kiln. This method is a game-changer for artists who want to produce a series or explore variations in color across the same design, streamlining the workflow significantly. Just remember, while the rubber mold creates the wax copies, you’ll still need traditional casting molds for the final glass piece.
2. Make a Plaster Mold
 In order to make a mold for casting, add silica, plaster, and water in equal proportion. Silica has a high refractory and plaster gives the support. Mix the mixture together until it gains consistency similar to heavy cream. Build a temporary cover around the wax model to secure the mold. Pour the mixture around the mold and let it sit for 30 minutes. Make sure you knock repeatedly on the work table to eliminate air bubbles trapped in the mixture.
3. Remove the Mold
After the mixture is completely dry and solidified, it’s time to remove the temporary cover and carefully flip the mold. If you have used clay, remove it slowly without breaking the plaster walls. On the other hand, if you have used wax, it’s time to melt down the wax. Now clean the mold to remove any loose particles. Let it dry for a few days to get rid of any moisture.
4. Melt Out the Wax
Microwave is the most effective tool to melt out wax from the mold. Place the mold in the microwave and place a container beneath the mold to collect the wax. Always heat the mold in short bursts until all the wax has collected into the container. Once all the wax is melted out, wash it with boiling water to get rid of any residual wax.
5. Measure Out the Glass
Water displacement is one of the best ways to calculate the amount of glass needed for the mold. Just follow these below-mentioned steps:
- Pour water into the mold and fill it till the brim
- Empty the mold in a container
- Weight the water collected from the mold
- Multiply the weight with 2.5 (the density of glass) to measure the amount of glass you’ll need
Make sure you select the right type of glass, as the quality of glass will affect the final result.
6. Pore the Glass into the Mold
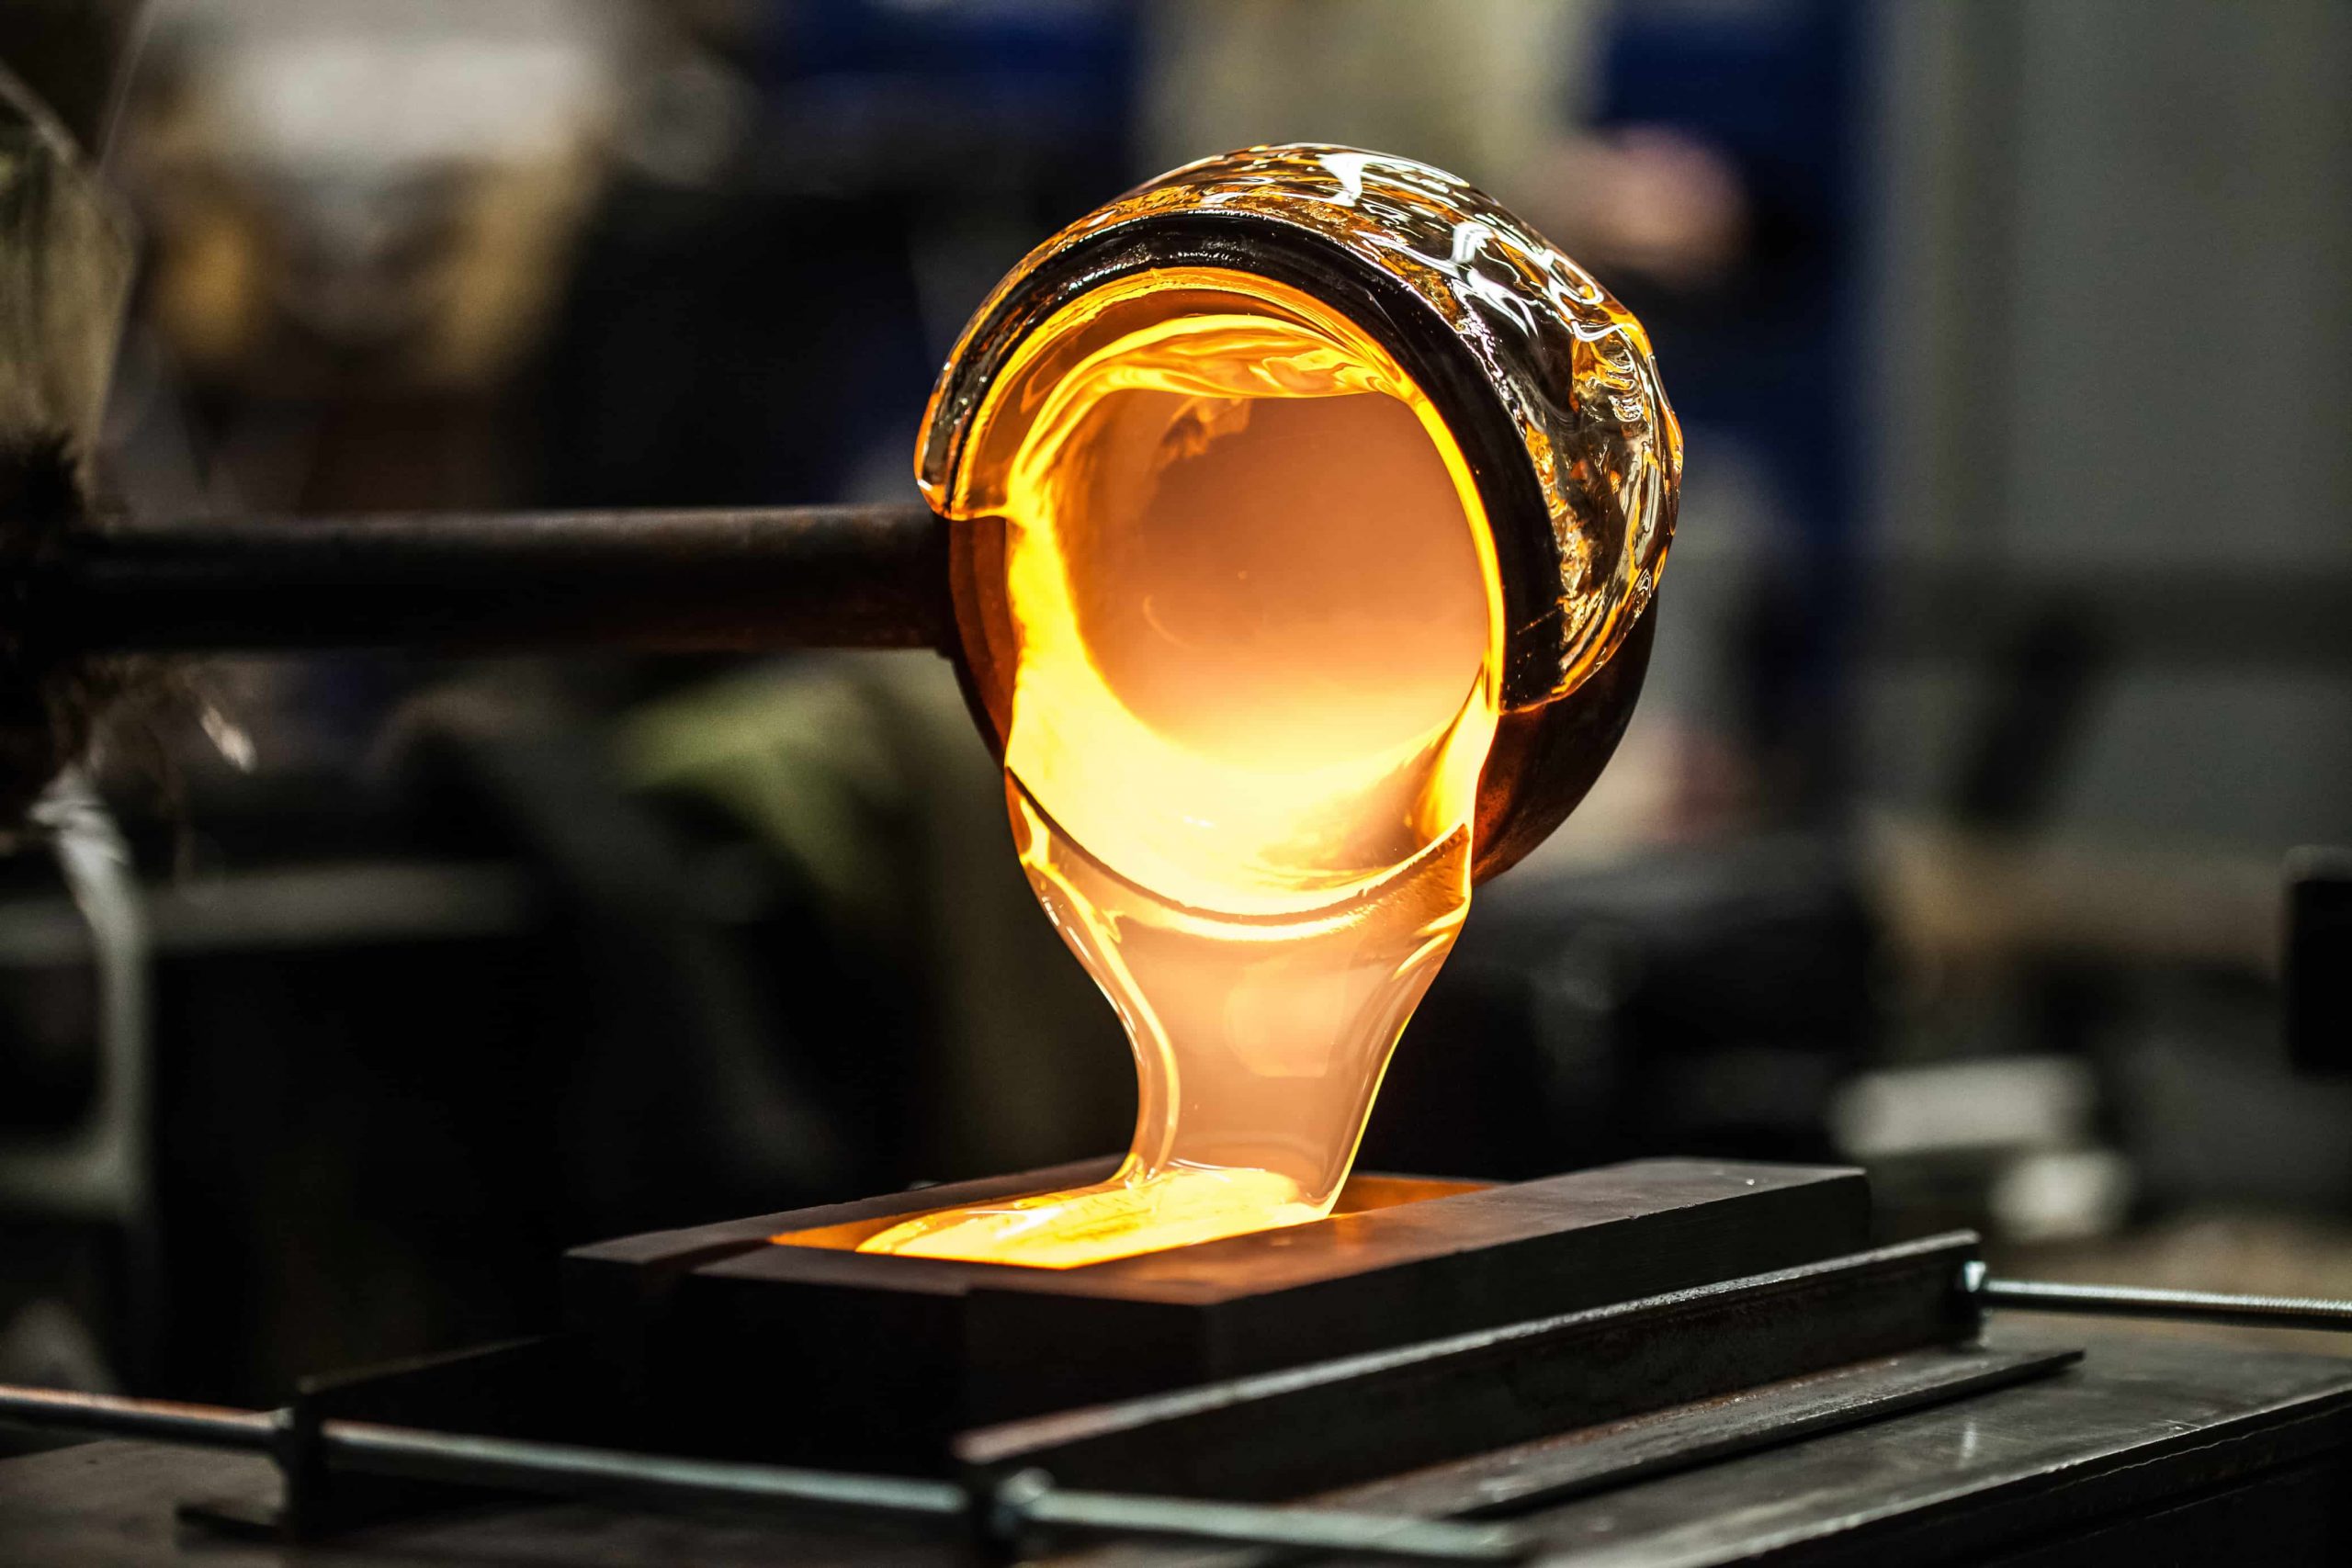 It’s time to melt the glass and pour it into the mold. Before you melt your glass, make sure it is thoroughly cleaned with vinegar diluted with distilled water. Also, use gloves to avoid smudges and fingerprints. Place the glass in the kiln over the kiln shelf paper and fire the kiln until it reaches the required temperature where your glass becomes liquid. Now carefully remove the glass and pour it into the mold.
7. Allow it to Cool Down
There is no one-size-fits-all temperature when it comes to firing glass, it all depends on the quality and thickness of the glass piece. Once your glass is poured into the mold, you must bring the temperature down as slowly as possible to prevent it from cracking.
Key Firing Temperatures
Getting the temperature right is everything. Generally, you’ll be working in a range between 1,525°F and 1,700°F for kiln casting. The exact temperature depends entirely on the type of glass you’re using and the thickness of your project. For instance, different types of glass, like COE90 or COE96, have unique melting points and viscosity. The goal is to get the glass hot enough to become fluid, allowing it to flow and capture every intricate detail of your mold. It’s a delicate balance; you need it hot enough to flow but not so hot that you run into other issues. Always check the manufacturer’s recommended firing schedules for the specific glass you’re using as your starting point.
Avoiding Devitrification
One of those issues I just mentioned is devitrification. It sounds complicated, but it’s basically a crystalline haze or scummy layer that can form on the surface of your glass, making it look cloudy instead of clear and glossy. This happens when the glass is held at a high temperature for too long, giving crystals a chance to grow. To avoid this, it’s crucial to follow a precise firing schedule. Don’t be tempted to leave your piece at the top temperature for extra time just to be “sure” it has filled the mold. Trust your schedule and your kiln’s controller. A well-planned firing cycle will get the glass to the right temperature to fill the mold and then begin cooling before devitrification has a chance to set in.
Annealing and Cooling Schedules
After the glass has fully melted and filled the mold, you can’t just turn the kiln off. The piece needs to be cooled down in a very controlled way through a process called annealing. This involves quickly dropping the temperature to the annealing point (often around 960°F, but again, this depends on the glass) and holding it there. This step is critical because it stabilizes the glass and relieves internal stress. If you cool the piece too quickly, that stress gets locked in, and your beautiful creation could crack or even shatter later on. After the annealing soak, the temperature must be brought down very slowly to room temperature. Patience is key here—the thicker the glass, the longer the annealing and cooling process will take.
8. Remove the Final Product
Once the firing schedule is completed, it’s time to remove the final glass sculpture from the mold. Use heat-resistant gloves and break the mold with the help of a rubber hammer. Chances are some of the plaster may stick to the glass. Using vinegar followed by gentle brushing helps you clean off any excess plaster.
Understanding “Waste” Molds
The term “waste mold” can sound a bit misleading, but it’s a fundamental part of kiln casting, especially when you want to create detailed, one-of-a-kind pieces. Unlike reusable graphite or metal molds, a waste mold is designed for a single use. You typically make it from a plaster and silica mixture that you build around your original model. Once your glass has been fired and cooled inside the kiln, you carefully break away—or “waste”—the mold to reveal the finished sculpture. This process is essential for creating complex shapes with undercuts that would be impossible to release from a rigid mold, ensuring every piece you make is truly unique.
9. Polish the Final Product
The last step of glass casting is to grind and polish the final product with cold working tools. Break off any sprues, grind the edges and bottom on the belt sander/lap wheel and pish the surface. Now, it’s time to admire your stunning piece of work.
Tips for Beginners
Now that you have the steps, let’s talk about setting yourself up for success. Glass casting has a learning curve, but with the right approach, you can avoid common frustrations and get to the fun part faster. Here are a few essential tips to keep in mind as you start your journey.
Take a Class or Workshop
If you’re new to glass casting, the best thing you can do is take a class from a professional. Reading guides is helpful, but nothing compares to hands-on experience where an expert can offer real-time feedback. A workshop provides a safe environment to learn the intricacies of the craft, from handling materials properly to understanding the behavior of a kiln. It’s also a fantastic way to try out the process before you invest in your own equipment. You’ll gain a much deeper understanding of the techniques and build a solid foundation of skills that will save you from costly mistakes down the road.
Keep Detailed Notes
Treat your studio like a lab and keep a detailed journal for every project. This practice is crucial for repeating successful results and learning from the pieces that don’t turn out quite right. For each casting, write down the type and amount of glass you used, the materials for your molds, your exact firing schedule with all temperatures and times, and any observations you made during the process. Taking a photo of the final result and adding it to your notes is also a great idea. Over time, this logbook will become your most valuable resource, helping you refine your techniques and perfect your art.
Understand the Challenges of Home Casting
Creating a casting studio at home is an exciting step, but it requires careful planning. First, you need a dedicated space with proper ventilation to manage kiln fumes and dust from mold materials. Safety is paramount. You also need to consider the electrical requirements, as a kiln draws a significant amount of power, and you may need to consult an electrician to ensure your wiring is sufficient. Finally, managing dust and hygiene is critical. Materials like plaster and silica can create airborne particles, so using a respirator and maintaining a clean workspace is essential for both your health and the clarity of your finished glass pieces.
Conclusion
Casting glass into a desirable form required patience and practice. Moreover, you need to be cautious while working with such high temperatures and molten glass. Now that you have learned the glass casting process. It’s time to design your own masterpiece with the help of the right casting supplies. However, the final results may vary depending on various factors such as the size of glass, temperature, and more.
Frequently Asked Questions
What’s the difference between glass casting and glass fusing? Think of it this way: fusing is about joining pieces of glass together side-by-side, like making a decorative tile or a shallow plate. The glass gets hot enough to stick together but generally keeps its original shape. Casting, on the other hand, is about creating a solid, three-dimensional object. You melt glass completely until it becomes a liquid that flows and fills a mold, much like making a sculpture.
Why is the COE number on glass so important for casting? The COE, or Coefficient of Expansion, tells you exactly how much a type of glass expands when hot and shrinks when cool. If you mix glasses with different COE numbers, they’ll fight against each other as they cool down, shrinking at different rates. This creates massive internal stress and will almost certainly cause your beautiful piece to crack. Sticking to one COE for your entire project is one of the most important rules for success.
Do I really have to break my mold after every use? For many intricate, sculptural pieces, the answer is yes. Molds made from a plaster and silica mix are called “waste molds” because you have to carefully break them away to free the glass inside. This is the only way to create complex forms that couldn’t be pulled from a rigid mold. However, for simpler shapes, you can absolutely use durable graphite or metal molds that can be used over and over again.
What’s a good first project for a beginner in glass casting? Starting small and simple is the best way to learn the fundamentals without getting overwhelmed. I’d suggest trying a small paperweight or a decorative tile using a pre-made graphite mold. This allows you to focus on the basics, like calculating how much glass you need and understanding your kiln’s firing schedule, before you add the extra step of creating your own mold from scratch.
Can I use any old glass bottles for recycled glass casting? Using recycled glass is a great, sustainable practice, but it requires a bit of strategy. You can’t just mix different types of bottles, as they all have different COEs and will likely crack. To get a successful result, you should use glass from identical bottles within a single project. You’ll also need to clean them perfectly and be ready to run a few tests to find the right melting temperature, since it won’t be as predictable as manufactured art glass.
Key Takeaways
- Control the Process from Mold to Cool-Down: Your success depends on two key stages: creating a precise mold to define the shape and executing a slow, controlled annealing schedule in the kiln to prevent cracks and ensure a durable final piece.
- Choose Your Glass and Technique Wisely: The final appearance of your artwork is determined before you even turn on the kiln. Your choice of glass (like COE90 or COE96) and its form (frit vs. billet) will directly impact the color, texture, and clarity of your cast sculpture.
- Set Up for Success with Safety and a Studio Journal: A safe, well-ventilated workspace is the foundation of glass casting. Complement this by keeping a detailed log of every project—including glass type, mold materials, and firing schedules—to learn from your results and consistently improve your technique.
Related Articles
- Holey Journey Circle Kiln Casting Mold | Art Glass Supplies – Casting Mold
- Slit Hole Scrap Master Casting Mold | Art Glass Supplies – Casting Molds
- Master Cast-A-Cab Casting Mold | Art Glass Supplies – Casting Molds
- Slab Server Casting Mold | Art Glass Supplies – Colour De Verre
- Pyramid Paperweight Kiln Casting Mold| Art Glass Supplies – Casting Molds