
Ever looked at a simple glass dish and wished you could add a personal touch? You can. With glass etching, you can transform everyday items like baking dishes and drinking glasses into beautiful, custom pieces. It’s a surprisingly simple craft that gives you professional-looking results right at home. Whether you’re making a one-of-a-kind gift or adding flair to your own collection, creating a stunning glass etching design is easier than you think. I’ll walk you through exactly how to etch glass, from start to finish.
The process to etch glass includes cutting a design on vinyl, sticking the stencil onto the glass, painting over the stencil with the etching cream, and washing it off to get the final product. In the article, we’ll explain each step in detail.
But before you begin with the DIY glass etching process, gather the suggested art glass tools and supplies and use the below-mentioned guidelines to make a variety of etching designs.
What is Glass Etching?
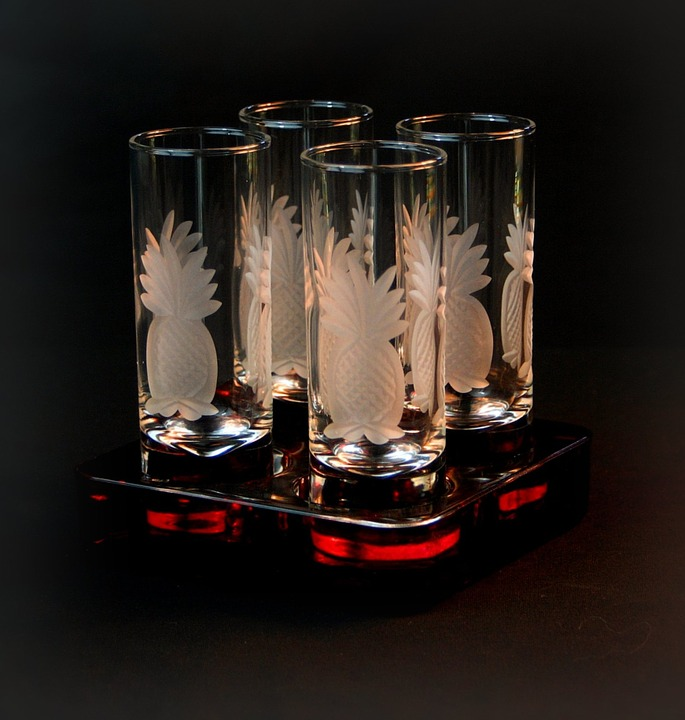
Glass etching, sometimes called “French embossing,” is a fantastic way to add permanent, custom designs to a glass surface. The process involves using either abrasive materials or acidic chemicals to remove a microscopic layer of the glass. This roughens the surface, creating a beautiful, translucent “frosted” appearance that contrasts with the smooth, untouched glass. It’s a popular technique for personalizing everything from drinkware and mirrors to large window panes. Unlike paint or vinyl decals, an etched design won’t peel or fade over time, making it a durable and professional-looking finish for your glass art projects.
How Etching Creates a Frosted Look
The magic behind the frosted look is all about light diffusion. A smooth glass surface allows light to pass through directly, which is why it’s transparent. When you etch glass, you create thousands of tiny, microscopic cuts on the surface. Instead of passing straight through, light hits these rough edges and scatters in many different directions. This scattering, or diffusion, is what makes the etched area appear cloudy and white. Whether you’re using a chemical cream or sandblasting, the principle is the same: you’re altering the texture of the glass to change the way it interacts with light. The more you etch, the deeper the cuts and the more opaque the finish becomes.
A Brief History of French Embossing
While it feels like a modern craft, glass etching has a rich history. The technique, also known as French embossing, gained significant popularity back in the mid-1800s. During the Victorian era, it was a highly sought-after decorative art form used to create ornate patterns on windows and doors in homes and pubs. This method allowed for intricate, delicate designs that offered both beauty and privacy. The fundamental techniques developed during that time have been refined over the years, but the classic, elegant look of etched glass has remained timeless. It continues to be a widely used decorative method in both commercial and residential settings today.
Glass Etching Methods
There are several ways to achieve that classic etched look, each with its own set of tools, processes, and ideal applications. The most common method for hobbyists is using an etching cream, which is accessible and relatively easy to manage at home. For larger or more industrial projects, abrasive blasting, or sandblasting, offers a powerful alternative. Beyond these two, other specialized techniques exist that create unique effects, from designs integrated during the glass-forming process to intricate, multi-layered patterns. Choosing the right method depends on the scale of your project, your desired finish, and your comfort level with the materials involved.
Chemical Etching with Cream
For most at-home crafters, chemical etching with a pre-mixed cream is the way to go. This cream contains fluoride compounds that react with the silica in the glass, gently eating away at the surface to create the frosted design. The process is straightforward: you apply a stencil to your glass piece, brush a thick layer of the etching cream over the exposed areas, let it sit for a few minutes, and then rinse it off. It’s an excellent option for detailed work on smaller items like wine glasses or baking dishes. Because it’s a chemical process, it’s crucial to work in a well-ventilated area and wear protective gear like gloves and safety glasses.
Abrasive Blasting (Sandblasting)
Abrasive blasting, commonly known as sandblasting, is a technique often used for larger projects or in commercial settings. This method uses a high-pressure stream of air mixed with an abrasive material, like aluminum oxide, to physically carve into the glass surface. By controlling the pressure and the duration of the blast, an artist can create varying depths and textures, from a light frosting to a deep, carved design. While it requires more specialized equipment, including an air compressor and a blasting cabinet, sandblasting offers incredible control and versatility for creating stunning effects on sheets of COE90 glass or other large pieces.
Other Techniques
Beyond the two most common methods, artists have developed other fascinating ways to etch glass. Each technique offers a unique aesthetic and requires a different approach, expanding the creative possibilities for glass decoration. Some of these methods are rooted in historical glassmaking traditions, while others are modern adaptations that mimic the classic frosted look without using chemicals or abrasives. Exploring these alternatives can open up new avenues for your glass art, whether you’re working with a kiln or simply decorating a window pane.
Mold Etching
Invented in the 1920s, mold etching is a clever technique where the design is etched directly into the mold used to shape the glass. When molten glass is blown or pressed into the mold, it picks up the pattern from the etched interior surface. This means the design becomes an integral part of the glass object as it’s being formed. This industrial method is perfect for mass-producing glassware with consistent, repeating patterns, such as logos or decorative motifs on bottles and jars. It’s a great example of how design can be integrated right into the manufacturing process.
Frost Etching
Frost etching is a non-destructive and reversible way to get the look of etched glass. This technique doesn’t actually alter the glass itself. Instead, it involves applying a frosted vinyl film to the surface. You can cut intricate patterns out of the vinyl material and then stick it onto a window or mirror. It’s a popular choice for adding privacy to bathroom windows or branding to storefronts because it diffuses light just like real etching but can be removed or changed later. It’s a simple, effective way to achieve the aesthetic without a permanent commitment.
Leptat Glass
Leptat glass is a specialized acid-etching process that creates a multi-layered, three-dimensional effect. Inspired by traditional Czech glass art, this technique involves covering the glass with a stencil and submerging it in acid. The process can be repeated multiple times with different stencils to create designs with varying depths and textures. The result is a beautifully detailed and tactile piece of art that has a sculptural quality. Due to the use of strong acids, Leptat etching is typically done by highly skilled artists in a controlled studio environment.
Safety First: Handling Etching Cream
When you’re working with glass etching cream, safety should always be your top priority. Even though it’s widely available for hobbyists, the cream contains powerful chemicals that can cause serious burns if they come into contact with your skin. Always wear chemical-resistant gloves, not just latex or vinyl ones, and safety goggles to protect your eyes from accidental splashes. It’s also essential to work in a well-ventilated space to avoid inhaling any fumes. Keep your workspace clear, have your water source ready for rinsing, and make sure pets and children are kept safely away from the area while you work.
Understanding the Chemicals
Glass etching cream works because it contains fluoride compounds, most notably hydrogen fluoride and sodium fluoride. These chemicals are capable of dissolving silica, which is the primary component of glass. When you apply the cream, these compounds react with the glass surface, creating the frosted effect. Because these acids are highly corrosive and toxic, you must handle them with extreme care. Always read and follow the manufacturer’s safety data sheet and instructions precisely. Understanding that you’re working with potent chemicals will help you respect the material and take the necessary precautions to ensure a safe and successful project.
Essential Glass Etching Supplies
Etching Pattern
You’ll need a pattern to start your project with. You can make it your own cool etching design using stencils and vinyl paper or buy a predesigned pattern.
It is advisable to start with a simple and easy-to-use pattern that does not have a lot of small complicated details. Coloring books and clip art are excellent sources for simpler patterns.
Using a Cutting Machine for Stencils
If you have a cutting machine like a Cricut or Silhouette, you can create incredibly detailed and professional-looking stencils. This method is perfect for intricate patterns, custom text, or logos that would be difficult to cut by hand. When you’re setting up your file in the design software, a helpful trick is to place a rectangular box or “weeding box” around your design. This gives you a clean edge and makes it much easier to peel away the excess vinyl after applying the stencil to your glass. Also, make sure you “attach” all the separate pieces of your design so the machine cuts them as a single, cohesive stencil. Using removable stencil vinyl will ensure you get crisp lines without leaving a sticky residue on your beautiful glass project.
Creating Stencils with Tape
You don’t need any fancy equipment to create beautiful etched designs. For a simpler, more accessible approach, you can make your stencil using painter’s tape or even electrical tape. This technique works especially well for creating bold, geometric patterns like stripes, chevrons, or color-blocked sections on your glass pieces. Simply apply the tape directly to the glass, pressing down firmly along the edges with a fingernail or a burnishing tool to prevent the etching cream from bleeding underneath. You can cut the tape into specific shapes with a craft knife before or after applying it to the glass to achieve your desired look. It’s a straightforward and budget-friendly way to get started with glass etching.
Glass Cleaner
Always use standard alcohol-based glass cleaners to ensure you always start with a clean surface. It helps you get rid of dirt, debris, and other contaminants that can affect the final finish.
Carbon Paper
Carbon paper helps you easily trace your etching pattern onto the contact paper.
Etching Surface
Any glassware, glazed ceramics, mirrors, and porcelain surface will do. It is advisable to start practicing your etching ideas on an old object before you try on an expensive one.
Choosing the Right Glass for Your Project
When you’re picking out a piece for your project, the good news is that most glass items are perfect for etching. Think about things like glass jars, mirrors, vases, or even plain drinking glasses. However, you’ll want to be cautious with certain types of glass, like some Pyrex bakeware or colored glass, as they can have special coatings that prevent the cream from working its magic. If you’re not sure, it’s always a smart move to test a tiny, hidden spot first. For the cleanest results, stick with a smooth, clear surface. Textured glass can make it difficult for the stencil to adhere properly, which can lead to a blurry or uneven design. If you’re an artist looking to incorporate etched designs into larger pieces, smooth sheets of art glass are also a fantastic canvas for your creativity.
Etching Cream
It is a fast-acting specially formulated compound that helps you etch glass. You can easily find it at your local art & craft store or buy it online.
Paint Brush
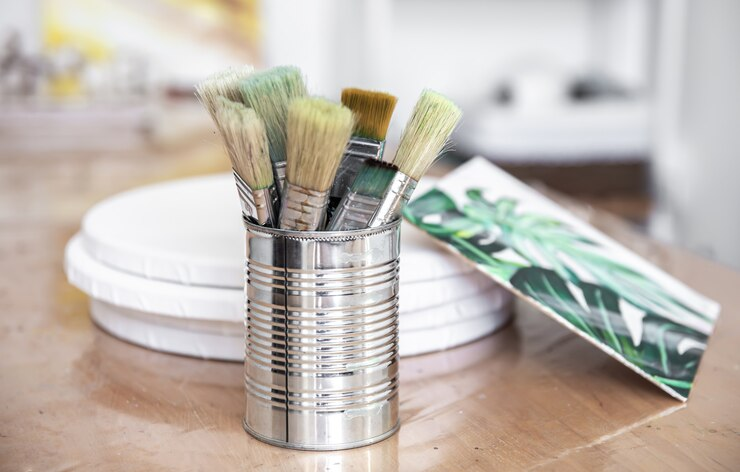
It helps you apply etching cream. If a paintbrush is not available you can also use a haik brush or paper towels. However, it can hinder the finishing. Also, read the instructions provided by the manufacturer of etching cream to see what is recommended for applying the cream.
Protective Equipment
Protecting equipment—latex gloves, industrial eye protection, apron, long sleeve shirt—is essential for your protection. It protects your hands, eyes, face, and other body parts from the acid present in the etching cream.
Utility Knife
Utility knife—scalloped/serrated edge, pointed/rounded tip, or X-Acto knife—helps you cut your pattern out.
Contact Paper
White contact paper works best for etching, however, plain/clear contact paper also works fine. You can also use your contact paper in stripes using masking tape.
After you have gathered all of the essential tools and supplies, it’s time to start your glass etching process.
Important Techniques for a Flawless Finish
Tips for Applying Etching Cream
Glass etching cream is what works the magic, creating a permanent, frosted design on your glass. Unlike a vinyl sticker or paint, this design won’t ever wash off, making your finished pieces completely dishwasher-safe. The key to a great result is applying a thick, even layer of the cream over your stencil. Don’t be shy with it—a thin coat can lead to a faint or blotchy finish. Use a soft-bristled brush to gently spread the cream, making sure you cover every part of your design. Think of it like frosting a tiny cake; you want full coverage without any gaps.
Working with Large Surface Areas
While it might be tempting to tackle a huge design all at once, most etching cream manufacturers advise against using it on areas larger than one square inch. Applying the cream to a big, open space can result in an uneven finish or visible brush strokes that disrupt the frosted look. If your heart is set on a larger design, try breaking it up into smaller, more manageable sections. This approach gives you more control and helps ensure a consistent, professional-looking result across the entire piece, whether it’s a simple sheet of fusible glass or a complex shape.
Getting the Wait Time Right
The instructions on your etching cream bottle might suggest a very short wait time, sometimes as little as one minute. While you should always read the manufacturer’s guidelines, many experienced glass artists find that letting the cream sit for longer yields a much better result. Leaving it on for 10 to 20 minutes can create a deeper, more opaque, and more noticeable etch. The ideal time can vary based on the brand of cream and the type of glass you’re using. A great practice is to test your cream on a scrap piece of practice glass first to find the sweet spot for a perfect finish.
How to Make Your Project Food-Safe
If you’re personalizing a plate, drinking glass, or baking dish that will come into contact with food, there’s a simple trick to ensure it’s completely food-safe. Apply your stencil to the back or underside of the glass object. For this to work, you’ll need to “mirror” your design before cutting the stencil, so it appears correctly when viewed from the front. This technique keeps the etched surface, which can be slightly porous, away from food, making the item easier to clean and perfectly safe to eat from. It’s a professional touch that makes your custom glassware both beautiful and functional.
Correcting Mistakes on the Fly
Oops! A little bit of etching cream dripped outside your stencil. Don’t panic—you can fix it if you act quickly. The cream begins to work almost immediately upon contact with the glass, so speed is essential. Keep a damp paper towel or sponge right next to you while you work. If a spill happens, wipe it up immediately and thoroughly. By cleaning it off right away, you can prevent the cream from leaving a permanent mark where you don’t want one. Being prepared for small mistakes is part of the process and helps ensure your final project looks clean and polished.
How to Etch Glass at Home
Step 1: Prepare Yourself
Before working with the etching cream, make sure you wear protective clothing and latex gloves, and eyewear. Ensure your working area is well-ventilated along with the covered work surface and thoroughly follow glass etching instructions.
Important Tip: Be cautious while working with the etching cream, as it contains acid that will etch anything it comes in contact with.
Step 2: Prepare Your Glass Etching Design
Use a pencil to outline your glass etching design pattern on the non-adhesive side of the blank adhesive vinyl pieces. You can also use a non-adhesive stencil, however, it must be taped with an adhesive.
You can design anything you want—alphabets, letters, numbers, different shapes, and more. However, remember that it will be cut out and your design will be what’s etched on the glass.
Step 3: Cut the Stencil
Cut out your design along with the outlines you made with the help of a sharp knife. Remove those parts of your design that you want to be etched into the glass. Also, take care not to tear the surrounding space.
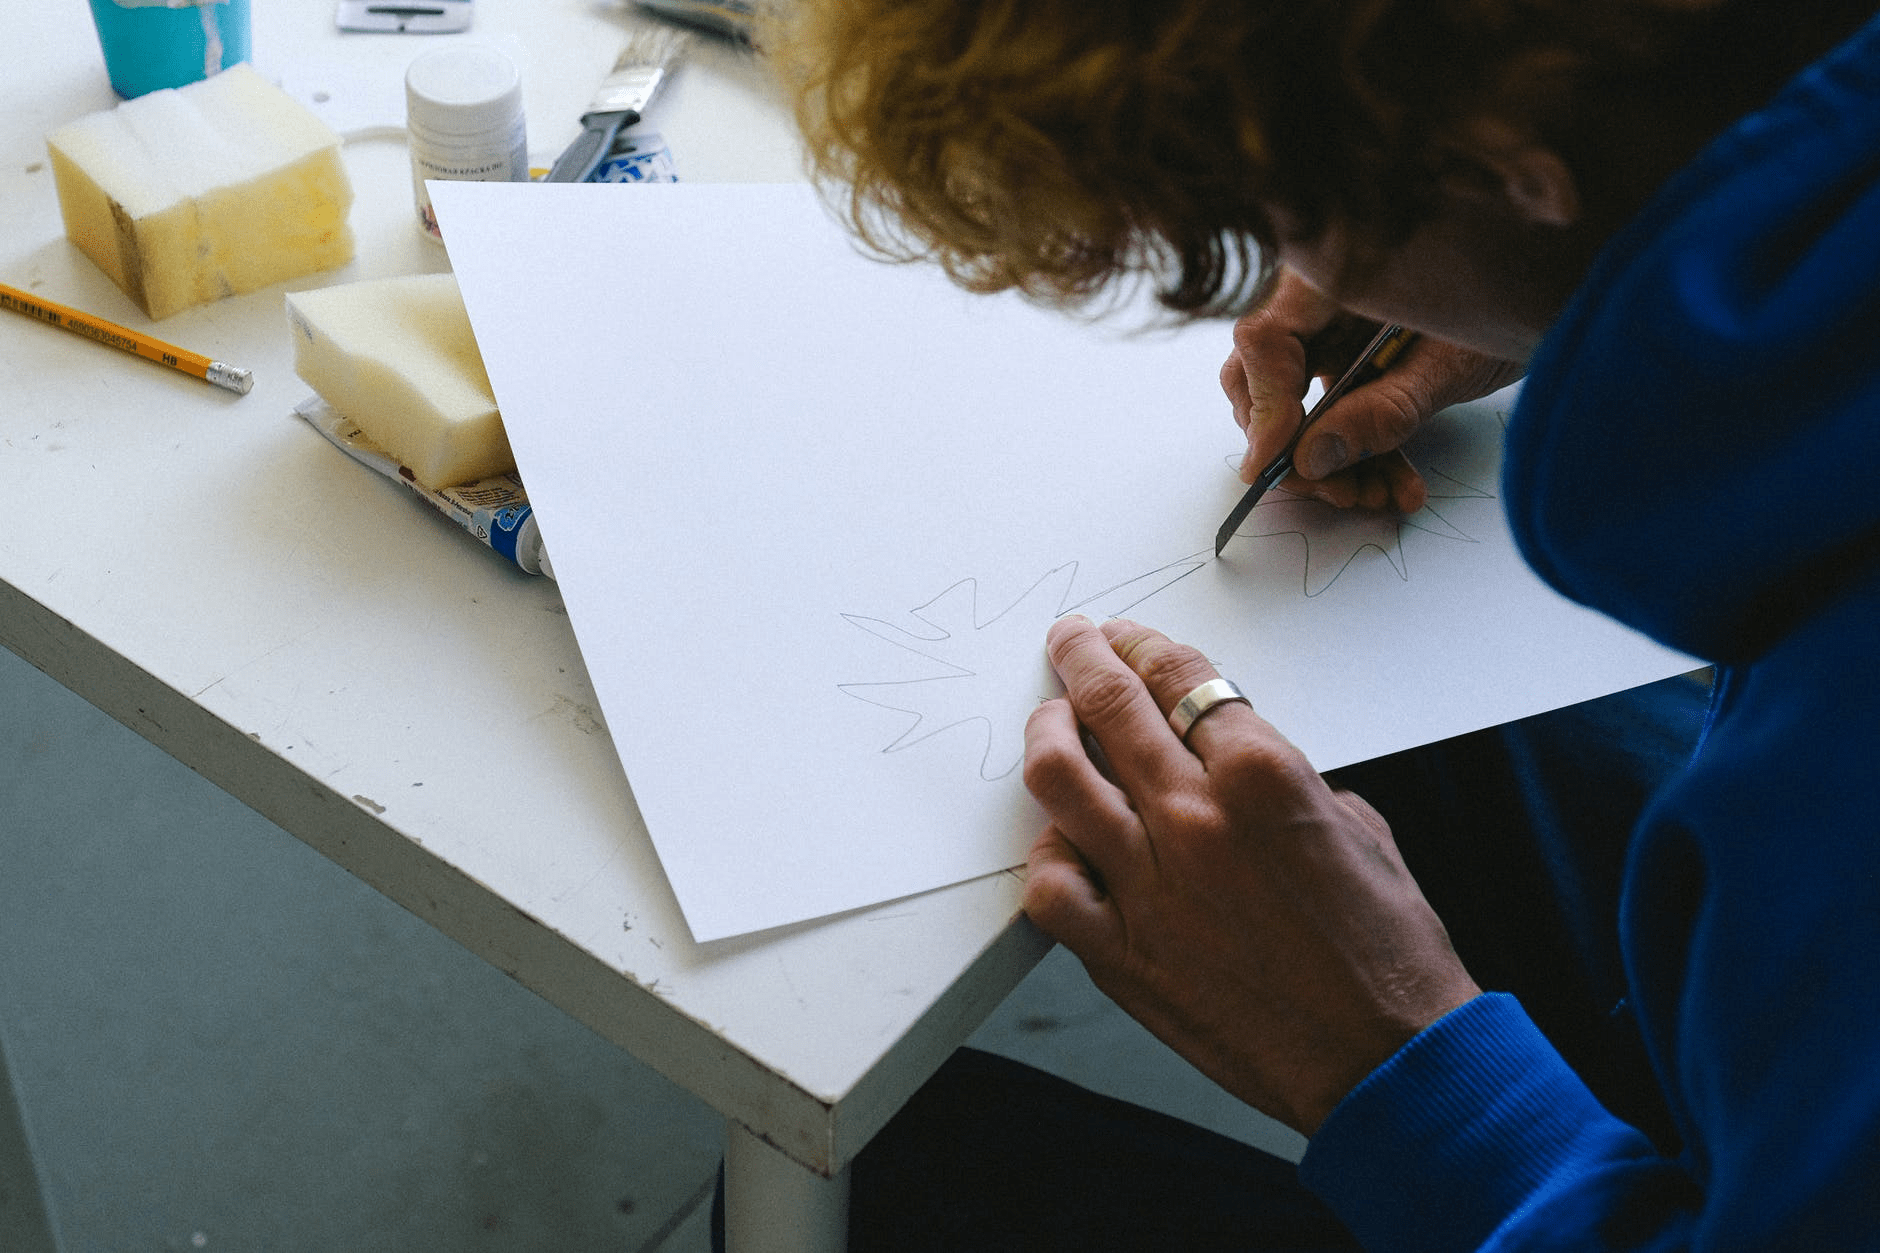
Important Tip: Always hold the blade of the knife upwards so that only its tip touches the stencil.
Step 4: Apply Contact Paper to the Glass
- For Adhesive Pattern: If you are using adhesive vinyl, you can peel off the back surface of your glass etching design and stick to the glass. Whatever type of adhesive you use, always check for bubbles.
Also, If you’re using just tape to create outlines patterns of alphabets, letters, and so on, tape the pattern and then cover the rest of the glass. Run a smoothing tool over the tape to evenly flatten it.
Important Tip: You can also use a plastic gift card as a smoothing tool
- For Non-Adhesive Pattern: Cut a piece of contact paper, a few inches larger than the size of your pattern design. Carefully place the paper on the surface of the glass and smooth out all the air bubbles.
Now use carbon paper over the contact paper and place your pattern over it. Carefully secure all these together with the help of masking tape. Trace the pattern on the contact paper and once done, remove the pattern along with the carbon paper.
Step 5: Apply The Etching Cream
After carefully covering the area you want to be etched, spread the etching cream over the uncovered area. Use a paintbrush to spread a thick, even coating over the area. Make sure you put your gloves on to prevent the cream from getting on your skin.
Stir the etching cream twice over five minutes. Also, pop up the trapped air pockets that may result in uneven etching.
Important Tip: Always apply a thick layer of cream, applying a thin layer can give an uneven or streaked finish.
Step 6: It’s Time to Wait
The cream needs to stay on the glass for a particular amount of time. So, set your glass in a safe spot and wait for the amount of time mentioned by the manufacturer of the etching cream.
It is generally between 10 to 15 minutes. If you remove the cream before the required time, your design may appear uneven and lighter.
Step 7: Remove the Etching Cream
After the prescribed amount of time, it’s time to remove the etching cream. The way to do so is to rinse off the cream by running water over it. Preferably use hot water as it will not only help you remove the cream but also, help you loosen up the tape.

Important Tip: If you are worried about your plumbing or have a ceramic sink that is subject to the acid present in the cream, use water in the bucket to clean the cream. Dip the glass in a clean bucket of water and apply low pressure to make sure all the cream is gone.
Step 8: Admire Your Etched Glass
Once the etching cream is washed off, the process of the glass etching process is almost complete. Now you can remove the contact paper and masking tapes to reveal your actual design.
Wash your glass for the final time and wipe off any moisture with a clean cloth. Your etching design is permanent and it’s time to admire your creation.
Conclusion
Practice and patience is the virtue of etching. You might not achieve the expected result on the initial try. However, with the right tools, glass etching materials, and some practice, you can get the best result.
For your safety, it is important that you use property safety gear. Also, the etching cream includes mild acids so avoid getting in direct contact with your skin.
Durability and Uses for Etched Glass
Now that you’ve learned the basic steps for etching glass, you might be wondering about the practical side of things. How long will your beautiful designs last, and what can you create beyond a personalized drinking glass? The great thing about glass etching is that it’s not just a fun craft—it’s a durable and versatile technique used for everything from simple home decor to large-scale architectural installations. Once you master the process, you can apply it to a wide range of projects, confident that your work will stand the test of time.
How Permanent is Etched Glass?
One of the best things about glass etching is its permanence. Unlike paint or vinyl decals that sit on top of the surface, etching cream creates a micro-abrasion that physically alters the glass itself. This means your design is permanent and will last as long as the glass does. You don’t have to worry about it peeling, chipping, or fading over time. Your etched creations are completely dishwasher-safe and can withstand regular use, making this technique perfect for customizing everyday items like bakeware, coffee mugs, and mirrors. The frosted design becomes a part of the glass, giving you a professional, long-lasting finish every time.
Common Applications in Art and Architecture
While etching is fantastic for personalizing items around the house, its uses extend far beyond that. In art and architecture, etched glass is a popular choice for adding both beauty and function to a space. It’s often used to create privacy on windows and shower doors without blocking natural light. You’ll also see it in decorative room dividers, elegant cabinet doors, and even on railings. For glass artists, etching can add incredible detail to larger projects. You can etch intricate patterns onto sheets of fusible glass before firing them in a kiln or add delicate linework to a piece of stained glass to create texture and depth.
Frequently Asked Questions
Is an etched design really dishwasher safe? Yes, it absolutely is. The etching cream permanently alters the surface of the glass itself; it isn’t a coating or a paint that sits on top. This means your design is as durable as the glass it’s on. You can wash, scrub, and run your etched pieces through the dishwasher without any fear of the design peeling or fading away.
Can I use etching cream on any type of glass? Most common glass items like drinking glasses, jars, and mirrors work beautifully for etching. However, you should be cautious with some types of specially treated glass, like certain Pyrex or Borosilicate bakeware. These can have coatings that resist the chemical reaction, which may result in a faint or uneven etch. If you’re ever unsure, it’s always a good idea to test the cream on a small, inconspicuous spot first.
What happens if I make a mistake? Can I remove the etching? Once the cream has reacted with the glass, the design is permanent and cannot be removed or undone. This is why it’s so important to secure your stencil properly and to wipe up any accidental drips immediately with a damp cloth before they have time to work. Think of it like a tattoo for your glass—preparation is everything because the result is forever.
Do I really need a special machine like a Cricut to make a stencil? Not at all. While a cutting machine is fantastic for creating intricate text or complex images, you can achieve beautiful results with much simpler tools. Painter’s tape is perfect for making bold stripes and geometric patterns. You can also easily cut your own custom shapes out of adhesive contact paper using a standard craft knife.
Why does the post suggest leaving the cream on longer than the bottle says? This is a common trick among experienced etchers. While you should always read the manufacturer’s guidelines, many find that the minimum time suggested can result in a very light, subtle finish. Letting the cream sit for a bit longer, often in the 10-to-20-minute range, allows for a deeper chemical reaction that creates a more opaque and noticeable frosted design.
Key Takeaways
- Work Safely with Etching Cream: This is a chemical process, so always wear gloves and eye protection in a well-ventilated area to protect yourself from the active ingredients.
- Ensure a Perfect Seal for Clean Edges: To get sharp, professional lines, firmly press down every edge of your stencil. This prevents the cream from seeping underneath and blurring your design.
- Be Generous with Cream and Time: Apply a thick, even layer of etching cream over your stencil and let it sit for 10-20 minutes. A thin coat or short wait time can result in a faint or uneven finish.
Related Articles
- Etch Cream | Art Glass Supplies – Tools
- Get Beautiful Etched Tree Silhouette Pattern | Thin COE96 Glass – COE96 Et
- Steampunk Pattern Glass – ArtGlassSupplies.com – COE90 & 96 Freestyle Etch
- Etched Eye of the Beholder Pattern on Thin Glass – COE96 Etched Dichroic G
- ArtGlassSupplies.com Etched Stripes Pattern on Thin Glass COE96 – COE96 Et