
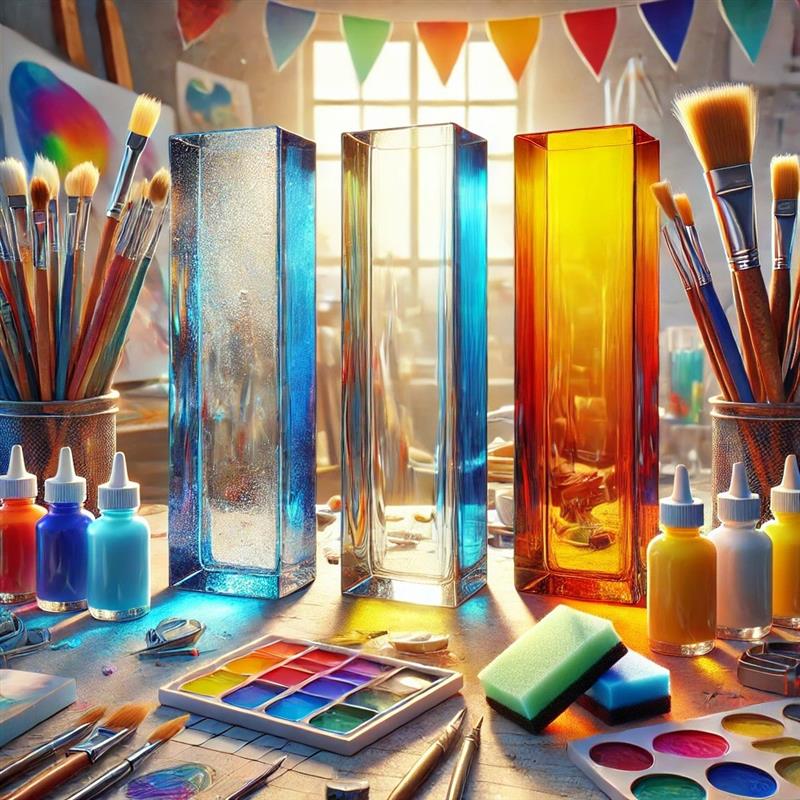
You have a beautiful piece of glass and a great idea, but which paint should you use? The options can feel a bit overwhelming. Should you go with a transparent color that lets light shine through, or an opaque one for a solid, bold design? Getting this choice right is crucial for a professional-looking result. This guide is here to clear up the confusion. We’ll break down the distinct features of transparent, opaque, and frosted glass paint, explaining what each is best for, so you can confidently select the right product and turn your creative vision into a reality.
Glass painting is a versatile and creative art form that transforms ordinary glass surfaces into breathtaking works of art. Whether you’re designing a sun catcher, adding privacy to your windows, or crafting decorative glassware, selecting the right type of paint is crucial. Transparent, opaque, and frosted glass paints each offer unique finishes, colors, and properties, catering to various artistic needs and functional requirements. In the U.S., glass painting is growing in popularity as a go-to craft for hobbyists, DIY enthusiasts, and professional artists. The variety of paints available today—like those offered by Art Glass Supplies—ensures that there’s a perfect option for every project. In this blog, we’ll explore the distinct features, benefits, and applications of transparent, opaque, and frosted glass paints, helping you make informed choices for your next masterpiece.
Preparing Your Glass for a Perfect Finish
Before you even think about uncapping your paint, let’s talk about prep work. It might not be the most glamorous part of the process, but getting your glass surface ready is the single most important thing you can do to ensure your paint adheres properly and your final piece looks professional. A clean surface is a blank canvas, free from oils, dust, and fingerprints that can prevent the paint from sticking. Taking just a few extra minutes to prepare your glass will save you from the frustration of peeling or chipping paint later on, ensuring your beautiful design lasts for years to come.
Why Proper Cleaning is the Most Important Step
Think of it this way: paint needs something to grab onto. The smooth, non-porous nature of glass makes it a tricky surface. Any residue, even the natural oils from your fingertips, can create a barrier between the glass and the paint. According to the experts at Mod Podge Rocks, “Proper surface cleaning is the most important step to make sure paint sticks well.” Without this crucial step, your paint might look great at first, but it won’t form a durable bond, leading to a finish that can easily be scratched or washed away. This applies whether you’re painting on a simple jar or a beautiful sheet of stained glass.
How to Clean Glass Before Painting
Getting your glass perfectly clean is a simple, two-step process. First, wash the item thoroughly with warm, soapy water to remove any dirt, dust, or sticker residue. Rinse it well and let it dry completely with a lint-free cloth. Once it’s dry, the second step is to wipe the entire surface down with a cotton ball soaked in rubbing alcohol or white vinegar. This removes any remaining oils or soap film. From this point on, try to handle the glass by the edges or wear gloves to avoid leaving new fingerprints on your pristine painting surface.
Choosing Your Paint and Tools
With a sparkling clean surface ready to go, it’s time for the fun part: selecting your paints and tools. The world of glass paint is vast, offering a spectrum of colors, finishes, and application methods. The right choice depends entirely on the look you want to achieve. Are you aiming for a translucent, sun-catcher effect or a bold, opaque design? Do you need fine lines for intricate details or broad strokes for full coverage? Understanding the different types of paints and the tools that work best with them will help you bring your creative vision to life with confidence and precision.
Types of Paint for Glass Projects
While you can technically use acrylic paint on glass, paints formulated specifically for this surface are always the better choice. As the team at Spotlight Stores points out, specialized glass paint is designed to adhere to a smooth, non-porous surface and can often be cured with baking for a permanent, dishwasher-safe finish. These paints come in various forms, including enamels, paint pens, and even spray paints, giving you plenty of options to match your project’s needs. Choosing a dedicated glass paint ensures your artwork remains vibrant and durable over time.
Enamel and Acrylic Paints
Enamel-based paints are a fantastic option for glass because they dry to a hard, durable finish. Products like FolkArt Enamels or DecoArt Glass Paint are specifically made for glass and ceramics, offering excellent adhesion once cured. While standard acrylics can work, they often require a primer to stick properly and a sealant to protect the finished design. For projects that will be handled or washed, sticking with an enamel paint designed for glass will give you a much more resilient and long-lasting result without the extra steps.
Paint Pens and Spray Paint
For detailed work, lettering, or crisp lines, paint pens are an artist’s best friend. They offer incredible control and are perfect for adding intricate patterns or personalizing glassware with names or dates. On the other end of the spectrum, spray paint is ideal for covering large areas with a smooth, even coat of color. When using spray paint, look for a formula designed for use on glass to ensure proper bonding and a streak-free finish. Both tools are great additions to your glass painting kit.
Paints with Different Finishes
Your creative options don’t stop at color. Glass paints come in a variety of finishes that can completely change the character of your piece. You can choose from rich, solid opaque colors for a bold statement or shimmering metallics for a touch of glamour. There are also translucent paints that mimic the look of stained glass, allowing light to pass through, and frosted finishes that provide a soft, etched appearance for privacy or decoration. Experimenting with different finishes can add depth and interest to your projects.
Essential Painting Tools
Beyond the paint itself, having the right applicators is key to achieving the look you want. The tools you choose will directly impact the texture and quality of your brushstrokes. While you can get creative with sponges and other items, a few basic tools will cover most of your needs. Investing in a small selection of quality brushes and applicators will make the painting process smoother and give you more control over the final outcome, helping you create clean lines, smooth fields of color, and interesting textures.
Using Brushes, Spouncers, and Daubers
For general painting, soft-bristled brushes are recommended to help minimize visible brush strokes and create a smooth appearance. For applying even coats of color over a larger area or creating perfect polka dots, foam “spouncers” or “daubers” are excellent tools. These simple applicators help you dab the paint on uniformly, avoiding the streaks that brushes can sometimes leave behind. Having a mix of flat and round brushes, along with a few spouncers, will prepare you for almost any design you can imagine.
Application Tips for a Flawless Look
You’ve cleaned your glass and selected your paints and tools—now it’s time to apply your design. This is where technique makes all the difference. A steady hand and a bit of patience are your greatest assets in creating a piece that looks polished and professional. Whether you’re painting freehand, using a stencil, or tracing a pattern, a few simple tips can help you achieve clean lines, smooth color, and a flawless finish. These techniques are easy to learn and will help you avoid common pitfalls like smudges, uneven coats, and bleeding edges.
Applying Smooth, Even Coats
The secret to a professional-looking finish is applying multiple thin coats of paint rather than one thick one. A thick layer of paint is more likely to show brushstrokes, drip, and take a very long time to dry. Apply your first thin coat and let it dry completely before adding the next. This layering technique builds up a rich, even color without sacrificing a smooth surface. It requires a little patience, but the crisp, high-quality result is well worth the wait, especially when working on a beautiful piece of COE96 glass.
Creating Sharp Lines with Tape
If your design includes stripes, geometric patterns, or any straight edges, painter’s tape or stencil tape is your best friend. Press the tape down firmly to ensure there are no gaps where paint could seep underneath. Once you’ve applied your paint, here’s the crucial tip: remove the tape while the paint is still wet. If you wait for the paint to dry completely, it can form a film with the tape, causing the paint to lift and peel off along with it, ruining your clean line.
How to Trace a Design onto Glass
Not all of us are confident in our freehand drawing skills, and that’s perfectly okay! Tracing a design onto glass is incredibly simple. Just print out your desired pattern or image, trim it to size, and tape it to the inside of the glass object. You will be able to see the design clearly through the glass, giving you a perfect template to follow with your paint pen or brush. This easy method allows you to create complex and intricate designs with precision and ease.
Get a Stained-Glass Look with Transparent Glass Paint
Transparent glass paints are ideal for projects that rely on light to enhance their beauty. These paints are formulated to allow light to pass through, creating luminous designs that mimic stained glass.
Key Characteristics of Transparent Paints
- Light Transmission: Allows for maximum light passage, producing a glowing effect.
- Finish: Offers a glossy, polished look.
- Colors: Available in vibrant, jewel-like tones that can be layered for depth.
Applications:
- Stained Glass Art: Perfect for creating intricate patterns on windows or panels.
- Sun Catchers: Bring vibrant colors to life by letting sunlight pass through the painted glass.
- Decorative Glassware: Add a pop of color to vases, jars, and wine glasses.
Techniques for Transparent Paints
- Layering: Apply multiple layers to create gradient effects.
- Detail Work: Use fine-tipped brushes for intricate designs.
- Sealing: Bake or apply a sealant to make your design permanent and dishwasher-safe.
Pros and Cons:
| Advantages | Disadvantages |
| Creates dazzling light effects | May require multiple coats |
| Ideal for stained glass projects | Uneven application can affect clarity |
| Easy to blend and layer | Best used on smooth surfaces |
Quick Tip: Transparent paints are highly versatile but require precision for even coverage. Explore glass paints to find the best options for your project.
Achieve Bold Coverage with Opaque Glass Paint
For designs that demand vibrant, solid colors without light transmission, opaque glass paints are the ideal choice. These paints offer bold coverage, ensuring that every stroke makes a statement.
Key Characteristics of Opaque Paints
- Light Transmission: Blocks light completely, resulting in a solid finish.
- Finish: Can be matte or glossy, depending on the formulation.
- Coverage: Thick consistency provides excellent coverage with fewer layers.
Applications:
- Functional Art: Great for labeling jars, creating logos, or adding patterns to tiles.
- Decorative Items: Use for bold, eye-catching designs on mirrors or glass panels.
- DIY Projects: Perfect for crafting personalized gifts like painted mugs and ornaments.
Techniques for Opaque Paints
- Stencils and Masking: Use masking tape or stencils to create clean edges and geometric patterns.
- Texturing: Experiment with sponges or tools to add texture.
- Layering: While opaque paints provide excellent coverage, layering can enhance the vibrancy of the colors.
Pros and Cons:
| Advantages | Disadvantages |
| Provides bold, vivid colors | Does not allow light through |
| Perfect for functional projects | Limited blending possibilities |
| Easy for beginners to use | Can appear flat if over-applied |
Quick Tip: Use opaque paints for projects where bold, non-transparent designs are needed.
Create an Elegant Frosted Glass Effect
Frosted glass paints are perfect for creating privacy or softening light. These paints produce a semi-transparent finish, mimicking the appearance of etched or sandblasted glass.
Key Characteristics of Frosted Paints
- Light Transmission: Diffuses light while maintaining privacy.
- Finish: Matte with a smooth or textured look.
- Durability: Long-lasting when sealed or baked.
Applications:
- Privacy Panels: Use for bathroom windows, shower enclosures, or office partitions.
- Ambient Lighting: Add frosted effects to glass lampshades or light fixtures.
- Decorative Patterns: Create subtle designs on mirrors or glass doors.
Techniques for Frosted Paints
- Stencil Work: Apply frosted paint over stencils for crisp, elegant patterns.
- Layering: Combine frosted paint with metallic or transparent paints for unique effects.
- Even Coverage: Use a sponge applicator or spray-on formula for uniform texture.
Pros and Cons:
| Advantages | Disadvantages |
| Adds privacy without blocking light | Limited color options |
| Creates a professional, elegant look | Requires even application |
| Versatile for décor and functional use | Not as vibrant as transparent or opaque |
Quick Tip: For projects requiring a sophisticated touch, frosted paints are the perfect choice.
Transparent vs. Opaque vs. Frosted: Which is Best?
To choose the right paint for your project, understanding the differences is essential. Here’s a quick comparison:
| Feature | Transparent Paints | Opaque Paints | Frosted Paints |
| Light Transmission | High | Minimal | Semi-transparent |
| Finish | Glossy and vibrant | Matte or glossy | Matte, textured |
| Best Uses | Sun catchers, stained glass | Bold patterns, functional décor | Privacy panels, ambient lighting |
| Application | Layers for depth, gradients | Thick application, solid colors | Smooth, diffused texture |
| Durability | High when baked | High when sealed | Long-lasting with proper care |
How to Choose the Right Glass Paint for Your Project
Selecting the best glass paint depends on the look you want to achieve. Consider these scenarios:
- For a Vibrant, Light-Reflecting Design: Transparent paints are your go-to for projects like sun catchers or stained glass panels.
- For Bold, Eye-Catching Patterns: Opaque paints excel in creating solid, vivid designs on glassware or functional items.
- For Privacy or Subtle Designs: Frosted paints are perfect for bathroom windows, partitions, or any space where a soft, elegant touch is needed.
Conclusion
Transparent, opaque, and frosted glass paints each bring their unique qualities to glass art. From the luminous effects of transparent paints to the bold coverage of opaque paints and the understated elegance of frosted finishes, there’s a perfect choice for every artistic vision. By understanding their differences and applications, you can elevate your glass painting projects to new heights. Ready to explore premium glass painting supplies? Visit Art Glass Supplies to find paints, brushes, and tools that inspire your creativity.
FAQs
- Can I mix different types of glass paints? Yes, combining transparent, opaque, and frosted paints can create layered effects and add depth to your designs. For example, overlay transparent paints over frosted patterns for a dynamic look.
- How do I make frosted paint more durable? Seal frosted paint with a clear coat or bake it in the oven (if compatible) to enhance its longevity.
- Are transparent paints suitable for outdoor projects? Yes, but ensure the paint is weatherproof or use a protective sealant to prevent fading.
- Can I use glass paints on surfaces other than glass? Yes, many glass paints work on ceramics, plastics, and metals. Always check the product instructions for compatibility.
- What tools work best with these paints? For detailed designs, use fine-tipped brushes. Sponges are great for frosted textures, and stencils help create clean, sharp patterns.
How to Cure Glass Paint to Make it Permanent
Once your design is complete, the final step is curing the paint. This process ensures your artwork becomes a permanent, durable part of the glass, resistant to chipping and washing. Depending on the type of paint you’ve used and the item you’ve created, you can either let it air-cure over time or bake it for a faster, harder finish. Both methods are effective, but one might be better suited for your specific project. Let’s walk through how to properly cure your painted glass to make sure your beautiful design lasts a lifetime.
Always Read Your Paint’s Instructions First
Before you do anything else, the most important step is to read the manufacturer’s instructions on your glass paint bottle. Think of this as the golden rule of glass painting. Different brands and formulas have very specific requirements for curing, including precise temperatures and baking times. Following these guidelines is the key to achieving a durable, professional-looking finish. Skipping this step can lead to disappointing results like tacky paint that never fully hardens, colors that change in the heat, or a design that peels off after the first wash. Taking a minute to read the label will save you a lot of potential frustration down the road.
The Air-Cure Method
The air-cure method is the simplest approach to making your paint permanent, though it does require patience. To air-cure your piece, place it in a safe, dust-free location where it won’t be disturbed. Most water-based acrylic or enamel glass paints need about 21 days to fully harden and bond to the surface. During this time, the paint undergoes a chemical process that makes it incredibly durable. While you don’t need any special equipment, it’s best to choose a spot with low humidity and good air circulation. This method is perfect for decorative items that won’t be handled or washed frequently, or for pieces that are too large or delicate to fit in an oven.
The Baking Method
For a quicker and often more resilient finish, baking is the way to go. This method uses heat to speed up the curing process, creating a hard, scratch-resistant surface that is frequently top-rack dishwasher safe. To start, place your painted glass item on a baking sheet in a cold oven. It’s crucial to start with a cold oven to prevent the glass from cracking due to thermal shock. Then, set the oven to the temperature recommended by the paint manufacturer, typically around 350°F. Once the oven reaches temperature, bake for the specified time—usually 30 minutes. After, turn the oven off but leave the glass inside to cool down completely. Just like artists use a kiln to carefully control temperature, this slow cooling process prevents cracking.
Care, Safety, and Troubleshooting
Creating your painted glass piece is only half the fun; knowing how to care for it ensures it stays beautiful for years to come. Proper handling, cleaning, and safe practices are essential, especially if your artwork will be used for food or drinks. It’s also helpful to know how to fix the occasional slip-up, because mistakes happen to every artist. Here are some practical tips for keeping your finished projects in perfect condition, working safely, and correcting common errors along the way.
Caring for Your Finished Project
Once your paint is fully cured, a little care will go a long way in preserving its beauty. For pieces that were air-cured or have delicate details, gentle hand washing is always the best choice. Use a soft cloth or sponge with mild soap and lukewarm water, and avoid using abrasive scrubbers that could scratch the design. If you used the baking method to cure your paint, your item may be top-rack dishwasher safe. However, always confirm this on the paint label first. Even for dishwasher-safe items, hand washing can help maintain the vibrancy and integrity of your artwork for much longer.
Important Safety Considerations
Working safely is a top priority in any art project. When painting with glass paints, especially solvent-based types, make sure you’re in a well-ventilated area to avoid inhaling strong fumes. Opening a window or using a fan can make a big difference. It’s also a good idea to wear gloves to protect your skin from direct contact with the paints and any cleaning solvents you might use. These simple precautions help ensure your creative process is not only enjoyable but also safe for your health.
Food and Drink Safety
If you’re painting glassware that will be used for eating or drinking, safety is paramount. Always choose a paint that is explicitly labeled as non-toxic and food-safe. To be extra cautious, avoid painting any surface that will come into direct contact with food or a person’s mouth. For example, when decorating a mug or wine glass, leave the top inch of the rim unpainted. This simple step ensures that your beautiful, functional art is completely safe for you and your loved ones to use and enjoy every day.
Using Non-Toxic Paints
Beyond items for food and drink, it’s always a good practice to opt for non-toxic paints for any project intended for home use, especially if it will be handled by children. Look for paints that carry an “AP” (Approved Product) seal from the Art and Creative Materials Institute (ACMI), which certifies that the product is non-toxic. Using these paints gives you peace of mind that your finished creations are safe for everyone. Checking the label for safety certifications is a quick and easy step that contributes to a healthier creative environment.
How to Fix Common Mistakes
Every artist makes a mistake now and then, but with glass painting, many errors are easy to correct. If the paint is still wet, you can often wipe it away cleanly with a paper towel or a cotton swab dipped in water for water-based paints, or rubbing alcohol for solvent-based ones. If the paint has already dried, don’t worry. You can usually scrape off the mistake by carefully using the edge of a craft knife or a razor blade. Just be gentle to avoid scratching the glass. For larger areas, a paint remover designed for glass can work, but be sure to use it in a well-ventilated space.
Key Takeaways
- Start with a Flawless Canvas: The most critical step for a professional result is surface preparation. A simple wash with soapy water and a final wipe with rubbing alcohol removes oils and ensures your paint adheres properly for a lasting finish.
- Select Paint Based on the Desired Effect: Your project’s outcome is determined by the paint’s finish. Choose transparent paints for a luminous, stained-glass look, opaque paints for solid and bold coverage, and frosted paints for an elegant, light-diffusing effect.
- Cure Your Paint to Make the Design Permanent: To make your artwork durable and washable, you must cure it correctly. Always follow the specific instructions on your paint bottle, whether that involves baking the piece or letting it air-cure over time.
Related Articles
- Etch Cream | Art Glass Supplies – Tools
- Get Grenadine Transparent Youghiogheny COE96 Glass From ArtGlassSupplies.com
- Bullseye Glass Clear White and Black Streaky Double Rolled 3mm COE90 – COE
- Fanta Sea Pattern Glass – ArtGlassSupplies.com – COE90 & 96 Freestyle Etch
- 3mm Thick Rainbow Iridescent, Pewter Transparent Bullseye COE90 Glass – CO