
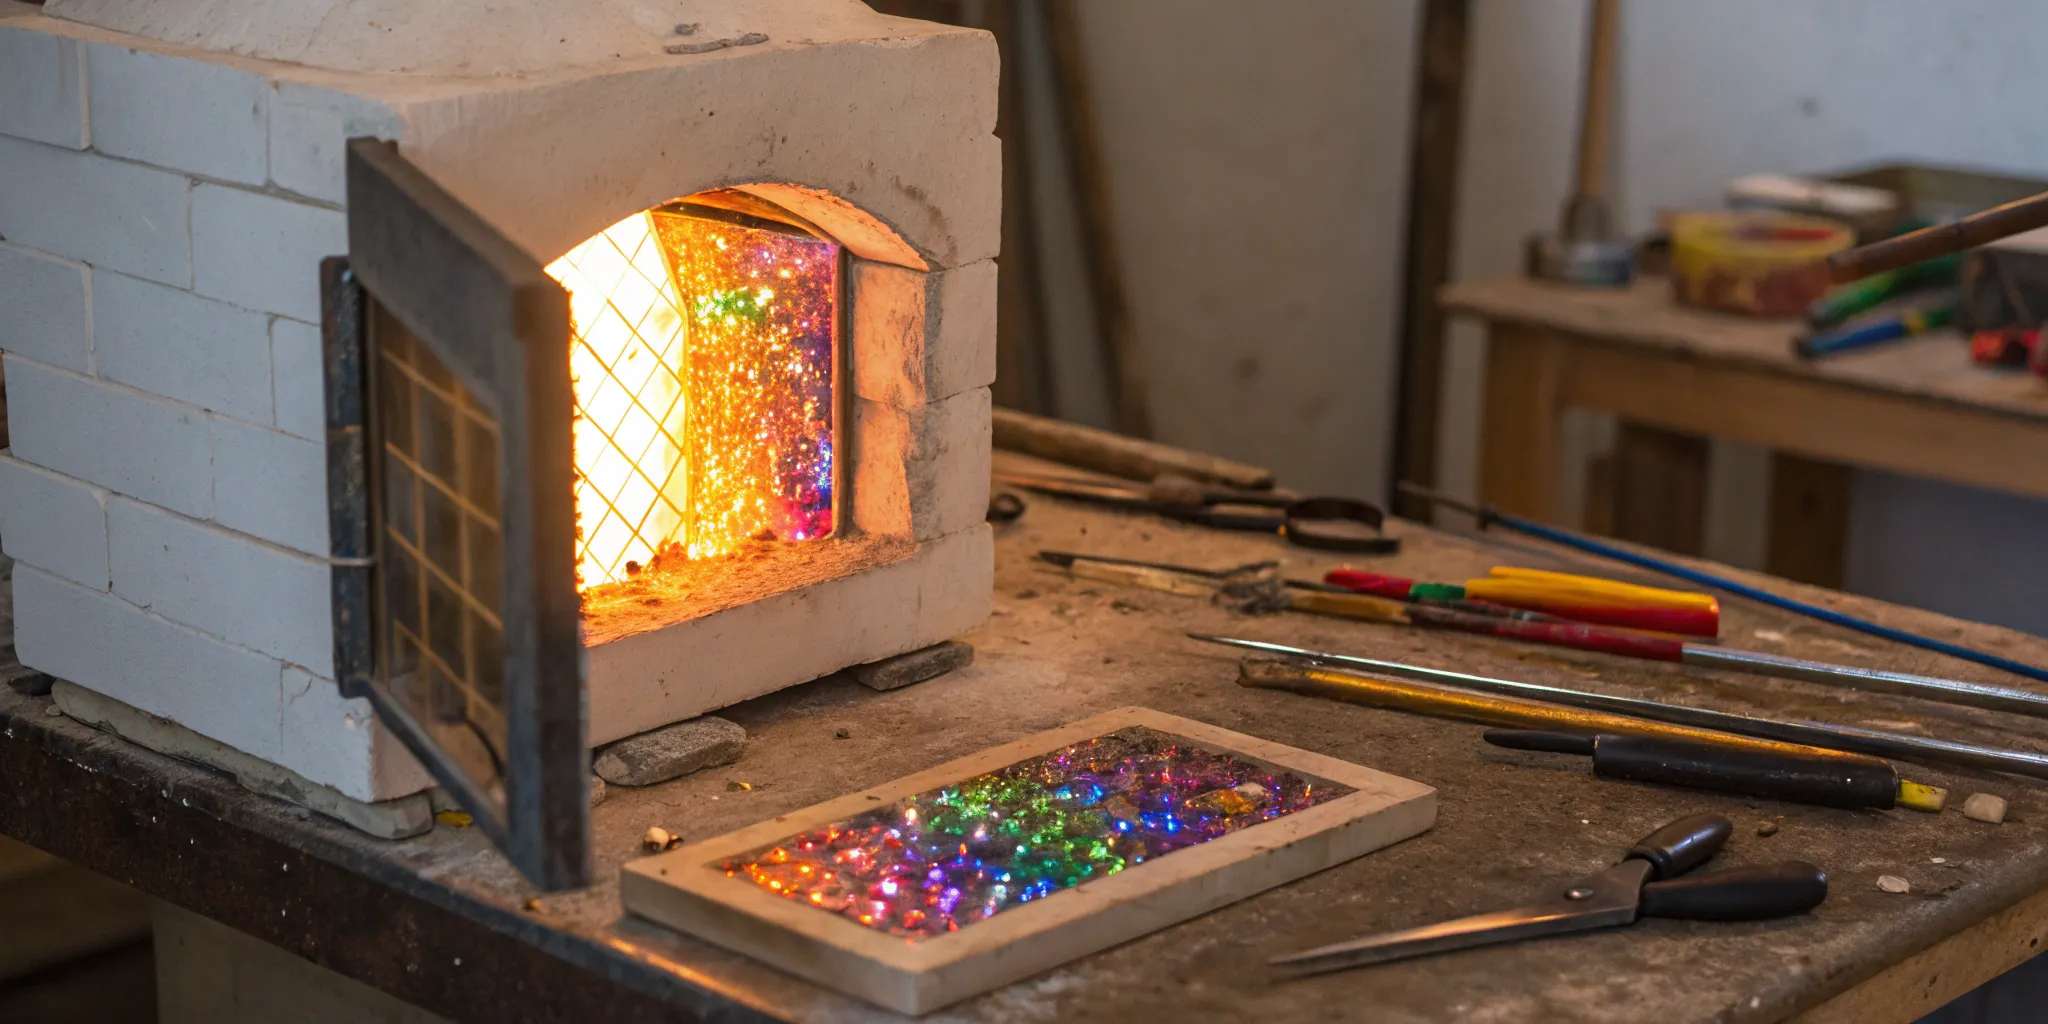
“Do I need special wiring?” “How big is too big?” “Is a digital controller really necessary?” If you’re shopping for a kiln, these questions are probably running through your mind. The sheer number of options can feel paralyzing, especially when you’re trying to meet the specific demands of firing dichroic glass. We’re here to cut through the confusion. This guide provides clear, straightforward answers, explaining everything from power requirements to what makes the best glass kiln controller. We’ll help you find the perfect dichroic glass kiln that fits your space, budget, and artistic ambitions.
Key Takeaways
- A Digital Controller is Your Best Friend: For the consistent, repeatable results that dichroic glass demands, a digital controller is essential. Pair this with a kiln that runs on a standard 120V household outlet to get started easily without needing an electrician.
- Your Kiln Can’t Fix Incompatible Glass: The most common cause of cracked or failed projects is mixing glass with different COEs (like COE90 and COE96). Always ensure your glass is compatible and properly cleaned before it ever enters the kiln.
- Prioritize a Safe Setup and Simple Maintenance: Give your kiln at least 18 inches of clear space on all sides and ensure proper ventilation. A little routine care, like keeping the interior clean and inspecting your elements, will protect your investment and keep it running reliably for years.
Understanding Dichroic Glass
Understanding Dichroic Glass
Before you can master firing dichroic glass, it helps to know what makes it so unique. This isn’t your average sheet of colored glass; it has a special quality that gives it that mesmerizing, color-shifting effect. The name itself, “dichroic,” literally means “two-colored,” which is a perfect description of its core characteristic. This chameleon-like ability to display different colors from different angles is what makes it a favorite among glass artists for creating stunning jewelry and art pieces. Understanding the science behind the shimmer will not only satisfy your curiosity but also make you a more intentional and successful artist when you start designing your projects.
The Science Behind the Shimmer
How It’s Made
Dichroic glass gets its incredible look from a high-tech manufacturing process. It starts as a standard sheet of glass, but then it’s coated with incredibly thin layers of metallic oxides, like titanium, chromium, or magnesium. This process happens inside a vacuum chamber, where the metals are vaporized and settle onto the glass surface in a fine, multi-layered film. This coating is what gives the glass its signature sparkle and color-changing properties. It’s a precise and complex technique that results in a material that is both beautiful and surprisingly durable for artistic use.
Transmitted vs. Reflected Color
The real magic of dichroic glass lies in how it plays with light. The micro-thin metallic coating acts like a filter, splitting light waves into two separate colors. When light bounces off the surface, you see the reflected color. But when light passes straight through the glass, you see the transmitted color, which is completely different. For example, a piece of dichroic glass might look brilliant blue when you look at its surface, but if you hold it up to a light source, it might appear as a warm, golden amber. This dual-color property is what gives your finished pieces such incredible depth and visual interest.
A Brief History of Dichroic Glass
While it feels like a modern artistic material, the technology behind dichroic glass has fascinating roots in the aerospace industry. It was originally developed by NASA and its contractors for use in satellite mirrors and spacesuit visors. The coating was designed to protect sensitive equipment and astronauts from the harmful effects of direct sunlight and radiation by reflecting specific wavelengths of light. It wasn’t long before artists discovered the aesthetic potential of this space-age material, adapting it for glass fusing and creating the vibrant art form we know and love today.
Types and Forms of Dichroic Glass
Sheet Glass, Frit, and Stringers
Dichroic glass isn’t a one-size-fits-all material. While it’s commonly sold in sheets, you can also find it in several other forms that open up a world of creative possibilities. Dichroic frit, which consists of small, crushed pieces of glass, is perfect for adding sparkling accents or creating textured, mosaic-like effects. You can also find dichroic stringers, which are thin, spaghetti-like rods of glass used for drawing lines or adding delicate details to your work. Having these different forms at your disposal allows you to layer, combine, and experiment to achieve truly unique designs in your fused glass art.
Once you understand the material, it’s time to gather your gear. Working with dichroic glass doesn’t require a massive, expensive setup, especially when you’re starting with jewelry. The key is to invest in a few quality basics that will make the process smoother and more enjoyable. You’ll need the glass itself, some simple tools for cutting and shaping it, and the right furniture for your kiln. Getting these essentials in order before you begin ensures you can focus on your creativity without being held back by a missing tool or the wrong type of supply.
Choosing High-Quality Dichroic Glass
The foundation of any beautiful piece is, of course, the glass itself. Dichroic glass is a fantastic material for beginners because its dazzling effects can make even simple designs look spectacular. When shopping, you’ll primarily find it available in two different coefficients of expansion: COE90 and COE96. It is absolutely critical that you do not mix these two types in a single project, as they expand and contract at different rates when heated, which will cause your piece to crack. Stick with one COE for all the glass components in your project, including the dichroic layer and the base glass it’s fused to.
Basic Glass Cutting Tools
You don’t need a lot of fancy equipment to cut dichroic glass. A few fundamental tools will handle most of the work for jewelry-sized pieces. First, you’ll need a quality glass cutter, which is a small, handheld tool with a carbide wheel that scores the glass. Next, you’ll want a pair of running pliers to help you break the glass cleanly along the score line. Finally, a simple straightedge or ruler will help you guide your cutter for precise, straight cuts. With these three tools, you’ll be able to cut squares, rectangles, and other basic shapes with confidence.
Must-Have Kiln Furniture
Kiln furniture refers to the accessories you place inside your kiln to support your glass during firing. The most essential piece is the kiln shelf, which provides a flat, stable surface for your projects. You’ll also need kiln posts, which are small ceramic stilts that hold the shelf up, allowing heat to circulate evenly all around your glass. It’s also crucial to use kiln wash or shelf paper on your shelf before every firing. This preventative layer acts as a separator, ensuring your molten glass doesn’t fuse directly to the shelf, which would ruin both your project and your equipment.
How to Choose the Right Kiln for Dichroic Glass Jewelry
Choosing your first (or next) kiln is a huge step, and it’s easy to get overwhelmed by the options. Think of it as investing in the heart of your studio, the one tool that will bring your creative visions to life. When you’re working with something as beautiful and sensitive as dichroic glass, the right kiln makes all the difference between a stunning piece and a frustrating puddle. The unique metallic coatings on dichroic glass react to heat in very specific ways, and even a slight temperature variance can dramatically alter the colors and finish. That’s why precision is non-negotiable.
To make the right choice, you need to focus on a few key areas: temperature control, size, the type of controller, and essential safety features. These aren’t just technical specs on a product page; they are the factors that will define your workflow and the quality of your art. A kiln with spot-on temperature control will let you achieve that perfect tack fuse without losing detail. The right size will fit your space and your production needs, whether you’re making a few pendants or a full collection. A modern digital controller will free you up to design your next piece instead of babysitting a firing schedule. And of course, solid safety features will give you peace of mind. Let’s break down what really matters so you can feel confident in your decision.
Why Temperature Control is Everything
When you’re working with glass, precision is everything. The good news is that most glass fusing doesn’t require extremely high temperatures; you’ll typically be working below 1700°F. For dichroic jewelry, having a kiln that can accurately hit and hold specific temperatures is crucial for different stages, from a tack fuse around 1350°F to a full fuse closer to 1475°F. A reliable kiln with precise temperature control gives you the power to execute complex firing schedules, ensuring your glass pieces fuse exactly how you envision. All quality glass kilns are designed to handle these ranges, so your main focus should be on the quality of the controller.
How Big Should Your Jewelry Kiln Be?
Bigger isn’t always better, especially when it comes to kilns for jewelry. Your ideal kiln size depends on your workspace and project goals. Smaller kilns, typically under 15 inches, are fantastic because they can run on a standard 120-volt household outlet. They heat up and cool down faster, making them efficient for firing small batches of pendants or earrings. Larger kilns offer the flexibility to fire bigger pieces or use complex molds, but they usually require a 240-volt outlet, similar to an electric stove. Consider the scale of your work and your studio’s electrical setup before you decide.
Digital vs. Manual: Which Kiln Controller is Best?
For glass fusing, a digital controller is practically a must-have. While manual kilns have their place, they require you to constantly monitor and adjust the temperature. A digital controller lets you program a specific firing schedule—the heating rates, target temperatures, and hold times—and then it runs the whole process for you. This consistency is key to getting repeatable, professional results. Modern touchscreen controllers even offer Wi-Fi connectivity, allowing you to monitor your kiln from your phone. Investing in a kiln with a good digital controller saves you time and prevents costly mistakes, letting you focus on your art.
Advanced Digital Controllers to Look For
While any digital controller is a huge step up from a manual one, some advanced features can make your life even easier. Look for controllers that come with pre-set firing schedules for different glass types, which is a fantastic starting point if you’re new to fusing. As you get more experienced, you’ll want the ability to create and save your own custom programs. Many modern controllers have intuitive touchscreen interfaces and can store dozens of your unique schedules. Some of the most convenient features on newer kilns include Wi-Fi connectivity, which lets you monitor your firing progress from an app on your phone—no more running back and forth to the studio. This level of control not only ensures consistent results but also gives you the freedom to focus on your next design while the kiln does the heavy lifting.
Non-Negotiable Kiln Safety Features
Your safety and the safety of your workspace are top priorities. When setting up your kiln, make sure you have at least 18 inches of clear space around all sides to allow for proper airflow and reduce any fire risk. Placing your kiln on a non-combustible surface, like a concrete floor or a custom steel stand, is also essential. Proper ventilation is another critical factor to keep your air clean, especially if your studio is in a shared or enclosed space. Always read the manufacturer’s instructions carefully and double-check your setup before you begin your first firing.
The Best Kilns for Dichroic Glass Jewelry (Reviewed)
Choosing your first or next kiln is a huge step, and with so many options, it’s easy to feel a little lost. The perfect kiln for you really comes down to your space, your budget, and what you dream of creating. Do you need something compact for a corner of your garage, or are you ready for a larger model that can handle bigger projects? Are you just starting out, or are you a seasoned pro looking for premium features? It’s not just about buying a piece of equipment; it’s about investing in your creative process and finding a tool that will grow with you. The right kiln can make the difference between frustration and pure joy in the studio.
To help you decide, we’ve put together a list of our favorite kilns for making stunning dichroic glass jewelry. We looked at everything from budget-friendly starters to professional workhorses, so you can find the one that fits your studio and your art perfectly. We’ve considered factors like power requirements, because nobody wants the surprise of needing an electrician just to get started. We also looked at ease of use, interior space, and special features that can make your life easier. Each of these picks has something special to offer, whether it’s plug-and-play simplicity or the capacity to fire large batches. Let’s find the right kiln to bring your sparkling creations to life.
The Overall Winner: Evenheat Studio Pro 17
If you’re looking for a fantastic all-arounder that gives you room to grow, the Evenheat Studio Pro 17 is our top choice. It’s known as the largest kiln available that runs on a standard 120V outlet, which is a huge plus for any home studio. With generous interior dimensions of 17″ x 17″, you’ll have plenty of space to fire multiple jewelry pieces at once or even work on larger plates and panels. This means more creative freedom without having to call an electrician. Its efficient heating makes it a reliable workhorse, delivering consistent results you can count on. It’s a solid investment for any artist ready to take their work to the next level.
Best on a Budget: Paragon Caldera Digital
Just starting your glass fusing journey? The Paragon Caldera Digital is a wonderful entry-point kiln that won’t break the bank. Its compact, 8″ x 8″ interior is perfectly sized for creating beautiful dichroic glass pendants, earrings, and beads. One of its best features is its simplicity—it plugs right into a regular household outlet, so you can set it up almost anywhere. This little powerhouse is ideal for artists with limited space or those who want to try glass fusing without a major financial commitment. It’s a reliable and affordable way to start firing your own unique jewelry pieces right away.
Easiest for Beginners: Olympic Champ XL
If the technical side of kilns feels a bit intimidating, the Olympic Champ XL is the perfect solution. It’s celebrated as one of the biggest kilns you can run on household power without needing any special electrical work. This takes all the guesswork and hassle out of the setup process. With a roomy 14.5″ x 14.5″ interior, you get plenty of space to experiment and grow as an artist. You can start with small jewelry projects and still have the capacity to try larger pieces later on. The combination of its generous size and plug-and-play convenience makes it a stress-free and encouraging choice for anyone new to the craft.
The Premium Choice: Hot Shot HS16 PRO Clamshell
For the serious artist who values precision and professional-grade features, the Hot Shot HS16 PRO Clamshell is an exceptional choice. Its clamshell design is a game-changer, allowing you to open the entire lid for easy and safe access to the interior. This makes arranging delicate dichroic glass pieces much simpler and reduces the risk of disturbing your designs. The heating elements are covered, which prevents dust and flakes from falling onto your glass—a crucial feature for flawless results. It also heats and cools quickly, making your production process more efficient. This kiln is a true studio upgrade for artists who demand quality and control.
Perfect for Small Batches: Paragon Fusion 17
Do you find yourself creating lots of jewelry in small, consistent batches? The Paragon Fusion 17 could be the perfect fit for your workflow. While it was originally designed for slumping bottles, its long, rectangular shape (17.5″ x 10.75″) is incredibly useful for lining up rows of pendants, earrings, or cabochons. This layout helps you maximize your firing space efficiently. Like many of our other favorites, it operates on a standard 120V outlet, making it a practical addition to any home studio. It’s an ideal workhorse for the artist who has a steady production of small items and wants a dedicated, reliable kiln to get the job done right every time.
A Note on Specialized Kilns
You might be wondering if you can use a ceramic kiln for your glass projects, and the short answer is: it’s not a good idea. The main difference comes down to where the heat originates. Glass needs to be heated evenly from both the top and sides to melt uniformly and avoid thermal shock, which can cause it to crack. That’s why glass kilns are designed with heating elements in the lid as well as the sides. Ceramic kilns, on the other hand, typically only heat from the sides, which can lead to uneven results and failed projects. This specialized design, combined with a precise digital controller, is what allows you to execute the complex firing schedules needed for fusing. Investing in one of the many kilns built specifically for glass isn’t just about getting better results—it’s about setting yourself up for success and protecting your beautiful glass from costly failures.
How Do These Top Kilns Compare?
Choosing a kiln is a big step, and it helps to see how the top contenders stack up against each other. While they all do the same basic job—getting hot enough to fuse glass—they differ in price, performance, and the little details that matter in your day-to-day studio life. Let’s break down how our favorite models compare so you can find the perfect fit for your art and your budget.
Comparing Kiln Prices at a Glance
It’s no surprise that price is a major factor when you’re investing in a new piece of equipment. The kilns we’ve reviewed vary in cost, largely based on their size, controller type, and extra features. Generally, you’ll find that smaller, manually controlled kilns are the most budget-friendly, while larger models with advanced digital controllers sit at the higher end. But a higher price tag doesn’t always mean it’s the right choice for you. Each of our top picks offers reliable performance and stands out for different reasons. Think about what you truly need. If you’re just starting, a more affordable kiln can be a fantastic way to get going without a massive upfront cost.
How Their Features Stack Up
Beyond price, performance is what truly sets these kilns apart. For fusing dichroic glass, precise temperature control is non-negotiable. That’s why digital controllers are a must-have; they can execute complex firing schedules without you having to babysit the process. This ensures your beautiful COE90 glass pieces come out perfectly every time.
Size is another key difference. Smaller kilns are great for jewelry and test pieces, heating up and cooling down quickly. Larger kilns, often those bigger than 15 inches, can handle bigger projects but usually require a 240-volt outlet and take longer to complete a cycle. A kiln is a long-term investment in your craft, so consider both your current needs and where you see your art going in the future.
What Other Artists Are Saying
Sometimes the best insights come from fellow artists who have already put these kilns to the test. Many glass fusers share their experiences online, comparing notes on performance, safety, and long-term operating costs. One common piece of feedback is that while a kiln might seem expensive initially, its running costs are often surprisingly low. For example, running a jewelry-sized kiln for a full firing cycle can cost less than a cup of coffee. Hearing from others confirms that choosing a reliable, efficient model pays off in the long run, giving you peace of mind and consistent results for years to come.
Beginner vs. Pro: What Features Matter Most?
Choosing a kiln can feel like a huge decision, whether it’s your first or your fifth. The features that matter most really depend on where you are in your glass art journey. A beginner needs a reliable, straightforward machine to learn the ropes, while a seasoned artist might be looking for more space and precision to push their creative boundaries. Let’s break down what to focus on based on your experience level, so you can invest in a kiln that grows with you and helps you create the beautiful dichroic jewelry you envision. We’ll also cover a few common missteps to help you avoid them from the get-go.
Your First Kiln: The Must-Have Features
When you’re just starting, simplicity is your best friend. You need a kiln that lets you focus on the glass, not on complicated controls. Look for smaller kilns (under 15 inches) that can plug into a standard 120-volt household outlet—no need to call an electrician. Glass kilns are designed to heat from the top and sides for even warmth, which is perfect for fusing and slumping without shocking the glass. Unlike ceramic kilns that reach scorching temperatures, glass fusing typically stays below 1699°F. A simple digital controller with preset programs is a fantastic feature for beginners, as it takes the guesswork out of firing schedules and helps you get consistent, beautiful results right away.
Ready to Upgrade? Features for Experienced Artists
If you’ve been working with glass for a while, you’re probably ready for an upgrade that offers more control and capacity. A precise digital controller is non-negotiable at this stage. It allows you to create and save complex, multi-stage firing schedules, giving you complete command over your results for intricate projects. You’re also likely looking at larger kilns to create bigger pieces or fire more jewelry at once. Most kilns over 15 inches require a 240-volt power supply, so be sure your studio is equipped for it. While larger kilns take longer to heat and cool, the ability to work with bigger molds and produce more art is a trade-off many professional artists are happy to make.
Common Mistakes to Avoid When Buying
A great kiln can’t make up for mistakes in your process, so it’s smart to keep fundamentals in mind. The most critical rule in glass fusing is compatibility. Glass expands and contracts when heated, and different types do so at different rates. This is measured by the Coefficient of Expansion (COE). Mixing glass with different COEs will cause it to crack during cooling. Always stick to one system, whether you’re working with COE90 Glass or COE96 Glass. Also, consider how a kiln’s features can help you avoid errors. A digital controller makes it much easier to follow proper firing schedules, while a clamshell design can simplify kiln loading and shelf preparation, preventing mishaps before you even press start.
How Much Should You Expect to Spend on a Kiln?
Figuring out your budget is one of the first big steps in buying a kiln. Prices can range from a couple of hundred dollars for a tiny microwave kiln to several thousand for a professional-grade studio model. The final cost really comes down to what you need, so it’s helpful to think about your goals before you start shopping. Key factors that influence the price include the kiln’s size, its maximum temperature, the type of controller it uses (digital or manual), and its power requirements. A larger kiln with a sophisticated digital controller will naturally cost more than a small, manually operated one.
Generally, you can group kilns into three main price brackets. Entry-level models are perfect for beginners or those with limited space and budgets. Mid-range kilns are the workhorses for serious hobbyists who are ready for more capacity and advanced features. Finally, professional kilns are built for artists who are running a business or creating large-scale work. Understanding where you fit will help you find the right balance between features and price, ensuring you get a kiln that serves you well without breaking the bank. Let’s look at what you can expect in each category.
Entry-Level Kilns (Under $1,000)
If you’re just starting your glass fusing journey or have a small workspace, an entry-level kiln is a fantastic choice. These kilns are typically smaller (under 15 inches) and have the major advantage of running on a standard 120-volt household outlet—no need to call an electrician! Models like the Paragon Caldera Digital are compact, easy to use, and perfect for making jewelry, beads, and other small pieces. For those on a very tight budget or with minimal space, microwave kilns are another great way to get started. They offer a low-cost entry point into the world of glass fusing, letting you experiment and learn the basics before committing to a larger investment.
Mid-Range Workhorses ($1,000-$3,000)
When you’re ready to move beyond the basics and start creating more ambitious projects, a mid-range kiln is your best friend. These kilns are designed for serious hobbyists and semi-professional artists who need more space, better temperature control, and more programming options. Tabletop electric kilns in this price range are perfect for fusing larger pieces of COE90 glass, slumping, and enameling. They offer a great balance of performance and affordability, giving you the features you need to grow your skills and produce consistent, high-quality work. Think of this as the sweet spot where you get professional-level features without the highest-end price tag.
Professional Kilns (For the Serious Artist)
For the dedicated artist running a studio or creating large-scale pieces, a professional kiln is a necessary investment. These kilns are significantly larger—often over 15 inches—and can handle big projects with ease. The biggest consideration here is power. Larger kilns almost always require a 240-volt power supply, which may mean hiring an electrician to upgrade your wiring. While they can fire bigger pieces and often come with advanced digital controllers, they also take longer to heat up and cool down. If you work with multiple materials, you might even consider a dual-media kiln designed to handle both glass and pottery, giving you incredible versatility for all your creative ideas.
Alternatives to Buying a Kiln Immediately
A kiln is a big investment, and it’s completely okay if you’re not ready to take the plunge just yet. The great news is, you don’t have to own a kiln to start fusing beautiful dichroic glass. Many local art studios and community centers offer kiln rentals, allowing you to pay for firing time as you need it. This is a fantastic way to experiment with different firing schedules and see what works for you without the upfront cost. Another great option is to take a class; you’ll not only get access to a kiln but also receive expert guidance. For those with a tight budget or limited space, a microwave kiln can be a fun, low-cost way to create small jewelry pieces and test out ideas right in your own kitchen. Exploring these alternatives lets you build your skills and confidence before you decide to bring a full-sized kiln into your studio.
Kiln Safety 101: Don’t Skip These Steps
Bringing a new kiln into your studio is a huge milestone. It’s tempting to plug it in and start firing immediately, but taking the time to set up a safe workspace is the most important first step you can take. Working with extreme heat requires respect and preparation. These guidelines aren’t just suggestions; they’re essential practices that protect you, your home, and your beautiful glass creations. Let’s walk through the fundamentals of kiln safety so you can fire with confidence for years to come.
How to Set Up a Safe Kiln Workspace
Your kiln needs its own dedicated spot, away from the main traffic of your home or studio. A garage, basement, or utility room with a concrete floor is the ideal location. Make sure to keep at least 18 inches of empty space around all sides of the kiln. This clearance is non-negotiable—it allows for proper air circulation to dissipate heat and drastically reduces fire risk. Clear the area of any flammable materials like paper, fabric, and chemicals. Think of this space as a “no-clutter zone.” Your kiln is the heart of your glass art practice, so give it the safe, stable home it needs to work its magic.
Why Proper Ventilation is Crucial
When your kiln heats up, binders and other substances in your glass and on your molds can burn off, creating fumes. Proper ventilation is essential to whisk these fumes away from your workspace and keep your air clean. At a minimum, you should have a window open with a fan directing the air outside. For a more permanent setup, installing a dedicated kiln vent system is the best option. This isn’t just about getting rid of unpleasant smells; it’s about protecting your long-term health. Good airflow also helps manage the ambient heat, making your studio a more comfortable and safer place to create.
How to Safely Place and Run Your Kiln
Before you even plug it in, take a look at your home’s breaker box. Your kiln needs a dedicated circuit with enough amperage (electrical flow) to run without overloading your system. If you’re unsure, it’s always best to consult an electrician. When you’re ready to fire, always read the instruction manual that came with your kiln. Each model has unique features and requirements. When opening a hot kiln, wear heat-resistant gloves and safety glasses, and use tongs to handle hot items like molds. Always have a heatproof surface, like a ceramic tile or fire brick, ready to place them on.
Avoid These Common Dichroic Firing Mistakes
Working with dichroic glass is like adding a little bit of magic to your art, but that magic can sometimes feel unpredictable when you open the kiln. If you’ve ever felt a pang of disappointment seeing a cracked piece or a color you didn’t expect, you’re not alone. Most firing issues come down to a few common missteps that are surprisingly easy to correct. It’s rarely the kiln’s fault; more often, it’s about what happens before you even press “start.”
Think of it like baking. You can have the best oven in the world, but if you mix the wrong ingredients, forget to grease the pan, or set the temperature too high, you won’t get the cake you wanted. The same principles apply to firing glass. Getting your firing schedule right, loading your kiln with care, and understanding the quirky nature of dichroic colors are the three keys to success. Let’s walk through each of these areas so you can avoid the most common pitfalls and get that dazzling, perfect result every time you fire.
Getting the Finish You Want: Coated Side Up or Down?
One of the coolest things about dichroic glass is that you can control its final texture just by how you place it in the kiln. The orientation of the metallic coating is what determines whether you get a matte or a glossy finish. For a textured, satin-like matte surface, you’ll want to fire your piece with the dichroic coating facing up, exposed to the heat. If you’re aiming for a smooth, shiny finish that looks like the color is trapped under liquid glass, you’ll need to cap it. This means placing the dichroic layer face down on your base glass and adding a layer of clear COE90 glass on top, sandwiching the coating between two layers. This simple choice gives you incredible creative control over the final look of your jewelry.
The Golden Rule: Never Face Two Coated Sides Together
If there is one rule to write down and tape to your kiln, this is it: Never fire two dichroic coated surfaces directly facing each other. While it might seem like a cool idea to get double the shimmer, the metallic coatings will permanently fuse together during firing. You won’t be able to pull them apart, and the result is often a messy, unusable piece. This is one of the most common and costly mistakes beginners make, but it’s also one of the easiest to avoid. Always make sure there is a layer of glass between any two coated surfaces. Remembering this simple rule will save you a lot of frustration and precious material, ensuring your projects come out exactly as you planned.
How to Perfect Your Firing Schedule
Your firing schedule is your recipe for success, and the most important ingredient is glass compatibility. All glass expands and contracts when heated, but different types do so at different rates. This is measured by the Coefficient of Expansion, or COE. Mixing glass with different COEs, like COE90 and COE96, is a recipe for disaster, as the pieces will pull apart as they cool, causing stress cracks or complete breaks. Always double-check that every piece of glass in your project has the same COE. Also, make sure your glass is squeaky clean before it goes in the kiln. Fingerprints and dust can leave permanent smudges after firing.
Firing Schedules for Slumping
Slumping is the process of gently shaping glass over a form at relatively low temperatures. Because no single schedule works for every project, it’s a good idea to visually check on your piece during the firing. A firing schedule designed to slump glass won’t be hot enough to fully fuse it, so precision is key to getting that perfect bend without melting your details away. This is where you’ll use different molds to create dishes, plates, or other dimensional shapes. Since the goal is to shape the glass rather than melt it flat, your target temperatures will be lower than in fusing, often hovering around 1200°F to 1250°F. The key is a slow, controlled heat-up and cool-down to allow the glass to bend without cracking.
Firing Schedules for Tack Fusing
Tack fusing is when you heat two pieces of glass just enough for them to stick together, leaving the top piece with a raised, textured surface. This technique is perfect for adding dimension to your jewelry. Achieving a successful tack fuse requires very precise temperature control, because if you go even a little too hot, you’ll end up with a full fuse where the pieces melt completely flat. This is where a digital controller is a lifesaver. It lets you program a specific firing schedule—the heating rates, target temperatures, and hold times—and then runs the process for you, ensuring you get consistent results every time you fire your kilns.
Firing Schedules for Glass Casting
Glass casting involves melting glass until it becomes molten and flows into a mold, creating a solid, three-dimensional object. This technique requires much higher temperatures and longer hold times than slumping or fusing. A firing schedule that works for slumping glass at 1200°F won’t be nearly hot enough to melt glass for a cast. You’ll need to reach temperatures closer to 1500°F or higher, depending on the volume of glass and the complexity of the mold. This advanced process highlights the importance of a reliable kiln that can execute precise, multi-stage programs, ensuring your COE90 glass melts completely and anneals properly to prevent cracking.
A Note on Microwave Kilns
If you’re just starting out or have a very small workspace, a microwave kiln can be a great, low-cost entry point. These tiny kilns are designed to work inside a standard household microwave, allowing you to experiment with fusing small jewelry pieces without investing in a full-size kiln. While they don’t offer the precise temperature control of a digital kiln, they are perfect for learning the basics of how glass melts and fuses. Think of them as a fun way to dip your toes into the world of glass art before you decide to purchase larger kilns for more ambitious projects.
How to Load Your Kiln Correctly
How you arrange pieces inside your kiln directly impacts the final result. A common mistake is overcrowding the kiln shelf, which prevents heat from circulating evenly. This can lead to some pieces being under-fired while others get the full heat treatment. As a rule of thumb, leave at least an inch of space between your projects. Also, never place glass directly on the kiln’s brick floor or shelf without a separator. Use kiln wash or shelf paper on your molds and shelves to create a barrier. This simple step prevents the glass from fusing to the shelf, saving you a lot of frustration and a potentially ruined shelf.
Troubleshooting Unexpected Color Shifts
One of the most exciting—and sometimes confusing—things about dichroic glass is its ability to shift colors. The color you see before firing is the transmitted color, while the color you see after is the reflected color. This is a normal and beautiful property of dichro, not a mistake! The final color is also heavily influenced by the base glass you use. For example, dichroic glass on a black base will look completely different than the same piece on a white or clear base. Capping your dichro with clear glass can also intensify its reflective color. I recommend creating a small test tile library to see how your favorite dichroic pieces fire on different colored bases.
How to Keep Your Kiln in Top Shape
Your kiln is the heart of your glass studio, and a little routine care will ensure it performs beautifully for years to come. Just like any essential piece of equipment, it needs regular attention to stay in top shape. Keeping up with simple maintenance tasks not only extends the life of your kiln but also helps you get consistent, predictable results with every firing. Think of it as an investment in your art. By spotting small issues before they become big problems, you can avoid costly repairs and frustrating firing failures, letting you focus on creating stunning dichroic glass jewelry. This guide will walk you through the essential maintenance steps, from your weekly cleaning routine to troubleshooting common problems. A well-maintained kiln is a reliable partner in your creative process, giving you the confidence to experiment with new designs and techniques without worrying about equipment failure.
Your Regular Cleaning Checklist
A clean kiln is a happy kiln. Make it a habit to regularly wipe down the interior and exterior to prevent glass dust and debris from building up. A soft brush or a slightly damp cloth works perfectly for this. Pay close attention to your kiln shelves, making sure they are smooth and free of any residue from previous firings, as this can impact the quality of your next project. A great preventative tip is to avoid using glue on the coated side of dichroic glass. This simple step helps maintain the integrity of both your glass and your kiln’s interior, preventing unwanted materials from sticking where they shouldn’t.
When and How to Replace Your Elements
The heating elements in your kiln are the workhorses that make the magic happen, but they don’t last forever. Over time, they wear out and will need to be replaced. It’s a good idea to visually inspect your elements regularly, looking for any signs of damage, sagging, or wear. Don’t be intimidated by the idea of replacing them yourself! With your kiln’s instruction manual and a few basic tools, it’s a manageable task for many artists. Always follow the manufacturer’s specific guidelines for your model to ensure you do it safely and correctly, getting your kiln back to optimal heating performance.
How to Fix Common Kiln Issues
Even with the best care, you might run into a few hiccups. If you notice uneven heating, the first things to check are your elements and how you’ve loaded your glass. A malfunctioning element or improper placement can easily throw off your results. Another common issue is the kiln failing to reach the target temperature. This could also point to a worn-out element or a potential electrical problem. Always start by reviewing the recommended firing schedule for your specific glass, like COE90, to rule out programming errors. For any electrical issues, your kiln’s manual is your best friend, but never hesitate to consult a professional technician for safety.
Ready to Buy? Here’s Where to Look
Once you’ve narrowed down your options, the final step is deciding where to make your purchase. Finding the right kiln is just as much about finding the right supplier. You want a partner who can offer support, fair pricing, and a great selection. Let’s walk through your options so you can feel confident when you’re ready to buy.
Shopping Online vs. Buying Local
Deciding between buying online or from a local shop really comes down to what you value most. Online retailers, like us, typically offer a much wider selection of kilns and more competitive pricing because of lower overhead. It’s easier to compare models and specs from the comfort of your studio. The downside can be shipping costs and not being able to see the kiln in person first. A local supplier is fantastic for hands-on service. You can ask questions face-to-face, get a feel for the kiln’s size, and potentially take it home the same day. However, their selection might be limited to a few brands, and prices may be higher. Weigh which experience feels right for you—the convenience and variety of online shopping or the personal touch of a local store.
How to Find the Best Deals
Everyone loves a good deal, and a little patience can save you a lot of money on a big purchase like a kiln. A great first step is to sign up for newsletters from your favorite suppliers. This is where you’ll often find out about sales events, special promotions, and exclusive discount codes first. Keep an eye out for seasonal sales, especially around major holidays. Some suppliers also offer package deals, bundling a kiln with essential tools or molds at a reduced price. These can be an incredible value if you’re just starting out and need to stock up on other supplies. Don’t be afraid to compare prices between a few trusted retailers before you commit.
How to Choose a Reputable Supplier
Your relationship with your supplier doesn’t end after you click “buy.” A reputable seller will be there to help if you have questions or run into issues later. Before purchasing, do a little homework. Look for a supplier with a solid track record and positive reviews from other glass artists in the community. Check their customer service policies. Is there a clear return policy? Do they have a phone number or email you can easily find for support? A supplier who is transparent and easy to contact is usually a good sign. You’re investing in a critical piece of equipment for your art, so make sure you’re also investing in a supplier who has your back.
Frequently Asked Questions
Can I plug my new kiln into a regular wall outlet? That depends on the kiln’s size. Many smaller kilns, typically those with an interior under 15 inches, are designed specifically to run on a standard 120-volt household outlet. This makes them incredibly convenient for home studios. However, larger kilns that can handle bigger projects almost always require a more powerful 240-volt outlet, the same kind used for an electric stove or clothes dryer. Always check the kiln’s power requirements before you buy to make sure your space is ready for it.
What’s the single most important mistake to avoid when firing dichroic glass? The most critical rule is to never mix glass with different Coefficients of Expansion, or COEs. All the glass in a single project must be either COE90 or COE96. Glass expands when it gets hot and shrinks as it cools, and different COEs do this at different rates. If you mix them, the pieces will literally pull themselves apart during the cooling process, resulting in cracked or shattered work.
Why can’t I just use a pottery kiln for my glass projects? While they both get hot, glass and pottery kilns are designed to heat differently. A glass kiln has heating elements in the lid to radiate heat downward, which evenly melts the glass for a smooth, fused finish. A pottery kiln typically has elements on the side walls, which is great for ceramics but can heat glass unevenly and cause it to crack from thermal shock. For the best results with glass, you need a kiln built for the job.
How will I know when it’s time to replace my kiln’s heating elements? Your kiln will give you a few clear signs. The most obvious is that your firing cycles will start taking much longer than they used to, or the kiln may struggle to reach its target temperature at all. You can also do a visual check when the kiln is cool and unplugged. If you see that the element coils are sagging, look brittle, or have visible breaks, it’s definitely time for a replacement.
My dichroic glass came out of the kiln a completely different color! What did I do wrong? You probably didn’t do anything wrong at all! This is one of the most magical properties of dichroic glass. The color you see before firing is its transmitted color, but the final, vibrant color you see after firing is its reflected color. The color of the base glass you fuse it to also has a huge impact on the final look. This color shift is a normal and exciting part of the process, so embrace the beautiful surprise.