
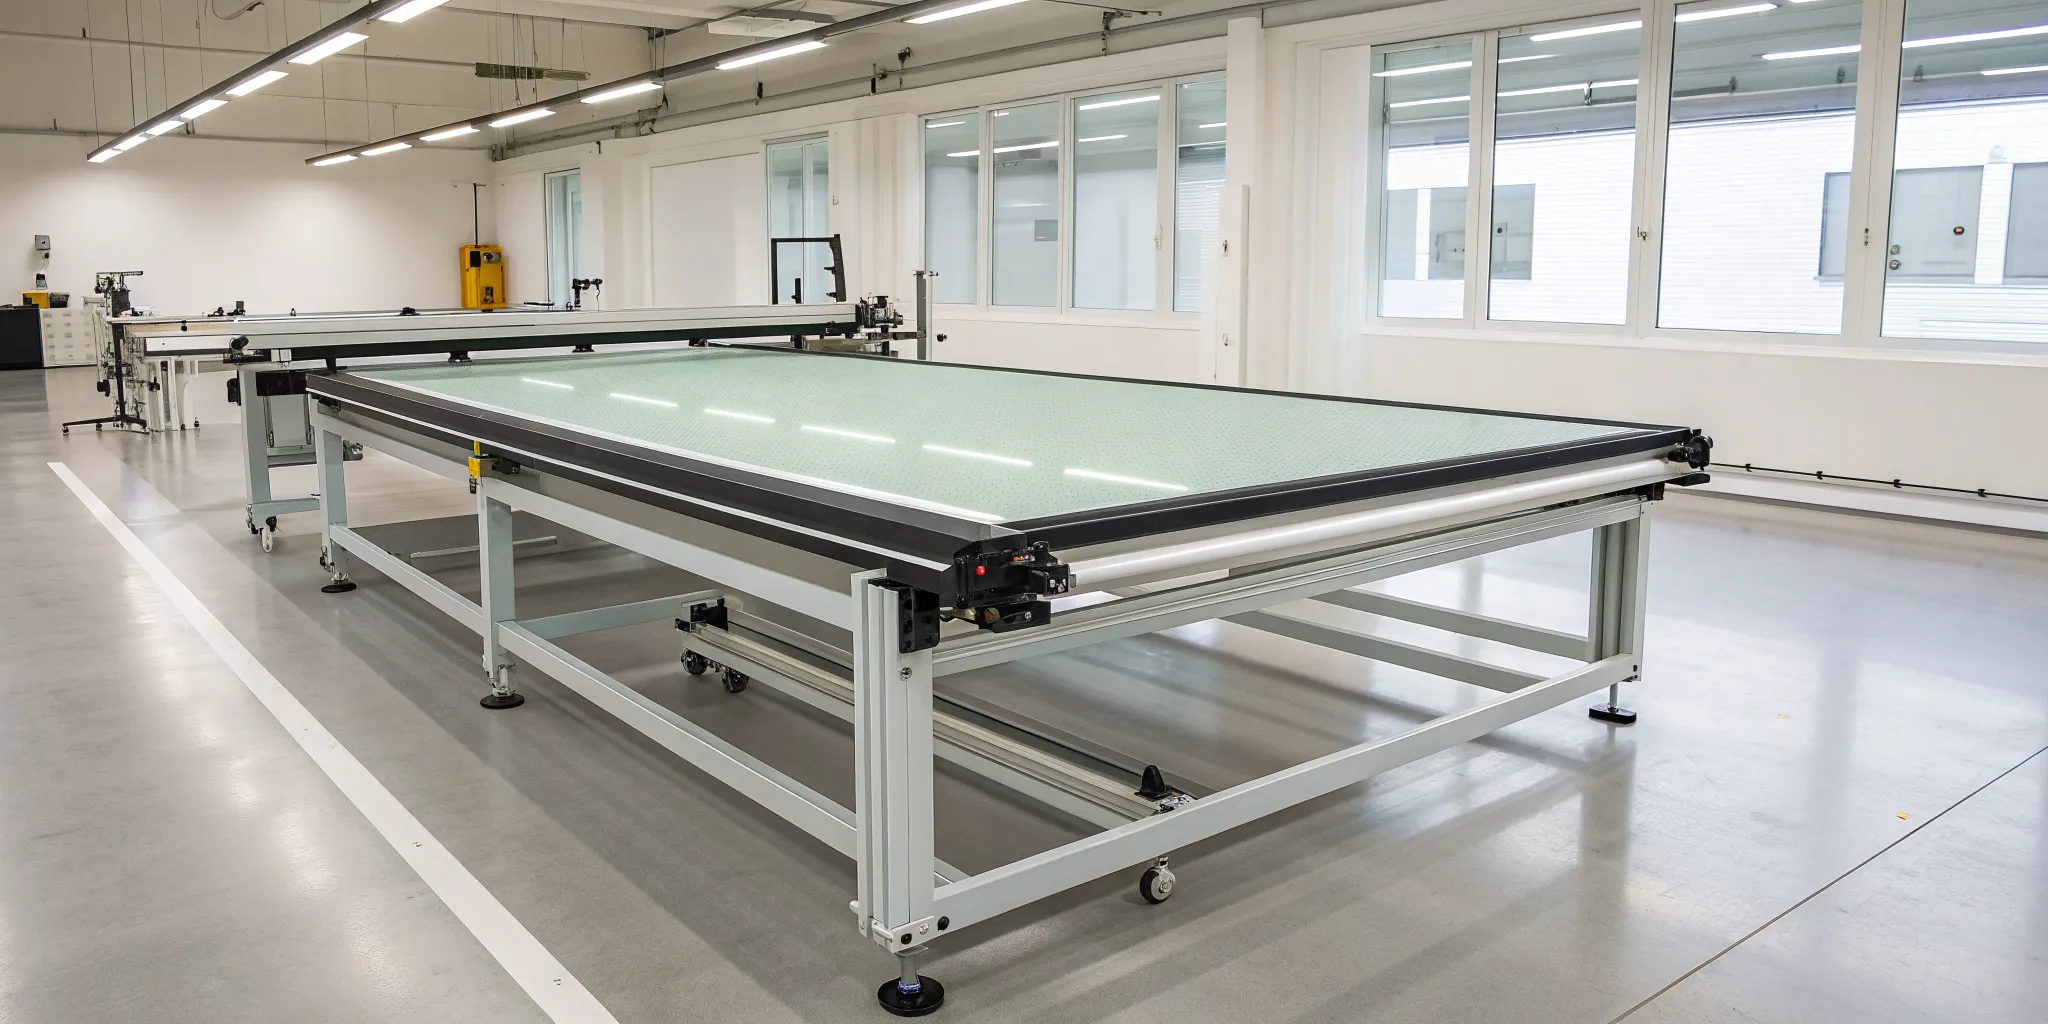
A glass cutter is more than just a tool; it’s an extension of your artistic hand. Like a painter’s favorite brush, it’s the instrument that translates your creative ideas into reality. The connection you feel with your cutter directly impacts your work, influencing everything from sweeping stained glass curves to precise geometric shapes. A simple handheld tool offers an intimate, tactile experience, while a sophisticated glass cutter machine provides the power for intricate, repeatable designs. Finding the right one is about matching the tool’s capabilities to your unique artistic style. This guide explores the options to help you find the cutter that feels right and empowers your best work.
Key Takeaways
- Choose a cutter that fits your artistic style: A flexible handheld tool is ideal for the flowing lines in stained glass, while a guided system provides the perfect, straight edges required for glass fusing projects.
- Focus on features that deliver a clean cut: A high-quality cutting wheel, a comfortable ergonomic grip, and compatibility with your glass thickness are the details that truly matter for achieving smooth, precise breaks.
- Simple maintenance ensures better performance: Regularly using cutting oil and storing your tool properly protects the cutting wheel, which helps you get a reliable, clean score every time and prevents wasting beautiful glass.
So, What Exactly Is a Glass Cutter?
At its core, a glass cutter is a tool designed to make a precise score on a glass surface. It doesn’t cut all the way through the material like a saw cuts through wood. Instead, it creates a fine, controlled line of weakness. This score allows you to apply pressure and snap the glass along that exact line, resulting in a clean, predictable break. Whether you’re a hobbyist cutting your first piece of stained glass or a professional artist producing intricate designs, the goal is the same: precision and control.
Glass cutters range from simple handheld tools that fit in your palm to large, automated machines guided by computer software. The type of cutter you choose depends entirely on the scope of your projects, the materials you use, and the level of detail you want to achieve. While a basic handheld cutter is perfect for straight lines and gentle curves, more complex systems can handle intricate patterns and high-volume work with incredible accuracy. Understanding how these tools function is the first step toward mastering the art of cutting glass.
Manual vs. Automated: What’s the Difference?
Manual glass cutters are the classic, handheld tools that give you direct, tactile control over every score. Using one requires a steady hand and consistent pressure, allowing you to feel the connection between the tool and the glass. This makes them ideal for artists who enjoy a hands-on process and for projects that involve organic shapes or freeform curves. They are also portable, affordable, and a great starting point for anyone new to glass art.
Automated cutters, on the other hand, prioritize precision and efficiency. These machines, which can range from tabletop models to large CNC systems, follow a pre-programmed path to create flawless, repeatable cuts. They minimize the risk of human error, making them perfect for producing identical shapes for a large mosaic or cutting complex geometric patterns that would be difficult to achieve by hand. The choice between manual and automated often comes down to your workflow, production volume, and artistic style.
How Do They Actually Work?
The magic of a glass cutter lies in creating a controlled fracture. The tool’s small, hard wheel (often made of carbide steel or diamond) rolls across the glass surface under pressure, creating a score line. This isn’t a deep cut but a microscopic fissure that disrupts the glass’s surface tension. This score line becomes the path of least resistance for a break.
Once the score is made, you apply gentle, even pressure from the underside of the line. This pressure “runs” the score, causing the fissure to travel cleanly through the thickness of the glass. The quality of the break depends on several factors, including the sharpness of the wheel, the consistency of your pressure, and the angle of the tool. A good score results in a smooth edge, which is essential for fitting pieces together in stained glass or preparing COE96 glass for fusing.
Which Type of Glass Cutter Do You Need?
Choosing the right glass cutter feels a lot like picking the perfect paintbrush. The best tool for the job depends entirely on what you want to create. Are you cutting gentle curves for a stained glass panel, or do you need hundreds of identical geometric shapes for a large mosaic? Your project’s scale, complexity, and personal workflow will all point you toward the ideal cutter. Let’s walk through the main types, from simple handheld tools to powerful automated systems, so you can find the one that fits your artistic vision.
The Classic: Handheld Glass Cutters
This is where most of us start, and for good reason. Handheld cutters are affordable, versatile, and perfect for the free-flowing lines needed in stained glass art. They come in a few styles, like the classic pencil grip or the more ergonomic pistol grip, which can reduce hand fatigue during long cutting sessions. While they require a bit of practice to master a consistent score, a quality handheld cutter is an indispensable tool for any glass artist. Using the right tool, even a simple one, helps you make the most of your beautiful glass sheets and avoid frustrating, wasteful breaks.
Carbide vs. Steel Wheels
When you’re looking at handheld cutters, the tiny wheel at the tip is doing all the heavy lifting, and its material makes a huge difference in your results. Carbide wheels are the go-to for many seasoned artists because they are incredibly durable and stay sharp for a long, long time. As the experts at Ribbecke Glass note, carbide cutters require about half the pressure of steel ones. This means less hand strain for you and a cleaner, more reliable score line, which is a massive plus for detailed patterns or long work sessions. That precision helps you feel more confident with every cut.
Steel wheels, on the other hand, are more budget-friendly and can be a decent starting point if you’re just dipping your toes into glass art. They’ll get the job done for simpler projects, but they tend to dull more quickly, which can lead to frustrating, uneven breaks and wasted glass. As the team at Inland Craft highlights, a strong carbide wheel simply lasts longer and performs better over time. If you’re serious about your craft and want consistent, clean results, investing in a cutter with a carbide wheel is one of the best moves you can make for your studio practice.
Powering Up: Electric Cutting Systems
If you’re looking for more precision and power without investing in a massive machine, an electric cutting system could be your answer. These tools, which you can find among other professional glass cutters and hand tools, automate parts of the cutting process to help you achieve cleaner, more consistent results with less physical strain. By minimizing the potential for human error, these systems are great for artists who need to create multiple, uniform pieces for a project. They bridge the gap between manual cutting and full automation, offering a way to get consistently high-quality scores, which is a huge advantage when you need your components to fit together perfectly.
Glass Saws: Ring, Band, and Wire
When your design includes cuts that are too complex for a standard scorer, it’s time to look at glass saws. These tools physically cut through the glass, opening up a world of possibilities for intricate shapes, deep curves, and inside cuts. There are three main types you’ll encounter. Ring saws use a circular blade that can cut in any direction, making them a favorite for navigating the complex patterns found in stained glass. Band saws are the workhorses for cutting thicker glass or tackling larger projects with straight lines and wide curves.
Finally, for the most delicate and detailed work, wire saws offer unmatched precision. They use a thin, diamond-coated wire to slice through glass, which is perfect for creating intricate shapes without causing chips or fractures. Understanding which saw to use is key, especially when you’re cutting glass to fit perfectly into specific molds for slumping or draping, or creating detailed components for a larger fused piece. Each saw gives you a different kind of control, helping you bring more complex visions to life.
For Your Studio: Tabletop Glass Cutter Machines
For artists who frequently cut strips, squares, and other geometric shapes, a tabletop glass machine is a fantastic studio addition. These systems provide a stable, guided cutting experience that’s hard to replicate by hand. They are especially popular for creating components for glass fusing, where precise, straight edges are key. When you’re working with different types of glass, it’s important to have a tool that can handle various thicknesses. Many tabletop systems are designed to work with everything from thin COE90 glass to thicker architectural sheets, making them a versatile choice for both hobbyists and professional studios.
Guided Cutters for Comfort and Consistency
When you need perfect straight lines or have to cut lots of identical pieces, a guided cutter is a game-changer. These tools are designed to give you a stable, controlled cutting experience, which is a huge help for creating the crisp, straight edges needed for geometric patterns or architectural work. They essentially guide the cutting head for you, removing the variables of hand pressure and steadiness. This not only improves the accuracy of your scores but also significantly reduces the physical strain of manual cutting, letting you work longer and more comfortably.
This level of precision is especially valuable for glass fusing, where your pieces must fit together perfectly before heading into the kiln. A guided system helps you produce flawless, repeatable cuts every time, minimizing the risk of error and wasted material. Instead of worrying about a shaky hand ruining a beautiful sheet of COE90 glass, you can focus on your creative design. The combination of ergonomic benefits and reliable consistency makes these cutters a worthwhile investment for any artist looking to streamline their process and achieve more professional results.
The Ultimate Precision: Waterjet and CNC Systems
Welcome to the big leagues of glass cutting. Waterjet and CNC (Computer Numerical Control) systems are computer-driven machines that offer unparalleled precision and speed. They can cut incredibly intricate designs that would be impossible to achieve by hand, and they can do it over and over again with perfect accuracy. These machines can significantly reduce the time and labor required for production, making them a game-changer for artists running a business. While the investment is significant, a CNC system is the ultimate tool for large-scale projects where efficiency and flawless repeatability are the top priorities.
Setting Up Your Workspace for Success
Having the right cutter is a great start, but the tool itself is only half the equation. Your workspace is the other half. A well-planned setup isn’t just about being tidy—it’s about creating an environment that promotes safety, efficiency, and better results. Taking a few minutes to optimize your cutting area can make the difference between a frustrating session full of wasted glass and a smooth, productive flow state where your creative ideas come to life effortlessly.
Choosing the Right Cutting Surface
The surface you cut on matters more than you might think. For large sheets of glass, you need a surface with a little give. A piece of low-pile carpet or a layer of thick paper helps cushion the glass, evening out any minor bumps on your table and preventing stress fractures. For smaller pieces, however, the opposite is true. You need a hard, flat surface like a bare wood board. A surface that’s too soft can cause the small piece to dip or wobble as you score it, making a clean break nearly impossible. The last thing you want is for a beautiful sheet of COE96 glass to crack unexpectedly because your surface wasn’t right.
Getting Your Workbench Height Just Right
Ergonomics are everything when you’re spending time in your studio. Your workbench should be at a height that feels comfortable for you, allowing you to work without straining. If your bench is too low, you’ll likely end up hunched over, which is a fast track to an aching back. If it’s too high, you won’t be able to get the proper leverage and apply the consistent, downward pressure needed for a perfect score. The ideal height lets you stand comfortably with your arm slightly bent, using your body weight to guide the cutter. Find your sweet spot, and you’ll be able to work for hours in comfort.
Using Jigs for Repetitive Cuts
If your project involves cutting multiple pieces of the same size or shape, a jig is your best friend. A jig is simply a guide you create to make cutting faster and more accurate. It can be as simple as a wooden strip clamped to your workbench to guide your cutter for perfectly straight lines. For artists who create geometric patterns or sell their work, jigs are essential for efficiency and consistency. Think of it like using molds to get uniform shapes when slumping glass in a kiln; a cutting jig brings that same uniformity to your initial cuts, ensuring a professional and polished final product.
Key Features to Look For in a Glass Cutter
Choosing the right glass cutter can feel like a big decision, but it really comes down to a few key details. The perfect tool for you will match your artistic style, the materials you use, and how you like to work. When you’re comparing different models, from simple handheld cutters to more advanced systems, focusing on these four features will help you find a tool that feels like an extension of your own hand and delivers beautiful results every time.
Does It Cut Cleanly? Precision and Edge Quality
The most important job of a glass cutter is to create a clean, precise score line. This is what allows you to get that perfect break. A high-quality cutting wheel is essential here; it ensures your cuts are smooth and free of tiny chips or flakes along the edge. When your score is clean, the glass breaks exactly where you want it to, which means less time at the grinder trying to smooth out rough edges. This precision is crucial whether you’re cutting intricate shapes for a stained glass panel or straight lines for a fused glass piece. A reliable cutter gives you the confidence to execute your designs flawlessly.
Will It Cut Your Glass? (Thickness & Compatibility)
Not all glass is the same, so your cutter needs to be able to handle the specific materials you work with. Think about the projects you love to create. Do you primarily use thin stained glass, or do you often work with thicker sheets of COE90 glass for fusing? Some cutters are designed for a specific range of thicknesses, so always check the product specifications before you buy. Choosing a versatile cutter that can handle various glass types and thicknesses gives you more creative freedom. It ensures your tool will be a valuable part of your studio for years to come, ready for whatever new project inspires you.
How Safe and Easy Is It to Use?
Your comfort and safety are paramount. A tool that feels awkward or uncomfortable can lead to fatigue and mistakes. Look for a cutter with an ergonomic grip that fits well in your hand, as this will give you better control and reduce strain during long cutting sessions. If you’re looking at electric or tabletop models, check for safety features like blade guards that keep your fingers away from the moving parts. A user-friendly tool isn’t just safer; it also makes the creative process more enjoyable. When you feel confident and comfortable with your cutter, you can focus all your energy on your art.
Does It Perform? A Look at Speed and Efficiency
For an artist, speed isn’t about mass production; it’s about efficiency and a smooth workflow. A high-performance glass cutter is one that works consistently, creating a perfect score line on the first try. This reliability is what really saves you time. You won’t have to waste precious glass or your own energy re-cutting pieces that didn’t break cleanly. Performance means you can trust your tool to do its job every single time, allowing you to move seamlessly from one step to the next. This consistency is what helps you bring your vision to life more effectively, without unnecessary frustration.
Mastering the Cut: Essential Techniques
Once you have the right tool, the next step is learning how to use it effectively. Mastering a few fundamental techniques will make a world of difference in the quality of your cuts and the overall enjoyment of your craft. It’s not about brute force; it’s about finesse, control, and understanding how glass wants to break. A good cut starts with a good score, and a good score comes from consistent pressure, proper direction, and confident handling. These skills will help you save time, reduce waste, and get that satisfying, clean snap every time. Let’s go over the essential techniques that will help you cut glass like a pro, turning frustrating breaks into a thing of the past.
The Perfect Score: Sound, Feel, and Pressure
The perfect score is something you learn to recognize with your senses. When you draw the cutter across the glass, listen for a sound like a cotton sheet ripping or Velcro being torn. That’s the sound of success. You should also be able to feel the scoreline with your fingernail, even if you can’t see it clearly. If you’re pressing so hard that the line is visible from two feet away, you’re using too much force. This not only risks an uncontrolled break but also wears out your cutting wheel much faster. Finding that sweet spot of just enough pressure is key to creating a clean, predictable break and preserving the life of your tools.
Push or Pull? Directional Cutting Strategies
The direction you move your cutter can make a big difference in your control and accuracy. As a general rule, you should pull the cutter toward you when making straight cuts, especially when using a ruler or cutting large sheets of stained glass. This motion allows you to use your arm and body weight to maintain a straight, steady line. For cutting patterns and curves, however, it’s often better to push the cutter away from you. Pushing gives you a clear view of the line you’re following and allows for more precise, deliberate movements with your wrist and hand, which is essential for navigating the twists and turns of a complex design.
Breaking the Glass: Hand Grips and Best Practices
Once you’ve made your score, the next step is to apply pressure to run the break. A great technique for this is to hold the glass on either side of the score line with both hands. Close your fists to protect your hands and position your pointer fingers together directly under the score. Place your thumbs on top of the glass, on either side of the line. Now, apply gentle upward pressure with your pointer fingers while simultaneously pushing down with your thumbs. This motion focuses the force exactly where it’s needed, encouraging the glass to snap cleanly along the score you so carefully created.
To Tap or Not to Tap?
You might have seen artists tap the underside of a score line with the ball end of their cutter to start a break. While this can work, it should be considered a last resort. Tapping often creates very sharp, jagged edges that can be dangerous and require a lot more time at the grinder to smooth out. It’s always better to achieve a clean break using a controlled hand grip or running pliers. Only tap if you absolutely have to, and do it as little as possible to get the break started. Your future self will thank you when you have less grinding to do.
Tackling Tricky Cuts: Inside Curves and Complex Shapes
Cutting an inside curve can seem intimidating, but it’s entirely manageable with the right approach. Instead of trying to cut and remove the entire piece of waste glass at once, the trick is to break it down into smaller, more manageable sections. Make your initial score along the inside curve of your pattern. Then, make a series of smaller, crescent-shaped relief cuts from the edge of the glass to your main score line. This divides the waste area into little sections that you can easily break out one by one using grozer or running pliers, leaving you with a clean, curved edge.
The Two-Handed Technique for Curves
When you’re cutting curves, especially on a larger piece of COE90 glass, using both hands on the cutter provides a huge boost in stability and control. Use one hand to steer the cutter along your pattern line, and use your other hand to help steady the tool and apply consistent downward pressure. Try to keep your shoulders and hands locked in a stiff triangle shape. Instead of moving just your fingers or wrists, move your entire upper body through the cut. This technique turns your whole body into a tool for precision, allowing you to create smooth, flowing curves with confidence.
Top Glass Cutter Brands You Should Know
When you start shopping for a glass cutter, you’ll notice a few brand names pop up again and again. Each one has its own strengths, from versatile handheld tools to high-tech automated systems. Getting to know the key players in the market will help you find a cutter that feels right for your hands and your projects. Whether you’re just starting out or looking to upgrade your studio, these are the brands that consistently deliver quality and performance. Let’s look at some of the most trusted names in the glass cutting world.
Our Pro Tools at ArtGlassSupplies.com
We’ve curated a complete range of professional tools specifically for glass artists like you. Our goal is to provide reliable, high-quality cutters that deliver the precision you need for every project, from intricate stained glass patterns to clean breaks for fusing. We believe that having the right tool can make all the difference, which is why our selection is built to support both new hobbyists finding their footing and experienced artists who demand consistency and durability from their equipment. When you choose a tool from our collection, you’re getting a piece of equipment we stand behind, designed to help you bring your creative vision to life with clean, confident cuts.
Toyo
You’ll often hear the Toyo name recommended in glass art communities, and for good reason. This brand is a favorite for its comfortable and effective designs. Toyo offers different styles to suit your preference, including classic pencil-grip cutters and ergonomic pistol grips that can reduce hand fatigue during long sessions. A standout feature on many Toyo models is the built-in oil reservoir that automatically lubricates the cutting wheel as you score. This small detail makes for a smoother process and a better score line. They even offer specific models for different cutting motions, like the TC10 for forward cutting and the TC17 for pull cutting.
Fletcher
If your creative work extends beyond glass, Fletcher is a brand you should know. The Fletcher 3000 Multi-Material Cutter is a fantastic example of versatility and safety. This machine is designed to handle a variety of materials with ease, including glass, mirrors, acrylic, and even matboard. It’s an excellent choice for artists who run a studio that requires cutting different types of materials and want a single, reliable tool to do the job. Its design prioritizes operator safety and effortless cutting, making it a solid investment for anyone looking for a versatile, all-in-one cutting solution that can keep up with diverse projects.
Key Features of the Fletcher 3000
The Fletcher 3000 is a true studio workhorse because it’s built for more than just glass. Its standout feature is its versatility. You can easily cut glass, mirrors, acrylics like Plexiglass, and even matboard and foamboard, making it an incredible asset for artists who work across different media. What makes this so seamless is the “3-position cutting turret.” This clever design holds three different tools at once: a wheel for scoring glass, a tip for acrylic, and a blade for matboard. You can switch between them in an instant, which keeps your creative flow uninterrupted. Plus, it’s designed to be incredibly user-friendly and safe, so you can focus on your project with confidence, knowing your cuts will be straight and precise every time.
Technical Specifications and Inclusions
When you’re considering a machine like the Fletcher 3000, the details matter. It can cut materials up to 1/4 inch (6mm) thick, which is perfect for most of the glass, mirror, and acrylic sheets you’ll encounter. It also handles material up to 60 inches high, giving you the freedom to tackle ambitious, large-scale projects without having to piece smaller cuts together. Best of all, it arrives ready for action. The box includes the main unit (with minimal assembly), ten blades for matboard, ten scoring blades for plastic, and ten glass wheel units. You also get wall mounting brackets to help you save space in your studio and a user manual to guide you through setup. It’s a complete package designed to get you cutting right away.
WAZER
For artists ready to step into high-tech cutting, WAZER offers a powerful solution with its waterjet technology. A waterjet cutter uses a high-pressure stream of water to make incredibly precise cuts through all types of glass, including stained, fused, and tough borosilicate glass. This method is fast, clean, and significantly reduces the time you’d normally spend grinding and polishing edges. It’s a game-changer for creating complex shapes or intricate patterns that would be difficult or impossible to achieve with a manual cutter. While it’s a bigger investment, a WAZER system can seriously expand your creative capabilities and streamline your production process.
How Much Should You Spend on a Glass Cutter?
Finding the right glass cutter often comes down to balancing your budget with the demands of your projects. You don’t always need the most expensive tool on the shelf, but investing a little more can save you a lot of time and frustration. The key is to understand what you get at each price point. For a beginner just starting with a few simple suncatchers, a reliable manual cutter is a perfect starting point. But if you’re running a professional studio and producing intricate pieces daily, a more advanced system might be a worthwhile investment.
Let’s break down the typical price ranges for glass cutters and what kind of performance you can expect from each. This will help you decide where your money is best spent, whether you’re making your first cut or looking to upgrade your entire setup. We’ll look at everything from simple handheld tools to sophisticated automated machines, so you can find the perfect match for your artistic goals.
Budget-Friendly Options (Under $50)
You can get a fantastic, reliable glass cutter without breaking the bank. For under $50, you’ll find high-quality manual cutters that are perfect for hobbyists and professionals alike. Many artists swear by the Toyo brand, which offers comfortable designs like the classic pencil grip or an ergonomic pistol grip. These cutters often feature a small, built-in reservoir for cutting oil, which automatically lubricates the wheel as you score. This simple feature makes a huge difference, giving you a smoother, more consistent score line every time. These tools are ideal for cutting curves and straight lines in stained glass and are a must-have in any artist’s toolkit, regardless of their skill level.
The Sweet Spot: Mid-Range Tools ($50-$200)
If you’re cutting glass frequently or need to work with other materials, stepping up to the mid-range category can be a game-changer. Here, you’ll find more specialized manual systems and entry-level electric cutters. A great example is the Fletcher 3000 Multi-Material Cutter, a tool that offers excellent precision and safety. It’s designed to handle not just glass but also mirrors, acrylic, and matboard, making it a versatile addition to any workshop. Tools in this price range are built for artists who need repeatable, accurate cuts for projects that require perfectly fitted pieces, like when creating glass elements to fit inside specific molds. They offer more stability and control than a standard handheld cutter.
Example: The ScoreOne Glass Cutter
The ScoreOne is a fantastic example of a tool that solves common cutting frustrations. If you struggle to keep your cutter perfectly straight or apply even pressure, this guided system is designed for you. It holds the cutting wheel at a perfect 90-degree angle, which is the secret to getting a clean score that breaks exactly where you want it to. The ergonomic design also lets you use a relaxed grip, reducing the strain on your hand and wrist during long projects. It’s a simple but effective tool that helps both new and experienced artists achieve more consistent, professional results without needing a large, expensive machine. You can learn more about how the ScoreOne works on the Inland Craft website.
Investing in Your Art: High-End Systems ($200+)
For professional studios with high-volume production, automated systems are the top tier. These machines, which include CNC and waterjet cutters, represent a significant investment but deliver unparalleled precision and speed. For instance, WAZER’s waterjet technology can cut incredibly intricate designs into any type of glass with perfectly smooth edges, drastically reducing or even eliminating the need for grinding. These systems are ideal for artists who need to create many identical components or complex shapes that would be nearly impossible to cut by hand. If your work involves detailed patterns in expensive materials like COE90 glass, an automated cutter ensures minimal waste and flawless results every time.
Beyond the Price: Performance Metrics That Matter
Regardless of how much you spend, a few key performance metrics determine the quality of a glass cutter. First is cutting precision. Your cutter should score the glass exactly where you guide it, without wavering. This leads to the second metric: edge quality. A good score results in a clean break with a smooth edge and minimal chipping or flaring. This is crucial for both safety and aesthetics, especially when working with sensitive materials like COE96 glass for fusing. Finally, consider cutting speed and ease of use. The right tool should feel comfortable in your hand and allow you to work efficiently without causing fatigue, helping you bring your creative vision to life.
What Artists Are Saying: A Look at User Reviews
Reading spec sheets is one thing, but hearing from artists who use these tools every day gives you the real story. Let’s see what your fellow creators are saying about their glass cutters, from the features they can’t live without to the practical advice they’ve picked up along the way. This feedback can help you find a tool that not only works well but also feels right for your creative process.
The Good Stuff: What Users Love Most
A common theme in reviews is comfort and ease of use. For many artists, especially those dealing with arthritis or hand fatigue, an ergonomic cutter can be a total game-changer. The right tool makes cutting glass feel less like a chore and more like a natural part of creating stained glass. Artists also rave about cutters that deliver highly accurate scores on the first try. This precision means less time spent on re-cutting or grinding down edges, which saves both material and frustration. A versatile cutter that handles straight lines and tricky curves with equal skill is another feature that consistently earns high praise.
How Long Will It Last? A Look at Durability
No one wants a tool that feels flimsy. Artists consistently give positive feedback for cutters that feel sturdy, well-made, and balanced in their hand. A tool with a bit of heft often provides a sense of quality and control, assuring you that it can handle the job. While most professional-grade cutters are built to last, users offer a practical tip for some models: plan your cuts ahead of time. Certain designs might have a limited working space, so thinking through your score line before you start can help you get the best results. This small step ensures your durable tool performs at its best every time.
Are They Reliable? Notes on Performance
When you need perfect cuts every single time, reliability is everything. This is where more advanced systems really shine. Artists who invest in automated or multi-material cutters appreciate how they minimize human error and produce consistently clean results. For a professional studio where precision is paramount, this level of performance is essential. Some of these machines also offer incredible versatility, with the ability to cut mirrors, acrylics, and other materials alongside your COE90 glass. This flexibility can open up new creative avenues and make the machine a valuable asset for a wide range of projects.
Common Glass Cutting Mistakes to Avoid
Even with the perfect tool, a few common habits can stand between you and a clean cut. We’ve all been there—a score line that just won’t break right, a curve that shatters, or an edge that looks more jagged than smooth. These moments are frustrating, but they’re also valuable learning opportunities. Most of the time, a small adjustment to your technique is all it takes to fix the problem. It’s not about having superhuman skill; it’s about understanding how glass behaves and working with it, not against it. Getting these fundamentals right is the key to turning a tricky process into a smooth, satisfying part of your creative workflow. Mastering these best practices will help you save beautiful, expensive stained glass and make your time in the studio much more productive and enjoyable.
Applying the Wrong Amount of Pressure
Finding the right amount of pressure is a classic “Goldilocks” challenge—it needs to be just right. If you press too lightly, your score won’t be deep enough to guide the break, leading to an unpredictable snap. On the other hand, pressing too hard is just as bad. According to the experts at Ribbecke Glass, applying too much force can create a score line so deep it’s visible from a distance, which can be a problem for your final piece. It also causes unnecessary wear and tear on your cutting wheel, shortening its lifespan. A perfect score should sound like a gentle, consistent “zip” or sizzle. If you hear a loud grinding or crunching noise, you’re likely pressing too hard. Practice on scrap glass until you find that sweet spot where the tool does the work for you.
Forgetting Lubrication
Cutting glass dry is one of the fastest ways to get a poor score and ruin your cutting wheel. Lubrication is non-negotiable. Using a quality cutting oil reduces friction between the wheel and the glass surface. This allows the cutter to roll smoothly, creating a cleaner, more uniform score line. It also helps prevent tiny glass chips from flying around and prolongs the life of your cutter’s wheel. Some artists keep a small, heavy container with a bit of oil to dip their cutter in, while many modern tools have a built-in reservoir that automatically lubricates the wheel as you work. Whatever your method, make sure you use cutting oil for every single score. It’s a small step that makes a huge difference in the quality of your breaks.
Scoring a Line More Than Once
It can be tempting, especially if you think your first score wasn’t deep enough, but you should never go over a score line more than once. This is a cardinal rule in glass cutting. Scoring a second time doesn’t “fix” a weak score; it creates a new, slightly different line of fracture right next to the first one. This compromises the integrity of the glass and almost guarantees an uneven, jagged break that strays from your intended path. You’re essentially telling the glass to break in two different places at once, and it will respond with chaos. Instead, trust your first score. If you’re worried it wasn’t good enough, it’s better to try breaking it and see what happens. If it fails, you can learn from it, but re-scoring is a recipe for frustration and wasted glass.
Poor Pattern Placement and Edge Avoidance
Before you even make your first score, take a moment to plan your layout on the sheet of glass. A common mistake is placing your pattern pieces too close to the existing edge of the glass. The outer edges of a glass sheet can have hidden stresses from the manufacturing and handling process, making them less stable. As a general rule, try to keep your score lines at least a half-inch away from the factory edge. This gives you a buffer zone and ensures you’re cutting on a more stable part of the sheet, which greatly increases your chances of a clean break. This simple habit of strategic placement will not only save you from frustrating breaks but also help you make the most efficient use of your beautiful and sometimes expensive COE90 glass.
Cutting Flashed Glass on the Wrong Side
This is a more specific tip, but it’s crucial for anyone working with flashed glass. Flashed glass is made with a thin layer of colored glass fused over a thicker, often clear or light-colored base. It’s beautiful, but it requires a specific cutting technique. The mistake is to cut on the thin, colored side. This can cause the delicate top layer to chip or flake away along your score line, ruining the effect. To get a clean cut, you must always score the glass on the thicker, base side. This allows the fracture to run cleanly through the entire piece without damaging the fragile flashed layer. If you’re unsure which side is which, hold the glass up to a light; the flashed side will often have a slightly different texture or sheen.
Choose the Best Glass Cutter for Your Art
The perfect glass cutter for you really comes down to the kind of art you want to create. A tool that’s ideal for intricate stained glass curves might not be the best choice for the precise, clean edges needed in glass fusing. Your workflow, the volume of your work, and your budget all play a role in this decision. Let’s look at some specific scenarios to help you find the right cutter for your studio, whether you’re a weekend hobbyist or a full-time professional artist.
Choosing a Cutter for Stained Glass
If you’re working with stained glass, you need a cutter that feels like an extension of your hand, giving you control over every curve and line. Many artists swear by the Toyo brand for its reliability and comfort. You can find these in a classic pencil grip style, which is great for detailed work, or a pistol grip that can reduce hand fatigue during longer cutting sessions. A key feature to look for is a self-oiling system. The cutter has a small, built-in reservoir for cutting oil, which automatically lubricates the wheel as you score. This simple feature makes a huge difference, ensuring a smooth, consistent score line every time.
What About Glass Fusing and COE?
Glass fusing demands incredible precision. When you’re stacking layers of COE90 glass, every piece needs to fit together perfectly to avoid gaps or overlaps in the kiln. A clean cut is essential, as it drastically reduces the time you’ll spend at the grinder. While a high-quality manual cutter works well for many projects, artists who create complex designs or produce work in volume might consider a waterjet system. This technology uses a high-pressure stream of water to cut intricate shapes with perfectly smooth edges, saving you hours of coldworking. It’s a serious investment, but for a busy studio, the efficiency and precision can be a game-changer.
Professional Studio vs. Hobby Space
Your studio’s scale will heavily influence your choice. If you’re a hobbyist, a durable manual cutter is an excellent place to start. It allows you to master the fundamentals without a large upfront cost. As you grow, you can always upgrade. For a professional studio, however, investing in a more advanced cutting system can directly impact your bottom line. Professional-grade machines offer repeatable precision, which is crucial when creating sets or using expensive molds. They also improve efficiency, allowing you to produce more work in less time. Think about your long-term goals and find a tool that balances your current budget with your future ambitions.
Where to Find the Best Deals on Glass Cutters
Finding the right glass cutter at a great price feels like a huge win. But a “deal” isn’t just about the lowest price tag; it’s about finding the best value for your specific needs. When you start your search, it’s helpful to remember that balancing cost with quality is key to getting a tool that will last. A cheap cutter that dulls quickly or creates rough edges will only cost you more in wasted glass and frustration down the line. Precision and efficiency are what you’re really after, and a machine with a high-quality cutting wheel can make a significant difference in achieving clean, smooth scores every time.
The best place to shop often depends on what you’re looking for. Are you seeking expert advice and a curated selection of tools designed for artists? Or are you comfortable hunting for a bargain on a more general marketplace? Both approaches have their benefits. Understanding what factors affect the cost, from the cutting wheel material and handle ergonomics to the brand’s reputation, will help you make a smart purchase. Whether you’re buying your very first handheld cutter or investing in a more advanced system for your studio, knowing where to look is the first step toward getting a tool you’ll love using for years to come.
Your Local Specialty Glass Store
Your local or online specialty glass supply store is often the best place to start. Retailers that focus specifically on glass art, like us here at ArtGlassSupplies.com, have a deep understanding of what artists need. The tools we carry are selected for their performance with materials like COE90 glass and stained glass. You get the peace of mind that comes from buying a quality product, plus access to expert staff who can answer your questions. While the initial price might be slightly higher than a generic tool from a big-box store, you’re investing in precision, durability, and a tool that’s right for the job.
Scoring Deals on Online Marketplaces
General online marketplaces like Amazon or eBay can be a good place to find a wide variety of cutters at competitive prices. You might even find second-hand deals on higher-end equipment. However, it’s important to do your homework. Read reviews carefully, check seller ratings, and make sure you’re buying from a reputable source. While you can find bargains, you might miss out on the specialized support you’d get from a dedicated supplier. Keep an eye out for seasonal sales and clearance events on specialty websites, too. These can be great opportunities to get high-quality kilns and tools at a lower price.
How to Make Your Glass Cutter Last
A quality glass cutter is one of the most important tools in your studio, and taking care of it is just as important as learning how to use it properly. Think of it as an investment in your art. With just a little routine maintenance, you can extend the life of your cutter, ensure it performs reliably, and get those crisp, clean score lines every single time. When your tool is in top shape, you’ll save yourself a lot of frustration and wasted glass, which is something every artist can appreciate.
Proper care isn’t difficult or time-consuming. It’s about building good habits, like cleaning your tool after use and storing it correctly. It also means using the right accessories that are designed to help your cutter work its best. From choosing the correct cutting wheel for your COE90 glass to always using cutting oil, these small steps make a huge difference in the quality of your work. A well-maintained cutter glides smoothly, scores deeply, and gives you the control you need for intricate designs. Neglecting it can lead to skipped scores, rough edges, and unpredictable breaks.
Below, we’ll walk through the essential accessories, safety gear, and care tips to keep your glass cutter in perfect working condition for years to come. We’ll cover everything from the must-have oils that keep your wheel sharp to the safety practices that protect you while you work. These tips will help you build a simple but effective maintenance routine, so you can spend less time troubleshooting your tools and more time creating beautiful glass art.
Must-Haves: Cutting Wheels and Oils
Think of your cutting wheel and oil as a team that works together to give you the best possible score. The wheel is what makes contact with the glass, and having the right one is key. Different wheels are designed for various glass thicknesses, so make sure yours matches the material you’re working with. Using glass cutting oil is just as essential. It lubricates the wheel, allowing it to move smoothly across the surface and keeping the cutting edge sharp. This simple step reduces friction, prevents the wheel from getting dull, and helps you create a deeper, more consistent score line for an easier break.
When to Replace Your Cutting Wheel
Even with perfect maintenance, your cutting wheel will eventually wear out. A good rule of thumb is that a wheel lasts for about a mile of scoring, but the real test is how it performs. If you find yourself pressing harder to get a good score, or if your cuts are becoming uneven and flaky, it’s time for a replacement. A dull wheel can crush the glass instead of cleanly scoring it, leading to frustrating breaks and potentially ruining a beautiful sheet of stained glass. Another clear sign is if you’ve dropped your cutter; check the wheel for a flat spot, as even a small imperfection can ruin your score line. Replacing the wheel is a simple, inexpensive step that ensures you continue to get the clean, precise cuts your art deserves.
Safety First: Essential Gear and Breaking Tools
Working with glass requires a healthy respect for safety, and the right gear is non-negotiable. Always wear safety glasses to protect your eyes from tiny glass chips that can fly up during scoring and breaking. A pair of cut-resistant gloves can also save your hands from sharp edges. Beyond protective gear, specialized breaking tools are your best friends for getting clean results. Running pliers apply even pressure on both sides of your score line to help “run” the score and separate the pieces cleanly. For smaller curves and details, grozing pliers help you nibble away excess glass with precision and control.
How to Properly Store and Care for Your Cutter
A little care after each session goes a long way. Make it a habit to wipe down your cutter to remove any excess oil and glass dust. This prevents buildup that can interfere with the wheel’s movement. When you’re done for the day, store your cutter properly. Avoid just tossing it into a drawer where it can knock against other tools. Keeping it in a dedicated stand or its original case protects the delicate cutting wheel from getting chipped or dulled. This simple routine ensures your cutter maintains its accuracy, so you can count on it for all your future stained glass projects.
Related Articles
- A Guide to the Different Types of Glass Cutters
- How to Use a Glass Cutter Tool: Step-by-Step
- 5 Creative Projects Using Precut Glass Shapes
Frequently Asked Questions
I’m just starting out. What’s the one glass cutter I absolutely need? If you’re new to glass art, your best bet is a high-quality manual cutter with a self-oiling feature. A brand like Toyo is a fantastic starting point. They offer comfortable pencil grip and pistol grip styles, so you can choose what feels most natural in your hand. This single tool will allow you to master the fundamentals of scoring straight lines and gentle curves, which is the foundation for nearly all glass projects.
Do I really need to use cutting oil with my glass cutter? Yes, absolutely. Using cutting oil is one of the most important habits you can develop. The oil lubricates the cutting wheel, which reduces friction and helps you create a deeper, cleaner score line. This not only makes the glass easier to break cleanly but also extends the life of your cutting wheel by keeping it sharp and preventing it from getting chipped.
How can I tell when it’s time to replace my cutting wheel? You’ll notice a few signs when your wheel is getting dull. Your cutter might start to skip or drag as you score, creating an inconsistent line. You may also hear a gritty, scratching sound instead of a smooth “zipping” noise. If your glass starts breaking unevenly or requires a lot more pressure to snap, it’s a clear signal that your wheel has lost its edge and needs to be replaced.
What’s the difference between a pencil grip and a pistol grip cutter? The main difference is ergonomics and how you apply pressure. A pencil grip cutter is held much like a pen and offers excellent control for intricate, detailed lines. A pistol grip cutter fits into your palm, allowing you to apply pressure more easily from your arm and shoulder. Many artists find the pistol grip more comfortable for long cutting sessions as it can reduce hand and wrist fatigue.
When should I consider upgrading from a manual cutter to an electric or tabletop system? It’s time to think about an upgrade when you find yourself needing more precision and efficiency than your manual tool can offer. If your projects involve cutting many identical geometric shapes, like for fusing or mosaic work, a tabletop system will give you perfect, repeatable results. An upgrade makes sense when you want to save time, reduce material waste, and achieve a level of accuracy that is difficult to maintain by hand.