
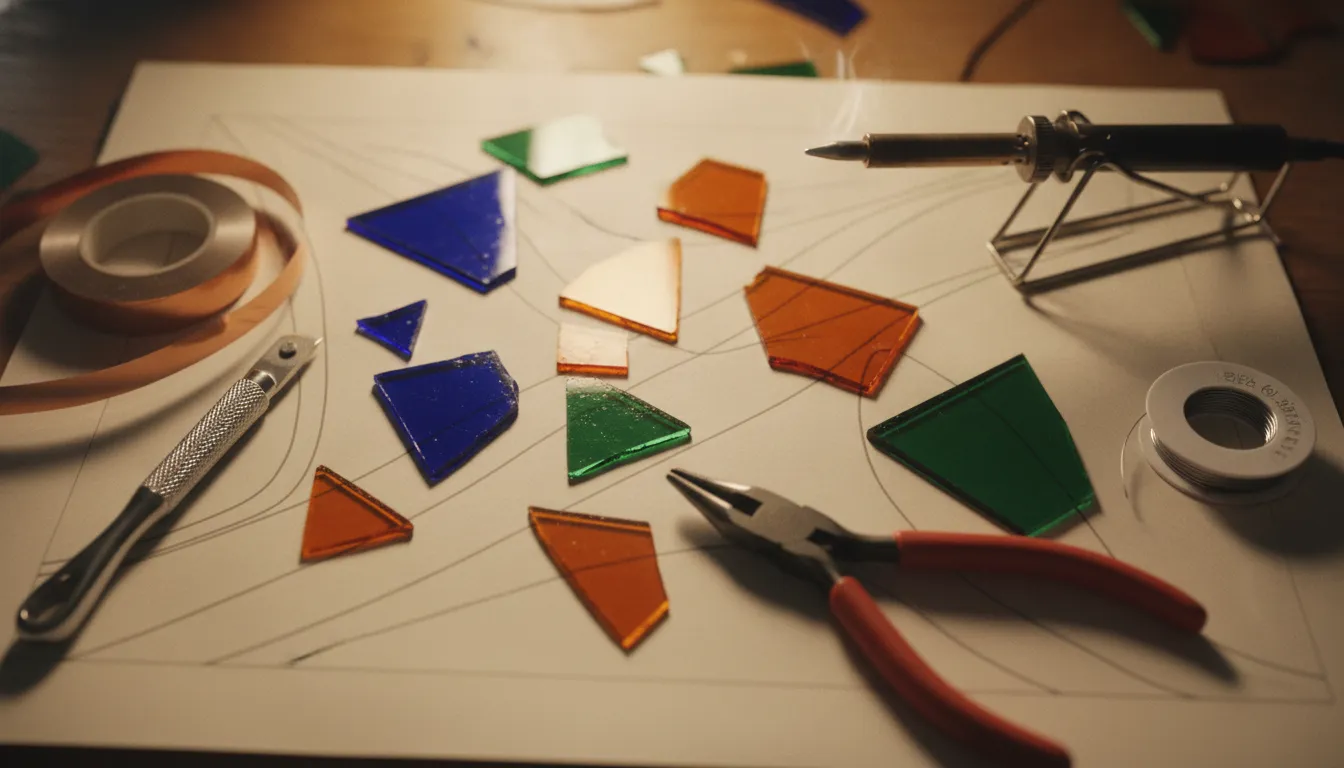
How is stained glass made if you are building a panel, not melting a sheet? You plan the design, cut colored glass to those shapes, smooth the edges, and join the pieces with copper foil or lead came. Then you solder the metal joints and finish the surface. The glass itself is not melted in your studio. You start with manufactured sheets and build the panel cold, at the bench.
That sequence is the same whether the piece is a small suncatcher or a window. What changes is the metal system and the tools you need to keep each piece in place. Art Glass Supplies stocks those bench tools, foil, solder, and sheet glass from a Goffstown, New Hampshire warehouse, with next-day shipping on non-custom orders and phone support Monday through Friday, 9 to 5 Eastern.
Browse stained glass equipment for each step
How stained glass is made, from plan to finished panel
Stained glass is assembled, not fired, in the usual copper-foil or lead-came panel. You work through six jobs in order. Skip one and the next job gets harder: a sloppy cartoon produces gaps, and rough edges tear foil.
- Cartoon. Draw the design at full size, with a line for every piece and a number so you can put it back together.
- Glass selection. Pick sheet colors and textures that match the cartoon, and cut each piece slightly inside the drawn line.
- Edge work. Score, break, groze, and grind until neighboring pieces sit with a small, even gap.
- Metal wrap or came. Cover each edge with copper foil, or set the glass into lead came.
- Solder. Join the metal at every intersection so the panel holds as one object.
- Finish. Clean flux, apply patina if you want a dark or copper line, polish, and add a frame or hanging hardware.
Fusing is a different craft. Fused work is heated in a kiln so compatible glasses flow together. A cold stained-glass panel does not need a kiln. If you are deciding between the two, the comparison in stained glass versus fused glass covers the practical split. This guide stays on the cold process.
The method details, including when foil is a better fit than came, live in the stained glass techniques reference. Use that page once you know which path you are on. Use this one to see the whole line of work and the tool that belongs at each station.
What the glass is, and what you actually cut
Sheet glass for this work is colored in the factory. Metallic oxides in the melt create the color, so a cobalt blue sheet stays blue through the thickness. You are not painting color onto clear glass and then calling it stained glass, though paints and stains exist as a separate surface step.
Artists shop sheets by color, texture, and how the light moves through them. Cathedral glass is transparent. Opalescent glass scatters light and looks milky. Streaky and textured sheets, including Wissmach English Muffle and Youghiogheny mixes, add movement without extra pieces. Art Glass Supplies carries Bullseye, Oceanside, Wissmach, and Youghiogheny stained-glass sheets, including non-fusible glass sold by the pound when you want smaller amounts for a first cartoon.
Match the sheet to the drawing before you score. A busy texture can hide a simple shape, and a pale transparent color disappears against a bright window. The stained glass sheets guide walks through those choices. The stained glass sheets category is where those brands are stocked.
Cut inside the cartoon line. Copper foil and lead came both take up space. If every piece is cut to the ink, the panel grows and the last pieces will not fit. A small, even gap is what you want, not a tight jam and not a wide hole you will have to fill with solder.
Cutting, breaking, and fitting the pieces
Cutting is a controlled break, not a saw cut. A carbide wheel scores a line in the surface. You then run that score with running pliers or by pressing along the line until the sheet separates. Oil on the cutter keeps the wheel from skipping and leaves a cleaner score. Grozing pliers nibble small bites off an edge when the break does not follow the line.
A glass grinder is the fitting tool. The diamond bit removes a little glass so neighboring pieces meet with that even gap, and it takes the sharp arris off an edge before foil goes on. You do not grind a piece down from a bad score if you can recut it. Grinding is for fit, not for redrawing the cartoon.
Pattern transfer matters more than people expect. Number every piece, keep the paper pattern with the glass, and grind to the pattern rather than to a neighbor that has already drifted. The pattern transfer and cut guide covers that setup. For cutter choice, wheel type, and oil, use the glass cutting tools guide. For bit size and water trays, use the stained glass grinder guide.
Safety at this station is ordinary shop sense. Wear eye protection when you score and break. Keep a bin for offcuts. Sweep the bench before you lay out foil, because a chip under a piece will throw the fit.
Two ways the pieces get joined
Once the glass fits, you choose a metal system. Both systems do the same job: they hold the glass and give you something to solder. They do not do it the same way, and they do not want the same projects.
Copper foil
The copper-foil method, often called Tiffany-style, wraps the edge of each piece in adhesive-backed copper tape. You burnish the tape flat, flux the copper, and solder along both faces so the tape becomes a raised bead. Foil suits small work, tight curves, and pieces with many intersections, including lamps and suncatchers. It is lighter than lead came and easier to start on a first panel.
Foil width has to match glass thickness and the look you want. That choice is its own topic, covered in the copper foil technique guide. Do not treat foil as optional trim. Bare glass edges will not take solder.
Lead came
Lead came is an extruded strip with channels that the glass slides into. H-came has two channels and sits between pieces. U-came, or edge came, caps the outside. You stretch the came before use so it is straight, pin the panel so it cannot creep, and solder only the joints where cames meet. Came is the older window method and carries large, heavy panels better than foil.
Came profiles, stretching, and pinning belong in the lead came guide. If your question is only “what holds the glass,” the short answer is foil for small and curved work, came for larger windows.
Soldering the joints
Solder is the fastener. It wets the copper or the lead and freezes into a joint. It does not stick to clean glass, which is why the foil or came has to cover every edge you intend to join.
Common stained-glass solder is a 60/40 tin-lead alloy. The melting range is about 183 to 190 °C (361 to 374 °F), wide enough to flow a bead without one sharp melting point. You want the iron hot enough to move the alloy smoothly, and cool enough that you do not boil flux or scorch the foil. Kester’s alloy temperature chart lists that Sn60Pb40 range for wire and bar solder.
Flux cleans the metal so the solder can wet it. Apply it to the joint, not across the glass face. A temperature-controlled iron with a stand is the right tool. An unregulated iron runs away from you on a long bead. After soldering, flux residue is corrosive and sticky, so it has to come off before patina.
Lead metal and lead solder are real exposure issues, not a footnote. Lead dust and residue can be inhaled or swallowed, so wash your hands before you eat, keep food off the bench, and do not sand a solder bead. NIOSH explains lead exposure for anyone who handles lead metal at a bench. The stained glass solder guide and the flux guide cover alloy choice, iron control, and cleanup in more detail than this overview should.
Finishing, framing, and what the panel can hold
A soldered panel is not finished. Neutralize and wash off the flux, then decide on the line color. Patina reacts with the solder to turn the bead black or copper. It will not color glass, and it will not hide flux that you left behind. The patina guide compares those finishes.
Polish the bead after patina so it does not stay dull and chalky. Then decide how the panel is held. Small pieces can hang from rings soldered into the frame. Larger panels need a rigid edge. Zinc channel is the usual rigid border: it is stiffer than lead U-came and keeps a rectangle square. The zinc channel framing guide covers fit and corners.
Reinforcement is a structural question, not a style question. A wide panel can hinge along a solder line if nothing crosses that span. Copper restrip, zinc, or a rigid frame is what stops that. If the piece will hang in a door or a large window, plan the frame before you fall in love with a cartoon that has no strong horizontal lines.
Which tool does which job
Buying a pile of accessories before you know the sequence is how first projects stall. Match the tool to the step. Art Glass Supplies groups this bench gear on the Tools page, including cutters, grinders, and the foil, solder, and metal supplies used after the glass is cut. Foil, solder, and came also sit together under foils, solder, and metal.
| Step | What happens | Tool or material | Where to go next |
|---|---|---|---|
| Plan. | Full-size cartoon with numbered pieces. | Paper pattern, marker, and a flat board. | Pattern transfer guide. |
| Cut. | Score and run each shape from sheet glass. | Carbide cutter, cutting oil, running pliers, and grozers. | Cutting tools guide. |
| Fit. | Smooth edges and set an even gap. | Glass grinder with a diamond bit. | Grinder guide. |
| Wrap or came. | Give every edge a metal surface. | Copper foil tape, or H-came and U-came. | Foil guide or came guide. |
| Solder. | Join the metal so the panel is one piece. | 60/40 solder, flux, and a temperature-controlled iron with a stand. | Solder guide. |
| Finish. | Clean, color the line, frame, and hang. | Flux cleaner, patina, and zinc channel or hangers. | Patina and zinc guides. |
You can build a first small foil piece without a kiln and without every texture in the catalog. You cannot skip eye protection, a stable iron stand, or a way to wash flux off your hands. If you want the shopping version of this list, the beginner supplies guide is the buying page. This table is only the process map.
Orders for these tools ship from Goffstown, and non-custom orders are set up for next-day shipping. Matching a cutter, foil width, or came size to a project already on the bench is a support question. The desk is open Monday through Friday, 9 to 5 Eastern. Send the project details through the contact form.
Where this process stops
This overview answers how stained glass is made: sheet glass, cut and fitted cold, joined with copper foil or lead came, soldered, then cleaned and framed. It does not replace a project tutorial. A first panel, with the order of foiling and the way you tack joints, is a different article. So is a window in came, where stretching, pinning, and cementing decide whether the panel stays square.
Use the links above when you are ready for those jobs. Stay here when you only needed the line of work and the tool that belongs to each one.
See stained glass equipment on the Tools page
Frequently asked questions
How is stained glass made if you do not own a kiln?
Most stained-glass panels are built cold. You cut manufactured sheet glass, fit the edges, wrap them in copper foil or set them in lead came, and solder the metal. A kiln is for fusing and slumping, which is a different process. You can finish a copper-foil panel without ever turning a kiln on.
Is stained glass melted and colored in the studio?
No. The color is in the sheet when you buy it, from metallic oxides added when the glass was made. In the studio you score, break, and assemble those sheets. Surface paints exist, but they are not what makes ordinary stained glass its color.
What is the difference between copper foil and lead came?
Copper foil is tape wrapped around each piece and then soldered into a bead. It suits smaller work and curves. Lead came is a channeled strip the glass slides into, and you solder only where the strips meet. Came is the usual structure for larger windows. Both need flux and solder. Neither sticks to bare glass.
What solder is used on stained glass?
A common choice is 60/40 tin-lead solder, which has a melting range of about 183 to 190 °C. You still need flux so the alloy wets the copper or lead, and a controlled iron so the bead flows instead of piling up. Wash flux off when you are done, and treat lead dust and residue as a real exposure risk.
What tools do you need before the first cut?
Start with a carbide cutter, cutting oil, running pliers, grozing pliers, eye protection, and the glass for a small pattern. Add copper foil, flux, 60/40 solder, and a temperature-controlled iron when you are ready to join pieces. A grinder comes next, once your breaks need fitting rather than another cut. The Tools page is organized around that bench, not around a single kit.