
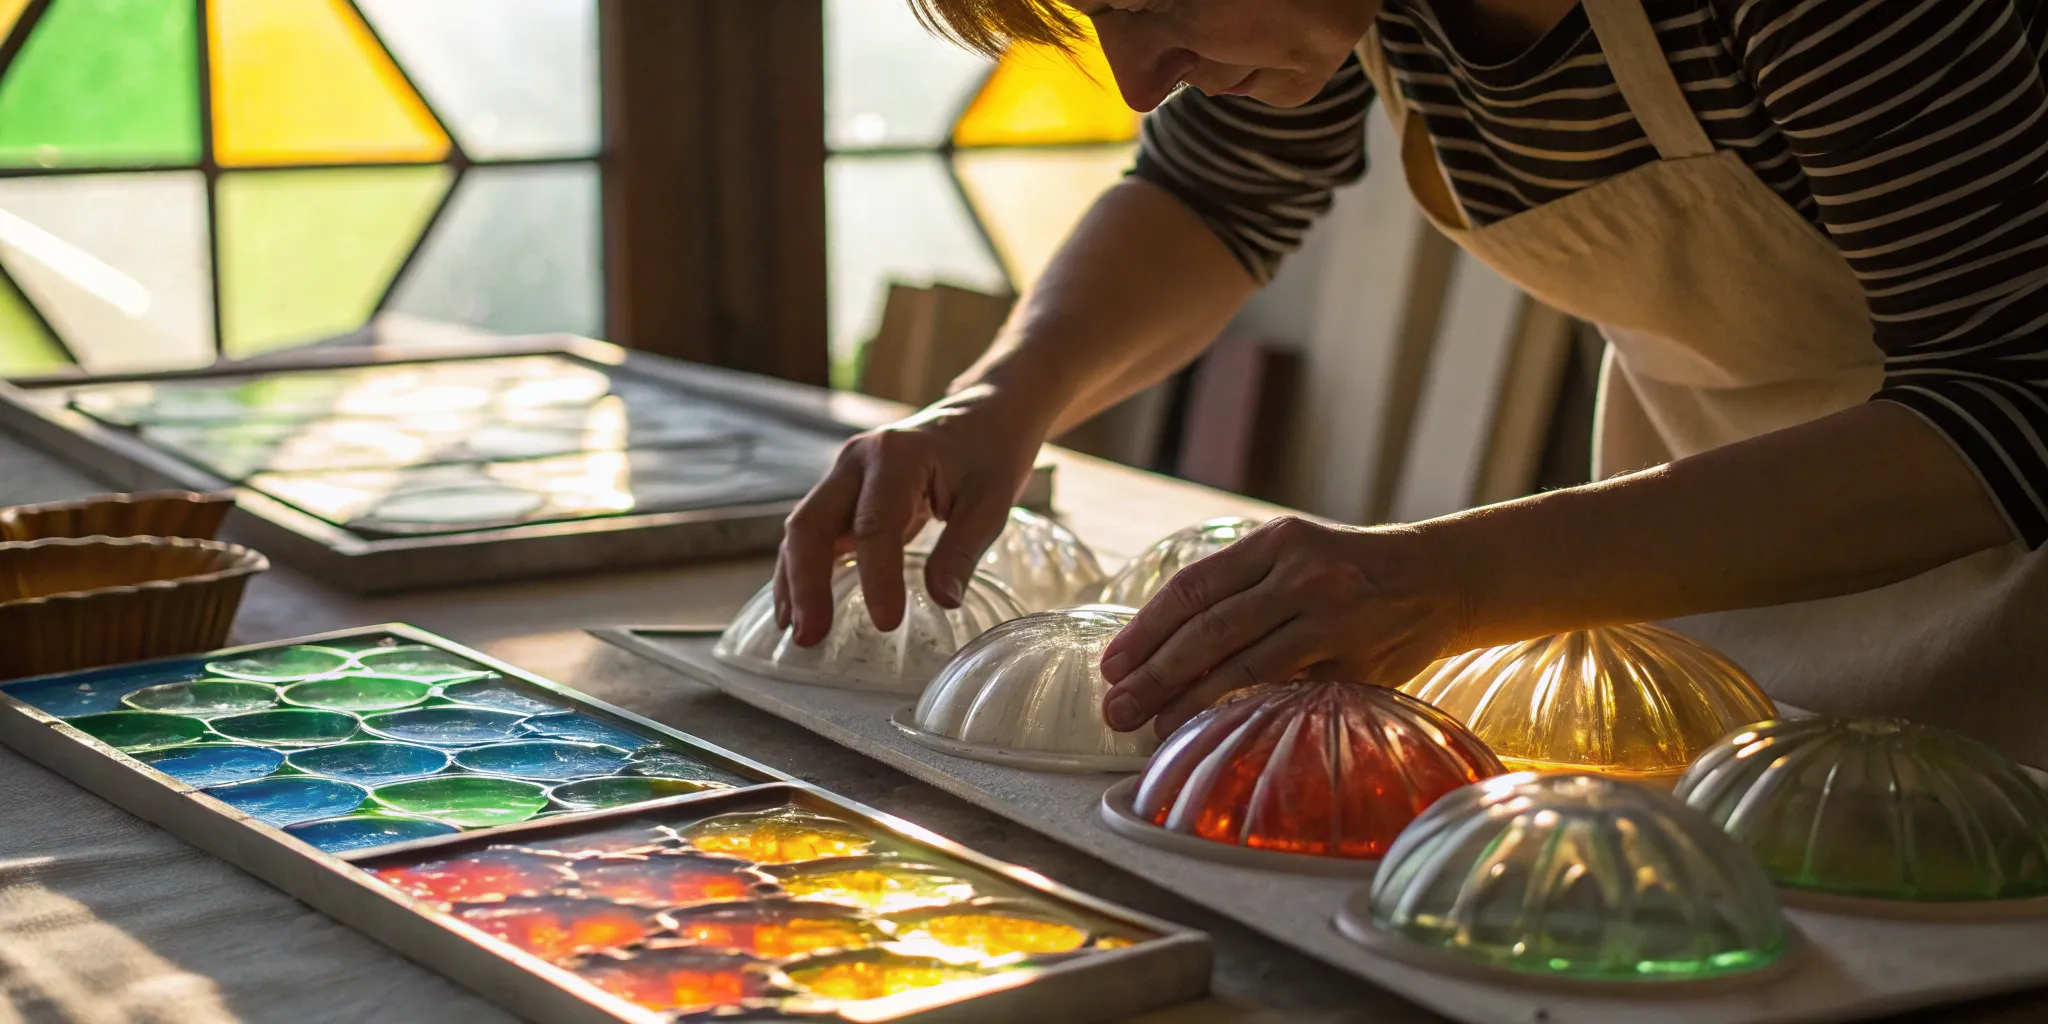
There’s a special kind of magic in pulling a fully formed, three-dimensional piece from your kiln. That flat sheet of glass is now a graceful bowl or an elegant platter, ready to be used and admired. This transformation is all thanks to the glass mold. These are your silent partners in the creative process, providing the structure your glass needs as it softens. To perfectly slump glass into your desired shape, you need the right mold. We’ll cover the practical side of making that magic happen, from prepping your molds to finding the best ones for your vision.
Key Takeaways
- Match your mold material to your technique: Use ceramic molds when slumping glass into a shape (like a bowl) and stainless steel when draping glass over one. This prevents stress cracks caused by the different cooling rates of glass and metal.
- Proper mold prep is non-negotiable: Before every firing, apply thin, even coats of kiln wash to prevent your glass from sticking. You should also confirm your mold fits inside your kiln with at least an inch of space on all sides for even heating.
- Select molds based on your project’s needs: Think about your end goal before you buy. A functional platter might call for a classic shape from Bullseye, while a detailed jewelry piece could require a specialty mold from Creative Paradise. Choosing the right tool is the first step to a successful project.
What is a Glass Mold in Art?
When we talk about glass molds in the art world, we’re referring to the tools that give your glass its three-dimensional form inside a kiln. Think of them as heat-resistant templates. These molds are typically made from ceramic or a plaster/silica mix, materials chosen specifically for their ability to withstand extreme temperatures without breaking down. Their entire job is to support and shape glass as it softens and becomes pliable in the heat. Whether you’re aiming to create a simple bowl, a decorative tile, or an intricate piece of jewelry, a mold is what translates your flat design into a finished, functional object.
The process of using these tools is often called slumping, draping, or casting. Slumping involves letting a sheet of glass sink into a concave mold, like a bowl mold. Draping is the opposite, where you lay the glass over a convex mold, allowing it to melt down and around the form. Casting is a bit different, as it involves melting glass until it’s molten and flows to fill a mold completely. Each technique requires a specific type of mold to achieve the desired outcome, giving you incredible control over the final shape of your piece.
Clearing Up Confusion: Art Molds vs. Biological Mold
Let’s clear up a common point of confusion with the word “mold.” If you find something fuzzy, discolored, or slimy growing on your glass or in your studio, that’s biological mold, and it has nothing to do with shaping art. That kind of mold is a fungus that thrives in damp environments and needs to be cleaned away for health and safety. The good news is that glass is non-porous, meaning biological mold can’t penetrate its surface. A thorough cleaning is usually all that’s needed to remove it, so you don’t have to throw away your beautiful sheets of COE96 glass if you find a bit of mildew on them.
A Brief History of Shaping Glass with Molds
Using molds to shape glass is far from a new idea. This technique, known as glass casting, has ancient roots stretching back to around 1500 BCE. Early civilizations discovered that they could pour hot, molten glass into a pre-made form to create detailed objects. The practice became especially widespread during the Roman Empire, allowing for the mass production of vessels, beads, and decorative items with a level of consistency that was impossible to achieve with glassblowing alone. This foundational method of using a mold to dictate the final shape of a glass object laid the groundwork for thousands of years of artistic innovation.
While the core principle remains the same, the tools and technology have evolved dramatically. Ancient artists worked with rudimentary kilns and hand-carved molds, while today’s glass artists have access to precisely engineered kilns and an incredible variety of commercially produced molds. This modern equipment allows for greater control over temperature and more complex designs. When you select a mold and place your glass inside a kiln, you’re taking part in a craft with a rich history. You’re connecting with a long line of artisans who have used heat and form to transform glass from a simple material into a work of art.
What’s the Difference Between Slumping and Draping?
If you’ve ever wanted to transform a flat piece of glass into a beautiful bowl, a delicate plate, or a sculptural art piece, then you’ll want to get familiar with slumping and draping molds. These essential tools are what give fused glass its three-dimensional shape. In simple terms, molds are forms that you use inside a kiln to shape glass as it heats and softens. By placing your glass project on or in a mold, you can guide it into a specific form as it reaches high temperatures.
The two primary techniques you’ll hear about are slumping and draping. While they sound similar, they produce different results and require slightly different approaches. Slumping involves shaping glass into a concave mold, like making a bowl. Draping, on the other hand, is when you shape glass over a convex mold, like forming a plate over a dome. Understanding the difference is the first step in choosing the right mold for your project and achieving the exact shape you have in mind. Both methods open up a world of creative possibilities beyond flat panels and jewelry.
A Quick Guide to Glass Slumping
Slumping is the process of heating a piece of glass until it becomes soft enough to sink, or “slump,” into a concave mold. Think of it like gently pressing the glass into a form. You’ll place your flat, fused glass project inside the mold, and as the kiln heats up, gravity does the work, pulling the softened glass down to match the mold’s interior shape. This is how artists create things like bowls, platters, and shallow dishes. A crucial step is always coating your mold with kiln wash first; this fine powder creates a barrier that prevents the glass from sticking to the mold during firing.
Understanding the Glass Draping Process
Draping is essentially the opposite of slumping. Instead of placing glass inside a mold, you place it over the top of one. As the glass heats, it softens and sags, or “drapes,” over the mold’s exterior contours. This technique is perfect for creating forms with soft, flowing curves, like a vase or a wavy platter. The material of the mold is especially important in draping. For example, a metal mold will contract at a different rate than the glass as it cools, which can affect the final shape. The key is to let the glass naturally form around the mold’s shape as it heats and cools.
What Are Glass Molds Made Of?
Molds come in a few different materials, but the most common you’ll find are ceramic and stainless steel. Ceramic molds are the go-to for slumping projects. They are durable, can be used many times, and are available in a huge variety of shapes and sizes, from simple bowls to intricate, textured designs. Stainless steel molds are often preferred for draping. Because metal heats and cools differently than ceramic, it can give your draped pieces a unique finish. No matter which material you choose, proper preparation with kiln wash and a well-planned firing schedule are the keys to getting a perfect result every time.
Plaster and Silica Molds
Beyond the ready-made ceramic and steel options, some artists prefer to create their own custom forms. This is where plaster and silica molds come into play. These molds are typically made from a carefully measured mix of plaster, silica, and water. The plaster provides the structural integrity, giving the mold its strength and holding the desired shape. The silica, a key ingredient, is what allows the mold to withstand the intense heat inside a kiln without cracking or breaking down. By creating your own molds, you can produce truly one-of-a-kind pieces that aren’t limited by commercially available shapes, offering a fantastic way to expand your creative horizons.
Graphite Molds
Graphite is another excellent material for glass artists, valued for its durability and smooth surface. Unlike ceramic, glass has a much lower tendency to stick to graphite, which means you can often get a clean release with minimal prep. These molds can be carved, machined, or stacked to create highly detailed and precise shapes, making them a favorite for jewelry makers and artists creating small, intricate components. While often used in glass casting where molten glass is poured, graphite forms are also perfect for slumping small pieces. Because they can be used over and over again without degrading, they are a worthwhile investment for artists who frequently reproduce a specific design.
Beyond Slumping: An Introduction to Glass Casting
While slumping and draping are fantastic for shaping sheets of glass into elegant forms, glass casting opens up a whole new dimension of creative possibilities. If you’ve ever wanted to create solid, sculptural glass pieces with more thickness and intricate detail, casting is the technique to explore. Unlike slumping, which reshapes a single piece of glass, casting involves melting glass—often in the form of frit, billets, or scrap pieces—until it becomes liquid enough to flow and completely fill a mold. This process allows you to create substantial objects, from paperweights and sculptures to detailed architectural elements.
The basic idea is simple: you create a negative space (the mold) and fill it with molten glass. Once the glass cools and solidifies, you remove the mold to reveal your finished piece. There are several different methods for casting glass, each offering a unique process and a distinct final look. Some techniques, like kiln casting, are very accessible for artists who already have a kiln for fusing and slumping. Others require more specialized equipment but allow for an incredible level of detail. Let’s look at a few of the most common casting methods you might want to try.
Kiln Casting
Kiln casting is one of the most approachable casting methods for home studio artists. The process starts with placing cold glass—like chunks, billets, or colorful COE90 frit—into a prepared mold. The mold and glass are then placed inside a kiln and heated slowly. As the temperature rises, the glass melts and flows, filling every detail of the mold’s cavity. After reaching its top temperature, the glass must be cooled down very slowly in a process called annealing to prevent stress and cracking. This technique is perfect for creating solid, dimensional objects and is a natural next step for anyone already familiar with kiln work.
Sand Casting
Sand casting is a more immediate and dynamic process that involves pouring molten glass directly from a furnace into a mold made of sand. First, you create a design by pressing an object or carving a shape into a bed of special, damp casting sand. Then, you pour hot, liquid glass into the impression. As the glass cools and solidifies, it takes on the shape of your design. Once it’s cool enough to handle, you simply break the sand away to reveal your finished piece. This method often leaves the glass with a unique, slightly rough texture from the sand, giving it a very organic feel.
Lost Wax Casting
For artists who want to capture exceptionally fine details, lost wax casting is the gold standard. The process begins with sculpting a model out of wax. Next, a durable, heat-resistant mold is built around the wax sculpture. Once the mold material has set, it’s heated to melt—or “lose”—the wax, leaving behind a perfect, hollow cavity in the exact shape of your original design. This empty mold is then filled with glass and fired in a kiln. The result is a precise glass replica of your wax sculpture, capable of capturing even the most delicate textures and intricate forms.
Pâte de Verre (Glass Paste)
Pâte de verre, which translates to “glass paste,” is a kiln-casting technique known for producing delicate, thin-walled objects with a distinct, sugary texture. The process involves mixing fine glass powder (frit) with a binder, like water or a special adhesive, to create a thick paste. This paste is then carefully applied to the inside surfaces of a mold. You can use different colored pastes to create painterly effects. When fired, the glass particles fuse together without completely melting into a liquid, resulting in a beautiful, often translucent piece that retains a granular quality. It’s an ideal method for creating detailed vessels and sculptural forms.
What Kinds of Glass Molds Can You Buy?
Once you get the hang of slumping and draping, you’ll realize the world of molds is vast and exciting. The type of mold you choose directly influences the final shape and texture of your piece, so it’s helpful to know what’s out there. From the material it’s made of to the specific shape it creates, each mold offers a different path for your creativity. Let’s look at the most common types you’ll find as you build your collection.
Ceramic vs. Stainless Steel: Which Should You Choose?
The two main materials you’ll encounter are ceramic and stainless steel, and each has its place in the studio. Ceramic molds are the go-to for most slumping projects, as they heat and cool evenly with the glass. Stainless steel molds, on the other hand, are fantastic for draping. Because metal contracts faster than glass during the cooling phase, it gently presses against the glass, helping it hold its draped form. Stainless steel is also incredibly durable and can handle countless trips to the kiln, making it a reliable, long-term investment for any glass artist.
Finding the Perfect Mold Shape and Size
You can find glass molds in just about any shape or size you can imagine. Whether you want to create a simple, elegant bowl or a large, intricate platter, there’s a mold for that. You’ll find basic squares, circles, and rectangles perfect for making plates and tiles. You can also find more complex forms like wavy dishes, deep bowls, and even bottle slumpers that transform recycled bottles into beautiful, functional art. This variety allows you to experiment with different forms and find the perfect shape to bring your vision for your COE90 glass project to life.
Creating Unique Designs with Specialty Molds
When you’re ready to move beyond standard shapes, specialty molds open up a whole new world of creative possibilities. These molds are designed to help you craft unique, three-dimensional pieces like jewelry pendants, decorative tiles, and sculptural art. Many are even themed for specific holidays or seasons, so you can make custom Christmas ornaments, spooky Halloween decorations, or beach-inspired pieces for the summer. Using specialty molds is a fantastic way to add a personal touch to your work and create one-of-a-kind items that truly stand out. They are perfect for making gifts or expanding your product line.
Who Makes the Best Glass Molds?
When you start shopping for molds, you’ll quickly notice a few brand names that pop up again and again. While there’s no single “best” brand for every artist, some companies have earned a reputation for quality, durability, and innovative designs. Choosing a mold from a trusted manufacturer means you’re more likely to get a product that holds up to repeated firings and gives you consistent, beautiful results.
The right brand for you often comes down to the specific project you have in mind. Some companies specialize in simple, functional shapes for making plates and bowls, while others are known for intricate, artistic designs that create one-of-a-kind pieces. Many experienced artists end up with a collection of molds from different makers, picking and choosing based on the needs of their next creation. Let’s look at some of the most popular and reliable brands you’ll find on the market.
Top Glass Mold Brands We Recommend
If you’re looking for a great place to start, you can’t go wrong with these four industry leaders. Each one brings something unique to the table, and they’re all well-respected in the glass art community for their quality and performance.
- Bullseye Glass: A go-to for functional and classic shapes that turn flat glass into beautiful bowls, platters, and plates.
- Colour de Verre: Known for their incredibly smooth, durable molds made from a special clay that takes kiln wash perfectly.
- Creative Paradise: Offers a huge variety of creative and intricate designs, perfect for making everything from jewelry to decorative tiles.
- Slumpy’s: A popular choice for their wide range of slumping and draping molds, offering reliable shapes for all kinds of projects.
Why We Love Bullseye & Colour de Verre
Bullseye Glass is a fantastic choice when you want to create useful items. Their molds are designed to help you transform flat art glass into functional pieces like bowls and platters using heat and gravity inside your kiln. They offer a solid selection of classic shapes, including squares and rounds, that serve as a great foundation for any glass artist’s collection.
Colour de Verre stands out for its material. Their molds are made from a unique clay formula that results in a very smooth surface. This makes applying kiln wash an even, simple process and helps you get a clean release every time. They are also designed to be quite durable, resisting cracks when fired correctly, so you can count on them for many projects to come.
Getting to Know Creative Paradise & Slumpy’s
Creative Paradise is all about options and intricate designs. This brand is perfect for artists who want to move beyond simple bowls and create something truly unique. You can find molds for everything from detailed jewelry pendants and cabochons to decorative art pieces and tiles. Their catalog is extensive, giving you plenty of inspiration for your next project.
Slumpy’s is another heavyweight in the world of glass molds. They are well-known for producing reliable and high-quality molds for both slumping and draping. Whether you’re looking for a simple curve to create a gentle slump or a more complex form to drape glass over, Slumpy’s likely has a mold that fits your needs. They are a trusted staple in many glass studios for their consistency and durability.
Real Reviews: What Other Artists Think
At the end of the day, most artists will tell you that the best mold is the one that’s right for your specific project. While brands like Bullseye and Colour de Verre are praised for their quality, the final choice often depends on the shape, size, and design you’re trying to achieve. Many artists mix and match, using a Slumpy’s mold for a large platter and a Creative Paradise mold for small jewelry components in the same week. The key is to think about your end goal and select a mold that will help you get there. Don’t be afraid to experiment with different brands to find your personal favorites.
How Much Should You Spend on a Glass Mold?
The price of glass molds can vary quite a bit, so it’s helpful to know what to expect before you start shopping. Costs depend on factors like the mold’s size, material, and the complexity of its design. A simple, small ceramic mold for a trinket dish will be much more affordable than a large, intricate stainless steel mold for a statement piece. Think about your budget and the types of projects you want to create. This will help you find the right balance between price and quality for your studio.
What to Expect: Beginner Mold Prices
When you’re just starting with glass slumping and draping, you don’t need to break the bank. There are plenty of affordable molds designed specifically for beginners. These are perfect for learning the basics of how glass behaves in a kiln without making a huge financial commitment. You can find small, simple shapes like plates, bowls, and coasters that are easy to work with and produce great results. Starting with these less expensive options allows you to explore different forms and techniques freely. These entry-level ceramic molds are a fantastic way to experiment and build your confidence as you get comfortable with the process.
Examples of Mold Pricing
To give you a clearer picture, a small, simple ceramic mold for a coaster or a small dish might cost you anywhere from $15 to $30. These are great for getting started. As you move into medium-sized molds for plates or shallow bowls, you can expect to spend in the range of $40 to $70. For larger, more intricate, or specialty molds—like those for creating large platters or unique sculptural forms—the price can easily go over $100. The best approach is to browse the different molds available to see what fits your budget and creative goals. This way, you can invest in a few affordable pieces to start and gradually add more complex molds to your collection as you grow.
Is It Worth Investing in Pro-Grade Molds?
Once you’ve honed your skills and are ready to create more refined pieces, you might consider investing in professional-grade molds. These are typically made from higher-quality ceramic clay that gives your glass an incredibly smooth finish, reducing the time you spend coldworking later. They’re also built to be more durable, handling the stress of repeated firings in your kiln with less risk of cracking. While they come with a higher price tag, professional molds are a worthy investment for serious artists who need consistent, high-quality results for their work. They take kiln wash evenly and are designed for longevity.
Smart Ways to Save Money on Molds
Everyone loves a good deal, and there are definitely ways to save money on molds. A great strategy is to keep an eye on sale or closeout sections on supplier websites. This is where you can find excellent products at a reduced price, often because they are being discontinued. Some suppliers also offer volume discounts, which is perfect if you’re stocking up a new studio or buying multiple molds for a large project. Signing up for newsletters is another smart move, as you’ll be the first to know about special promotions and new product launches, giving you a head start on savings.
Buying from a Distributor
Here’s a pro tip for getting the best value: buy your molds from a distributor instead of directly from the manufacturer. While brands like Creative Paradise make amazing products, they often sell them at full retail price on their own sites. Distributors, on the other hand, buy in bulk and can pass those savings along to you. This is a huge plus, especially when you consider the shipping costs for heavy ceramic items. Shopping with a distributor also means you can browse a wide selection of brands in one place, making it simple to compare options and find the perfect tool for your next project. It’s a smart and convenient way to stock your studio with quality molds without overspending.
How to Choose the Right Glass Slumping Mold
Picking the right mold involves more than just finding a shape you love. To get the best results, you need to think about how the mold will interact with your glass and your kiln. A little planning at this stage can save you from a lot of frustration later. By considering the material, size, and surface quality, you can find a mold that not only works for your current project but will also become a reliable tool in your studio for years to come. Let’s walk through the key factors to keep in mind when you’re ready to buy.
First Things First: Check COE Compatibility
If you’ve worked with fusing glass before, you know how important Coefficient of Expansion (COE) is. It’s a measure of how much glass expands and contracts when heated and cooled. While it’s most critical for fusing glass pieces together, it also plays a role with certain molds. Some molds, particularly those made of glass or other materials with a specific expansion rate, need to be compatible with your glass. An incompatible mold can cause stress and lead to cracking. For example, the expansion rate of a mold can determine whether it’s better suited for draping glass over it or slumping glass into it. Always check the manufacturer’s recommendations and stick with either COE90 or COE96 glass for your project to ensure consistency.
Look for Great Surface Quality and Durability
The texture of your mold’s surface will transfer directly to your glass, so a smooth, well-maintained mold is essential for a professional finish. Most high-quality ceramic molds are designed to be durable and last through many firings, but they require proper care. Before every use, you should coat your mold with a quality kiln wash. This thin, protective layer does two things: it prevents the molten glass from sticking to the mold, and it helps you achieve a smoother finish on your final piece. Taking the time to apply kiln wash properly is one of the easiest ways to protect your investment and ensure beautiful, consistent results.
Will the Mold Fit in Your Kiln?
This might seem obvious, but it’s a common mistake to buy a mold that doesn’t quite fit your equipment. Before you fall in love with a large or unconventionally shaped mold, measure the interior of your kiln. You’ll need to leave at least one to two inches of space on all sides of the mold to allow for proper air circulation. This ensures an even heat distribution, which is critical for a successful slump. Remember the typical process: you’ll fuse your glass flat first, then place it on or in the mold for a second firing. Make sure your glass is cut to the right size for the mold and that the entire setup fits comfortably inside your kiln.
How to Pick the Right Material for Your Project
The two most common materials for molds are ceramic and stainless steel, and each has a specific purpose. As a general rule, ceramic is used for slumping (shaping glass into a concave form) and metal is used for draping (shaping glass over a convex form). Why? It comes down to how the materials cool. According to glass experts, metal contracts faster than glass. As a metal mold cools, it can shrink and press too hard against the glass, potentially causing it to crack. A ceramic mold, on the other hand, cools more slowly, allowing the glass to set in its new shape without added stress. Choosing the right material is key to matching the technique you want to use.
Safety First: Essential Precautions
Working with glass is an incredible experience, but it’s important to remember that your studio is a workshop. Just like any craft, there are risks involved, but they are easy to manage with a bit of awareness and the right habits. Safety isn’t about limiting your creativity; it’s about protecting yourself so you can continue to create beautiful things for years to come. When you’re slumping and draping, the main things to be mindful of are sharp glass edges and airborne dust from materials like kiln wash. Taking a few simple precautions will keep you safe and let you focus on the fun part—watching your artistic vision come to life in the kiln.
Handling Mold Materials Safely
The most obvious hazard in a glass studio is the glass itself. Always handle your sheets and cut pieces with care to avoid cuts, as even smooth-looking edges can be sharp. When working with larger molds or heavy sheets of glass, use proper lifting techniques to protect your back. Beyond the glass, be mindful of the dust created by your materials. Kiln wash and some ceramic molds can release fine particles into the air when you’re prepping them. It’s best to apply kiln wash in a well-ventilated area and to wipe down surfaces with a damp cloth to capture dust instead of sweeping it back into the air where it can be inhaled.
Protective Gear for Glass Art
Your personal protective equipment, or PPE, is your first line of defense in the studio. At a minimum, you should always wear safety glasses to protect your eyes from any stray shards of glass. Your hands are your most valuable tools, so safeguard them by wearing protective gloves whenever you’re handling or cutting glass. When it comes to airborne particles, especially the fine dust from kiln wash, a standard paper mask won’t cut it. You need to protect your lungs with a properly fitted, NIOSH-certified respirator with a P100 rating. This ensures you’re filtering out the smallest particles that can cause long-term health issues. Investing in quality gear and wearing it every time is a non-negotiable part of the process.
Tips for Getting Great Results with Your Molds
Once you’ve chosen the perfect mold, the real fun begins. But getting that beautiful, smooth finish you’re picturing takes a little more than just placing glass on a mold and hitting “start” on your kiln. Following a few key steps in preparation, firing, and aftercare will make all the difference. These practices will not only help you create stunning pieces but also extend the life of your molds, making them a worthwhile investment for years to come. Let’s walk through how to set yourself up for success with every firing.
How to Properly Prep Your Molds with Kiln Wash
Think of kiln wash as the essential barrier between your glass and your mold. Without it, the molten glass will fuse directly to the mold’s surface, creating a permanent bond you really don’t want. You’ll end up with a ruined project and a damaged mold. To avoid this heartbreak, always coat your mold with kiln wash to prevent the glass from sticking. Apply a few thin, even coats, letting each one dry completely before adding the next. A smooth, consistent layer is your goal. This simple prep step is the single most important thing you can do to ensure your glass releases easily after firing.
A Note on Product Compatibility
When you’re choosing between different molds, it’s vital to match the material to your technique. Ceramic molds are your best friend for slumping, where the glass sinks into a concave shape. Stainless steel molds, however, are the better choice for draping, where glass forms over a convex shape. This isn’t just a suggestion; it’s based on physics. Metal cools and contracts much faster than glass. If you slump glass into a metal mold, the mold can shrink too quickly around your piece during cooling, causing stress cracks. Ceramic, on the other hand, cools down more slowly and evenly, giving your glass the gentle support it needs to set perfectly without any added pressure.
Calculating How Much Glass to Use
One of the trickiest parts of a new project is figuring out exactly how much glass you need. Too little, and your piece won’t fill the mold properly; too much, and you’ll have an uneven, thick edge. Luckily, there’s a simple trick to get a great estimate. Just fill your mold with water and pour that water into a container to weigh it in grams. Once you have the weight of the water, multiply that number by 2.5. The result is the approximate weight of the glass you’ll need in grams. This easy calculation works for any mold and helps you cut the right amount of COE90 glass from the start, saving you time and material.
Nailing Your Firing Schedule
Your kiln’s firing schedule is the recipe that transforms flat glass into a three-dimensional work of art. Getting it right is critical for a successful slump or drape. A proper schedule ensures the glass heats and cools at the right pace, preventing thermal shock and stress fractures. As a general rule, you should program a slow, controlled annealing schedule to prevent stress from building up within the glass as it cools. Different types of glass and mold thicknesses require different schedules, so it’s a great idea to keep a firing log. Documenting your settings and results will help you perfect your process for different kilns and projects.
How Glass Thickness Affects Firing Time
The thickness of your glass is one of the most important factors influencing your firing schedule, especially during the cooling phase. While a thicker piece obviously takes longer to heat all the way through, the real challenge is ensuring it cools down slowly and evenly. If the outside of the glass cools much faster than the insulated core, it creates internal stress that can cause cracks long after the piece is out of the kiln. The difference in time can be dramatic; a piece just over an inch thick might need more than 24 hours to anneal properly, while a very thick casting could take weeks. Always adjust your firing schedule to account for your project’s thickness, adding more time for both heating and cooling to prevent thermal shock.
Common Glass Slumping Mistakes to Avoid
A few common missteps can stand between you and a great result. One of the biggest is choosing the wrong technique for your mold material. The decision to drape over or slump into a mold is often determined by its expansion rate. For example, ceramic is typically used for slumping into, while metal is better for draping over. Why? Because metal contracts faster than glass as it cools. If you slump glass into a metal mold, the mold can shrink and press so hard against the glass that it breaks. Always match your technique to your material to avoid frustrating cracks and breaks.
How to Make Your Glass Molds Last
Taking good care of your molds ensures they’ll last through countless creative projects. The first step in good care is consistent prep—that kiln wash we talked about protects the mold’s surface just as much as it protects your glass. After a successful firing and once the mold is completely cool, gently brush off the old kiln wash with a soft brush. Avoid using water or harsh scrapers, which can damage the mold’s surface. Store your molds in a dry, safe place where they won’t get chipped or cracked. With a little bit of care, your molds will remain reliable tools in your studio for a very long time.
Finishing Your Piece: An Intro to Coldworking
Once your kiln has completely cooled and you’ve carefully removed your new creation, the process isn’t quite over. The final step is coldworking, which is just a term for shaping glass without heat. This is where you refine the piece, smoothing any sharp edges left from the slumping process and polishing the glass to a brilliant shine. Coldworking tools like grinders and sanders are used at the end to smooth and polish your finished glass piece. This stage can be as simple as hand-sanding the rim of a bowl for a soft, professional feel or as involved as grinding and polishing the entire surface to achieve a flawless, gallery-quality finish.
Cleaning Your Finished Glass Art
After your piece has been fired and coldworked, the last thing you need to do is give it a good cleaning. It will likely have some residual kiln wash or dust on its surface. A simple and effective method is to soak the glass in a bath of white vinegar for a short time. This helps loosen any stubborn bits of kiln wash that might be clinging to the surface. Once it has soaked, you can use a soft brush to gently scrub away any leftover material. A final rinse with clean water and a polish with a soft cloth will leave your new artwork sparkling and ready to be displayed or used.
Where to Learn More
Working with glass is a journey of continuous learning and discovery. Each project teaches you something new about how glass moves, how colors interact, and how different molds create unique forms. As you grow as an artist, you’ll find yourself building a library of knowledge right alongside your collection of tools and supplies. Many experienced artists end up with a collection of molds from different makers, picking and choosing based on the needs of their next creation. The key is to stay curious and seek out resources that can help you refine your techniques and expand your creative horizons. There are plenty of great places to find inspiration and guidance.
Using Manufacturer Resources
The companies that make your favorite molds are often one of your best resources. Brands like Bullseye, Colour de Verre, and Creative Paradise frequently publish their own firing schedules, project tutorials, and tips specifically for their products. Following their recommendations is a great way to get predictable, successful results. Choosing a mold from a trusted manufacturer means you’re more likely to get a product that holds up to repeated firings and gives you consistent, beautiful results. Their websites and product guides are packed with valuable information that can help you get the most out of your investment and avoid common pitfalls.
Why Taking a Class is a Great Idea
While online resources are fantastic, there’s no substitute for hands-on learning. If you’re new to glass fusing and slumping, it’s highly recommended to take a class from a professional. An instructor can provide personalized feedback, demonstrate techniques in person, and answer your specific questions as they come up. Most importantly, a class is the best environment to learn how to use equipment like kilns safely and correctly. Look for classes at local art centers, glass supply shops, or community colleges. It’s a wonderful way to connect with other artists and build your confidence in a supportive setting.
Related Articles
- Slab Server Casting Mold | Art Glass Supplies – Colour De Verre
- Round Slumper 11.8″ Bullseye Glass Mold | Art Glass Supplies – Bullseye Gl
- Simple Rimless Dish 9″ Bullseye Glass Mold | Art Glass Supplies – Bullseye
- Square Slumper B with Flat Base 6.1″ Bullseye Glass Mold | Art Glass Supplies
- Large Round Slump Ring Mold | Art Glass Supplies – Slumping & Draping Mold
Frequently Asked Questions
What’s the simplest way to remember the difference between slumping and draping? Think of it this way: slumping is when glass goes in to a mold, like pouring soup into a bowl. Draping is when glass goes over a mold, like laying a blanket over a chair. Slumping uses a concave mold to create a vessel, while draping uses a convex mold to shape the glass around its outer form.
Is it okay to skip kiln wash just once? In a word, no. Skipping kiln wash is one of the most costly mistakes you can make. Without that protective layer, your hot glass will fuse directly to the ceramic or metal surface of your mold. This will almost certainly ruin both your project and your mold, as they will become permanently stuck together. Taking a few minutes to apply it properly is always worth the effort.
How do I figure out the right firing schedule for my mold? There isn’t one universal firing schedule because the right one depends on your specific kiln, the thickness of your glass, and the final shape you want. A great starting point is to use the schedule recommended by the manufacturer of your glass. From there, keep a detailed firing log. Write down your settings, the type of glass and mold you used, and the results. This log will become your most valuable tool for perfecting your process over time.
Can I use a ceramic mold for draping or a metal one for slumping? It’s best to stick to the general rule: ceramic for slumping and metal for draping. The reason comes down to how the materials cool. Metal contracts faster than glass. If you slump glass into a metal mold, the mold can shrink around the glass as it cools, squeezing it until it cracks. A ceramic mold cools at a rate much closer to glass, which prevents this kind of stress.
Does my glass need to be the exact same size as my mold? For the best results, you should cut your glass to fit the top surface of your mold. If your glass is significantly smaller than the mold, it may not slump evenly or reach the bottom. If it’s too large, it can slump or drape over the edges in an uncontrolled way, which might not be the look you’re going for. Matching the glass size to the mold gives you the most control over the final shape.