
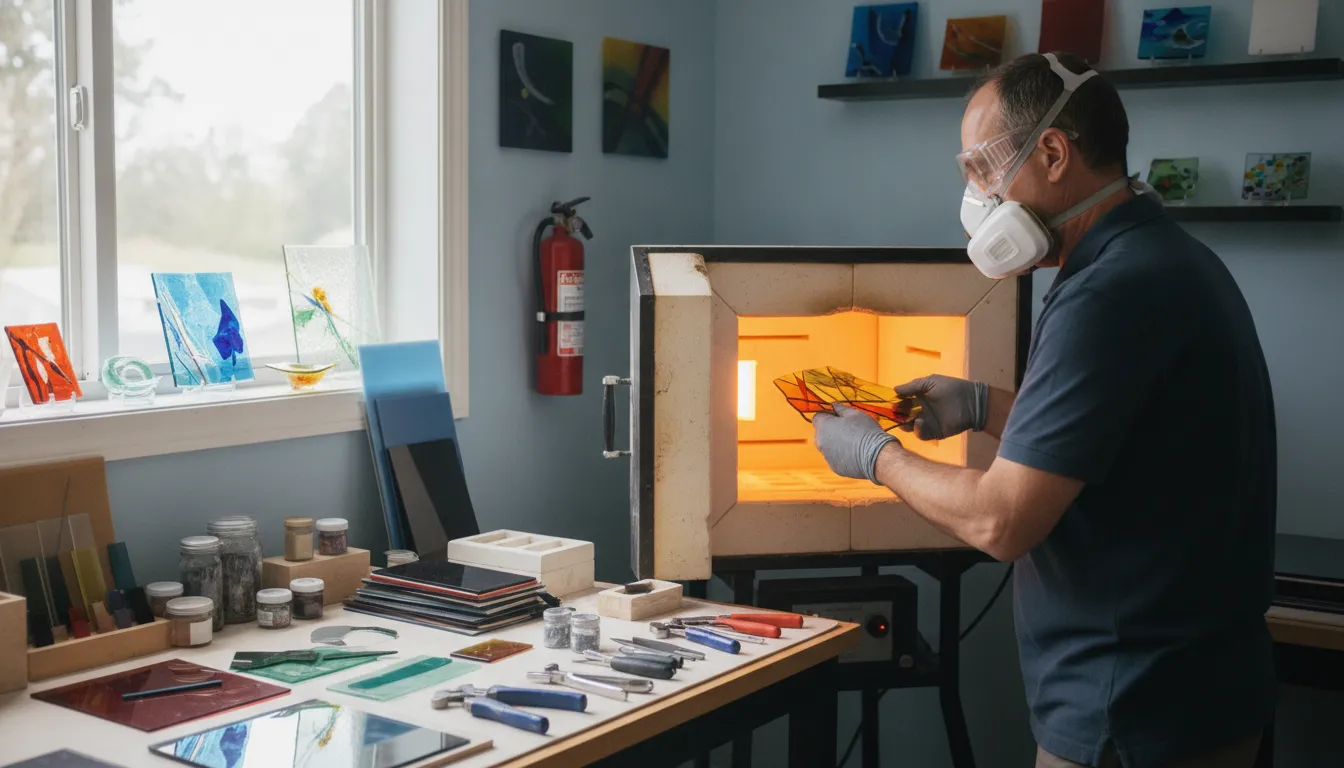
A home glass studio can be both inspiring and hazardous when heat, sharp edges, fine dust, and chemical colorants share the same workspace. The safest approach is to build protection into every stage, from cutting and grinding to kiln loading, firing, and cooling. Good ventilation, suitable eye and respiratory protection, tidy work habits, and firm boundaries around children reduce risks without interrupting the creative process.
The most important glass fusing safety tips are to control dust with wet methods and HEPA cleanup, protect your eyes and skin from shards and heat. Keep loose clothing and hair secured, and vent kiln exhaust directly outdoors. Work only with compatible glass, because a COE mismatch can create internal stress and unexpected fractures that turn a finished piece into a shard hazard.
Before choosing equipment or firing a project, review the broader Glass Fusing for Artists guide for foundational technique and process planning. Then, start by understanding why these safeguards matter at every temperature and skill level.
Shop glass fusing safety gear and supplies to protect your home studio.
Why Safety Is Non-Negotiable in Glass Fusing
Fused glass rewards patience and precision, but the process begins with hazards that deserve respect. A kiln commonly reaches about 1292 F (700 C) to 1472 F (800 C), depending on the desired result. At those temperatures, glass can burn skin, ignite nearby materials, and remain dangerously hot after a firing cycle appears complete. The kiln atmosphere also matters. Firing can release hazardous fumes and particles, so a safe studio needs appropriate ventilation rather than relying on an open door or a small room fan.
Glass fusing also includes cold-working steps that create a different set of risks. Cutting, grinding, and handling frit can release fine glass dust, including respirable crystalline silica. The National Institute for Occupational Safety and Health recommends half-facepiece particulate respirators with N95 or better filters for certain airborne crystalline-silica exposures. That recommendation is not a substitute for dust control, wet methods, or suitable local exhaust. But it shows why ordinary fabric masks are not an adequate answer to every studio task. Read the NIOSH respirator guidance before selecting respiratory protection.
Material chemistry adds another reason to work deliberately. According to the Washington State Department of Health glassworking guidance, colorants, frits, and glass paints may contain toxic metals such as lead, cadmium, copper, chromium, and cobalt. The risk is not limited to a dramatic spill. Dust on a work surface, residue on gloves, or poor kiln ventilation can create exposure pathways that are easy to overlook.
Compatibility is part of safety, too. Glasses should be compatible by coefficient of expansion, or COE. A mismatch can leave internal stress in a finished piece, increasing the chance of cracking or producing sharp fragments during cooling, handling, or later use. Follow a tested firing schedule and learn the material behavior described in our Glass Fusing for Artists guide before experimenting.
These precautions do not restrict creativity. They protect your hands, lungs, eyes, and studio so you can keep making work with confidence. Treat every firing and every dusty process as a controlled operation, and your safety routine becomes part of the craft rather than an obstacle to it.
Essential Glass Fusing Safety Tips for Your Home Studio
A safe firing routine begins before you load the kiln. These glass fusing safety tips help you control the main hazards in a home studio: sharp fragments, hot equipment, airborne dust, fumes, and accidental contact with moving tools. Build the routine into your workspace so you do not have to rely on memory when you are focused on a design.
-
Set up a designated workspace
Choose one area for cutting, grinding, assembling, and firing rather than moving materials between household rooms. Keep the work surface stable, uncluttered, and easy to clean. Store glass, frit, powders, tools, and chemicals so they cannot be knocked over or confused with food or household supplies. A defined workspace also makes it easier to keep children, pets, and bystanders away while equipment is operating.
-
Put on your safety gear before handling glass
Safety gear is non-negotiable, not an accessory added after a project becomes difficult. Wear impact-rated eye protection when cutting, breaking, or grinding glass. Use suitable hand protection when handling sharp edges, while keeping gloves away from rotating tools where they could catch. Select respiratory protection for the task and follow the equipment manufacturer’s instructions. Washington State Department of Health guidance for glass artists addresses protective equipment and exposure risks from glass materials and colorants: Department of Health guidance.
-
Control hair and clothing around equipment
Tie back long hair and secure loose sleeves, scarves, jewelry, and drawstrings before using saws, grinders, or other moving equipment. Loose clothing and hair can catch unexpectedly, while sleeves can also brush against sharp glass or hot surfaces. Wear closed-toe shoes and clothing that covers your skin when the task involves flying particles or heated materials. Make this check before switching on any tool, not only before kiln work.
-
Position the kiln for heat and fire safety
Place the kiln on a stable, heat-resistant surface with at least one foot of clearance from flammable materials. Keep paper, fabric, solvents, wood, storage boxes, and finished work outside the clearance area. Do not use a crowded shelf or improvised stand that can shift under the kiln’s weight. Before firing, inspect the power cord, controller, and surrounding floor, and confirm that the kiln can operate without blocking an exit or creating a trip hazard.
-
Make a pre-firing check part of every project
Confirm that the glass is compatible before firing. Pieces with mismatched COE can develop internal stress and fracture, creating a shard hazard during handling or cooling. Check that the kiln lid and ventilation setup are ready, the firing schedule matches the project, and no combustible item is nearby. Keep the kiln closed during the firing cycle unless your documented process requires otherwise, and allow the work to cool fully before opening or moving it.
Keep the supplies that support this routine together, including eye protection, gloves, cleanup tools, and appropriate respiratory protection. Browse glass fusing supplies to build a setup that makes safe habits easy to repeat.
Protecting Your Lungs from Glass Dust
Glass dust is easiest to control before it becomes airborne. Cutting, grinding, dry polishing, mixing dry pigments, and kiln-firing can all create dust or fumes that should not be treated as ordinary household debris. The Washington State Department of Health specifically advises glassworkers to protect their lungs during dry grinding, polishing, and kiln-firing, along with other dust- or fume-producing processes. Read the glassworking hazard guidance from the Washington State Department of Health.
Use wet methods whenever the process allows. A wet slurry during cutting or grinding keeps particles contained and helps control exposure to crystalline silica and toxic metal dust. Keep the work surface wet enough to suppress dust without creating an electrical hazard, and follow the instructions for your saw, grinder, and other equipment. Do not dry-sweep a cold shop after working. Use a HEPA-filtered vacuum instead, then wet mop the floor and wet wipe nearby surfaces so settled dust is captured rather than redistributed.
Choose respiratory protection for the task
Respiratory protection is a backup to dust suppression, not a substitute for it. NIOSH recommends a half-facepiece particulate respirator with an N95 or better filter for certain airborne crystalline silica exposures. For very fine glass dust, choose a properly fitted respirator with NIOSH-approved P100 particulate filters. The filter rating alone is not enough: the respirator must seal correctly to your face, and facial hair or an incorrect size can compromise that seal. Follow the manufacturer’s replacement and maintenance instructions.
Wear respiratory protection during dry grinding, polishing, and kiln-firing, and whenever your controls cannot reliably prevent airborne particles. If your process also produces chemical vapors or fumes, particulate filtration may not address the full hazard. Identify the material and use protection designed for that exposure. Good ventilation remains essential, especially around kilns and colorants.
Reduce dust at the material and cleanup stages
Material choices can reduce the amount of dust created in the first place. The Washington State Department of Health recommends pelletized batch, cullet, and second-melt glass to reduce toxic metal dust. Keep powders and colorants closed when they are not in use, and handle them gently so they do not spill or plume into the room.
For a practical checklist of equipment and workspace essentials, see our first studio essentials guide. Build lung protection into the routine: suppress dust while working, wear the right respirator for the task, vacuum with HEPA filtration, and finish with wet cleaning.
Eye Protection: Safety Glasses and Kiln-Viewing Options
Eye protection needs to match the task. In a fusing studio, three hazards can reach your eyes: flying shards from cutting or cracked glass. Dust from grinding and cleanup, and infrared radiation from glowing-hot glass or an open kiln. One pair of eyewear may not address all three. For everyday bench work, choose impact-rated protection. For kiln viewing, choose lenses specifically designed to filter infrared.
Do not assume that dark glass is automatically kiln-safe. Standard didymium glasses are useful for reducing the intense yellow sodium flare that can make hot glass uncomfortable to view. But they do not block the infrared radiation released by glowing-hot materials and furnaces. The Washington State Department of Health recommends goggle lenses that block infrared wavelengths from 600 to 6,000 nanometers to reduce the risk of cataracts and other eye damage. See the Washington State Department of Health glassworking safety guidance for the source recommendation.
| Protection option | Best use | What it protects against | Important limitation |
|---|---|---|---|
| Everyday prescription glasses | Routine vision correction away from active cutting, grinding, or kiln viewing | Basic vision correction and limited splash or particle coverage | Not a substitute for certified impact protection or infrared-filtering kiln goggles |
| Standard didymium glasses | Reducing sodium flare while observing some hot-glass work | Bright yellow glare that can make a flame or hot glass difficult to see | They do not block infrared, so do not rely on them for kiln infrared protection |
| IR-blocking kiln-viewing goggles | Brief, necessary viewing of glowing-hot glass or kiln interiors | Infrared exposure when the lenses are rated for the relevant wavelength range | They are not automatically impact-rated; use separate shop safety glasses for shard hazards |
| Impact-rated safety glasses | Cutting, breaking, drilling, grinding, and handling fragile pieces | Flying particles and glass shards from cold-work operations | Ordinary impact lenses do not necessarily filter kiln infrared |
Keep your face out of the kiln opening and make viewing brief. If a piece breaks, stop and let the area settle before removing fragments. Match your eyewear to the hazard rather than treating safety glasses, didymium lenses, and IR goggles as interchangeable.
Safe Kiln Ventilation in Home Studios
A kiln adds two separate hazards to a home studio: intense heat and contaminated air. During firing, fumes and fine particles can collect around the kiln, especially when glass contains colorants, frits, or other materials that release hazardous substances. Safe ventilation removes that air from the studio and sends it outdoors. It should not simply move fumes into another room or recirculate them through the house.
Use local exhaust that vents outdoors
The most direct setup is a local exhaust fan connected to ductwork at the electric kiln. The Washington State Department of Health recommends connecting the fan and ductwork directly to the kiln so contaminated air is pulled outside: glassworking ventilation guidance. A local exhaust system should terminate outdoors, with the outlet positioned so exhaust cannot flow back through windows, doors, or other air intakes.
Do not treat a general room fan, open window, or ceiling fan as a substitute for source control. Those approaches may dilute or spread fumes, but they do not reliably capture them where they are produced. Keep the exhaust path as short and direct as practical, and check that the fan, ducting, clearances, and electrical installation are appropriate for the kiln and building. Follow the kiln manufacturer’s instructions and local building requirements before operating the equipment.
Why a canopy hood is not enough
A canopy hood positioned above the kiln can capture rising heat and some particles, but it is not a complete respiratory-protection system. The Washington State Department of Health notes that canopy hoods often provide limited protection and may capture only heat and the lightest particles released immediately below the canopy. If a hood is used, it should supplement, not replace, direct local exhaust to the outdoors.
Control heat and fire risks
Ventilation does not replace safe kiln placement. Set the kiln on a heat-resistant surface and keep it at least one foot from flammable materials. Leave sufficient clearance for inspection, loading, and airflow, and keep curtains, paper, solvents, fabrics, and stored supplies away from the hot zone. Never block the kiln’s required clearances to improve airflow or squeeze it into a cabinet not designed for heat-producing equipment.
Firing conditions also affect safe operation. Use the glass fusing temperature guide when planning a program, and review annealing and cooling schedules so finished work cools in a controlled way. Good ventilation, correct placement, and a disciplined firing schedule work together to keep heat and fumes outside your breathing zone.
First Aid for Glass Cuts and Burns
Even with good studio habits, a sharp edge or hot piece can cause an injury. Keep calm, stop the work, and move away from the kiln, cutter, grinder, or other active equipment before treating it. Protective gloves are essential when handling hot or sharp glass, as recommended by the Washington State Department of Health, but gloves cannot prevent every accident.
What to do for a glass cut
For a small, shallow cut, wash your hands first if possible, then rinse the wound gently with clean running water. Apply steady, direct pressure with sterile gauze or a clean cloth to control bleeding. Once the bleeding has stopped, wash around the area, check for visible debris, and cover the cut with a clean bandage or dressing. Replace the dressing if it becomes wet or dirty.
Do not dig into a wound to remove a deeply embedded shard. Seek medical attention if the cut is deep or gaping, bleeding does not slow after sustained pressure. Glass remains embedded, sensation or movement is affected, or blood is spurting. A shard in the foot deserves prompt attention, too. Never continue working barefoot, since small fragments can lodge in flooring or travel under a workbench.
What to do for a burn
For a minor burn from hot glass, kiln hardware, or a hot tool, cool the area under gently running clean water for several minutes. Remove jewelry or clothing near the injury before swelling develops, but do not pull away anything stuck to the skin. Do not apply ice, grease, or adhesive directly to the burn, and do not pop blisters. After cooling, cover the area loosely with a clean, non-fluffy dressing.
Get medical care for a severe or extensive burn, deep or white-looking skin. Burns involving the face, hands, feet, major joints, or genitals, or any injury caused by electricity or chemicals. If you are unsure how serious the injury is, contact a healthcare professional rather than returning to the studio.
Keep first aid within reach
Store a stocked first-aid kit where you can reach it without crossing the active work area. Include sterile gauze, bandages in several sizes, clean dressings, medical tape, disposable gloves, tweezers for superficial splinters, and a burn-appropriate dressing. Keep a phone nearby and make sure everyone using the studio knows the address and emergency plan. Check supplies regularly, and replace anything used or expired. A prepared response helps you handle a small mishap safely and recognize when professional care is the right next step.
Child Safety Around Kilns and Glass Materials
A kiln and a box of glass may look like studio equipment, but neither belongs in an unsupervised child’s reach. Treat the entire work area as an adult-only zone, including the kiln, shelves, tools, glass scraps, frit, powders, and chemical colorants. A clear boundary prevents curious hands from becoming part of an accident investigation.
Control access to the kiln
Whenever possible, place the kiln in a dedicated room with a door that closes. Use a gate, lock, or other physical barrier when children are present in the home, classroom, or studio. Keep kiln controls, the lid handle, peep-hole plugs, and loading tools out of reach. Children should never be allowed to open a kiln, inspect a firing, or touch shelves and posts without direct adult supervision.
A kiln can remain dangerously hot after the firing program ends, even when the chamber no longer glows. Do not leave a hot kiln unattended in an area children can enter. Establish a simple rule that everyone understands: the kiln stays closed, and children stay out. Until an adult has confirmed that the equipment and work are cool and safe.
Lock up glass, frit, and chemical materials
Store glass sheets and sharp offcuts in stable racks or containers that cannot tip. Keep frit, powders, colorants, enamels, and other chemical materials in locked cabinets, preferably in their original labeled containers. Small containers are especially easy for a child to knock over or open. The Washington State Department of Health advises keeping colorant and chemical containers tightly closed because toxic dust can spill from poorly sealed containers. Review its glassworking hazard guidance when setting up storage and cleanup procedures.
Do not rely on a high shelf alone. Children may climb, and an unsecured cabinet can create a larger hazard when pulled forward. Keep broken glass, kiln wash, powders, and cleanup materials behind a locked door, and clean spills before anyone enters the room. Never transfer a chemical into an unlabeled cup or food container.
Make supervision and ventilation part of the plan
Use an explicit “adult tools only” rule for cutters, grinders, torches, kiln furniture, and chemicals. In a teaching environment, demonstrate from outside the restricted area and allow access only under one-to-one supervision. The UK Health and Safety Executive emphasizes that kilns in schools and craft studios require appropriate ventilation and safety measures. That principle applies to home studios too: keep children away while the kiln operates, and ensure the room’s ventilation system is installed and used correctly.
Child-safe glass fusing is not about making a hot, sharp process risk-free. It is about controlling access, securing materials, supervising every interaction, and treating ventilation and heat as essential safeguards.
Ready to outfit your studio with the safety gear you need? Shop glass fusing supplies now.
Frequently Asked Questions
Does a glass kiln need to be vented?
Yes. Kiln firing can release fumes and particles, so a home studio should use local exhaust that connects to the kiln and vents directly outdoors. A canopy hood alone may capture heat and some nearby particles, but it provides limited respiratory protection. Follow the kiln manufacturer’s installation instructions and local electrical and building requirements. Washington State Department of Health guidance supports direct outdoor exhaust for glassworking ventilation.
What are the main hazards of fusing glass at home?
The main risks are cuts from sharp or broken glass, burns from hot work and kiln surfaces. Airborne dust from cutting or grinding, and fumes or particles released during firing. Some colorants, frits, and glass paints may contain toxic metals, including lead and cadmium. Use wet methods for cutting and grinding, clean cold-shop dust with a HEPA vacuum instead of sweeping, and wear task-appropriate eye, hand, and respiratory protection.
What should I check before using a kiln in a DIY studio?
Place the kiln on a heat-resistant surface with the clearance specified by its manufacturer, keep flammable materials away, and verify that the electrical circuit is suitable. Keep hair and loose clothing secured, make sure controls cannot be reached accidentally, and never leave children or untrained people unsupervised around hot equipment. Keep ventilation operating throughout the firing cycle.
Is fused glass automatically food-safe?
No. A fused piece is not automatically suitable for food contact. Use only glass and compatible components that the manufacturer identifies for that purpose, and follow the recommended firing schedule. Mixing glass with different coefficients of expansion can create internal stress and later fracture, producing a shard hazard. When food-contact suitability is uncertain, use the piece decoratively instead.
Ready to Build a Safer Fusing Studio?
Good safety habits let you focus on technique, from preparing glass to managing kiln heat with confidence. Browse the fuller glass fusing techniques guide for a deeper look at studio practice, then shop glass fusing safety gear and supplies from Art Glass Supplies. If you need help choosing practical essentials for your setup, contact us and we will help you get started with the right materials.