
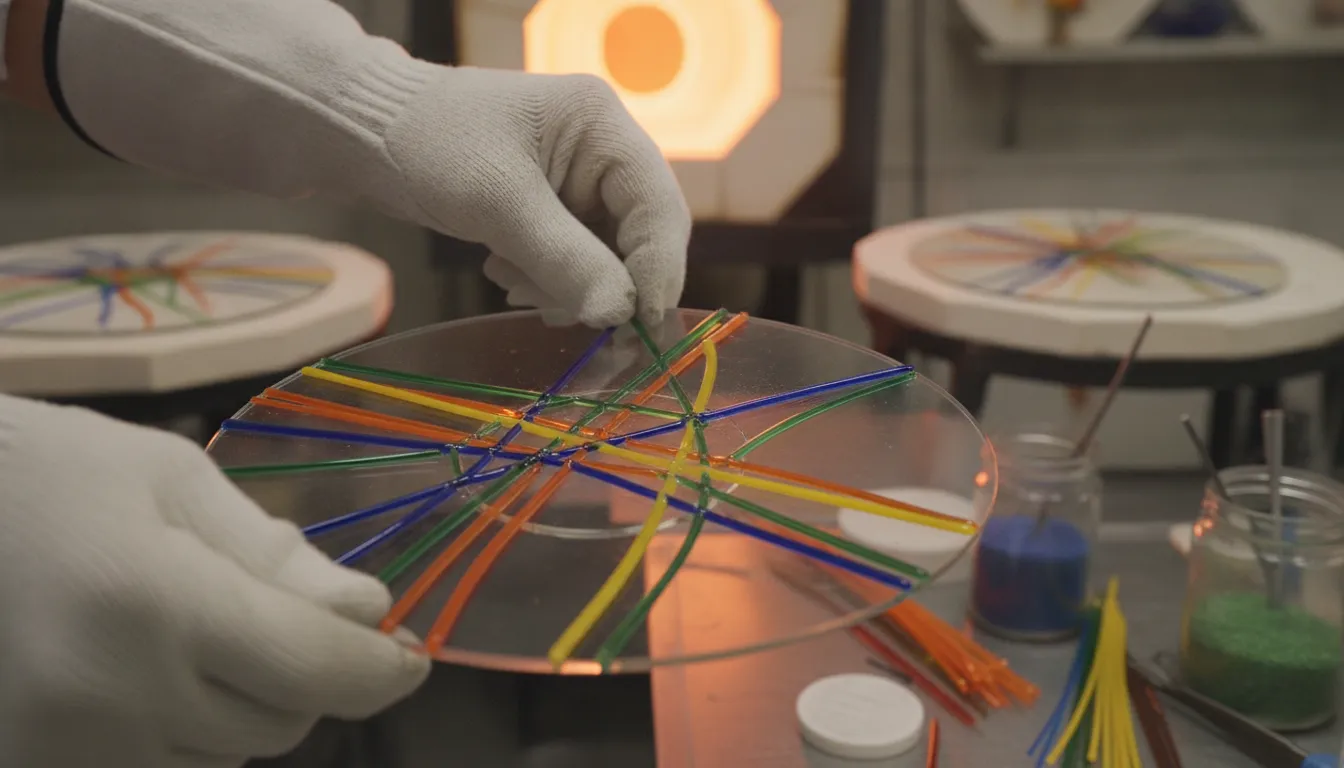
Thin glass rods can turn a flat fused surface into a drawing, border, or raised texture with remarkably little material. Their small diameter gives you control over line weight, spacing, and relief, but the result depends on more than placement. The stringer must be compatible with the base glass throughout heating, fusing, annealing, and cooling.
Glass stringers for fusing are slender rods that artists snap, cut, bend, or layer onto compatible sheet glass to create lines, textures, and fine detail. Choose a stringer from the same COE system as the base. Then select its diameter and firing schedule according to whether you want a subtle fused line or visible surface relief.
That combination of design control and material discipline makes stringers useful across COE90 and COE96 work. Before choosing colors or patterns, it helps to understand how these rods behave, what they can add to a project, and why compatibility remains non-negotiable. For the broader relationship between materials, kiln schedules, and surface effects, see our glass fusing techniques guide.
Shop compatible glass stringers for fusing.
What Are Glass Stringers and What Are They Used For
Glass stringers are thin, solid rods of glass used to place controlled lines and small-scale detail in a fused glass design. Most are pulled into a consistent, hair-thin profile, with a common commercial size measuring approximately 1.1 mm in diameter and 17 inches, or 45 cm, long. Their narrow form lets an artist create marks that would be difficult to cut from sheet glass or achieve with larger pieces of frit.
For artists working with glass stringers for fusing, the material is both a decorative element and a precise design tool. Stringers can be bent, snapped, cut, or arranged before firing. Depending on the firing schedule and the thickness of the rod, they may soften into a low line. Retain a small amount of relief, or become part of a fully fused surface. The base glass and stringer must belong to the same compatible COE system, because decorative detail is not useful if it introduces stress during cooling.
How stringers differ from noodles and twisted cane
Stringers are generally round and narrow, which makes them useful for crisp lines, dots, outlines, and fine borders. Noodles are wider, flatter strips of glass. They cover more surface area and can create broader bands, ribbons, or irregular blocks of color. Twisted cane is made by twisting multiple glass colors or strands together, so it contributes a striped or spiral pattern rather than one uniform line. These forms can be combined, but they are not interchangeable. The shape affects how much glass is deposited, how the piece moves during firing, and how much texture remains after a tack fuse.
Decorative uses in fused glass
Artists use stringers for more than simple outlines. Straight sections can define geometric patterns, grids, lettering, or architectural details. Short cuts can become small dashes, dots, and accents. Curved pieces can suggest stems, waves, tendrils, or flowing movement. Several colors placed side by side can create a drawn line with visual depth, while a sparse arrangement can preserve the transparency of the base sheet.
Stringers are also useful for adding texture to tiles, coasters, panels, pendants, and sculptural work. A tack fuse can preserve a raised tactile mark, while a hotter or longer schedule can flatten the rod and integrate its color into the surface. The result depends on the glass composition, diameter, placement, and kiln cycle, so test small samples before committing a detailed design. For a broader explanation of firing methods, materials, and studio planning, use this glass fusing techniques guide.
Choose stringers by both visual purpose and material compatibility. Art Glass Supplies carries options for common COE90 and COE96 fusing systems. Allowing artists to select fine detail that belongs with the rest of the project rather than treating stringer color as a standalone purchase.
Stringer Sizes and How They Fire Differently
Diameter is one of the most important variables when selecting glass stringers for a fused design. Thin stringers near 0.5 mm create delicate marks, while heavier pieces approaching 2 mm produce stronger lines and more visible surface relief. A common standard size is approximately 1.1 mm in diameter and 17 inches, or 45 cm, long. That length gives you room to cut several accents from one rod while preserving enough control for curved or geometric layouts.
Think of diameter as a starting thickness, not a guaranteed finished height. The final profile depends on the firing schedule, the amount of glass above the base. The spacing between elements, and whether the project is fired as a tack fuse or full fuse. Glass viscosity changes as temperature rises, so the same stringer can produce a crisp raised mark in one schedule and a nearly level line in another.
Thin stringers create fine, flatter lines
At a full-fuse temperature, a thin stringer has relatively little volume to maintain its original round profile. As the surface softens, the rod spreads into the surrounding glass. The result is usually a narrow, low-relief line that reads more like drawn color than an applied bead. This makes smaller diameters useful for lettering, fine veining, delicate borders, and tightly spaced linear patterns.
Thin pieces can also disappear visually if they are buried beneath too much glass or fired too aggressively. Place them on a clean, compatible surface and use enough contrast for the design to remain legible after flow. If a line needs to stay visibly raised, use a thicker diameter or adjust the schedule toward a tack fuse rather than relying on a very thin stringer.
Thicker stringers and stacked lines retain more relief
A thicker stringer contains more glass volume, so it has greater potential to remain rounded or visibly raised when fired. In a tack fuse, the kiln softens and bonds the stringer to the base without fully flattening every contour. This preserves tactile texture, stronger highlights, and a more pronounced line height. It is useful for dimensional borders, raised patterns, and designs meant to catch light across the surface.
Stacking two or more stringers increases the height and mass of the design, but it also changes how heat moves through that area. A multi-layer stack may retain relief during a tack fuse, while a full fuse generally allows the layers to spread and merge into a flatter band. Keep stacks consistent when you want even results, and avoid assuming that two thin rods will behave exactly like one thicker rod. Their contact points, spacing, and color composition can all affect the finished appearance.
Before committing to a large panel, fire a small sample using the same base glass, stringer diameter, layer count, and schedule. Record the line height after firing. This simple test lets you choose between a fine flat mark and deliberate relief without sacrificing an otherwise successful project.
What COE Rules Apply to Glass Stringers for Fusing?
Compatibility is the first rule when selecting glass stringers for fusing. The stringer must be compatible with the base glass beneath it, or the finished piece can develop internal stress, cracks, or breakage as it cools and anneals. A stringer is not automatically safe to use because it is thin, decorative, or sold for kilnwork. Its glass composition still needs to belong to the same compatible system as the sheet, billet, or casting glass in your project.
Match the stringer to the base glass system
For most studio work, begin by identifying the COE system of the base glass. Art Glass Supplies carries stringers for both Bullseye COE90 and Oceanside COE96 systems, allowing you to select an accent material that matches the glass you are already using. Keep COE90 stringers with a COE90 base, and keep COE96 stringers with a COE96 base. Do not combine the two systems in a fused piece simply because the colors or diameters appear similar.
COE, or Coefficient of Expansion, describes how glass responds dimensionally as temperature changes. If two joined glasses contract at different rates during cooling, the resulting tension has nowhere to go. The piece may crack during the annealing cycle, fail later at room temperature, or break when handled. The thinner profile of a stringer does not eliminate that risk. It only makes the component less visually obvious before the stress appears.
For a broader explanation of how expansion, viscosity, and firing behavior interact, review our COE compatibility guidance before combining materials.
| Factor | COE90 stringers | COE96 stringers |
|---|---|---|
| Primary brand. | Bullseye. | Oceanside. |
| Best paired with. | A COE90 base sheet. | A COE96 base sheet. |
| Compatibility rule. | Keep with COE90 glass. | Keep with COE96 glass. |
| Mixing COE systems. | Never mix into one fused piece. | Never mix into one fused piece. |
Keep the stringer in the same COE family as the base for the entire project.
Why one COE number is not the whole compatibility test
A COE label is useful for identifying a glass family, but it is not a complete prediction of how two glasses will behave. Compatibility depends on both expansion properties and viscosity characteristics. Viscosity affects how the glass moves and stiffens through the firing and cooling range, while expansion affects dimensional change as the material heats and contracts.
These properties also change across the temperature range. Compatibility matters from the annealing point down to room temperature, not only at one measured COE value. Expansion is not constant through the transition range, and a single number cannot describe a glass perfectly across every processing temperature. Treat an unfamiliar combination as untested until you confirm it with a small sample firing.
When the manufacturer or supplier does not clearly identify compatibility, treat the material as untested rather than assuming it will work. Test a representative stringer with the intended base glass, use a controlled firing schedule, and inspect the result after cooling. This is especially important when mixing brands within the same nominal COE family or when the stringer will be fused into a thick. Rigid design with little room to relieve stress.
Shop glass stringers for fusing in COE90 and COE96
Techniques for Placing and Fusing Stringers
Stringers reward careful handling. Their small diameter makes them ideal for crisp lines, borders, curls, and fine surface texture. But it also means that a small placement error can become obvious after firing. Before cutting or arranging any piece, confirm that the stringer and base glass belong to the same compatible COE system. A matching label is essential, although compatibility also depends on expansion and viscosity through the firing and cooling range.
Cut stringers cleanly
For short decorative segments, score the stringer lightly and snap it by hand at the score. This is fast and works well when the cut end will be hidden or incorporated into a larger pattern. When you need repeated lengths, a running plier or lens cutter gives more control and reduces accidental breakage. Specialized cutting tools are also useful when making tiny pieces for lettering-like marks, radiating lines, or detailed motifs. Wear eye protection and contain the fragments, because thin glass can produce sharp splinters when it breaks. Stringers can be bent, cut, and manipulated into intricate designs, as documented by glass fusing technique guidance.
Build the pattern on the base
Place stringers directly on a clean, fully supported base sheet. Straight pieces can form parallel lines, grids, or borders. Curved sections can create waves, petals, spirals, and loose abstract drawings. For a curl, shape the glass gently and avoid forcing a sharp bend that may leave a stressed point. If the design needs to remain open or dimensional, use an appropriate fiber paper, separator, or kiln furniture support according to the project plan and firing schedule.
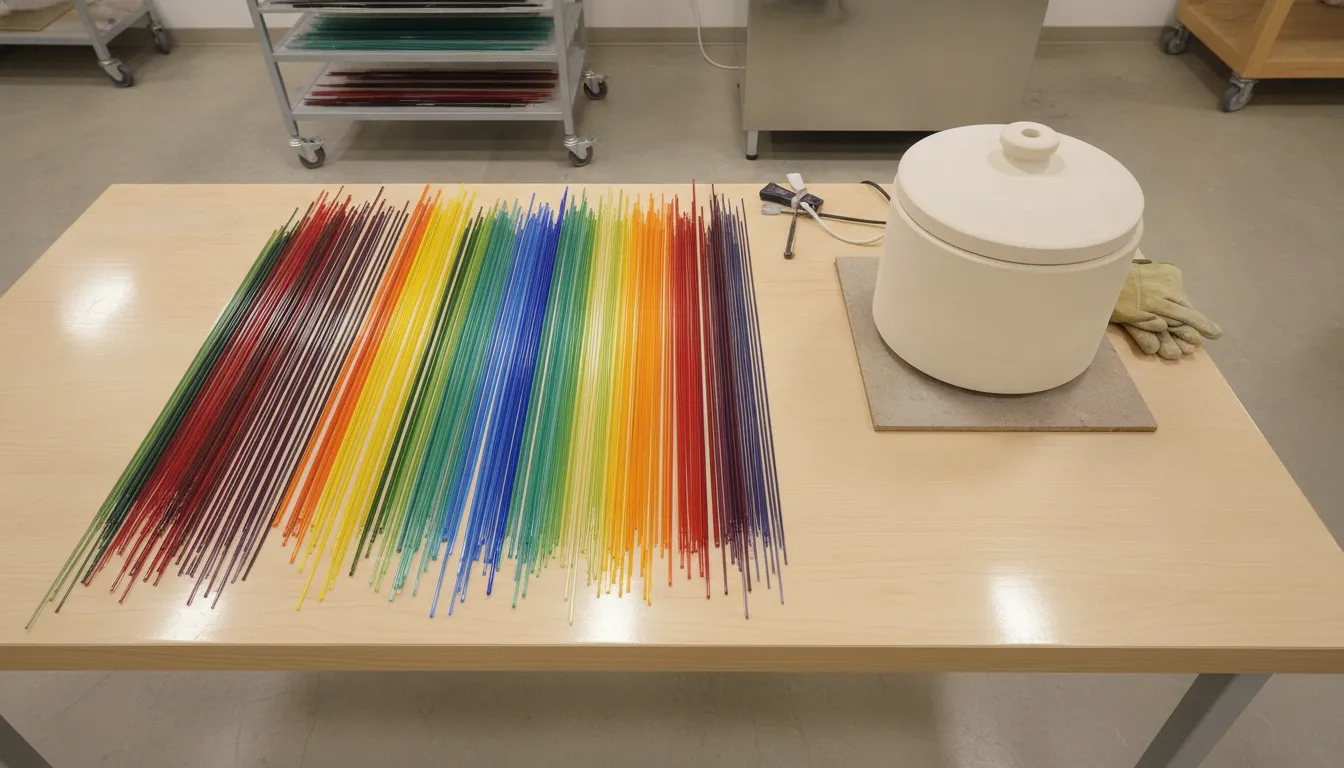
Lay each piece so its edges meet the neighboring glass flush. Gaps between adjacent stringers can trap air and leave pinholes or uneven surfaces after the glass softens. Pressing pieces together is not a substitute for a clean arrangement, so inspect the entire pattern from above before moving the shelf into the kiln. Remove dust, loose chips, and separator particles that could interrupt the surface.
Use controlled heat and the right fuse schedule
A gradual, controlled approach helps protect fine details and reduces the risk of devitrification or unwanted distortion. Follow the tested schedule for the specific glass system, thickness, and kiln rather than assuming that a hotter or faster firing will improve the result. A tack fuse holds more of the stringer’s relief and preserves a raised, tactile line. A full fuse allows the glass to flow farther, producing a flatter design with less surface definition. The final effect depends on stringer diameter, placement, peak temperature, hold time, and the complete annealing cycle.
- Confirm the stringer and base have the same compatible COE, then clean both surfaces.
- Cut and sort the stringers before placing them so the pattern can be arranged without repeated handling.
- Lay the pieces on the base with edges flush, adding an approved separator or fiber support where the design requires space.
- Inspect for gaps, dust, and unintended overlaps, then fire with a controlled schedule suited to a tack or full fuse.
- Allow the kiln to complete the annealing and cooling cycle before judging compatibility, shape, or surface quality.
For more guidance on heatwork, annealing, and surface design, use this glass fusing techniques guide alongside the firing recommendations for your chosen COE system.
How Do You Test Glass Stringers for Compatibility?
A stringer test gives you a practical warning before you commit two glasses to a larger fused piece. It reveals whether their contraction behavior is different enough to create stress during cooling, rather than relying on a COE label alone. For the clearest result, choose two glass rods with contrasting colors and exactly the same diameter. Use roughly equal amounts of each glass, because unequal diameters or volumes can produce a false reading.
Craig Milliron’s stringer compatibility test uses the following method:
- Heat one end of each rod until the glass is molten enough to join. Fuse the two rods together at their ends.
- Pull the joined glass into one continuous stringer. Pull straight, without twisting the glass. Twisting can cancel the visible effects that would otherwise show incompatibility.
- Allow the pulled stringer to cool, then cut a consistent length from the center of the pull. A consistent sample makes it easier to compare curvature from one test to another.
- Observe the cooled sample against a straight reference. A stringer that remains straight indicates that the two glasses are behaving closely enough for that test. A stringer that bends by itself indicates a difference in COE and that the glasses are not truly compatible for the intended application.
The direction of the bend provides useful information. The concave side of the curve identifies the glass with the higher COE, because that glass contracted more as the joined sample cooled. This is not merely a visual defect. The two materials were joined while molten, so different contraction rates can leave stress in a fused project. A dramatic curve is an especially clear reason to keep the glasses separate.
Interpret the result according to the scale of your project. Beads and other small objects may tolerate more curvature in a test than a large fused panel or dish, where accumulated stress has greater consequences. For larger work, treat any meaningful bend as a reason to stop and verify the manufacturer’s compatibility guidance, annealing schedule, and complete glass system before proceeding. The test is a screening tool, not a substitute for understanding how expansion and viscosity behave across the firing range.
When testing glass stringers for fusing, label each sample with the glass colors, diameter, and intended base glass. Keeping those records prevents an ambiguous result from becoming an avoidable crack in a finished piece.
Best Stringer Projects for Beginners
The best first project uses a small amount of glass, a simple firing schedule, and geometry that remains attractive even when placement is not perfectly uniform. These projects let you learn how glass stringers for fusing respond to heat without committing a large sheet or a complex design. Start with a base and stringers from the same COE system, then anneal the piece according to the base glass manufacturer’s schedule.
Fused coasters with parallel lines
A pair of small coasters is an efficient first exercise. Cut several stringers to similar lengths and place them in parallel rows over a compatible sheet-glass base. The straight layout makes spacing easy to evaluate, while a small base keeps the project manageable and the firing relatively short. Try a tack fuse first if you want the lines to retain visible relief. A fuller fuse will soften the rods into flatter bands. This project also teaches how slight gaps, overlaps, and color contrast change after firing.
Line-art pendants or wall tiles
For a more deliberate design, use short stringer segments to draw a leaf, geometric motif, or simple abstract outline on a small tile or pendant blank. The limited surface area makes it easier to position each segment with tweezers, and line art is forgiving because the design does not depend on perfect symmetry. Keep the perimeter clear of the edge unless the design specifically calls for a border. A small pendant or tile also lets you test a new color combination before using it in a larger panel.
Suncatchers with curved stringer borders
Curved borders introduce a useful next step without requiring advanced pattern work. Arrange stringers around a compact round, oval, or irregular base to create a frame, gently bending or cutting pieces as needed. The border can be continuous or intentionally segmented. A segmented border is often easier for a beginner because small gaps can look designed rather than accidental. Use a tack fuse when you want the curve and texture to remain legible, and confirm that the finished piece will be properly supported when hung.
Abstract strings-on-glass panels
An abstract panel is ideal when you want to explore movement instead of representational drawing. Place straight, diagonal, or gently curved stringers over a small compatible base, then add only a few larger glass elements for contrast. The forgiving geometry means that variations in spacing become part of the composition. Keep the first panel modest in size and record the stringer diameter, placement, and firing result so you can repeat what works.
Before choosing a project, review these glass stringer project ideas for additional layouts. Keep your studio setup practical with the right essential glass fusing supplies, and consult the broader glass fusing techniques guide when you are ready to compare tack fusing, full fusing, and annealing practices. Art Glass Supplies maintains COE90 and COE96 materials and is known for next-day shipping, so selecting the correct system before you begin is straightforward.
Shop glass stringers for your next fusing project
Frequently Asked Questions
How do you choose the right stringer diameter?
Choose a fine diameter for delicate lines, lettering, and small accents. Choose a thicker stringer when you want stronger visual weight or surface relief after firing. Test the first piece with your planned schedule because tack fusing and full fusing produce different profiles.
Can glass stringers from different COE systems be fused together?
Do not combine stringers and base glass solely because they look similar. Match the stringer’s COE system to the base, and consider viscosity and expansion behavior through the transition range. Glasses with the same stated COE can still be incompatible in practice, so fire a small sample before committing a full design.
What is the safest way to cut glass stringers?
For quick decorative work, snap a stringer by hand while protecting your eyes and controlling the small fragments. For repeatable lengths, use an appropriate glass-cutting tool. Keep cut pieces organized by COE and color so they cannot be mixed into the wrong project.
How can you test a stringer for compatibility?
Join equal amounts of two contrasting glass rods with the same diameter, pull them into one stringer without twisting, and let the sample cool. A visible bend indicates different contraction behavior. The stringer test method is described by Arrow Springs.
What can beginners make with fused stringers?
Begin with a small coaster, pendant, or abstract line design. Place short lengths over a compatible base, tack fuse to hold the arrangement, and evaluate the result before attempting a larger panel. Simple grids, borders, and curved motifs make useful practice projects.
Ready to Add Stringers to Your Next Fuse?
Precise stringer placement can give fused work cleaner lines, controlled texture, and more deliberate detail. Choose the compatible COE system for your base glass, then build your next project with materials suited to your firing schedule.
Shop Bullseye COE90 and Oceanside COE96 glass stringers and get the fusing technique support you need from Art Glass Supplies.