
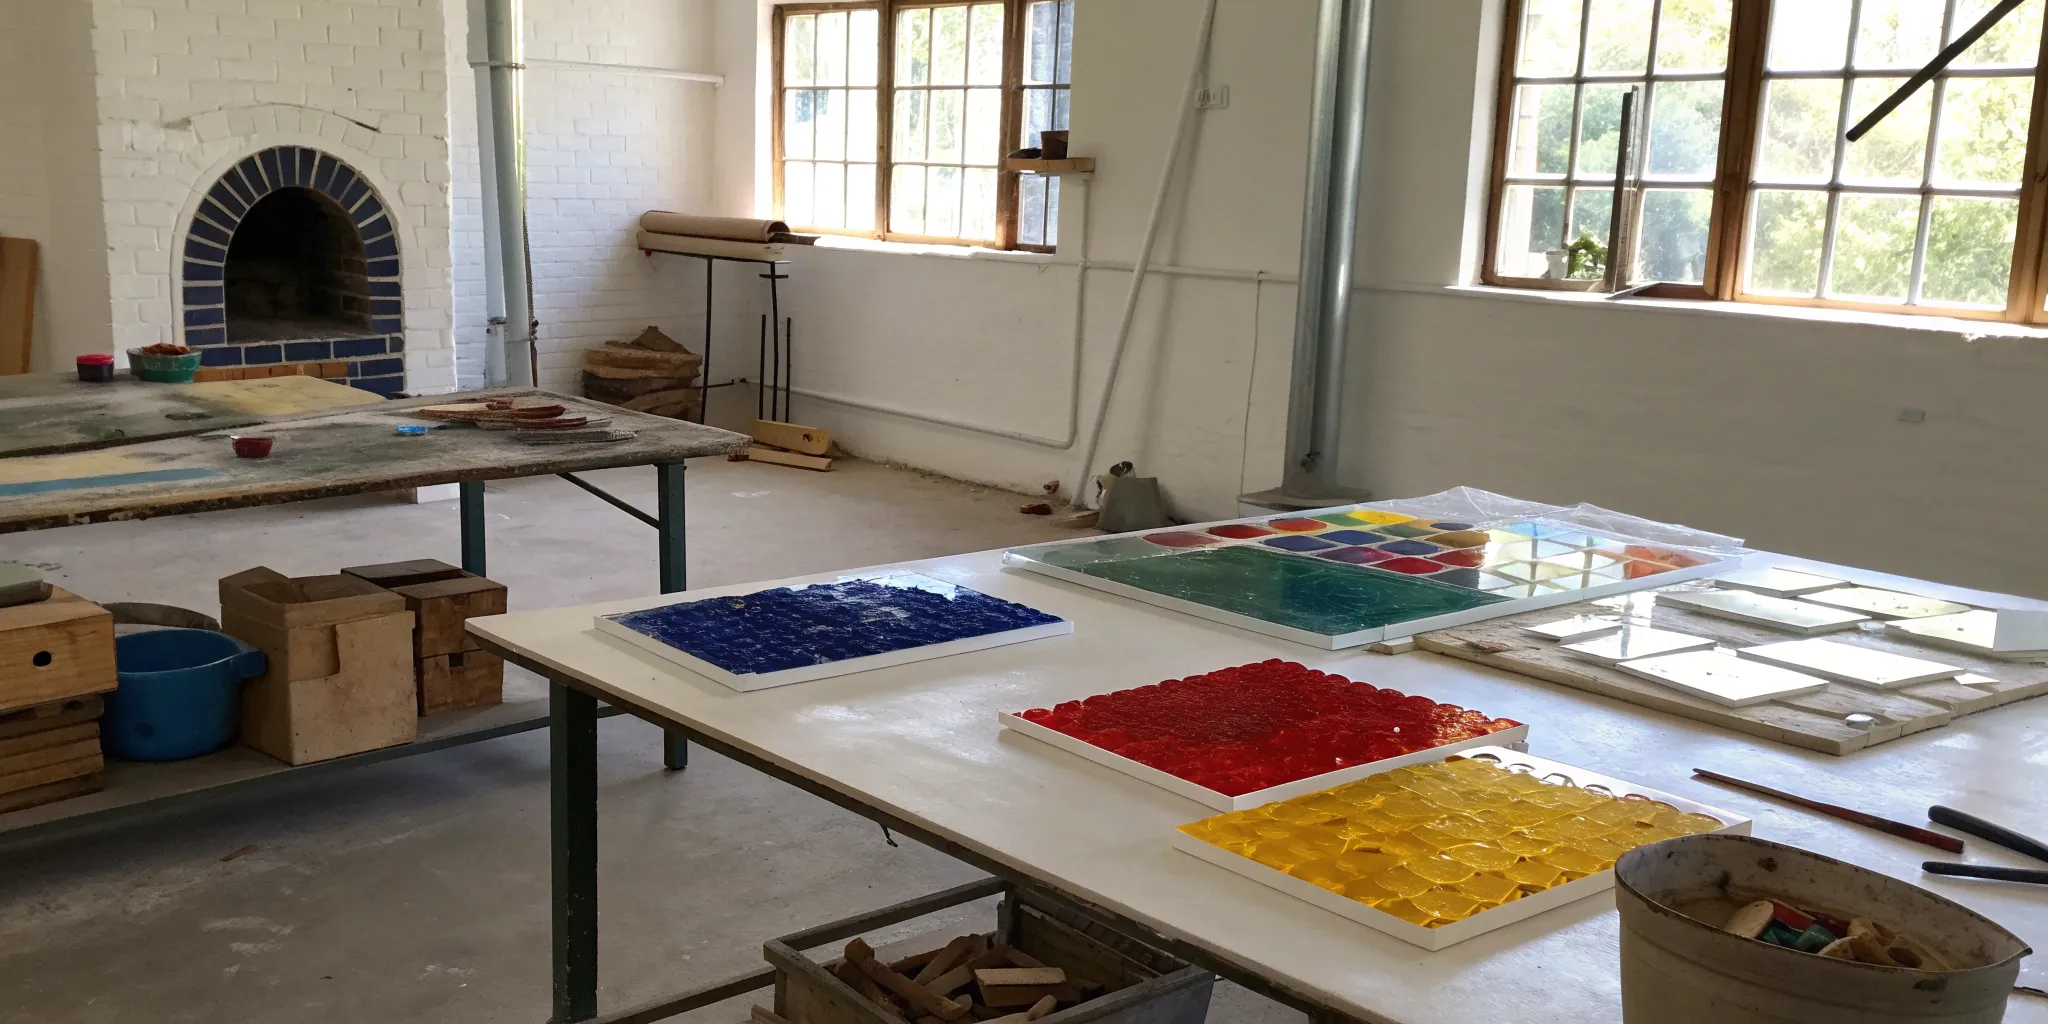
Ever wonder how fused glass artists create those stunning, seamless pieces? It’s not magic, but science. Every piece of glass must expand and contract at the same rate when heated. If they don’t, your beautiful creation will crack under stress. This compatibility is measured by the Coefficient of Expansion, or COE. So, what does COE mean in glass? It’s your key to success. By using a single system like COE 90 fusing glass, you remove the guesswork. This lets you focus on your art, knowing all your materials will fuse together perfectly.
Key Takeaways
- Master the golden rule of fusing: Always use glass with the same COE for every part of your project. Mixing 90 COE with other types is the most common reason pieces crack, so double-checking compatibility is the best way to ensure your work survives the kiln.
- Think beyond the sheet for richer designs: Your creative options expand when you combine different forms of glass. Use frit for texture, stringers for fine lines, and dichroic glass for a pop of shimmer to add depth and detail to your work.
- A clean, planned approach is key: Set your project up for success before it ever enters the kiln. A simple sketch helps finalize your design, thoroughly cleaned glass prevents blemishes, and a proper firing schedule ensures a perfect, durable fuse.
Getting to Know 90 COE Fusible Glass
If you’re getting into the wonderful world of glass fusing, you’ll hear the term “90 COE” a lot. Think of it as one of the most popular and versatile types of glass you can work with. In short, 90 COE fusible glass is a family of glass products specifically manufactured to be melted together in a kiln. The “fusible” part means it’s designed to play well with other glass when heated, creating a single, seamless piece of art. The “90 COE” is a technical number, but it’s the key to your success. It ensures that all the different pieces of glass in your project will expand and shrink at the same rate, which prevents your masterpiece from cracking.
What Does COE Mean in Glass?
Let’s get this bit of jargon out of the way, because it’s simpler than it sounds. “COE” stands for Coefficient of Expansion. It’s a measurement of how much the glass expands when it gets hot and shrinks when it cools down. Every piece of glass in your project must have the same COE to be compatible. Imagine trying to fuse two types of glass with different COEs. As they heat up, one expands more than the other. As they cool, one shrinks more. This difference in movement creates immense stress within the glass, which almost always results in cracks. By sticking with glass from the same family, like 90 COE, you ensure every component works together in harmony.
How COE is Measured
So, how do glass manufacturers get this number? Scientists measure COE by observing how much a specific length of glass expands for every degree Celsius its temperature rises. The result is a very long decimal number, but for simplicity, the art glass world shortens it. For example, “90 COE” actually refers to a COE of 90 x 10⁻⁷/°C. You definitely don’t need to remember the formula, but it’s helpful to know that this isn’t just an arbitrary number. It’s a precise, scientific standard that allows manufacturers like Bullseye Glass to produce a huge range of products—from sheets to powders—that you can trust will all fuse together perfectly in your kiln.
COE of Other Common Glass Types
In the world of art glass, you’ll primarily encounter two main families: COE 90 and COE 96. While that difference of six points might seem tiny, it’s a massive gap in fusing terms and will absolutely cause your project to crack. Think of them as two different languages that just can’t communicate. Beyond these, other types of glass have their own ratings. For instance, the glass in your windows typically has a COE between 84 and 87. Most stained glass isn’t tested for fusing compatibility at all, so its COE can be inconsistent. This is why it’s critical to buy glass specifically labeled as “fusible” and to stick to one COE system for an entire project.
What Makes 90 COE Glass Special?
So, what makes 90 COE glass special? Artists often choose it for its specific working properties. Generally, 90 COE glass is considered more stable and a bit “stiffer” than its main alternative, 96 COE glass. This means it tends to hold its shape well and fuses at slightly higher temperatures. Many artists are also drawn to the color palette of 90 COE glass, which is known for its rich, saturated hues. Because it’s a bit harder, it can be a great choice for projects where you want crisp details and minimal color bleed. The stability and vibrant colors of 90 COE make it a reliable medium.
Why Choose 90 COE for Your Projects?
One of the biggest reasons to work with 90 COE glass is the incredible variety available. Industry pioneers like Bullseye Glass built their entire system around this standard, resulting in a massive and coordinated palette of colors and forms. You can find everything from large sheets and delicate stringers to powdered frit and iridescent coatings, all guaranteed to be compatible. This extensive selection gives you immense creative freedom. You can confidently mix and match different forms of glass knowing they will fuse together perfectly. Whether you’re creating intricate jewelry, functional plates, or decorative art, the reliability and vast range of options make 90 COE a fantastic choice.
An Introduction to COE 96 Glass
Just as 90 COE is a complete system for glass fusing, so is its popular counterpart, 96 COE. This family of glass is manufactured with a slightly different recipe, giving it a unique Coefficient of Expansion. As you’ve learned, COE is the critical measurement of how much glass expands and contracts when heated. The number “96” simply indicates that this glass expands a tiny bit more than 90 COE glass. While the difference seems small, it’s more than enough to cause catastrophic cracks if the two types are mixed in a kiln. The golden rule remains the same: for successful fusing, you must stick to one COE system for your entire project. By choosing to work with COE 96 glass, you gain access to another full suite of compatible products designed to work together seamlessly.
The COE 96 Glass System
The COE 96 system operates on the exact same principle of compatibility as COE 90. Every product labeled “96 COE”—from sheet glass and stringers to frit and powders—is designed to fuse together without causing stress. Because it has a slightly higher rate of expansion, COE 96 glass often has a different firing schedule than COE 90. It tends to melt and become fluid at a lower temperature, which artists describe as being “softer.” This characteristic can be an advantage, as it allows colors to blend smoothly and can create a lovely, liquid finish in the final piece. This softness also makes it a favorite for techniques like kiln casting and pot melts, where encouraging the glass to flow is part of the creative process.
Key Manufacturers of COE 96 Glass
The world of COE 96 glass is supported by several excellent manufacturers. For years, Spectrum and Uroboros were the leading names in this space. While those brands have been discontinued, their beloved formulas are now produced by Oceanside Glass & Tile under the Fuse-It line, ensuring their vibrant color palettes live on. Another major player is Wissmach Glass Company, which produces a wide range of beautiful and reliable COE 96 fusible sheet glass. When you shop for COE 96 glass, you’ll often see these names. Knowing the key manufacturers helps you confidently select materials, knowing they are part of a tested and proven compatible system that artists have trusted for decades.
COE 90 vs. COE 96: Which is Right for You?
Choosing between COE 90 and COE 96 is less about which one is “better” and more about which one is right for your artistic vision and working style. Neither system is inherently superior; they simply offer different characteristics. Many artists end up working with both, dedicating separate areas of their studio to keep the materials from getting mixed up. Your decision might come down to a specific color you fall in love with, the feel of the glass as you cut it, or practical considerations like your budget. The best way to decide is to understand their key differences and perhaps even experiment with a small project in each system to see which one you prefer.
Comparing Color Palettes
One of the most significant differences between the two systems is their color palettes. While both offer a huge range of hues, they have distinct personalities. COE 90 glass, primarily from Bullseye, is often celebrated for its rich, deep, and complex colors. It’s sometimes described as having a more “artistic” or painterly palette. On the other hand, the COE 96 family is known for its bright, crisp, and vibrant colors. You’ll find many pure, clean primary and secondary colors that are fantastic for creating bold, graphic designs. If your work relies on subtle shading and layered depth, you might lean toward COE 90. If you want your pieces to pop with brilliant, straightforward color, COE 96 could be your perfect match.
Ease of Use and Cutting
The working properties of the glass also differ. As mentioned, COE 96 is generally considered a “softer” glass. This means it melts at a lower temperature and flows more readily in the kiln. This can make it easier to achieve a full, smooth fuse. Some artists also find that COE 96 is slightly easier to cut by hand, which can be a welcome advantage for beginners or those cutting intricate shapes. In contrast, COE 90 is “stiffer,” holding its shape and edges more defined at higher temperatures. This quality is ideal for projects where you want to minimize color bleeding and maintain crisp details between different elements of your design.
Price and Availability
For many artists, especially those just starting or working on a large scale, budget is a key factor. Historically, COE 96 glass has often been the more economical option, making it a popular choice for hobbyists, teaching studios, and production artists. However, prices can vary widely based on the specific color, texture, or special coating on the glass. Both COE 90 and COE 96 systems are widely available from major suppliers, offering a complete range of compatible sheets, frits, and accessories. The best approach is to browse the selections for both systems to compare the costs of the specific colors and forms you need for your project.
When Does COE Not Matter?
After emphasizing the importance of COE, it might be surprising to learn that there are glass art forms where it doesn’t matter at all. The concept of COE is exclusively for “hot” or “warm” glass techniques—any process where you are heating glass in a kiln to its melting or fusing point. If the glass isn’t being melted together, the different expansion rates can’t create stress. This is a crucial distinction that can save you a lot of unnecessary worry and open up your creative possibilities when working with “cold” glass techniques, where the pieces are assembled without heat.
Stained Glass and Copper Foil Projects
The most common example where COE is irrelevant is traditional stained glass. Whether you are using the lead came or copper foil method, you are simply cutting pieces of glass and fitting them together like a puzzle. The pieces are joined by metal, not by heat, so they never melt into one another. In these projects, you are free to mix glass from any manufacturer, regardless of its COE. You can use a piece of Bullseye (COE 90) next to a piece of Wissmach (COE 96) next to a piece of antique stained glass with an unknown COE, and your panel will be perfectly stable. This freedom allows stained glass artists to choose pieces based purely on color, texture, and transparency.
Your Guide to 90 COE Glass Types
One of the best parts about working with 90 COE glass is the sheer variety of forms it comes in. It’s not just about flat sheets; you can find everything from crushed glass to thin, spaghetti-like strands. This diversity is what gives you so much creative freedom. You can layer different types of glass to build texture, combine colors in unique ways, and add intricate details that make your work stand out. Think of these different forms as your artist’s palette. By learning how to use each one, you can create everything from delicate jewelry to stunning sculptural pieces.
Whether you’re just starting or looking to try a new technique, understanding the different types of COE90 glass is the first step. Let’s walk through the most common forms you’ll encounter and explore how you can use them in your projects. You’ll quickly see how combining sheet glass with frit, stringers, and specialty glass can open up a whole new world of design possibilities.
Creating with Sheet Glass
Sheet glass is the foundation of many glass fusing projects. It comes in flat pieces of various sizes and thicknesses and serves as the base for your designs. You can cut it into specific shapes to create your main structure or use a solid piece as a canvas for layering other glass elements. Brands like Bullseye Glass are well-known for producing high-quality 90 COE sheet glass that is reliable and consistent, making it a favorite among artists. Whether you need transparent, opaque, or streaky colors, sheet glass provides the starting point for countless creative ideas.
Adding Detail with Frit and Powders
If you want to add texture, shading, or painterly effects to your work, frit and powders are your go-to materials. Frit is simply glass that has been crushed into small particles, ranging from coarse chunks to fine, sand-like grains. Powders are even finer. You can sprinkle frit over sheet glass to create a speckled or textured surface, or use powders to blend colors smoothly. They are perfect for creating gradients, filling in small areas with color, or adding a delicate dusting of sparkle to your final piece.
Drawing Lines with Stringers and Rods
Think of stringers and rods as tools for drawing with glass. Stringers are thin, spaghetti-like strands of glass, while rods are thicker, more like pencils. Both are fantastic for adding fine lines, intricate details, and crisp outlines to your designs. You can lay them on top of sheet glass to create patterns, write words, or form delicate, web-like structures. They are incredibly versatile and allow for a level of precision that’s hard to achieve with other forms of glass, making them essential for detailed work.
Making it Shine: Dichroic & Specialty Glass
When you want to add a little extra flair to your project, specialty glass is the way to go. The most popular type is dichroic glass, which has a special metallic coating that makes it shimmer with different colors depending on the angle of the light. It’s perfect for creating eye-catching jewelry and decorative accents. You can also find other specialty options like iridescent glass, which has a subtle rainbow sheen, or glass with pre-made patterns and textures. These unique materials can add depth and a “wow” factor to any piece.
What Can You Make with 90 COE Glass?
The versatility of 90 COE glass means you can create an incredible range of projects. It’s a popular choice for making beautiful beads, pendants, and earrings because of how well it holds detail and color. You can also use it to craft functional art like plates, bowls, and coasters by slumping it over molds in a kiln. For larger-scale work, 90 COE glass is excellent for creating vibrant mosaics, decorative tiles, and even small sculptures. All of these projects are made possible by firing the glass in a kiln, which melts the pieces together into a single, unified creation.
Setting Up for Success: Tools & Safety
Getting your supplies and workspace ready is one of the most exciting parts of starting a new project. With the right tools and a few safety precautions, you can set yourself up for a smooth and creative fusing experience. Think of this as building your artist’s palette—gathering all the essentials you need before you start creating. A little preparation goes a long way in glass art, helping you avoid common frustrations and letting you focus on bringing your vision to life.
Your Essential Glass Fusing Toolkit
Before you can start creating, you’ll need to gather a few key supplies. The star of the show, of course, is the glass itself. For your projects to fuse correctly, you’ll want a variety of COE90 glass products, including base sheets, colorful crushed glass known as frit, and thin rods called stringers. You’ll also need a quality glass cutter for shaping your pieces and running pliers to help break the glass along your score lines. A kiln is the most significant piece of equipment, as it’s where the magic of fusing happens. Finally, don’t forget kiln paper or kiln wash to protect your kiln shelf from melted glass.
Getting the Temperature Right
Your kiln is your most powerful tool, but you need to know how to use it. Every glass fusing project follows a specific firing schedule—a set of instructions that tells the kiln how hot to get and for how long. The right schedule ensures your glass melts smoothly and cools down properly in a process called annealing. It’s also critical that every piece of glass in your project has the same COE. Mixing different COEs will cause stress in the glass as it cools, leading to cracks. Taking the time to understand your kiln and your glass will save you from a lot of heartaches later.
Safety First: Simple Rules for Fusing
Working with glass is incredibly rewarding, and following a few simple safety rules makes it a stress-free hobby. First, always wear safety glasses. Tiny, sharp shards of glass can fly off when you’re cutting or breaking pieces, and protecting your eyes is non-negotiable. Keep a small brush and dustpan handy to clean up glass dust and small scraps from your work surface frequently. When handling larger sheets of glass, be mindful of the sharp edges. And as we mentioned, always double-check that you’re using glass with a compatible COE. This simple step is a safety measure for your project, preventing it from breaking apart.
How to Set Up Your Workspace
Creating a dedicated space for your glass art helps keep you organized and safe. You don’t need a huge studio—just a sturdy, flat table for cutting and assembling your projects. Good lighting is also a must. Before you fire up your kiln, you need to prepare the shelf. Applying kiln wash prevents the glass from sticking permanently. You’ll want to apply at least four thin coats, letting each one dry completely. Brush each layer in a different direction—side to side, then top to bottom, then diagonally—to ensure you get smooth, even coverage for your shelves and molds.
Techniques for a Perfect 90 COE Fuse
Working with 90 COE glass is incredibly rewarding, and with a few key tips, you can set yourself up for success right from the start. Think of these as your friendly guideposts to help you create beautiful, durable pieces you’ll be proud of. It’s all about being thoughtful in your approach, from the initial design to the final polish. A little bit of planning and attention to detail can make a huge difference, helping you avoid common frustrations and get straight to the fun part: watching your artistic vision come to life in the kiln. Let’s walk through some practical advice to get you fusing like a pro.
How to Plan Your Fusing Project
Before you even cut your first piece of glass, take a moment to map out your project. A simple sketch can help you visualize the final piece, decide on colors, and figure out the layers. This is also the time to think about your firing schedule. Different types of glass and project thicknesses require specific heating and cooling cycles to fuse properly. Do a little research to find a schedule that matches your materials and desired outcome. Having a clear plan helps you gather all the necessary COE90 glass and tools ahead of time, making the entire process smoother and more enjoyable. It’s much easier to make adjustments on paper than it is once the glass is already in the kiln.
Understanding Your Kiln’s Firing Schedule
Your kiln is your most important tool, and understanding how it works is key to successful fusing. Temperature control is everything. Even small variations can affect the outcome, so it’s worth getting to know your kiln’s specific quirks. The most critical rule is to never mix glass with different COEs in the same project. Mismatched COEs will expand and contract at different rates, leading to stress that can cause your beautiful piece to crack, sometimes immediately and sometimes days later. Stick exclusively with compatible 90 COE glass for your project. For beginners, it’s a great idea to follow established firing schedules and keep a log of your settings and results for each project. This will help you learn what works best with your specific kiln.
Key Fusing Stages and Temperatures
A firing schedule isn’t just about hitting one magic number. It’s a carefully planned sequence of temperature changes that guides your glass through different stages of transformation. Each stage serves a specific purpose, from gently shaping the glass to melting it into a seamless whole. Understanding these key stages—slumping, tack fusing, full fusing, and annealing—is what gives you control over the final look and feel of your piece. By mastering the temperatures for each, you can decide whether you want a textured, dimensional piece or a smooth, glossy finish.
Slumping
Slumping is the process of heating a piece of glass just enough for it to soften and take the shape of a form beneath or inside it. This typically happens at lower temperatures, around 1,200°F to 1,300°F. Think of it as gently draping your glass over a ceramic mold to create a bowl, a plate, or a wavy piece of art. The beauty of slumping is that it shapes the glass without completely melting your design. Any details you created on the flat piece, like layered colors or frit patterns, will remain intact as the glass bends into its new form.
Tack Fusing
If you want to join pieces of glass together while keeping some texture and dimension, tack fusing is the technique you’ll use. At temperatures around 1,350°F, the glass becomes hot enough for the separate pieces to stick to each other securely, but not so hot that they melt completely flat. This is perfect for creating designs where you want some elements to remain raised, like laying stringers on a base to create a linear pattern. The result is a single, fused piece that still has a tactile, layered surface, preserving the individual shapes of the glass you used.
Full Fuse
A full fuse is what most people picture when they think of glass fusing. This happens at high temperatures, usually between 1,450°F and 1,500°F, where the layers of glass melt completely into one another. The result is a single, smooth, and glossy piece with no raised edges or texture. All the individual components blend seamlessly into a uniform surface. This is the goal for projects like coasters, pendants, or tiles where you want a perfectly flat and integrated design. A standard full fuse of two layers of 3mm glass will naturally settle to a thickness of about 6mm.
Annealing
No matter which fusing technique you use, annealing is the most critical final step. This is the controlled cooling process that allows the glass to stabilize and relieve internal stress. After reaching its top temperature, the glass is held at an annealing temperature—around 1,000°F for 90 COE—before it is cooled slowly to room temperature. Skipping or rushing this step is the surest way to end up with a cracked piece, as the stress from rapid cooling will cause it to break. Modern kilns with digital controllers make this process easy by automatically running the proper annealing schedule for you.
Common Fusing Mistakes to Avoid
We all make mistakes, but knowing what to watch out for can save you a lot of time and heartache. One of the biggest slip-ups is ignoring glass compatibility—always double-check that you’re using only 90 COE glass. Another common issue is inadequate cleaning. Tiny specks of dust or fingerprints can cause bubbles or blemishes in your final piece, so always clean your glass thoroughly before firing. Using incorrect firing schedules can also lead to disaster, so don’t just guess. Finally, pay attention to your kiln loading and shelf preparation. Always use kiln wash or shelf paper to prevent the glass from sticking, and make sure your pieces, especially if you’re using molds, have enough space around them for even heating.
Tips for a Flawless Finish
Ready to create something amazing? Let’s focus on the habits that lead to a perfect fuse every time. First and foremost, only use compatible glass with the same COE. This is the golden rule of glass fusing. Next, make cleanliness a priority. Wipe down every piece of glass with a lint-free cloth and a glass cleaner before you assemble your project. Proper annealing—the slow cooling phase of the firing schedule—is also essential for creating a strong, stable piece that will last. Don’t be tempted to rush this step! If you’re trying a new technique or color combination, consider running a small test fire first. This lets you see the results on a small scale before committing to a larger project.
How to Store and Care for Your Glass
Once you start building your collection of beautiful glass, you’ll want to protect your investment. Proper storage and care not only keep your materials in pristine condition but also set you up for success when it’s time to create. A little organization goes a long way in preventing frustrating mistakes, like accidental breaks or a project cracking in the kiln. Let’s walk through some simple, effective habits for managing your glass supply.
Storing Your Glass the Right Way
Keeping your glass organized is about more than just a tidy studio—it’s essential for successful fusing. The most important rule is to store your glass by its Coefficient of Expansion (COE). Mixing up COE90 glass with COE96 is a recipe for disaster, as incompatible glass will crack during firing or cooling. Use a labeling system and dedicated shelves or bins for each COE. Store sheets vertically in slots or flat with separators to prevent scratches. Before you put any glass away, give it a quick wipe to remove dust and debris, ensuring it’s clean and ready for your next project. This simple habit saves you cleaning time later.
How to Clean and Handle Fusible Glass
For a flawless finish, your glass needs to be perfectly clean before it enters the kiln. Fingerprints, dust, and oils can leave unwanted marks or cause devitrification (a cloudy haze) on the surface after firing. The best way to clean your pieces is with a soft, non-abrasive cloth and lukewarm water. If you need a bit more cleaning power, a 50/50 mix of isopropyl alcohol and distilled water works wonders. Always dry your glass thoroughly with a lint-free cloth. When you handle your pieces, try to hold them by the edges to minimize fingerprints. This careful approach helps maintain the glass’s integrity and ensures your final artwork looks polished and professional.
How to Organize Your Glass Supply
A well-organized workspace makes the creative process so much smoother. Beyond sorting your sheet glass, find a system for your other materials. Use clear, labeled containers for frits, powders, and stringers so you can see what you have at a glance. Organizing your tools is just as important. When it comes to your equipment, proper prep is key. For instance, always make sure your kiln shelves are ready for a project. Applying at least four thin coats of kiln wash, with each layer brushed in a different direction, creates a protective barrier that prevents glass from sticking to your kilns. This small step can save you a major headache.
How to Prevent Scratches and Breaks
Protecting your glass from physical damage starts with mindful handling. To prevent scratches, never slide glass sheets against each other. Instead, lift them carefully. If you need to stack sheets, place paper or thin foam between each one as a cushion. When it comes to preventing breaks during firing, the golden rule is to double-check your COE. Every single piece in your project, from the base sheet to the tiniest bit of frit, must be compatible. This is the single most effective way to keep a fused glass project from breaking in the kiln. Taking a moment to verify compatibility before you start assembling will save you from potential disappointment and wasted materials.
How to Check Glass Quality and Compatibility
When you’re investing time and materials into a new piece, the last thing you want is for it to crack in the kiln. Taking a few moments to check for quality and compatibility can save you from that exact heartbreak. Think of it as setting your project up for success from the very beginning. High-quality, compatible glass will fuse more predictably, giving you cleaner results and the confidence to try more complex designs. It’s not about being overly technical; it’s about understanding what makes glass play well together. By paying attention to a few key details before you even start cutting, you can ensure your finished piece is strong, stable, and beautiful.
Why Color Consistency Matters
One of the first signs of quality glass is consistent color. When you buy a sheet of, say, Bullseye Royal Blue, you want it to look the same from edge to edge and be a close match to the last sheet you bought. Reputable manufacturers are known for this reliability. While both major COE types offer beautiful palettes, COE90 glass is particularly known for its rich, stable hues, partly due to its lower expansion rate. This stability helps maintain color integrity during firing. When you’re shopping, look for glass that appears uniform in color and free of unexpected streaks or blemishes, as this will translate to a more predictable and professional-looking final product.
How to Test for Stability
Here’s the most important rule in glass fusing: never mix glass with different Coefficients of Expansion (COE) in the same project. Fusing COE90 glass with COE96 glass is a recipe for disaster. As the piece cools, the two types of glass will shrink at different rates, creating internal stress that will almost certainly cause it to crack. The easiest way to ensure stability is to commit to one COE for a project and make sure every single component—from the base sheet to the tiniest sprinkle of frit—is a match. Always double-check the labels on your glass to confirm its COE before you start building your piece.
Why Temperature Precision is Crucial
Compatibility extends beyond the glass itself and into your firing process. Achieving the perfect fuse depends heavily on temperature precision, which is why a reliable kiln is your most important tool. Different projects require different firing schedules; a thick piece needs to heat up and cool down much more slowly than a thin one to prevent thermal shock. Researching and following a firing schedule designed for your specific glass and project thickness is essential. This precision helps you avoid issues like bubbling, devitrification (a cloudy surface), or an incomplete fuse, ensuring your glass melts together exactly as you planned.
Beyond COE: Other Factors in Compatibility
While matching your COE is the golden rule of glass fusing, it’s not the whole story. Think of it this way: just because two people speak the same language doesn’t mean they have the same personality. Similarly, two pieces of glass with the same COE can still behave differently when they get hot. This is why reputable manufacturers go a step further. They don’t just match the Coefficient of Expansion; they test their entire line of glass to ensure it’s truly compatible in the kiln. This means you can confidently mix an opaque sheet with an iridescent one, knowing they are designed to melt and cool together harmoniously, without unexpected results.
Viscosity and Surface Tension
Two of the biggest “personality traits” of glass are viscosity and surface tension. Viscosity is just a fancy word for how thick or runny the glass is when it’s molten. A glass with high viscosity is “stiffer” and holds its shape more, while a low-viscosity glass is more fluid. If you fuse two glasses with the same COE but different viscosities, one might spread out more than the other. Surface tension is the force that makes molten glass want to pull itself into a rounded shape, which is why the edges of your projects soften in the kiln. This is why sticking with a tested system like Bullseye’s COE90 glass is so helpful. They’ve already done the hard work of ensuring that the viscosity and surface tension of their products are balanced to work well together. This level of testing is what allows you to fuse different colors and types with predictable, beautiful results.
How to Run a Simple Compatibility Test
Before you commit your best glass and hours of work to a large design, run a small test. This is especially smart when you’re trying a new technique, a new color combination, or even a new-to-you kiln. A compatibility test can be as simple as fusing a few small squares of glass together to see how the colors interact and to confirm your firing schedule. This little experiment can reveal potential problems, like colors reacting unexpectedly or air getting trapped between layers. It’s a low-risk way to work out the kinks, build your confidence, and make sure your final piece turns out just right.
Where to Buy 90 COE Glass
Once you’re ready to start your next project, you need to find the right materials. Knowing where to look for high-quality 90 COE glass can save you time and ensure your finished piece looks exactly as you envisioned. Whether you prefer shopping online or in person, there are plenty of great options available for every type of artist.
Finding Reputable Online Retailers
For the best selection, online retailers are often your best bet. You can browse a massive inventory of colors, styles, and brands from the comfort of your studio. Reputable online stores offer everything from basic sheets to specialty dichroic glass, giving you access to materials you might not find locally. When you’re just starting, look for a supplier that carries trusted brands like Bullseye Glass, a true pioneer in the fusible glass world. You can find an incredible array of COE90 glass perfect for any fusing project, making it easy to find exactly what you need all in one place.
Sourcing from a Specialized Supplier like ArtGlassSupplies.com
When you’re serious about glass fusing, where you buy your supplies makes a huge difference. A specialized supplier like ArtGlassSupplies.com understands that the golden rule of fusing is compatibility. You can shop with confidence, knowing you’re getting a comprehensive selection of COE90 glass where every sheet, stringer, and sprinkle of frit is designed to work together. This eliminates the risk of accidentally mixing COEs, which is the number one cause of cracked projects. Beyond just ensuring compatibility, a dedicated glass supplier gives you access to a much wider creative palette, from specialty dichroic glass to a huge variety of slumping and draping molds. Sourcing from a specialist sets you up for success, letting you focus on your art with the confidence that your materials are high-quality and reliable.
Shopping at Your Local Art Supply Store
Sometimes, you just need to see the glass in person. Local art supply stores are fantastic for this. Being able to hold a piece of glass, see how the light hits it, and feel its texture can be incredibly helpful, especially when you’re trying to match colors or find inspiration. While their selection might be smaller than a large online warehouse, local shops are a great resource for grabbing a few essential sheets or when you need something for a project right away. It’s also a wonderful way to connect with other glass artists in your community.
Should You Buy Your Glass in Bulk?
If you’ve found yourself deep in the world of glass fusing, buying in bulk is a smart move. It’s a cost-effective way to build your collection and ensure you always have your favorite colors and materials on hand. Many suppliers offer variety packs of sheet glass or larger containers of frit, which brings down the cost per piece. This is perfect for artists who work on large-scale projects or run their own small business. Stocking up on your most-used supplies means you can spend less time shopping and more time creating.
What to Know About Shipping Glass
Ordering glass online is incredibly convenient, but it’s wise to pay attention to the shipping details. Glass is fragile, so you want to order from a company that knows how to pack it securely for a safe journey to your studio. Some materials may also have special shipping requirements that can affect the cost. Before you check out, take a moment to review the retailer’s shipping policies. This quick step helps you understand the entire cost upfront and avoid any surprises, ensuring your beautiful new glass arrives ready for the kiln.
How Much Does 90 COE Glass Cost?
When you’re ready to buy your supplies, you’ll notice that the price of 90 COE glass can vary quite a bit. Understanding what goes into that cost will help you make smart purchasing decisions that fit your budget and your artistic vision. Think of it not just as buying materials, but as investing in the quality and success of your final piece. From small bags of frit to large sheets of iridescent glass, there’s an option for every project and every price point.
What Factors Affect the Price of Glass?
The cost of COE90 glass depends on several factors: the type, size, and color. For example, you can find individual colors of glass frit starting around $4, which is perfect for adding small details. If you’re building a palette, you might find multi-color packs that range from $150 to $170. Sheet glass prices also vary widely based on size and complexity, with small pieces available for under $5 and larger or more specialized sheets costing significantly more. This range means you can start small and experiment without a huge initial investment, or you can stock up on your favorite materials for larger projects.
Investing Smartly in Your Glass Supply
Investing in high-quality 90 COE glass is an investment in your art. Brands like Bullseye Glass were pioneers in creating glass specifically for fusing, and their products are known for reliability and stunning results. While premium glass might have a higher price tag, you’re paying for consistency and innovation. Using dependable materials means fewer surprises when you open the kiln and a more predictable creative process. When your materials are reliable, you can focus on your design and technique, knowing the glass will perform as expected. This peace of mind is often worth the extra cost.
How to Balance Quality and Price
While it’s tempting to go for the cheapest option, it’s important to balance quality and price. COE90 glass is known for its stability and lower expansion rate, which leads to stronger, more durable fused pieces. In comparison, COE96 glass often has a more attractive price point but comes with a higher expansion rate. This can sometimes affect the richness of certain colors and the overall stability of the project. Understanding these fundamental differences helps you choose the right material for your specific goals. For intricate work where stability is key, sticking with COE90 is usually the best path forward.
Choosing the Right Glass for Your Budget
The great thing about glass art is its scalability. You don’t have to buy everything at once. With prices for 90 COE glass ranging from a few dollars for small pieces to over $500 for large packs, you can find materials that fit your budget. If you’re just starting, consider buying smaller sheets or a curated frit palette to experiment with color and texture. This allows you to learn the properties of the glass without committing to a large, expensive inventory. As you grow more confident, you can gradually invest in larger quantities and more specialized types of glass for your projects.
Frequently Asked Questions
Why would I choose 90 COE glass instead of 96 COE? Think of it as choosing between different types of paint, like oil versus acrylic. Both are great, but they behave differently. 90 COE glass is generally a bit “stiffer,” meaning it holds its shape and fine details well at high temperatures. It’s also known for its incredibly rich and stable color palette, thanks to industry leaders like Bullseye Glass who built their entire system around it. Artists often choose 90 COE for its reliability and the vast, coordinated selection of materials available.
What really happens if I mix different COEs in my kiln? Mixing glass with different COEs is the one mistake that will almost certainly ruin your project. As the piece heats and cools, the two types of glass expand and shrink at different rates. This creates immense stress within the glass. The result is a crack, which might happen dramatically in the kiln or, even more frustratingly, days later as the piece sits on your shelf. To save yourself the heartache, always dedicate a project to a single COE and double-check every piece of glass you use.
I’m just starting out. What are the essential supplies I need for my first 90 COE project? You can get started with a surprisingly simple toolkit. You’ll need a few sheets of 90 COE glass to use as a base, some decorative elements like frit or stringers, a quality glass cutter, and a pair of running pliers to make clean breaks. The most important equipment is your kiln, and you’ll also need kiln wash or shelf paper to protect your kiln shelves from sticking. With these basics, you have everything you need to create your first fused piece.
My finished piece has a cloudy or hazy look. What causes that? That cloudy finish is likely devitrification, which is a crystallization that forms on the glass surface during firing. It’s a common issue that is usually caused by one of two things: contaminants on the glass or an incorrect firing schedule. Tiny specks of dust or fingerprints can trigger it, so cleaning your glass thoroughly before firing is essential. It can also happen if the glass is held at a high temperature for too long. Always start with clean glass and a trusted firing schedule to keep your projects clear and glossy.
Can I use my 90 COE sheet glass for stained glass projects too? Yes, you absolutely can! While 90 COE glass is specifically tested to be fusible, at its core, it’s still high-quality art glass. It cuts, grinds, and handles beautifully, making it perfectly suitable for traditional stained glass techniques like copper foil or lead came. Using fusible-grade glass for stained glass is a great way to ensure your materials are versatile, especially if you enjoy working in both art forms.
Related Articles
- Pop Art Frit Blend Coarse Grain COE90 – COE90 Frit Blends
- Precut Dichroic Glass Circles Rainbow 2 on Clear Glass COE90 – COE90 Glass
- Precut Dichroic Glass Circles – Candy Apple Red on Black Glass COE90 – COE
- Gold Purple Opalescent Frit Balls COE90 – COE90 Frit Balls
- Icicle Clear Transparent Oceanside COE96 Glass – COE96 Transparent 3mm