
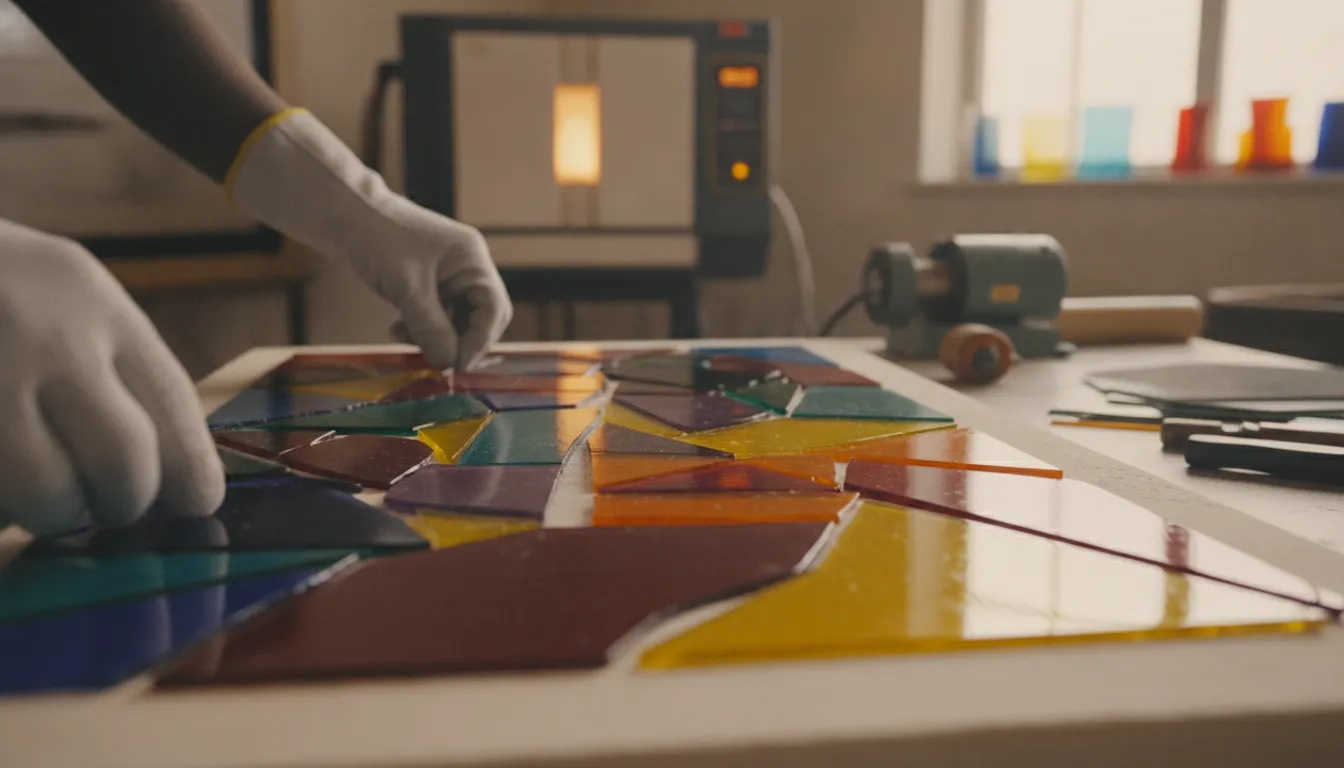
Opening a kiln to find a cracked project is the most frustrating moment in glass art. This heartbreak usually comes from mixing incompatible sheets of glass.
Standard glass fusing techniques use a kiln to heat compatible sheet glass until it softens and joins into a single piece. The process typically operates around 1490 degrees Fahrenheit for a full fuse, though artists use different temperature ranges to achieve various textures and shapes. The chemistry of the glass determines how it flows at high heat. To prevent stress cracks, select glass with the same coefficient of expansion and never mix COE 90 with COE 96 in the same project. By learning the fundamental heat steps and material rules, you can consistently produce clean, strong art.
Whether you want to make jewelry components or large architectural panels, understanding how glass behaves under extreme heat is essential. The journey begins with mastering the core process of glass fusion.
Glass Fusing Techniques: What Is Glass Fusing and How Does It Work?
Glass fusing is the process of joining compatible sheets of glass in a kiln by heating them until they soften and bond together. The kiln temperature ranges from 1350 degrees Fahrenheit for the lowest tack fuse to 1490 degrees Fahrenheit for a full fuse. Through this controlled heat work, multiple layers of glass can merge into a single solid form. The heat of the kiln softens each layer to its softening point, allowing the pieces to flow together into one cohesive surface.
While fusing joins flat sheets, slumping uses a mold to shape the hot glass into a curved form. Artists frequently combine these glass fusing and slumping methods to create functional art like bowls, plates, and dishes. Glass projects can range from small jewelry components to large architectural panels.
The Chemistry and Physics of Glass
Glass fusing is a precise science that relies on clear rules of chemistry and physics. The most important concept to understand is the Coefficient of Expansion, or COE. The COE measures how much a particular type of glass expands when heated and contracts when cooled. This expansion rate is unique to each glass formulation and is determined during manufacturing.
If you mix glasses with different expansion rates, internal stress builds up as the piece cools. This stress causes the finished work to crack or shatter, sometimes immediately but often days or weeks later. For successful results, you must choose compatible glass types that share the same COE. In the art studio, the two most common options are COE 90 and COE 96. You must commit to one type for the entire project and never mix them. Pay close attention to glass compatibility before you fire your kiln.
Viscosity and Heating Principles
The viscosity of glass determines how it flows at high temperatures. Viscosity measures how much a liquid resists flow. When the glass is cold, it is effectively a solid with extremely high viscosity. As the kiln temperature climbs, the glass becomes less viscous and begins to soften. At its softening point, the glass flows enough to bond with adjacent layers.
Understanding viscosity is essential for controlling the final shape of your piece. A glass that reaches low viscosity too quickly may flow out of its intended shape. The rate of heating, also called the ramp rate, affects whether air bubbles get trapped between layers of glass. A slow ramp allows trapped air to escape, while a fast ramp can seal bubbles inside. Glass with the same COE value from different manufacturers may still have slightly different viscosity curves, which is why test firings are recommended.
Ready to start your first fusing project? Browse COE90 glass or call 888-213-8588 to talk with our glass experts.
Why COE Compatibility Matters in Glass Fusing
Glass fusing relies on a strict and precise scientific principle. As the kiln heats the glass, it expands, and as it cools, it contracts. This rate of change is called the Coefficient of Expansion, or COE. Every fusible glass sheet has a COE rating that tells you how much it will move during temperature changes.
The Science of Expansion
Every glass sheet has its own COE number that indicates its expansion behavior in the kiln. The two most common types are COE 90 and COE 96. You must choose one COE for your studio and stick with it. When buying glass, always verify the COE rating on the label. Glass manufacturers test each batch to measure this expansion rate and mark fusible sheets accordingly. However, glass from different brands can still behave differently even when they share the same COE rating due to variations in formulation. Always keep COE90 glass and COE 96 stored in separate labeled containers. Store them in clearly separated bins to prevent accidental mixing, which can ruin an entire project.
Why Mixed COEs Cause Cracking
If you mix COE 90 and COE 96, they contract at different rates as they cool from peak temperature to room temperature. This difference creates internal tensile stress. One layer pulls against the other as it shrinks faster, and the resulting tension causes the glass to fracture. The crack may appear immediately during cooling or develop later during handling. Higher viscosity glass resists flow and may crack before the stress can equalize. For a deeper technical explanation, read our full guide on glass compatibility.
Testing with Polarizing Filters
The polarizing filter test is a reliable method for checking whether glass projects are properly annealed and stress-free. Hold your fired piece between two polarizing filters and view it against a bright light source. If the glass is stress-free, you will see a uniform dark color across the entire piece. If you see bright rings or halo patterns, the glass has trapped internal stress that may cause future cracking. Always perform a test fire on new glass combinations before committing to a large project.
Tack Fuse vs Contour Fuse vs Full Fuse: Temperature Guide
Glass artists use different glass fusing techniques to achieve different effects in the kiln. Each approach uses a specific temperature range that produces a distinct visual and structural result. The table below compares the three primary fusing methods for COE 90 glass.
| Technique | Temperature Range | Appearance | Best For |
|---|---|---|---|
| Tack Fuse | 1350°F – 1400°F (732°C – 760°C) | Layers join at contact points, retaining original shape and texture | Textured pieces, raised designs, jewelry, layered art |
| Contour Fuse | 1400°F – 1450°F (760°C – 788°C) | Edges soften but some raised detail remains visible | Decorative plates, bowls with layer definition |
| Full Fuse | 1450°F – 1490°F (788°C – 810°C) | All layers melt into a single smooth, flat sheet | Functional ware, coasters, base sheets for slumping |
Safety note: Always wear heat-resistant gloves when handling kiln shelves and use proper eye protection when observing the kiln interior at high temperatures. A viewing port with a protective glass filter allows you to check the progress of your piece without opening the kiln and losing heat.
Choosing the right temperature depends on your design goal. Tack fusing preserves individual glass shapes and creates a textured surface, making it ideal for jewelry and layered art where each layer should remain distinct. Contour fusing softens the appearance while maintaining some depth. Full fusing creates the strongest, most uniform result for functional pieces that need to be durable. The firing schedules for glass fusing will differ based on which technique you select.
Firing Schedules for Each Technique
Each fusing method requires a specific firing schedule to achieve consistent results. A tack fuse needs a slower ramp rate and a shorter hold at peak temperature to preserve the individual shapes of each glass layer. Pushing the temperature too high or holding too long transforms a tack fuse into a full fuse. A full fuse requires a higher peak temperature and a longer soak to ensure the glass flows into an even, bubble-free sheet.
The ramp rate affects whether air becomes trapped between layers. Fast ramp rates can trap air, creating unwanted bubbles. Slow ramp rates allow air to escape gradually. Beginners should start with a simple full fuse project to learn basic kiln programming before attempting tack or contour fusing. Record every firing schedule so you can reproduce successful results.
Slumping, Draping, and Casting: Shaping Your Fused Glass
Once you master flat fusing, the next step is shaping glass over or into molds. Slumping, draping, and casting are three shaping methods that transform flat fused sheets into dimensional functional art.
Understanding Slumping
Slumping is the process of heating fused glass so it sags into a concave mold under its own weight. This technique is how flat sheets become bowls, plates, and curved dishes. The glass releases cleanly from the mold as it cools, preserving the new shape. Slumping requires a different firing schedule than fusing, with lower peak temperatures to prevent the glass from sticking to the mold surface. A typical slump temperature range for COE 90 glass is 1250°F to 1350°F, depending on the depth of the mold.
Draping Over Molds
Draping is the opposite of slumping. The glass is heated and allowed to drape over a convex mold, producing open vases, curved panels, and sculptural forms. The glass must be heated evenly so it settles smoothly across the mold surface without ripples or wrinkles. Draping requires careful temperature control because the glass can trap air underneath, leading to unwanted bubbles or uneven thickness.
Casting in Molds
Casting involves filling a refractory mold with glass to create a thick, specific shape. This method demands more glass material and longer firing times. Casting can produce solid sculptural forms that are impossible to achieve with flat fusing alone. Kiln furniture such as stilts and molds help shape glass during both slumping and casting. Always prepare your kiln shelf with Bullseye Thinfire, Papyros, or Hotline Primo Primer to prevent the work from sticking.
For step-by-step guidance, see our detailed glass slumping instructions. The right mold choice can transform a simple fused piece into a striking artwork.
Annealing and Cooling: How to Prevent Cracks in Fused Glass
Annealing is the most critical stage of the firing cycle and the one most beginners rush through. Proper annealing relieves internal stress that builds up as the glass cools, preventing cracks that may not appear until days later.
The Annealing Process
When glass cools, different parts of the piece contract at slightly different rates. Thicker areas retain heat longer than thin areas, creating differential stress. The annealing soak is a controlled hold at a specific temperature that allows the entire piece to equalize. For COE 90 glass, the annealing point is approximately 960°F to 970°F. At this temperature, the glass is stiff enough to hold its shape but still fluid enough for internal stresses to relax and redistribute.
Cooling Rates and Stress Management
The cooling phase of a firing cycle can last many hours. Slow, controlled cooling prevents the glass from developing thermal shock. Cool no faster than 100 degrees per hour from the annealing temperature down to room temperature. Thicker or larger pieces need even slower rates, sometimes as low as 50 degrees per hour. Firing cycles for glass are intentionally lengthy. Rushing the cooling phase is the most common cause of cracked projects. Beginners often open the kiln too early out of excitement, which introduces thermal shock.
Common Annealing Mistakes
The most frequent annealing mistake beginners make is cooling too fast. A piece removed from the kiln at 500 degrees and exposed to room air develops a temperature difference of hundreds of degrees across its thickness in seconds. Causing immediate thermal shock. Another mistake is skipping the annealing soak entirely for small pieces. Even small pieces benefit from a proper anneal, especially when visible stress can cause cracking later during drilling or grinding.
Opening the kiln above 200 degrees is the fastest way to crack a finished project. Always wait until the kiln reaches near room temperature before opening. For large or thick pieces, allow the kiln to cool naturally overnight before opening the lid.
Verifying Proper Annealing
After the piece has cooled completely, use the polarizing filter test to verify it is stress-free. A properly annealed piece shows a uniform dark color between the filters. If bright stress patterns appear, the piece needs to be re-fired through another annealing cycle. Re-annealing is often successful if the piece has not already cracked. For complete details, consult our firing schedules for glass fusing guide.
What Causes Devitrification and How to Prevent It
Devitrification is a common defect where the glass surface becomes cloudy or dull due to crystal formation within the glass structure. This happens when the glass stays within a specific temperature range for too long during firing.
Understanding Devitrification
Devitrification occurs when microscopic crystals form on the glass surface during firing. These crystals scatter light and create a cloudy, frosted finish that ruins the optical clarity of your work. The devitrification range for most fusible glass is approximately 1100 degrees to 1350 degrees Fahrenheit. Extended soak times within this temperature range encourage crystal growth. The crystals nucleate on surface imperfections, dust particles, or edges that were not cleaned thoroughly before firing.
Prevention Strategies
Clean glass edges thoroughly before firing. Oils from your fingers, dust from cutting, and debris from the studio environment can seed crystal growth. Control your ramp rates to move through the devitrification range without extended holds. Apply fresh kiln wash to your shelves before each firing cycle. Kiln wash should be applied in thin, even layers and allowed to dry completely. A properly coated shelf provides an effective barrier between the glass and the kiln furniture.
How to Fix Devitrified Glass
If your fused piece develops a cloudy surface, you can save it with additional work. For mild cases, acid etching can remove the thin layer of devitrified surface. For deeper crystallization, wet-grind the glass to remove the cloudy layer. Once the surface is smooth, refire the piece with a faster ramp through the devitrification range to restore gloss. Adjusting your original firing schedule helps prevent recurrence.
Essential Tools and Materials for Your Glass Fusing Studio
Setting up a glass fusing studio requires planning around the scale of your projects. A well-equipped workspace gives you the flexibility to explore a wide range of glass fusing techniques.
Kiln Selection
The kiln is the most important investment in your studio. Skutt kilns are known for precise temperature control and excellent uniformity, making them ideal for fusing work. Art Glass Supplies carries over 38 Skutt kiln models and over 65 Olympic kiln models, suitable for everything from small jewelry pieces to large architectural panels. Choose a kiln with a digital controller that supports programmable ramp-hold functionality, as manual kilns make consistent firing schedules difficult to maintain.
Cutting and Shaping Tools
- Glass scorer — your most frequently used tool for straight-line cuts made with a simple score-and-snap approach.
- Running pliers — help propagate the score line cleanly for straight cuts.
- Mosaic cutters and nippers — create smaller irregular shapes for detailed work.
- Circle cutter attachments — allow you to cut round pieces without a bandsaw.
Always clean the sharp edges of cut glass before placing pieces in the kiln, as loose glass particles can cause uneven fusing.
Kiln Shelf Preparation
Kiln shelves must be prepared with a release agent to prevent the glass from sticking during firing. Kiln wash is brushed onto shelves in thin, even layers and allowed to dry before firing. Kiln paper options such as Bullseye Thinfire and Papyros provide a clean release surface for detailed work. Hotline Primo Primer is another reliable shelf protection choice. Each release method has advantages depending on your project type and firing temperature.
Understanding Glass Thickness
Glass thickness directly affects how your project behaves in the kiln. Standard fusible sheet glass comes in 3mm thickness. Two layers stacked together equal 6mm, which is the ideal thickness for a full fuse. Three layers equal 9mm, which at full fuse temperature will spread outward and lose its square shape. A single 3mm layer will shrink and its edges will pull inward. Calculate your final stack height before cutting to ensure the finished size matches your mold or design dimensions. For slumping projects, a 6mm base provides enough strength for most functional pieces.
Decorative Materials for Advanced Techniques
Frit, stringers, and dichroic glass expand your range of creative possibilities. Frit is crushed glass that creates color gradients, texture, and shading effects between transparent layers. Stringers are long, thin strands of glass used for fine line work and detailed patterns. Dichroic glass produces brilliant color shifts and metallic effects that change depending on the viewing angle. Art Glass Supplies holds the world’s largest inventory of dichroic glass, with patterned and etched varieties suitable for advanced fusing projects.
Building a Project from Start to Finish
A successful glass fusing project follows a predictable workflow from design to final polish. Understanding this sequence helps you plan each step and avoid common mistakes.
- Design and Material Selection — Sketch your design and determine the final dimensions. Calculate the total glass stack height to match the 6mm rule for your intended fuse level. Select all glass from the same COE family. For color effects, layer transparent glass over opaque backgrounds or use frit between clear layers.
- Cutting and Assembly — Cut your glass pieces using a quality scorer and running pliers. Clean every edge thoroughly to remove dust and oils. Assemble the pieces on the kiln shelf using small dabs of white glue to hold them in position. Arrange the glass with the design facing up and ensure all pieces fit within the planned footprint.
- Firing Schedule Selection — Choose your firing schedule based on the desired fuse level. Program the kiln with three segments: a slow ramp through the devitrification zone, a controlled ramp to peak temperature with a soak at the target temperature, and a slow anneal cool. Record every parameter so you can reproduce the results.
- Cooling and Finishing — After the firing cycle completes, do not open the kiln until the temperature drops below 150 degrees. Remove the piece and inspect it under polarizing filters for stress. Clean any kiln wash residue from the back.
Safety Essentials
- Respirator — Invest in a good quality respirator rated for silica dust when grinding or sanding glass. The fine glass dust created during coldworking is hazardous if inhaled repeatedly. Work wet whenever possible to capture dust at the source.
- Ventilation — Always ensure adequate ventilation during firing to protect against fumes released from metallic additives and coatings.
- Protective gear — Wear gloves when handling sharp glass edges. Use eye protection when cutting, grinding, or working with kiln wash.
Beginners should start with simple flat-fused projects before progressing to complex molds and advanced techniques. Small projects like coasters and jewelry cabochons teach the fundamentals of COE selection, temperature control, and firing schedules.
Troubleshooting Common Fusing Problems
Even experienced artists encounter problems in the kiln. Recognizing the cause of common defects helps you adjust your process and avoid repeating mistakes.
Bubbles Between Layers
Bubbles are one of the most frequent issues in glass fusing. They form when air becomes trapped between layers of glass during assembly. Trapped air expands during heating and cannot escape before the glass seals shut. To prevent bubbles, ensure each glass layer is clean and flat. Use a slower ramp rate below 400 degrees per hour up to 1000 degrees to allow trapped air to escape. If bubbles persist, fire a test piece first to determine whether the issue is in your assembly or your schedule.
Sharp Edges That Do Not Round
If the edges of your fused piece remain sharp after firing, the peak temperature was too low or the soak time was too short. Glass needs sufficient heat work to round its edges through surface tension. Increase the peak temperature by 10 to 20 degrees or extend the soak time by five to ten minutes. For tack fuse projects, some edge sharpness is expected and part of the desired texture.
Glass Sticking to the Shelf
When glass fuses to the kiln shelf, the cause is almost always inadequate shelf preparation. Either the kiln wash was applied too thinly, the wrong release agent was used for the firing temperature, or the kiln wash was not fully dry before firing. Remove the stuck glass carefully, clean the shelf, and reapply a fresh coat of kiln wash. Allow it to dry completely before the next firing.
Color Changes or Burning
Some glass colors are sensitive to high temperatures. Red, orange, and pink glasses often contain cadmium or selenium that can burn off at full fuse temperatures, causing the color to shift or disappear. Test-fire colored glass at your target temperature before committing it to a finished piece. Firing these sensitive colors at a tack or contour fuse level helps preserve their vibrancy.
Uneven Surface or Wavy Texture
Uneven surfaces typically result from inconsistent heating in the kiln or from a glass stack that is too thick. A piece that is significantly thicker than 6mm may not flow evenly. Place the piece in the center of the kiln where heating is most uniform. If the kiln has hot spots, rotate the shelf between firings to distribute thermal exposure.
Need help troubleshooting your glass fusing project? Shop Skutt kilns and supplies at Art Glass Supplies, or call 888-213-8588 for expert advice.
Frequently Asked Questions
What is the 6mm rule for glass fusing?
The 6mm rule is a guideline based on glass viscosity and surface tension during firing. When heated to a full fuse, glass naturally settles at approximately 6mm (1/4 inch) thickness. If your stack is thinner than 6mm, the edges pull inward and the piece shrinks. If the stack is thicker, the glass spreads outward. Calculate your final thickness by adding the thickness of each glass layer. Two layers of 3mm sheet glass perfectly equal 6mm.
Can I fuse glass without a kiln?
No. Standard glass fusing techniques require sustained temperatures between 1350°F and 1500°F. Home ovens and microwaves cannot reach these temperatures. Using a torch heats glass unevenly, causing thermal shock and shattering. Only a properly designed kiln with controlled heating and cooling can produce safe, predictable fusing results.
What is the difference between tack, contour, and full fusing?
Tack fusing at 1350°F to 1400°F bonds layers at contact points while preserving individual shape and texture. Contour fusing at 1400°F to 1450°F softens edges while retaining some raised detail. Full fusing at 1450°F to 1490°F melts all layers into a single smooth sheet. Each technique serves a different artistic purpose.
What are the common glass fusing techniques for beginners?
Beginners should start with simple flat fusing before attempting complex molds. Common starter projects include small plates, bowls, soap dishes, and jewelry cabochons. According to NC State University, making small items teaches fundamental skills in glass selection, cutting, and temperature control. Practice with matching COE glass and basic kiln programming before advancing to slumping or casting.
Can you use Elmer’s glue for glass fusing?
Yes. Small dabs of white school glue hold glass pieces together during assembly. The glue burns off cleanly during firing without leaving residue on the finished piece. Use minimal amounts and avoid glue pools near the glass edges.
Ready to Shop Premium Glass Fusing Supplies?
Using the wrong glass or mixing incompatible sheets can cause your entire project to shatter during cooling, wasting hours of careful work. Choosing compatible COE 90 or COE 96 glass ensures your artwork survives the kiln firing without stress cracks. With next-day shipping on most orders, you can get glass, tools, and kilns delivered directly to your studio. Our team of experienced glass artists is available to answer your questions.
Ready to get started? Call 888-213-8588 today to shop glass fusing supplies. Browse the world’s largest selection of COE90 glass, kilns, and essential fusing tools at Art Glass Supplies.