
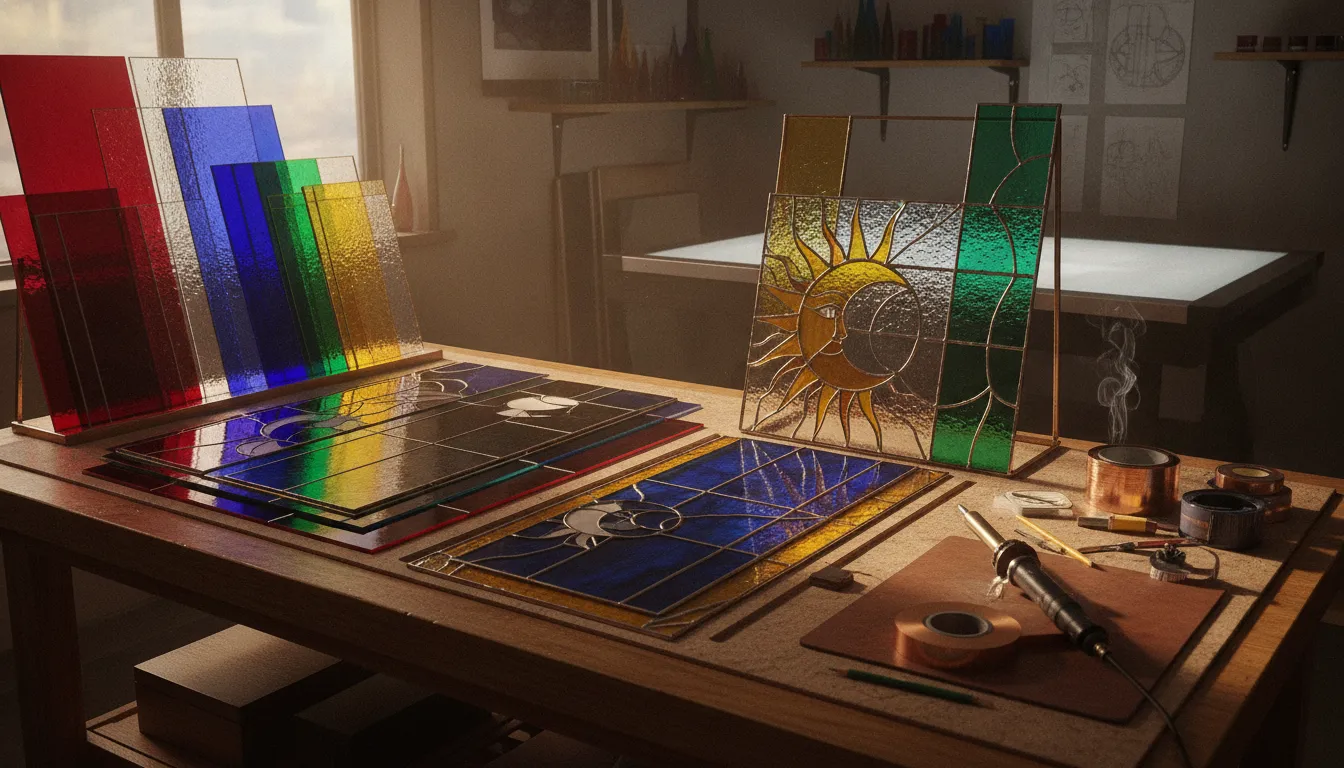
Even minor errors in your initial pattern transfer will ruin the fit of finished glass panels. Achieving flawless joints and deep color requires a systematic approach to every step in the workshop.
Stained glass techniques include a precise series of workshop steps used to design, cut, join, and strengthen art glass panels. As shown in a custom stained glass guide by Flathead Valley Community College, the process begins by making a full plan or cartoon. Next, the artist scores and breaks the glass sheets, grinds the sharp edges for a perfect fit, and wraps each piece in copper foil. For large and heavy windows, classic lead came construction is used instead of copper foil to provide lasting strength and withstand wind. To finish, the joined pieces are fused with hot solder, treated with a dark patina, cleaned to remove acid flux, and mounted into a zinc frame.
How do you choose between these methods and ensure your glass pieces fit together well? Let us start by understanding the two core stained glass techniques so you can select the right path for your next project.
Understanding Stained Glass Techniques: Two Core Methods
Whether you are selecting stained glass sheets or choosing a pattern, you must pick your building path. Every project relies on one of two main pathways. These are the lead came method and the copper foil method. Before you start, gathering your essential stained glass supplies is a key first step.
The traditional lead came method
The lead came method is the oldest way to build glass art. This classic technique dates back to the late 11th century. Artists fit each piece into H-shaped lead strips called cames before they solder the joints. This style is strong and works best for large windows.
To build with came, you lay out your cut glass pieces on a board. You slide the soft metal came around the edges of each piece. Small nails hold the parts tight as you work. Once all cames are in place, you solder the joints where the metal strips meet to keep the glass safe.
The copper foil Tiffany method
The copper foil method offers a more modern option. Louis Comfort Tiffany made this style famous in the early 1900s when he got the patent from Stanford Bray. In this approach, you wrap the edge of each glass piece with thin copper tape. You then solder along the seams to join the pieces.
This method is perfect for projects that have fine details or tight curves. Since the foil is thin, the solder lines are much thinner than lead came. After wrapping all the pieces, you apply flux and melt solder along the full length of every seam. This forms a strong metal web that binds the whole design.
Choosing the right method
Each option has its own strengths for your shop. Modern stained glass techniques often replace lead came with copper foil and solder to create a weather tight, rattle-free product. Copper foil lets you make fine, curved designs like lampshades. Lead came is best for rigid, flat panels that must withstand wind.
| Method | First Used | How to Solder | Best For | Key Benefit |
|---|---|---|---|---|
| Lead Came | Late 11th century | Solder the joints only | Large flat windows | Strong frame |
| Copper Foil | Early 1900s | Solder the whole seam | Tight curves and lamps | Rattle-free seal |
Your choice of style will dictate the tools and glass prep steps you need. Foil pieces must have smooth edges, so grinding each edge is key. Came panels do not need as much grinding, but they need cementing and cleaning steps at the end. Many artists master both paths to expand their art skills.
Pattern Design and Cartoon Creation
Every glass art project starts with a clear plan. You must know your exact size and choose your subject before you start to cut. This early planning lets you find the right path for your work and avoid major mistakes later in the process.
Design planning
When you start planning a glass project, you must think about three main things. First, you must look at structural strength. The lines that hold the pieces must support the weight. Second, you must think about light transmission.
How does the light pass through your work? Third, you must plan for color harmony. You can learn how to balance these details by selecting stained glass sheets that work well together. The right sheets make the work much easier.
Cartoon creation steps
To use different stained glass techniques, you must make a full-size drawing. This plan is called a cartoon. It shows the exact shape of each piece, the colors you will use, and where the lead came or copper foil will go.
Once the cartoon is complete, you must move it onto your glass. This layout acts as a map for every step of your project. Use a few basic tools to copy your plan.
- Draw the pattern: Sketch a full-scale plan on paper to show all glass shapes, colors, and metal lines. These lines must form a strong frame and enhance the visual style of your piece.
- Mark the colors: Write numbers or letters on each section to mark the color and grain line. This code keeps your pieces in order and helps you place them in the correct spots.
- Transfer the design: Copy the pattern lines onto your work board or right onto the glass. You can use carbon paper, trace from a template, or project the image to do this.
- Cut the templates: Cut the paper pattern into single pieces to use as templates. Use special three-blade shears to leave small gaps for the lead came or solder joints.
Glass Selection and Cutting Techniques
To make a beautiful glass panel, you must master the fundamental steps of the craft. Your success depends on using the right methods from the start. Choosing the correct glass sheets and making clean cuts are the core stained glass techniques that keep your project strong and beautiful.
Choosing your glass sheets
Choosing your glass sheets with care is the first step. You must pick more than just pretty colors. It is vital to check that your glass sheets are compatible.
Glass expands and shrinks when you heat it, and this rate is known as the Coefficient of Expansion, or COE. If you mix glass with different COE numbers, your finished piece will crack as it cools. Always use sheets with the same COE rating to prevent stress cracks. You can learn more about these materials when selecting stained glass sheets for your studio.
Scoring and breaking the glass
Once you select your glass, you are ready to cut your pattern pieces. You do not actually cut through the glass. Instead, you use a carbide wheel cutter to score a light line across the surface. Press down with firm, even force as you glide the wheel along your pattern. This action creates a controlled run in the glass.
Next, you must break the glass along this score line. Place your running pliers over the line and squeeze the handles gently to open the crack. For curved cuts, you can use grozer pliers to nibble small bits of glass off the edges. This tool lets you trim away excess glass to get an exact fit within your pattern lines.
Grinding for a precise fit
Even with great cutting skills, some glass edges will still have sharp points or small bumps. A quality glass grinder is the best tool to fix these issues. The machine uses a wet, spinning diamond bit to smooth the rough edges. Most standard glass grinders run at 2,800 to 3,600 RPM to grind the glass quickly and safely. Running the grinder at these speeds gives you full control as you shape each piece.
Always keep the grinder bit wet with water to stop glass dust and make the tool last longer. Hold the glass flat on the work surface and push it gently against the spinning head. This step is vital when grinding glass pieces to match your cartoon lines. Clean, smooth edges also help the copper foil or lead came stick better to the glass in the next stage.
Copper Foil (Tiffany) Technique: Step by Step
The copper foil method, often called the Tiffany technique, is one of the most common stained glass techniques used today. This approach is the best choice for small glass art pieces, lampshades, and highly detailed work. Unlike heavy lead came, foil lets you join small, curved pieces of glass with tight, thin seams. Wrapping each piece in sticky copper tape before soldering creates a weather tight, rattle-free product.
Why artists choose copper foil
Lead came works well for large, straight windows, but copper foil is the main tool for curved designs. The thin tape bends easily around tight corners and deep cuts. This ease lets you build small suncatchers or 3D shapes like glass boxes and shades. To get smooth, precise edges before you wrap, read our guide on grinding glass pieces.
Selecting your foil width
Copper foil comes in rolls of many widths, and choosing the right size is key for a strong bond. The most common sizes are 1/4 inch, 3/16 inch, and 1/8 inch. Your choice depends on the thickness of your glass sheets.
Standard art glass is about 1/8 inch thick, which fits best with 3/16-inch foil. If your foil is too wide, it will block out too much light and look sloppy. If it is too narrow, the foil will not wrap around the sides of the glass far enough to hold the solder.
Five steps to foil and solder
Foiling and soldering need steady hand work to get a strong and clean finish. Follow these five key steps to complete the process with ease.
- Clean and dry your glass pieces well to remove all oil, dust, and grinding dust. Any dirt on the glass edge will prevent the foil tape glue from sticking well.
- Wrap the copper foil around the outer edge of each glass piece, making sure the tape is centered just right. You want an equal amount of foil on both the front and back faces of the glass.
- Press the foil down firmly using a plastic burnisher or fid tool to smooth out all wrinkles and air pockets. Rub the front, back, and edge of each piece to lock the foil in place.
- Apply a thin layer of liquid flux to the foiled seams using a small brush. Flux cleans the copper and helps the solder flow smoothly across the metal joints.
- Melt your solder over the copper seams using a soldering iron heated to about 700 degrees Fahrenheit. Using the correct soldering iron techniques ensures a smooth, shiny, and strong bead.
Lead Came Construction for Traditional Panels
For centuries, artists have used lead came to build strong windows. This is one of the most trusted stained glass techniques for large-scale projects. It uses metal strips to lock glass pieces into a solid panel.
The role of H-came and U-came
This classic method uses soft metal channels to build strong panels. It is ideal for large windows and heavy outdoor panels. Artists put the work together on a flat light table. They fit glass pieces into H-shaped metal cames that hold the glass, then solder the joints (Patton, n.d.). The H-came channels secure two glass pieces side by side. For the outer edges of the panel, artists use U-came to make a strong frame. Before starting, check your bench to make sure you have the essential stained glass supplies.
How to assemble the panel
To build a lead came panel, you need a few tools. You will use a sharp lead knife to cut the soft metal. A cutting jig helps you make precise angles on your came pieces. As you build, use horseshoe wedges and layout nails to hold the cames tight. You can also use a grinder for grinding glass pieces if they do not fit the came channels.
Start the build in one corner of your drawing. Slide each piece of glass deep into the H-came channels. Make sure each joint fits snug before you cut the next lead piece. Once all glass and came pieces are set, apply flux to the joints. You will then use a hot iron to solder each junction.
Lead came safety practices
Working with lead came requires strict safety habits. Lead is a heavy metal that can build up in your body over time. This buildup can cause high blood pressure or memory problems (Mayo Clinic, n.d.). To stay safe, wash your hands and wear gloves when you handle lead. Never eat or drink in your workspace.
Cleaning the finished panel is also a risk. The traditional cleaning step is known as whiting. This process uses a powder to clean flux and grease off the glass. But whiting can raise lead dust levels in your breathing zone to 60 or 80 micrograms per cubic meter. This exceeds the OSHA safety limit of 50 micrograms per cubic meter (CDC, 1992). Always wear an approved dust mask when you clean your panels.
Soldering Techniques: Temperature and Materials
Soldering is a vital skill when you learn stained glass techniques. The process joins your cut glass pieces with metal to make a strong and lasting panel. To get clean seams, you must choose the right tools and keep your heat steady. Using proper soldering iron techniques will help you avoid cracks and keep the glass safe.
Solder Alloys and Melting Points
Solder is a mix of tin and lead. The two main types are 60/40 and 50/50. Each type has a unique melting point that changes how the metal flows. The 60/40 solder melts at about 361 degrees Fahrenheit. It cools fast and is great for copper foil work because it forms a high and round bead. The 50/50 solder melts at about 421 degrees Fahrenheit. It stays soft longer and works well for flat seams on came windows.
| Solder Type | Tin to Lead Ratio | Melting Point | Flow Quality | Best Use Case |
|---|---|---|---|---|
| 60/40 Solder | 60 percent tin, 40 percent lead | About 361 degrees Fahrenheit | Flows quick and makes a high bead | Copper foil joints |
| 50/50 Solder | 50 percent tin, 50 percent lead | About 421 degrees Fahrenheit | Stays soft longer for flat seams | Lead came windows |
Iron Selection and Heat Control
You need a good tool to melt your solder. A 100W iron with built-in heat control is the best choice. This tool keeps the tip at a steady heat. For most glass projects, setting your heat to about 700 degrees Fahrenheit works best. This heat level lets the metal flow without melting the came. You must also pick the right tip shape. A wide chisel tip holds more heat for came lines, while a screwdriver tip works well for tight foil corners.
Flux, Technique, and Safety
Flux is a mild cleaner that you must use before you solder. It removes oxide layers so the molten metal can stick to the joints. You must match your flux to your project method. For lead came projects, an acid flux paste works best because it clings to joints better. For copper foil projects, a liquid flux or a light gel is easier to brush on.
Good hand speed is key to a smooth bead. Move your iron along the seam at a steady pace. If you move too fast, you will get bumpy joints. If you stay in one spot too long, you can crack the glass with too much heat. This can also cause flux burnout, which leaves black soot and stops the metal from flowing. A bad joint that looks dull and cracked is called a cold joint. You can fix a cold joint by adding fresh flux and melting it again.
Safety is key when you use lead-based metals. Lead is a heavy metal that can build up in your body over time. This buildup can cause serious health problems like high blood pressure or memory loss. The Mayo Clinic explains lead hazards and how lead hurts adult health. Always work in a room with a fan, wear a mask, and wash your hands with cold water and soap after you solder.
Patina, Cleaning, and Final Finishing
The final steps of your project will define its look and strength. Many essential stained glass supplies are used for this stage. Proper cleaning and finishing are key stained glass techniques to make your solder lines shine and protect them from rust. If you skip these steps, your project will dull over time.
Preparing the panel for patina
Before you apply any color, you must clean off all flux film. Leftover flux is acidic and will corrode your metal. Mix baking soda with distilled water to stop this acid. Scrub the solder lines with a soft brush, rinse them well, and dry the panel with a clean cloth.
How to apply patina solutions
Patina is a chemical that changes the color of your solder. You will mostly use two types of patina. Black patina uses a copper sulfide solution to turn silver solder dark.
Copper patina gives a warm bronze or copper tone. Apply the liquid to your panel with a brush or sponge. Work in small sections to get an even coat. Rinse the panel with water right after you finish to stop the chemical reaction.
Once the patina is dry, you should protect the metal from rust. Spread a thin layer of wax over your solder lines. This wax prevents air and moisture from dulling the surface and gives the panel a bright, polished look. Let the wax dry to a haze, then buff it with a soft cloth.
Safety and lead dust precautions
Safety is vital during the cleaning and finishing stages. Patina chemicals have strong fumes, so you must work in a space with fresh airflow. Always wear gloves and safety glasses when you handle these liquids. If you use lead came or lead solder, take extra care to avoid exposure.
Lead is a metal that builds up in your body over time. This buildup can cause serious health issues like high blood pressure or memory loss, as noted by the Mayo Clinic. You must also be careful during clean up steps. For example, some artists use abrasive whiting powder to scrub and clean their panels.
But a study by the Centers for Disease Control and Prevention shows that whiting can make too much lead dust in the air. These dust levels can exceed safe limits for breathing. To stay safe, clean your panels with wet methods instead of dry powders to keep lead dust out of your lungs.
Framing and Installing Stained Glass Panels
Rigid Edging with Zinc Channels
The final step in your project is framing and installing the finished panel. Adding a solid border protects the glass edges and keeps the work flat.
For large panels, you should use a zinc channel, also called U-came, for the outer border. This rigid metal channel grips the glass to stop the panel from bending. It also shields the glass from cracks during transport. You can buy came and other essential stained glass supplies to complete this task.
Panel Reinforcement and Frame Materials
Large window panels need extra support to prevent sag. Without support, the soft lead came can bend and ruin the glass.
You must add thin steel reinforcing bars across the back of the work. Solder these stiff metal bars directly to the came joints. This step spreads the load so the panel stays flat for many years. For the outer frame, wood works well indoors, but metal frames last longer in damp areas.
Hanging Hardware and Weatherproofing
To display your finished art, you must attach strong hanging loops. For panels with a zinc border, you can solder copper wire loops directly to the frame.
You should use a high-heat tool and correct soldering iron techniques to ensure a strong bond. For came borders, install tinned copper wire loops deep inside the lead came joints. Always anchor the wire loops near the top corners to keep the came from pulling apart under tension.
If you install your panel in an outside window, you must weatherproof it. Classic stained glass techniques use glazing cement or putty to seal the gaps between the glass and the came. This paste keeps out wind and rain, and it also stops the glass from rattling.
Frequently Asked Questions
Should you use copper foil or lead came for stained glass windows?
Large windows and outdoor panels often need the strength of classic lead came. For smaller projects, copper foil is a great choice. According to this tutorial from FVCC, using copper foil instead of lead came creates a tight, rattle-free product. Your choice depends on the size of the piece and the level of detail you want to make.
Is lead exposure dangerous when soldering stained glass?
Yes, lead safety is critical. Lead is a heavy metal that can build up in the body over time. According to the Mayo Clinic, lead build-up can cause high blood pressure and memory issues. To stay safe, always wash your hands after handling lead and solder. Work in a well-ventilated space and do not eat or drink in your studio.
What is a grozer and how do you use it?
A grozer is a small hand tool used to shape glass pieces. It has a flat jaw and a curved jaw with small teeth. You use it to nibble tiny bits of glass off the edges of your cut pieces. This helps you get an exact fit inside your pattern. Be sure to wear safety glasses when using this tool.
How do you keep your stained glass solder lines from tarnishing?
To keep your solder lines bright, you must clean off all flux residue right after soldering. Flux is acidic and will corrode the metal if left on the glass. Once the piece is clean and dry, apply a good finishing compound or wax. This wax layer seals the solder and protects it from air and moisture.
Ready to start your next stained glass project?
Working with old or dull tools can quickly lead to cracked glass sheets, weak solder joints, and ruined pieces. It is frustrating to spend hours on a project only to watch your glass break at the very end. This wastes both your time and your hard-earned money. If you get the right premium supplies today, you can start shaping and joining your best work this week. You will avoid the stress of bad cuts and enjoy clean, bright, and strong lines on every panel. Our expert team can help you find the exact sheets, irons, and foils that fit your studio needs.
Ready to start? Call (888) 213-8588 to browse our complete selection of stained glass supplies and tools.