
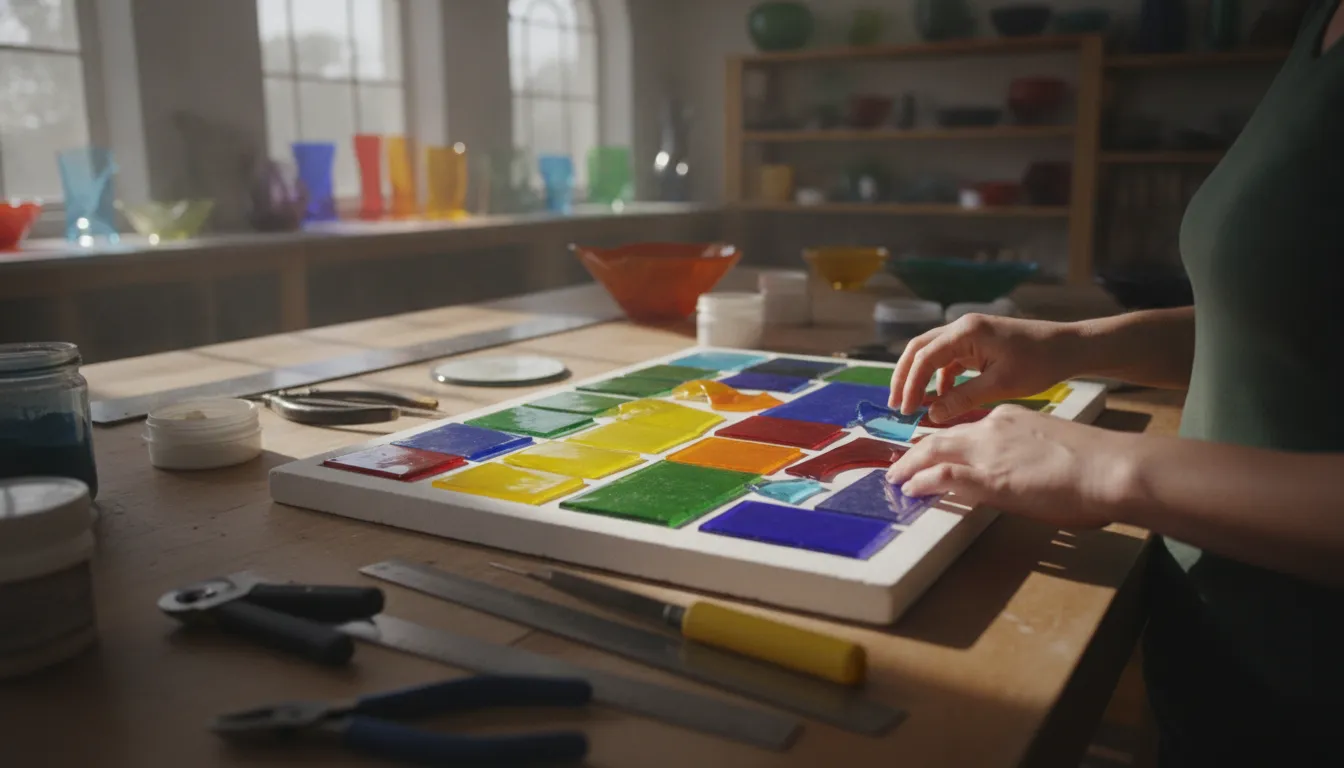
Glass fusing turns carefully selected pieces of compatible glass into a single form through controlled kiln heating. The process is approachable, but successful results depend on more than placing glass in a kiln. You need a clear understanding of compatibility, temperature, safe tool handling, and annealing before starting a first project.
Glass fusing for beginners starts with compatible glass, basic cutting and assembly skills, and a kiln schedule matched to the material. As pieces heat, their surfaces soften and bond, while controlled cooling relieves internal stress. Learning these principles first helps prevent cracks, distortion, and avoidable studio mistakes.
Introductory instruction commonly combines studio safety, scoring and breaking, assembly, kiln firing, and finishing techniques, giving new artists a practical foundation. The basic kiln-fusing process is simple to describe, but the science behind each stage determines the outcome. Understanding how heat changes glass, and why compatibility matters, is the right place to begin.
What Is Glass Fusing for Beginners
Glass fusing is the controlled process of joining compatible pieces of sheet glass in a kiln. The kiln heats the assembled pieces until their surfaces soften and bond, then cools them through a carefully managed schedule. This approach lets artists build color, texture, and dimension in a single glass form rather than joining pieces with foil or lead.
For glass fusing for beginners, the important distinction is that heat alone does not make every piece of glass safe to combine. The pieces must have compatible Coefficients of Expansion, or COE. COE describes how much a glass changes size as its temperature changes. Glasses with mismatched expansion rates can develop internal stress and crack during cooling, even if the finished piece looks sound immediately after firing. Viscosity and softening behavior also affect how layers move and bond in the kiln.
How heat transforms assembled glass
The process begins with clean, compatible glass cut and arranged in layers. A kiln then raises the temperature according to a programmed schedule. The glass reaches a fusion range where its edges soften and the layers bond. Full fusing typically occurs between 1,350 and 1,500 degrees Fahrenheit, depending on the glass type, according to Skutt’s glass-fusing temperature guidance. A frequently cited full-fuse target is approximately 1,490 degrees Fahrenheit, but the exact peak temperature and hold time depend on the desired result, glass thickness, and kiln behavior.
Artists can use lower temperatures for a tack fuse, which preserves more surface texture and definition, or higher heat for a smoother full fuse. The firing schedule matters as much as the peak temperature. Heating too quickly can create thermal stress, while an unsuitable hold can leave layers incompletely bonded or over-soften details.
Why controlled cooling matters
After the glass reaches its target, the kiln must cool through the annealing range in a controlled way. Annealing allows the material’s internal stresses to equalize before the kiln opens. Skipping or shortening this stage can produce cracks that appear hours or days later. Beginners should treat studio safety, accurate cutting, careful assembly, kiln firing, and finishing as one connected skill set, not separate tasks.
Once the fundamentals are secure, explore advanced glass fusing techniques for more control over texture and form. Understanding the differences between stained and fused glass also clarifies why kiln schedules, compatibility testing, and annealing are central to this process.
Shop Bullseye COE90 glass at Art Glass Supplies — start your fusing journey with tested, compatible materials from a trusted supplier.
Essential Supplies: What You Need to Start Fusing
A focused starter setup lets you learn cutting, layering, firing, and finishing without buying every tool at once. Begin with compatible fusible glass, a kiln with programmable firing control, and the equipment needed to prepare and handle glass safely.
Choose one compatible glass system
Art Glass Supplies carries Bullseye COE90 glass and Oceanside COE96 glass. COE, or coefficient of expansion, describes how glass responds to temperature changes. Treat COE90 and COE96 as separate systems unless a manufacturer has specifically tested the combination. Differences in expansion and viscosity can create stress, cracks, or delayed failure after firing. Keep each sheet, scrap, and frit clearly identified from the beginning.
You will also need a glass cutter and running pliers for scoring and breaking, plus a small grinder for refining edges and fitting pieces. Use kiln wash or fiber paper on the kiln shelf to prevent the project from bonding to the shelf. Follow the product instructions for application, drying, and replacement.
Select a kiln that matches your projects
A kiln must hold the work evenly and allow you to control ramp rates, holds, cooling, and annealing. Full fusing commonly occurs between 1,350°F and 1,500°F, depending on the glass type, so a kiln program is not an optional convenience. It is part of the material science that protects the finished piece.
| Kiln option | Best starting point | Budget and planning note |
|---|---|---|
| Skutt FireBox 8 | Small projects, test tiles, jewelry, and individual learning exercises | Available from Art Glass Supplies starting at $976. Confirm current price and specifications before ordering. |
| Skutt FireBox 14 | Artists who want more working room as project size or batch size increases | Compare chamber dimensions, electrical requirements, and current pricing with your available studio space. |
Round out the bench with safety glasses, heat-resistant gloves for appropriate handling tasks, and a clean work surface. Glass edges remain sharp even when a piece looks finished, and kiln shelves and fired projects can retain substantial heat. Keep ventilation, dust control, and safe kiln clearances in your studio plan. Art Glass Supplies offers next-day shipping on non-custom orders, which helps you assemble essential materials without unnecessarily delaying your first firing.
Before purchasing a mixed assortment of scraps, decide whether you will work in COE90 or COE96. A consistent glass system makes compatibility testing, firing records, and troubleshooting much more reliable.
Understanding COE: Why Glass Compatibility Matters
COE, or Coefficient of Expansion, describes how much glass expands as it heats and contracts as it cools. In kilnforming, that movement must remain consistent across every piece in a project. Two glasses can look identical and still respond differently to temperature because their COE, viscosity, and softening behavior do not match.
COE90 and COE96 are separate glass systems
COE90, commonly associated with Bullseye glass, and COE96, commonly associated with Oceanside glass, are the two primary systems used by many fusing artists. They are not interchangeable. Mixing them in one fused project can create uneven expansion and contraction during the firing and cooling cycle. The resulting internal stress may produce cracks immediately, or the piece may fail later after repeated temperature changes.
Choose one COE system for the entire project, including sheet glass, stringers, frit, noodles, rods, and any decorative components. Matching the COE number is essential, but it is also wise to confirm that materials come from a compatible manufacturer and product line. For a deeper explanation, read our guide to understanding glass compatibility.
How to test compatibility before firing
A polarizing filter test can help identify stress in a sample before you commit valuable materials to a larger design. Place a small assembled sample in a kiln, fuse it using an appropriate schedule, and allow it to cool completely. Hold the cooled sample between two polarizing filters, such as polarized lenses or a polarizing sheet and lens. Rotate one filter while viewing the glass against a bright, even light source.
Uniform, relatively dark glass with little visible color change suggests low residual stress. Bright bands, rainbow colors, or concentrated patterns around the edges and joins indicate stress and warrant further investigation. The test is a screening method, not a substitute for using verified compatible glass and an appropriate annealing schedule.
Art Glass Supplies stocks both COE90 and COE96 systems, clearly labeled so you can select materials deliberately and keep each project within one compatibility family. Careful material selection at the start is one of the most important foundations for reliable glass fusing for beginners.
Your First Glass Fusing Project: Step by Step
A coaster is an excellent first project because it has a simple shape, a manageable surface area, and enough room to observe how glass behaves in the kiln. Use tested COE90-compatible glass throughout the project. For the most predictable result, aim for a finished thickness close to 1/4 inch, or 6 mm. Keep the design to two layers: one base layer and one decorative layer.
-
Choose and clean compatible glass
Select COE90 glass from a compatible manufacturer and keep every piece within the same tested system. COE describes the glass’s coefficient of expansion, but compatibility also depends on viscosity and how each glass responds during heating and cooling. Wipe the glass with glass cleaner or denatured alcohol and a lint-free cloth. Remove fingerprints, cutting oil, dust, and adhesive residue before assembly. Contamination can contribute to devitrification or leave marks in the finished surface.
-
Cut the base and decorative pieces
Cut a square or rectangle for the coaster base, then add small strips, dots, or geometric accents. If cutting glass is new to you, use precut COE90 squares and concentrate on assembly and firing. Score with steady pressure, break along the score, and smooth sharp edges carefully. Avoid stacking enough material to make the project substantially thicker than 6 mm, because thickness affects heatwork and shape stability.
-
Assemble no more than two layers
Place the decorative pieces on the base with narrow gaps or a controlled pattern. Keep the design flat and avoid heavy clusters at the edges. A two-layer construction gives a beginner a clearer view of the full-fuse result and reduces variables. Before moving the project, check that every accent is seated securely and that no loose powder or glass fragments remain on the surface.
-
Prepare the kiln shelf
Apply kiln wash according to the product directions, or use compatible fiber paper, and allow the shelf surface to dry fully. Set the coaster level on the prepared shelf with space around it for even heat circulation. Never place glass directly on an unprepared kiln shelf. Keep the kiln area clear, use appropriate eye and respiratory protection when handling dry materials, and follow the kiln manufacturer’s safety instructions.
-
Fire through the full-fuse segment
Program this beginner schedule as a starting point, then adjust it for your kiln, glass system, and project size:
- Ramp at 400 F per hour to 1,000 F, then hold for 15 minutes to equalize the temperature.
- Ramp at 900 F per hour to 1,460 F, then hold for 20 minutes for a full fuse.
These temperatures are not a universal substitute for a tested kiln program. Watch the glass through the peephole only when necessary, and do not open the kiln during the firing cycle.
-
Anneal and cool slowly
After the full-fuse hold, cool as fast as your kiln safely allows to 960 F. Hold at 960 F for 60 minutes so internal stresses can equalize. Then cool at 200 F per hour to 800 F. Keep the kiln closed while it continues cooling toward room temperature. Opening the lid too early can create thermal shock, even when the coaster appears solid.
When the kiln and glass are completely cool, remove the coaster and inspect its edges, surface, and overall shape. A successful first firing is not only about a smooth appearance. It also demonstrates controlled preparation, compatible materials, and an annealing cycle that leaves the glass structurally sound.
Common Beginner Mistakes and How to Avoid Them
Most early firing failures come from a small set of preventable process errors. Treat compatibility, preparation, thickness, and kiln programming as parts of one system rather than isolated details.
Mixing COE systems
COE, or coefficient of expansion, describes how much glass expands and contracts as its temperature changes. COE 90 and COE 96 glass are different systems, so combining them in one project can leave internal stress that appears as cracks during cooling. Choose one COE system for every piece, including the base, decorative components, and powders or frits. Confirm the manufacturer’s compatibility information before assembling unfamiliar materials.
Rushing the firing schedule
A kiln schedule controls more than the peak temperature. The annealing hold gives the finished piece time to equalize internally as it cools. Skipping that hold, shortening it, or opening the kiln while the glass is still vulnerable can produce thermal shock and breakage. Follow a schedule appropriate for the glass thickness and kiln, and let the piece cool gradually before removing it.
Choosing the wrong thickness
For a first project, aim for about 1/4 inch, or 6 mm, of glass. A single 3 mm layer can lose its shape because the edges shrink during firing. At roughly 9 mm, the volume of glass can push outward and distort the form. Beginners should generally work with one layer of 6 mm glass or no more than two compatible layers until they understand how their kiln responds.
Firing dirty glass
Fingerprints, cutting oil, dust, and smudges can fire into the surface and leave permanent marks. Handle pieces by their edges when possible. Clean each component with an appropriate glass cleaner, use lint-free materials, and allow the surface to dry fully before stacking it on the kiln shelf.
Overfiring, underfiring, and devitrification
Full fusing commonly occurs between 1,350 and 1,500°F, depending on the glass type. A schedule that does not reach the required working range may leave layers poorly bonded, while excessive heat or an overly long hold can flatten details and distort the design. Consult the glass manufacturer’s schedule rather than copying a peak temperature blindly.
Devitrification is a cloudy or crystalline-looking surface that can develop when glass is held at high temperature too long. Use a controlled schedule, avoid unnecessary time at peak temperature, and record results from each firing. A firing log helps you adjust one variable at a time instead of guessing on the next project. Skutt’s glass-fusing temperature guidance provides useful context for selecting a starting range.
How to Set Up a Home Glass Fusing Studio
A functional home studio does not need to be large, but it must be planned around heat, electricity, ventilation, and clean glass handling. A dedicated setup helps you work consistently and keeps kiln firing separate from cutting and grinding, where glass dust and debris can contaminate a project.
Choose a kiln that fits your current work
For most beginners, a small tabletop kiln is the practical starting point. The Skutt FireBox 8 provides a manageable chamber for coasters, small tiles, jewelry, and test firings. It is listed at $976 on sale at Art Glass Supplies. As your projects grow, larger Skutt and Olympic kilns provide more firing area and program flexibility. Review the choosing a glass fusing kiln before comparing chamber size, electrical requirements, controller features, and clearance needs.
Art Glass Supplies carries Skutt FireBox models and Olympic kilns, with next-day shipping available on non-custom orders. Confirm the kiln’s voltage and amperage requirements before placing it in a room.
Prepare the space and organize essential tools
Place the kiln on a stable, noncombustible surface with the manufacturer’s required clearance on every side. Keep it away from curtains, shelving, solvents, and other combustible materials. The room should have adequate ventilation for heat and kiln fumes, with airflow directed away from occupied areas. Do not install or operate a kiln in a confined closet.
Store your core tools where you can reach them without crossing the kiln’s hot zone:
- Glass cutter, running pliers, and a grinder for shaping and finishing.
- Kiln wash and fiber paper for preparing shelves and controlling sticking.
- Safety glasses and a properly fitted dust mask for cutting, grinding, and cleanup.
- Heatproof gloves, a working fire extinguisher, and a first-aid kit nearby.
Build safety and glass storage into the routine
Never leave a firing kiln unattended. Keep its exterior clearance open, inspect cords and plugs regularly, and follow the kiln manufacturer’s firing and ventilation instructions. Let the kiln cool fully before opening it, because visible darkness does not mean the glass is safe to handle.
Store COE90 and COE96 glass on separate, clearly labeled shelves or bins. Coefficient of Expansion is only one part of compatibility, but mixing glasses from different systems can create stress and delayed cracks. Keep labels with offcuts and return scraps to the correct storage area after every session. A clean, deliberate studio is one of the most important tools in glass fusing for beginners.
Browse glass fusing kilns and starter supplies — equip your studio with the right tools for consistent, reliable results.
Frequently Asked Questions
What is glass fusing?
Glass fusing is the process of heating compatible pieces in a kiln until they bond. The firing temperature and hold determine whether the result is a tack fuse, in which edges remain defined, or a full fuse, in which the pieces form a smoother unified surface. Full fusing commonly occurs around 1,350 to 1,500 degrees Fahrenheit, depending on the glass. Skutt explains the temperature range.
What tools do beginners need for glass fusing?
Start with compatible sheet glass, a glass cutter, running pliers, a kiln shelf, kiln wash, and heat-resistant safety equipment. A grinder is useful for refining edges but is not essential for a first project. Add a fiber brush or dustpan for cleanup, and keep a reliable firing schedule for the specific glass manufacturer.
Why is glass compatibility, or COE, important?
COE describes how much glass expands and contracts as temperature changes. Pieces with different COE values can develop stress during cooling and crack later, even when they appear sound after firing. Use glass from one compatible system, such as COE 90 or COE 96, and do not combine systems without verified testing. A polarizing filter test can reveal stress, but it does not replace manufacturer compatibility guidance.
How do you prepare glass for fusing?
Plan the design, score and break the glass, then clean every piece thoroughly to remove oils and debris. Assemble pieces on a kiln shelf prepared with kiln wash, keeping edges aligned and avoiding trapped dust. Check the finished stack for compatible materials, consistent thickness, and sharp exposed corners before loading the kiln.
What safety precautions are necessary for glass fusing?
Wear eye protection when cutting, closed-toe shoes, and appropriate heat-resistant gloves when handling hot equipment. Use ventilation and follow the kiln manufacturer’s clearance and electrical requirements. Never open a hot kiln unnecessarily, and allow the project to anneal and cool gradually. Beginner instruction should cover studio safety, equipment care, scoring, assembly, firing, and finishing, as outlined by NWTC’s fused-glass fundamentals course.
Get started with your glass fusing supplies
A well-chosen starter setup gives you the right glass, tools, and safety essentials to practice with greater confidence as you learn kiln firing and compatibility. To get your glass fusing starter supplies, contact Art Glass Supplies and choose the materials that fit your first projects.