
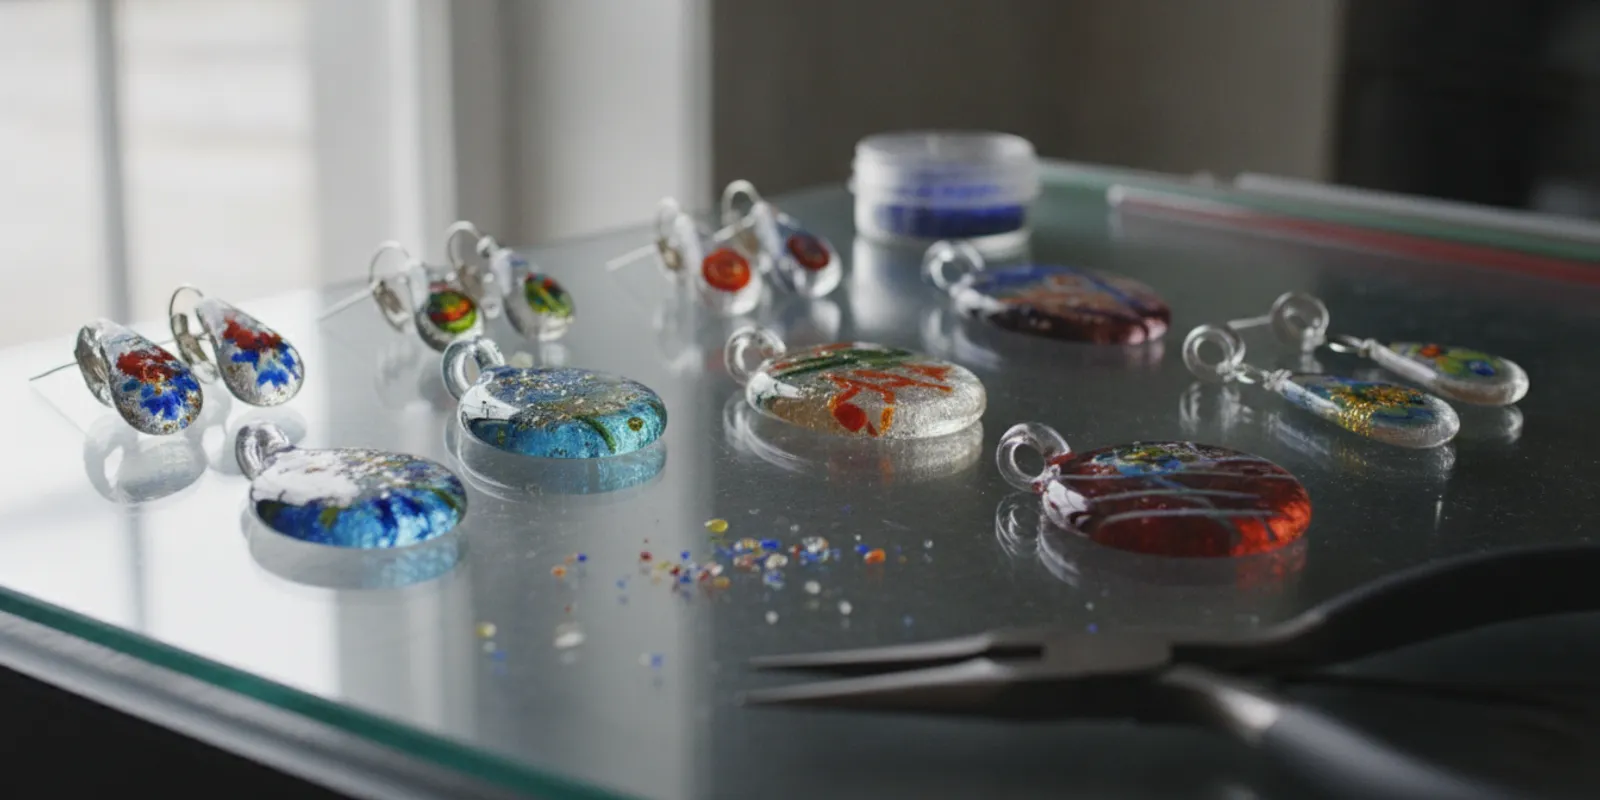
The best COE 96 glass frit for jewelry making is the frit that suits the scale of your design, matches the compatibility of the base glass, and behaves as expected in a test firing. Fine grades can create soft color transitions, while coarser pieces make more visible accents. Start with a compatible COE 96 base, choose frit by the effect you want, and test before making a finished pendant or pair of earrings.
Explore glass fusing and stained glass supplies
What makes frit useful for jewelry?
Glass frit is crushed glass sorted into particle sizes. In a fused piece, it can add color, texture, dots, gradients, or small details without cutting every accent from a sheet. For jewelry, the small scale matters: a modest amount of frit can create a strong focal point, while a crowded layer may obscure the base or make the design look busy.
Frit can be used alone as a decorative layer or combined with sheet glass and other compatible components. It is useful when you want repeated color accents across several pieces, or when a design needs tiny details that would be difficult to cut as separate shapes. The final appearance depends on the frit size, amount, placement, glass compatibility, and firing conditions.
How do you choose the best COE 96 glass frit for jewelry making?
Choose based on the physical result you want, not simply the color name. First confirm that the frit and the base glass are intended to work together as COE 96 materials. Then consider particle size, coverage, color interaction, and the scale of the piece.
- Match the COE. Use COE 96 frit with compatible COE 96 glass. COE, or coefficient of expansion, describes how much glass expands and contracts as temperature changes. Different expansion behavior within a fused piece can create stress as the glass cools, which may contribute to cracking. A matching COE is an important starting point, but it does not guarantee an identical result: glass composition, viscosity, and softening behavior also influence how materials fuse and settle. For an additional technical overview of fusing compatibility, consult Gofusing.
- Pick a particle size for the design. Fine frit is suited to subtle shading and small areas. Medium particles remain more individually visible and can form clear accents. Coarser frit can give a bolder, more textured look, but can overpower a very small pendant. Check the actual product description for its grade rather than assuming all frit labeled with the same color behaves alike.
- Plan the amount and coverage. A sparse scatter leaves more of the base glass visible. A denser application creates a stronger area of color. For a small jewelry blank, begin with less than you think you need, then add particles in controlled increments on a test tile.
- Think about the base and layering. Decide whether the frit will sit on top of a base, be sandwiched between layers, or form a compact design element. Layer placement changes how the color is seen and how particles are held in place. Follow the glass and kiln maker’s firing guidance for the materials and thickness you use.
- Test the finished scale. A test that is much larger than the intended jewelry may not show how crowded the design will look at final size. Make a small sample using the same base glass, frit amount, arrangement, and intended layer structure.
Which frit size works best for small jewelry designs?
There is no single ideal grade for every piece. Fine frit gives a softer, more even field of color and can help with delicate transitions. Medium frit is a flexible choice when you want visible dots or a defined patch of color. Coarser particles create a more pronounced texture and are easiest to see as distinct pieces, but require careful placement on a compact surface.
Use the table as a starting point, not a firing guarantee. Product grading terms can differ, so verify the specific grade and follow its instructions. Test with the actual base glass and kiln setup before committing valuable materials.
| Frit choice | Visual effect | Useful for | Watch for |
|---|---|---|---|
| Fine | Soft, close-set color | Small gradients and delicate coverage | Can read as a broad color patch if over-applied |
| Medium | Visible individual grains | Dots, small motifs, and controlled accents | Spacing can look uneven unless placed deliberately |
| Coarse | Bold particles and more texture | Distinct focal points and expressive surfaces | May dominate a small piece or create a lumpy profile |
How should you match frit color to a jewelry design?
Start with the role of the color. A focal color should be easy to distinguish from the base. A supporting color can echo a backing layer or provide a narrow border. If you are combining several colors, make a small sample of the whole palette rather than testing each color only in isolation. Colors may look different when fused, layered, or viewed against another glass.
Think about contrast at the finished size. A color combination that looks balanced on a large sheet can become crowded in a small pendant. Leave a clear area around the main accent, and avoid scattering every available color across the surface. When making a set, repeat a simple placement pattern so the pieces feel related without requiring identical grain arrangements.
For a colorful COE 96 project, COE 96 frit balls can be considered when their size and intended use fit your design. Review the listed product details and use the material only in a compatible project. You can also browse glass fusing supplies for related materials and tools.
How do you place frit for controlled results?
Work on a clean, stable kiln shelf prepared according to the kiln and shelf product directions. Assemble the piece in the same order you plan to use for the final jewelry. If you are placing frit on a small blank, arrange it with a small tool or carefully controlled pinches, keeping particles within the design boundary. Avoid piling frit near an edge unless that is part of the intended effect.
- Lay out the base and any top layer before adding frit, so you can see how much space remains.
- Place the largest accents first, then fill small gaps with finer particles if the design needs them.
- Keep the pattern away from the edge if you want a clean perimeter and less risk of loose particles shifting beyond the intended shape.
- Record the frit grade, amount, base glass, layer arrangement, and firing schedule for each test.
There is no universally correct firing schedule for every frit project. The appropriate schedule depends on the glass, thickness, kiln, desired surface, and other project details. Follow manufacturer guidance and your kiln manual. Do not assume that a schedule used for a different glass or a larger piece will produce the same result on a small jewelry blank.
What should you test before making finished jewelry?
A useful test answers a specific question. If you are unsure about color density, vary only the amount of frit. If you want to compare particle sizes, keep the base and firing conditions as similar as possible. Changing one main factor at a time makes the results easier to interpret.
- Cut or prepare a small compatible base. Use the same COE 96 glass and approximate thickness planned for the jewelry.
- Make two or three samples. Apply a light, medium, and heavier amount, or compare grades while holding the other variables steady.
- Fire according to reliable material guidance. Use the glass maker’s and kiln maker’s instructions as your reference. Keep a written record of the schedule and setup.
- Inspect after cooling. Check the color, surface, edge, and whether the frit stayed where you intended. Look for visible cracks or other defects and do not use a questionable sample as finished jewelry.
- Adjust one thing at a time. Change the particle size, amount, or placement based on what the sample shows, then test again if needed.
Testing is especially useful when changing glass brands or compositions, combining layers, or trying a new kiln setup. COE compatibility is foundational, but it is not a substitute for following product specifications and evaluating a real sample. Glasses with different viscosity or softening points may flow or retain texture differently even when their stated expansion compatibility is appropriate.
How can you plan a matching set of earrings or pendants?
For pairs, repeat the same design recipe rather than relying on memory. Weighing or measuring small amounts consistently can help, but the visual placement still matters. Sketch a simple layout, mark the focal area, and use the same sequence on each piece. If the design depends on a scattered effect, accept slight natural variation while keeping the overall color balance consistent.
For a pendant and matching earrings, scale the pattern down rather than copying it at full density. Use fewer accents on the smaller pieces. You can also repeat one identifying element, such as a central dot or short color band, while adjusting the surrounding frit to fit the available area.
Before assembly, confirm that the fused piece is suitable for the jewelry hardware and finishing method you plan to use. Edges should be assessed and finished appropriately, and drilled or attached components should follow safe, suitable practice for the material. The frit choice does not determine whether a finished piece is strong enough for wear; inspect the complete piece and its construction.
What common frit selection mistakes can you avoid?
- Choosing by color alone. Check COE, grade, and use details as well as the color name.
- Using too much on a tiny blank. Begin with a light application and build up on a test instead of covering the whole surface at once.
- Assuming matching COE guarantees identical behavior. Expansion compatibility matters, but viscosity and softening behavior also affect the fired result.
- Testing with a different base or schedule. A sample is most useful when it reflects the real project as closely as practical.
- Skipping notes. Without recording materials and settings, it is difficult to repeat a successful result or understand an unexpected one.
- Making every piece a first experiment. Test new combinations before producing a full set or using a limited material.
To explore other compatible color and shape options, compare turquoise COE 96 dots and assorted COE 96 dots where their appearance suits the design. These are decorative alternatives, not interchangeable recommendations for every frit technique. Check each listing for its material details and intended use.
How should you troubleshoot a frit sample?
A test tile is useful only if you read it against the question you asked. Separate visual preferences from material problems. A pattern that looks less delicate than expected may simply need fewer grains or a finer grade. A crack or separation, by contrast, is a reason to review compatibility, construction, handling, and firing guidance before trying another finished piece.
If the color area looks too dense, note whether the issue came from particle size, quantity, or placement. On the next sample, keep the same base and arrangement but reduce the amount. If the frit appears scattered or leaves gaps, decide whether the design needs a tighter pattern or a different grade. Avoid changing the base, frit, and firing schedule together, because then it becomes hard to tell which change affected the result.
If particles seem to have moved, check whether the piece was bumped during assembly or whether the placement was too close to an edge. Repeat the test with a stable layout and a little more clearance around the boundary. If the fired surface does not match the planned texture, consult the specific material instructions and consider whether the firing conditions caused more or less flow than intended. Do not infer a universal schedule from one result; record the exact setup and adjust only with reliable guidance.
Keep a simple sample log. Give each test a short ID and record the base glass, frit grade and color, approximate amount, layer order, kiln, schedule source, and outcome. A quick photograph beside the notes can preserve details that are difficult to describe later. When you find a result you like, reproduce it once before making a larger group. That second sample checks whether the recipe is repeatable rather than a one-off arrangement.
How can you plan a small jewelry batch?
After a test succeeds, translate it into a repeatable batch plan. Decide how many pieces you need, then prepare blanks and materials for the whole group before arranging the frit. This makes it easier to compare each piece while the layout is fresh in mind. Keep spare compatible glass for a trial or a replacement rather than using every blank in the first run.
Make a simple design map for a pair or coordinated set. Mark the focal area, the approximate number of larger particles, and where finer grains will fill or soften the pattern. The map need not prescribe the exact position of every fragment. Its purpose is to preserve the balance and spacing that made the test sample work.
Use a consistent workflow: lay out the blanks, arrange the focal accents, fill supporting areas, inspect the group side by side, and remove any particle that crowds an edge or competes with the central feature. For a set of earrings, compare the overall visual weight rather than demanding a mirror-image arrangement. Natural variation can look intentional when scale, color balance, and spacing remain consistent.
Before firing the batch, review the material labels and confirm that each element is suitable for the intended assembly. Keep pieces with different construction or thicknesses separate if their firing needs differ. Follow the kiln and glass manufacturers’ directions and avoid treating a sample schedule as a general recipe for all projects. After cooling, inspect every piece individually; a good result on one blank does not prove that every item in the batch is defect-free.
When you are ready to compare suitable supplies, browse COE 96 frit options, look through precut COE 96 glass shapes, and consider a magnetic broach finding if that style of jewelry construction fits your plan. Check the individual listings for material details and intended use before combining products.
Frequently asked questions
Is COE 96 frit suitable for all jewelry glass?
No. Use COE 96 frit with compatible COE 96 glass and confirm product specifications. Do not combine it with glass of a different COE merely because the colors appear to match.
Is fine frit always better for small pendants?
No. Fine frit can give a smooth, subtle look, but medium or coarse particles may be better when you want visible accents. Make a small sample at the intended scale.
Can I combine several colors of frit?
Yes, if the materials are compatible and the design benefits from the combination. Test the full palette together because the fired appearance can differ from the loose particles.
Does the COE number tell me exactly how the frit will fire?
No. COE describes expansion behavior, but it does not specify every aspect of viscosity, softening, or surface appearance. Follow the maker’s material guidance and test the specific combination.
Choose frit by compatibility, particle size, and the visual role it should play, then test a small sample before making a finished jewelry piece.