
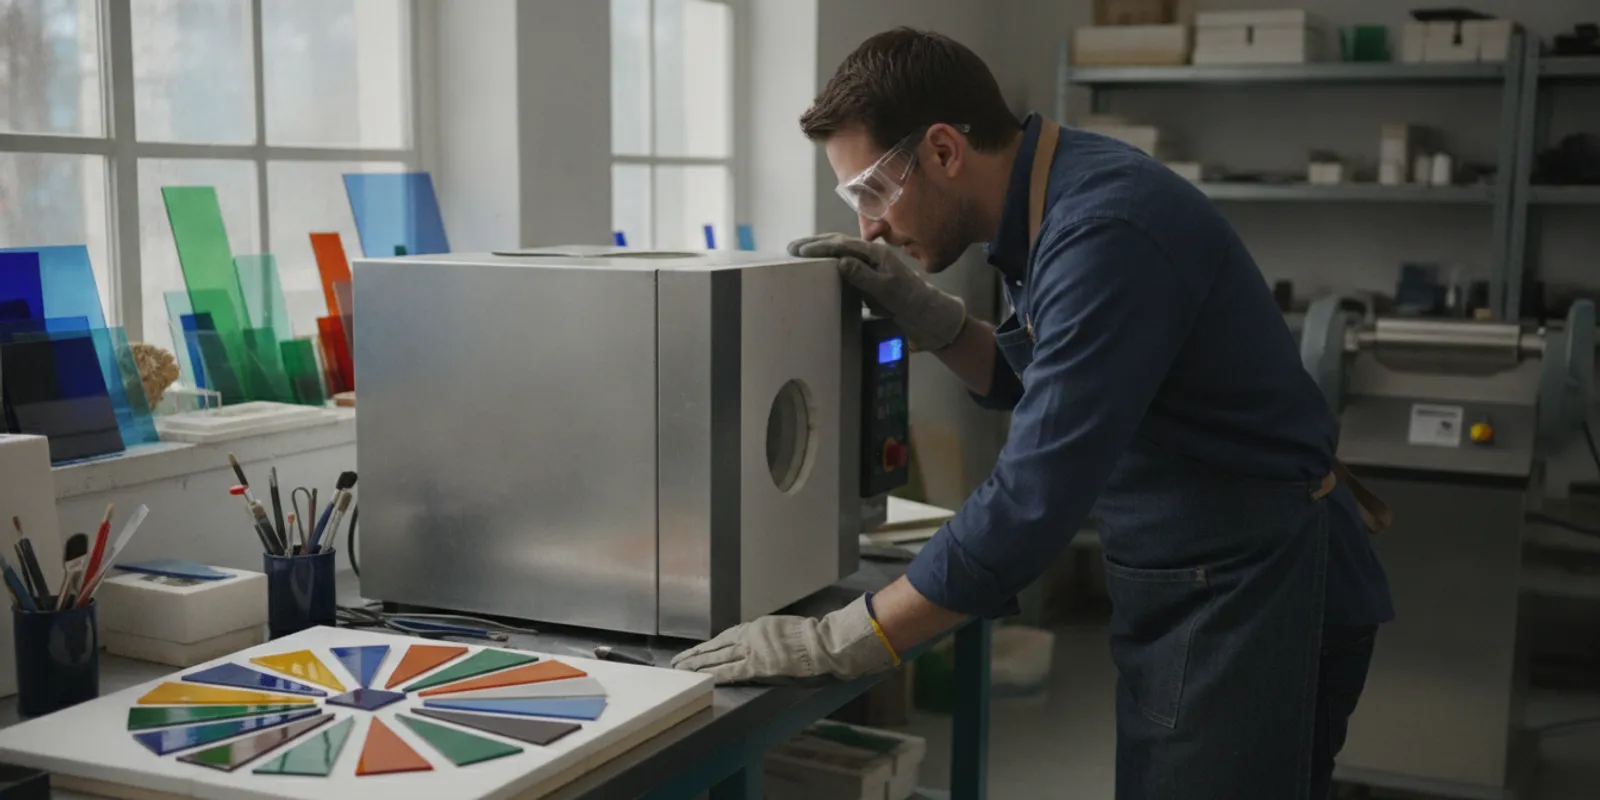
A pottery kiln can look like a practical choice for a glass studio, but its name does not tell you whether it suits your project. If you are comparing a pottery kiln with a glass kiln, begin with the work you want to make, the kiln’s usable interior, its controls, and the firing schedule it can run. A kiln supplies heat; a successful glass result also depends on controlled heating and cooling, compatible materials, and equipment designed for the process.
Explore kilns for glass projects
What does pottery kiln mean for a glass artist?
A pottery kiln is generally designed for firing clay and ceramic work. Some models may also be suitable for selected glass projects, but that does not make every pottery kiln appropriate for fusing, slumping, casting, or draping. The useful question is not simply whether a kiln gets hot enough. Ask whether the exact model provides the space, temperature control, element arrangement, and programmed firing behavior your work requires.
Glass changes as it heats. It softens gradually, may fuse to another piece, may slump over a mold, or may become over-fired if heat continues too long. The displayed temperature is only one part of the process. Heating speed, heat distribution, temperature measurement, peak holds, and cooling all affect the result. Two kilns with similar maximum temperatures can therefore behave very differently during a glass firing.
Before comparing equipment, identify your intended process. Small jewelry pieces, flat fused panels, cast shapes, and curved bowls have different space and loading needs. A kiln that fits a pendant may not fit a platter or a mold with enough clearance. A model suited to occasional small work may also be a poor fit for repeat production if its controller makes detailed schedules difficult to enter or repeat.
How do pottery and glass firing differ?
Both ceramics and glass require heat, but their firing goals and schedules are not interchangeable. Ceramic firing transforms clay and glaze through a cycle suited to the clay body and glaze combination. Glass firing aims to soften glass to a selected degree while controlling its form, surface, thickness, and internal stress.
For glass, a schedule commonly includes a controlled ramp, a hold at a target temperature when appropriate, and a cooling plan. The thickness of the glass, the way pieces are arranged, and the intended result influence that schedule. A ceramic program should not be assumed to produce a suitable glass result merely because its controller displays a temperature within a useful range.
Ask whether the kiln has a controller that supports programmable segments and whether you can set ramp rates, holds, and cooling steps appropriate to glass work. Read the manufacturer’s instructions for the exact model. Do not infer glass suitability from a product name, a broad product category, or a maximum temperature alone.
Safety is part of the comparison. The UK Health and Safety Executive says kiln operators should understand the position, function, and setting of controls and safety devices. That principle applies in any studio: learn the controller and safety features before firing, and follow the equipment maker’s installation and operating guidance. Review the HSE’s kiln safety information as part of your planning.
Which specifications should you compare?
Use the same checklist for every model. A useful comparison considers the full firing process, not just the advertised temperature. It also includes the physical and electrical conditions in your studio.
| Specification | Why it matters for glass | What to verify |
|---|---|---|
| Interior dimensions | Determines project size and room for molds, supports, and spacing | Usable shelf area, chamber height, and clearance from walls or elements |
| Controller | Controls ramp, hold, and cooling behavior | Programmable segments, ramp settings, firing modes, and instructions |
| Heating layout | Can affect heat distribution across the load | Element placement and maker guidance for glass applications |
| Electrical requirements | Must match the studio circuit and installation | Voltage, amperage, plug or hardwire needs, and circuit requirements |
| Maximum temperature | Shows an upper operating range, not glass suitability by itself | Manufacturer specifications and intended applications |
| Loading and access | Affects how safely you place and remove work | Lid or door design, shelf handling, and access to the chamber |
| Cooling and monitoring | Cooling rate can influence stress and finished form | Controller behavior, monitoring guidance, and safe cool-down practices |
How large should a pottery kiln be?
Choose the chamber around the work you actually expect to fire, rather than the largest project you might make someday. Measure the finished piece and its supporting setup. A slumping mold adds height and width, while a multi-piece batch needs spacing so pieces do not touch as they move. A flat panel also needs enough shelf area to load it without placing the glass too close to the chamber walls.
Make a paper or cardboard outline of your intended shelf load. Include separators, mold edges, supports, and any clearance required by the manufacturer. Then compare that layout with the kiln’s usable chamber and shelf dimensions. Product listings may show outside dimensions as well as interior dimensions, so confirm which measurements describe the firing area.
Small projects can benefit from a compact chamber because it may suit the work volume and available studio space. Larger kilns allow larger work or multiple items, but they also require more room and an electrical setup that meets the manufacturer’s requirements. A bigger chamber can also encourage inefficient small loads if your normal projects are jewelry or small decorative pieces. Select capacity for regular work, with reasonable room for growth.
If you plan bowls, compare the chamber with the footprint and height of the mold. A bowl slumping form needs room around it for the glass to settle without obstruction. For a different shape, review a fluted bowl slumping mold and measure the setup before deciding on a kiln. A jewelry batch, a broad panel, and a tall draped form should not be treated as the same capacity problem.
What does COE have to do with a pottery kiln?
COE means coefficient of expansion. It describes how much a material expands or contracts as its temperature changes. In glass fusing, pieces intended to fuse together need compatible expansion behavior. A kiln cannot make incompatible glass compatible. If materials expand and contract differently, stress may remain in the finished piece and contribute to cracking or breakage.
Match glass by verified compatibility, not by color, thickness, appearance, or the kiln you own. Keep COE systems separate unless the manufacturer confirms that the materials are compatible. For example, a project using COE96 glass should be planned with compatible COE96 components. A COE90 collage sheet belongs in a project planned around compatible COE90 glass, rather than being combined casually with a different system.
COE is not the only factor. Glass composition and viscosity, meaning the material’s resistance to flowing, affect how it softens and moves in heat. Softening behavior varies by glass type, so a schedule that works for one family of glass may not produce the same result with another. Follow the glass maker’s technical guidance and test a small sample when combining unfamiliar materials or trying a new schedule. Do not use a firing curve as a substitute for confirming compatibility.
Can you use ceramic kiln schedules for glass?
Do not assume that a ceramic schedule is a glass schedule. They are built around different materials and goals. A program intended to fire clay may have ramp rates, holds, or peak conditions that do not suit a particular glass project. Even if a kiln controller can be programmed, the schedule must be selected for the glass, thickness, load, and desired result.
Start with the glass maker’s recommendations and the kiln manufacturer’s instructions. Record the schedule and load details for each firing. Include the glass type, COE, thickness, number of layers, mold or shelf setup, and the result. Change one variable at a time when experimenting, such as the hold or peak temperature, so you can learn what caused a change.
A useful test sequence begins with a small, low-risk piece. First confirm that the materials are compatible. Then load a simple arrangement with a known thickness and use a documented starting schedule. Inspect the result only after the kiln and glass have cooled safely. If the piece is under-fused, over-fused, distorted, or cracked, record that observation before changing anything. This method is slower than guessing, but it makes later firings easier to understand.
Watch the kiln and use the viewing or monitoring approach specified by its manufacturer. Never open a hot kiln to check the glass unless the instructions explicitly explain how to do so safely. Allow the work to cool according to the schedule, and avoid handling it until the kiln and glass are at a safe temperature.
Which kiln type fits your glass work?
Kiln shape and loading style influence how the chamber is used. A top-loading kiln can be straightforward for placing shelves and small work from above. A front-loading design may make access easier for some studio layouts or larger pieces. The right choice depends on the project, available space, shelf handling, and safe access rather than on the loading style alone.
Compare models specifically described for glass work. The Olympic GF3E and Olympic GF12ECS are glass-oriented options to examine alongside the size and features you need. For a different chamber format, compare the Olympic TopHat 189E. These examples are starting points for comparison, not a substitute for checking suitability against your actual work.
For small-format glass work, usable shelf area and controller functions may matter more than a high maximum temperature. For draping or slumping, chamber clearance and mold height become more important. For repeat production, consistent programming and a clear firing log can be useful. If you are considering a kiln for larger work, compare the chamber and installation requirements of the Olympic Kiln 2514GFE with your planned load rather than assuming more capacity is automatically better.
What electrical and placement details matter?
Electrical planning should happen before ordering. Compare the kiln’s required voltage and amperage with the circuit available in your studio. Check whether the unit uses a plug or requires hardwiring, and confirm any dedicated-circuit requirements in the manufacturer’s documentation. If the installation is unfamiliar, consult a qualified electrician. Do not improvise wiring, adapters, or circuit changes.
Placement also affects safe operation. Follow the manufacturer’s requirements for clearance from walls and other materials, the supporting surface, ventilation, and access around the kiln. Leave enough room to load shelves without awkward lifting or reaching. Keep the controller visible and make sure the power connection can be inspected. A technically suitable kiln is still a poor studio choice if it cannot be placed and operated safely.
Include setup items in the planning exercise. Depending on your process, you may need shelves, shelf primer or paper, molds, supports, handling tools, and a safe area for cooling work. The exact requirements depend on the kiln and project, so use the product documentation and process guidance rather than assuming that the kiln alone is a complete setup.
What should you check before buying?
- List your projects. Write down the largest piece, typical batch size, and processes you plan to use, such as fusing, slumping, casting, or draping.
- Measure the work area. Include molds, supports, and clearance. Compare those measurements with the stated usable interior dimensions.
- Confirm glass use. Check manufacturer documentation for the specific kiln model and ask whether it is intended for your process.
- Review controller functions. Confirm that the controller can run the segments, holds, and cooling approach your glass work requires.
- Check electrical service. Compare voltage and amperage with your available circuit. Use a qualified electrician when needed; do not improvise wiring.
- Plan kiln placement. Follow clearance, ventilation, surface, and access instructions supplied with the kiln.
- Budget for the complete setup. Account for shelves, kiln wash or shelf paper as appropriate, tools, installation, and safe operating space, not only the kiln itself.
- Keep a firing log. Record glass type, thickness, load arrangement, schedule, and result so later firings are easier to compare.
For example, someone making small pendants may prioritize a compact usable shelf, precise programming, and easy loading. Someone making a 10-inch bowl should start with the mold footprint and chamber clearance. Someone producing several small pieces per week may care most about repeatable schedules and a load layout that makes efficient use of the shelf. These are different buying decisions even though all three artists may search for a pottery kiln.
What are common selection mistakes?
- Choosing by maximum temperature alone. A high temperature rating does not demonstrate that a kiln has suitable controls or behavior for glass.
- Assuming every pottery kiln suits glass. Verify intended use and model-specific guidance instead of relying on the broad category name.
- Ignoring interior measurements. External size does not tell you how much usable room the chamber provides.
- Mixing incompatible glass. Match COE and manufacturer compatibility information before firing pieces together.
- Using an unverified schedule. A schedule copied from another material, kiln, or glass thickness may not suit your project.
- Overlooking electrical needs. Confirm the circuit and installation before ordering or connecting equipment.
- Firing a full load before testing. A small test can reveal whether the glass and schedule behave as expected with less material at stake.
- Buying more chamber than the studio can use. A large kiln must still fit the room, circuit, loading path, and regular workflow.
How do you compare options without overbuying?
Begin with a short list of must-haves: enough interior space for your largest routine project, a controller suited to your intended schedules, and electrical requirements your studio can meet. Treat convenience features as secondary unless they solve a real problem in your workflow.
Compare at least two models using identical questions. What is the usable shelf area? What control functions are provided? Is the model described for glass applications? What installation and clearance requirements apply? What accessories are needed to start? A comparison of the Olympic 1210FLE with another glass-oriented model can make differences in dimensions and configuration more concrete.
Create a simple decision sheet with three columns: required, helpful, and unnecessary. Put chamber dimensions and electrical compatibility in the required column. Put features that would make your normal workflow easier in helpful. Put specifications that do not affect your projects in unnecessary. This prevents an impressive feature list from distracting you from the conditions that determine whether the kiln will actually work in your studio.
Keep your intended glass and process in view. A kiln with more capacity is not automatically a better choice if you mostly make small pieces. A compact option may not work if your regular work includes broad panels or tall molds. The best fit is the one whose documented capabilities align with your work and setup.
Frequently asked questions
Can a pottery kiln fire glass?
Some kiln models designed for pottery may also be suitable for particular glass work, but suitability depends on the exact model, controls, heat distribution, and intended process. Confirm with the manufacturer rather than assuming all pottery kilns can fire glass.
Is a pottery kiln the same as a glass kiln?
No. The labels reflect different intended uses, and the firing goals differ. A glass artist should check whether the model supports glass schedules and has the dimensions and features needed for the planned work.
Can I use the same kiln for ceramics and glass?
That depends on the kiln’s design, manufacturer instructions, materials, and how it is installed and operated. Ask the manufacturer whether the specific model can be used for both processes and follow its directions for setup and firing.
Does a higher maximum temperature mean a better kiln for glass?
No. Glass results depend on controlled heating and cooling, the controller, chamber conditions, and the glass itself. Maximum temperature is only one specification and does not establish suitability.
What should I check first when buying?
Start with the largest work you expect to fire, then check usable chamber dimensions, control functions, electrical requirements, and manufacturer guidance for glass use. Confirm these before comparing optional features.
Compare kiln options for your studio
Choose for the work you plan to make
A pottery kiln may be relevant to a glass artist, but the right choice depends on verified model specifications and your actual firing needs. Compare usable space, programming, electrical requirements, cooling behavior, and glass compatibility, then begin with a carefully planned test firing.