
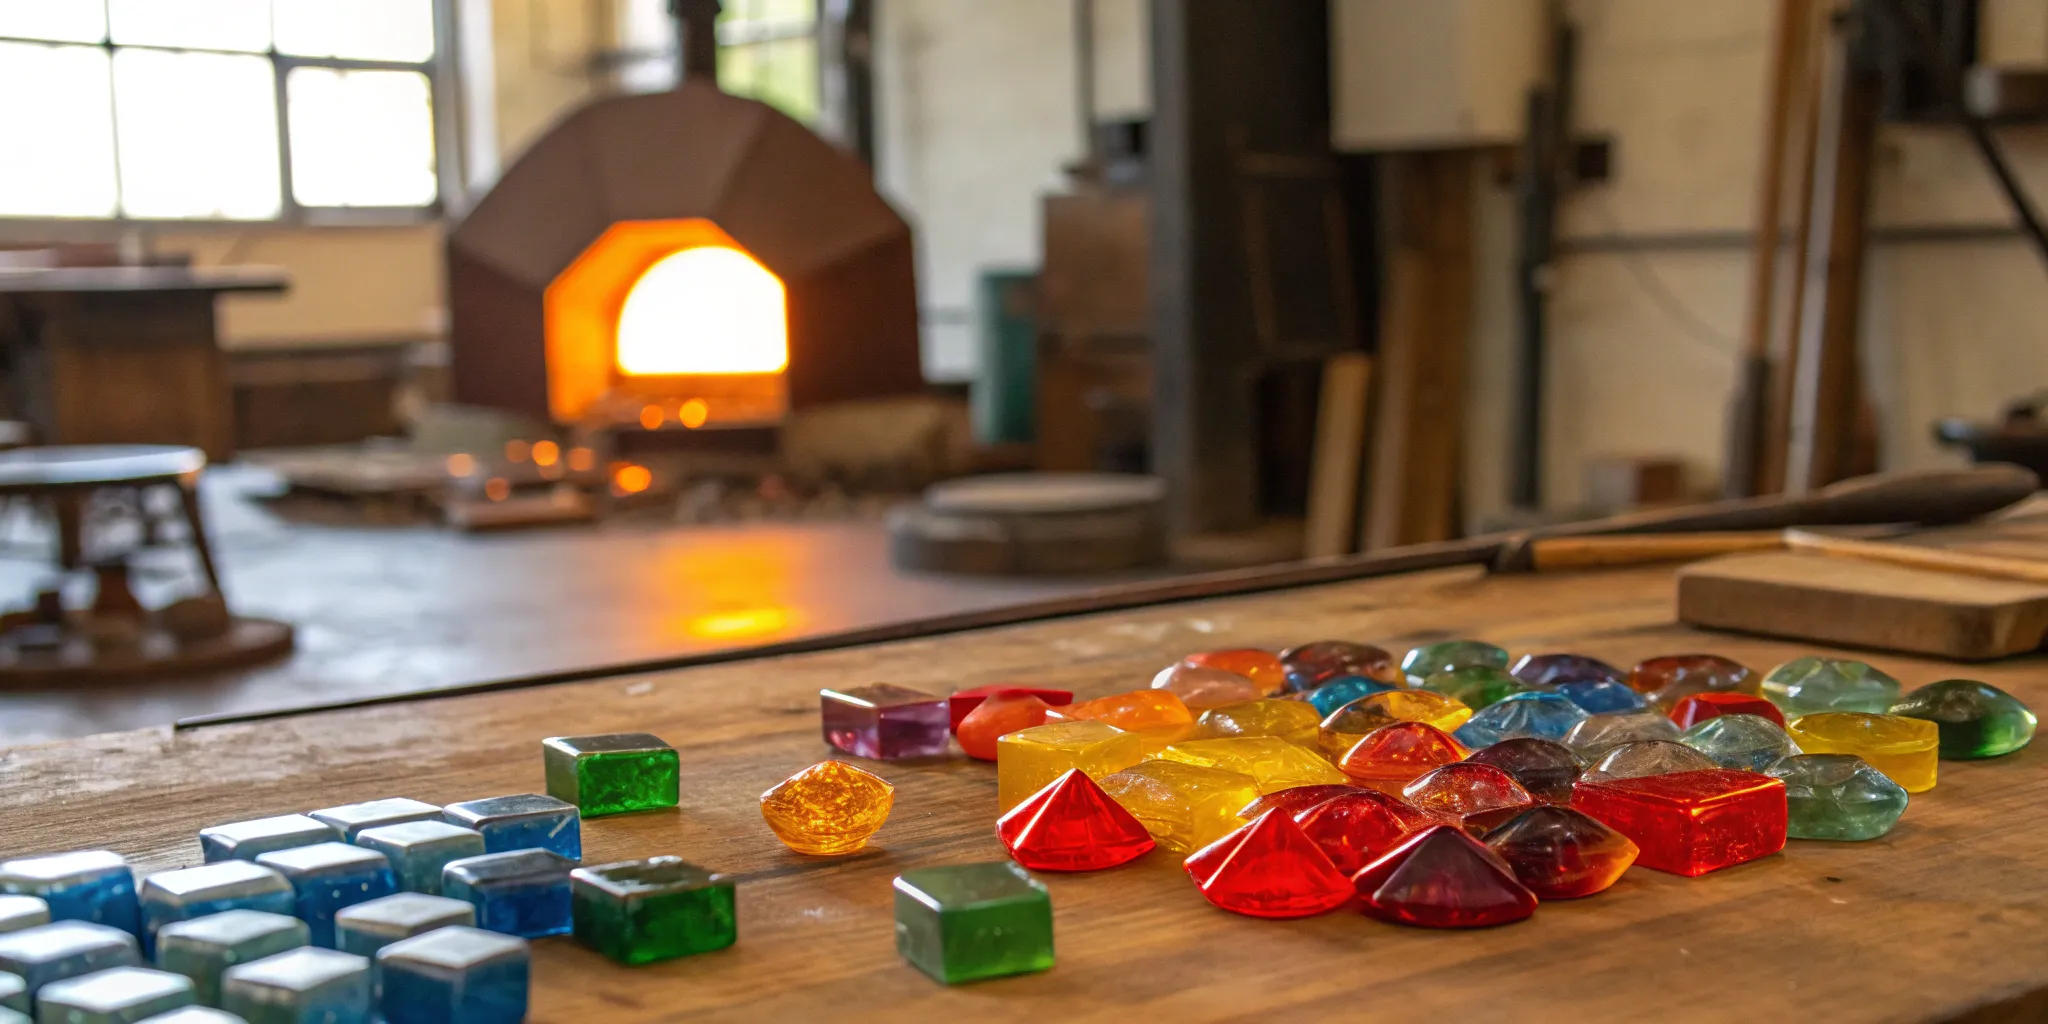
Ready to move beyond basic designs? The COE 96 glass system is your answer. Think of it not just as a single sheet of glass, but as an entire palette of compatible materials designed to work together flawlessly. You can layer vibrant sheets, sprinkle on textured frit, and add a touch of shimmer with dichroic accents—all with confidence. The best glass fusing news for any artist is knowing your piece will emerge from the kiln strong and unified. This guide explores the different types of glass fusing, showing you how to combine these forms to bring your most ambitious projects to life.
Key Takeaways
- Stick to One COE Family for Crack-Free Results: The golden rule of fusing is compatibility. To prevent your project from cracking, make sure every single component—from the base sheet to the tiniest sprinkle of frit—is rated COE 96.
- A Clean Start and a Smart Schedule are Non-Negotiable: For a professional, crystal-clear finish, always clean your glass thoroughly to remove dust and oils. Then, follow a proper firing schedule to ensure your glass fuses perfectly and cools down slowly to prevent thermal shock.
- Use Frit, Stringers, and Dichroic Glass for Artistic Flair: Move beyond basic designs by incorporating different forms of glass. Use frit to create painterly textures, draw fine lines with stringers, and add a captivating shimmer with dichroic accents to give your work depth and personality.
Understanding the Basics of Glass for Fusing
Before you even think about firing up the kiln, let’s talk about the star of the show: the glass itself. Not all glass is created equal, especially when it comes to fusing. Choosing the right type is the foundation of a successful project, ensuring your piece melts evenly and comes out of the kiln without any unwanted cracks or stress. It’s a bit like baking—you wouldn’t substitute bread flour for cake flour and expect the same result. Understanding the fundamental properties of different glass types will save you a lot of headaches and materials down the line. It’s the first step in making sure your creative vision translates perfectly into a finished piece.
Soda-Lime vs. Float Glass
When you’re shopping for fusing glass, you’ll mostly encounter soda-lime glass. This is the standard for art glass because it’s specifically formulated to melt at a consistent, manageable temperature, usually between 1350 and 1500 degrees Fahrenheit. This predictability is exactly why it’s the foundation of the COE 96 system, allowing you to confidently layer sheets, frit, and stringers. On the other hand, you have float glass—the kind used for windows. While you *can* fuse it, it requires about 50 degrees more heat to melt properly. This higher temperature makes it less versatile and generally incompatible with the colorful accessory glasses you’ll want to use, making soda-lime glass the clear winner for your artistic projects.
Why Choose COE 96 Glass for Your Fusing Projects?
If you’ve spent any time exploring the world of glass fusing, you’ve definitely come across the term “COE 96.” It’s one of the most popular and versatile types of glass for artists, and for good reason. Think of it as a reliable, creative partner for your kiln. Whether you’re just starting out or have been fusing for years, COE 96 glass offers a fantastic range of colors, textures, and forms that all work together beautifully.
But what exactly does COE 96 mean, and why is it so important for your projects? Understanding this simple concept is the key to creating strong, crack-free fused glass art. It’s all about ensuring the different pieces of glass you use in a project are compatible, meaning they can be heated and cooled together without causing stress. Let’s break down what makes COE 96 a go-to choice for fusers everywhere.
What is COE and Why Does It Matter for Fusing?
“COE” stands for Coefficient of Expansion, which is just a technical way of describing how much glass expands when it gets hot and shrinks when it cools down. Every piece of glass has a COE number. For a fusing project to be successful, every single piece of glass you use—from the base sheet to the tiniest sprinkle of frit—must have the same COE.
Think of it like baking a cake with ingredients that don’t mix well; the result will be a disaster. The same goes for glass. If you try to fuse glass with different COE numbers, they will expand and contract at different rates inside the kiln. This creates stress as the piece cools, which almost always leads to cracks or even a complete break.
Why You’ll Love Fusing with COE 96 Glass
The biggest benefit of working with COE 96 glass is compatibility. An entire system of glass products is designed to work together seamlessly. This means you can confidently mix and match sheets, stringers, and frit from different manufacturers, as long as they are all rated COE 96. This opens up a huge world of creative possibilities without you having to worry about your project cracking apart.
Fusing a piece of COE 90 glass with your COE 96 project is one of the most common mistakes a new artist can make, and it will unfortunately lead to breakage. Sticking to one COE family, like 96, removes that risk. Plus, COE 96 is known for being relatively forgiving and has well-established firing schedules, making it easier to get beautiful, consistent results every time you fire up a project.
Your Guide to the Different Types of COE 96 Glass
When you think of glass for fusing, you might picture large, colorful sheets. While those are definitely a staple, the world of COE 96 glass is so much richer and more varied. Think of it like a painter’s palette—you have your base canvas, but you also have a whole range of different paints, textures, and tools to bring your vision to life. Combining different forms of glass is how you create projects with incredible depth, detail, and personality. It’s the secret to moving beyond flat, one-dimensional pieces into art that feels dynamic and alive.
From tiny, sand-like grains of frit that create subtle shading to shimmering, color-shifting dichroic pieces that demand attention, each type of glass offers a unique way to express your creativity. Getting to know these different materials is one of the most exciting parts of learning glass fusing. It opens up a whole new set of possibilities for your designs. Let’s look at the main players you’ll want to have in your studio. Understanding what each one does and how they can work together will help you plan your projects and achieve stunning results in the kiln.
Transparent, Opaque, and Iridized Glass
Beyond fun additions like frit and stringers, the sheet glass you choose as your foundation comes in a few key styles that will completely change your final piece. You’ll mainly work with three types: transparent, opaque, and iridized glass. Their names give you a pretty good clue about what they do, and it all comes down to how they interact with light. Transparent glass lets light pour through, opaque glass stops it in its tracks, and iridized glass has a shimmery metallic finish that catches the light. Picking the right one is a critical design choice that sets the entire mood of your project. Knowing the difference will help you confidently select the perfect glass for your next creation.
Tips for Working with Transparent Glass
Transparent glass, which you might hear called cathedral glass, has that classic, luminous quality you see in stained glass windows. Its magic lies in letting light shine through, making colors pop with a rich, jewel-toned brilliance. To really make it sing, always place it on a light or clear base—a dark background can dull its vibrancy. A fun thing to remember is that layering transparent colors is like working with watercolors; where they overlap, they’ll mix to create a new shade. This can be a beautiful effect, but it can also be an unwelcome surprise if you weren’t expecting it! And, of course, always confirm your transparent sheets are COE 96 to keep your finished piece strong and free of cracks.
Glass Sheets: The Canvas for Your Fused Art
Glass sheets are the foundation of most fusing projects. This is your canvas. You’ll use them to create the base layer that everything else is built upon, or you can cut them into larger shapes to form the main elements of your design. COE 96 sheets come in a huge variety of colors, from transparent to opaque, and with different textures. Starting with a solid, high-quality sheet is key to a successful piece, as it provides the structural integrity for your entire project. Whether you’re making a simple coaster or a complex piece of wall art, you’ll almost always start with a piece of sheet glass.
Add Sparkle and Texture with Frit and Confetti
If glass sheets are your canvas, think of frit and confetti as your specialty paints. Frit is simply crushed glass, available in various sizes from fine powder to coarse chunks. You can sprinkle it on your base to create speckled patterns, shaded effects, or rich textures. Confetti is paper-thin flakes of glass that can be layered to produce delicate, watercolor-like washes of color. Using these materials is a fantastic way to add intricate detail and a painterly quality to your work without having to cut tiny, complicated shapes. They allow you to literally “paint” with glass, giving you incredible artistic freedom.
Understanding Frit Sizes
Frit isn’t a one-size-fits-all material; it comes in several different grits, and each one creates a unique effect. Think of powder frit as powdered sugar—it’s perfect for creating soft, airbrushed shading or blending colors smoothly. Fine frit is more like sand, giving you a delicate, speckled texture that’s great for filling small areas with color. For a more defined, grainy look where you can see the individual glass particles, you’ll want to use medium frit. Then you have coarse frit, which consists of small, chunky pieces of glass that create bold, dimensional effects. Experimenting with the different sizes of COE 96 frit is the best way to discover which textures best suit your artistic style.
Jumpstart Your Design with Precut Shapes and Stringers
Sometimes you need a perfect circle, a crisp line, or just a little creative shortcut. That’s where precut shapes and stringers come in. Stringers are thin, spaghetti-like rods of glass that are perfect for drawing lines, creating outlines, or adding delicate details to your designs. Precut shapes are exactly what they sound like—circles, squares, hearts, leaves, and more, all ready to be placed directly into your project. They are a huge time-saver and ensure you get clean, consistent shapes every time. These are especially helpful for creating geometric patterns or for when you want to add a quick, fun embellishment to your piece.
Stringers, Noodles, and Other Glass Forms
While stringers are perfect for creating thin, spaghetti-like lines, don’t overlook their flatter cousin: noodles. The analogy is simple: if stringers are spaghetti, noodles are fettuccine. Both are fantastic for adding linear details, but they create different effects. Noodles give you a wider, ribbon-like line that’s great for borders or bolder graphic elements. You can lay both stringers and noodles straight onto your project for crisp, geometric designs, or you can gently heat them with a candle or torch to bend them into graceful curves before placing them. This simple technique allows you to ‘draw’ with glass, adding a whole new layer of detail and movement to your fused pieces.
Create an Iridescent Shine with Dichroic Glass
Want to add a little sparkle and intrigue to your work? Dichroic glass is your best friend. This amazing glass is coated with micro-layers of metals, which causes it to reflect different colors depending on the angle of the light. The effect is a mesmerizing, color-shifting shimmer that can make any project pop. Because it’s so eye-catching, a little goes a long way. You can use small pieces as accents in a larger design or make it the star of the show in jewelry. Adding a touch of dichroic glass is a surefire way to give your fused art a professional and captivating finish.
Where to Find the Best COE 96 Glass Supplies
Finding a reliable source for your glass is just as important as mastering your kiln schedule. The quality of your materials directly impacts the final look and durability of your art. When you have a go-to supplier, you can spend less time searching for what you need and more time creating. Let’s walk through where to find the best glass and what to look for when you’re stocking up your studio for your next project.
Our Go-To Source: ArtGlassSupplies.com
Starting with the right glass fusing supplies is more than a matter of convenience—it’s the foundation for safety, creativity, and long-term success in your art. Having a single, trusted source for everything you need simplifies the entire process. We offer a huge selection of COE 96 glass in every color and form you can imagine, from sheets and stringers to frit and powders. Plus, you can find all the essential tools, molds, and even kilns to complete your setup. It’s everything you need to bring your ideas to life, all in one place.
Trusted COE 96 Glass Brands for Great Results
When you’re working with COE 96 glass, brand consistency can make a big difference in your results. Different manufacturers have unique color palettes and characteristics, but they are all formulated to be compatible. Brands like Wissmach and Oceanside Compatible (formerly Spectrum Glass) are industry standards known for their reliability and stunning colors. Wissmach COE 96 sheet glass, frit, and stringers are known to work well and fire beautifully. Exploring these trusted brands helps you find the exact look you want while ensuring your pieces fuse together perfectly every time.
How to Choose the Right Glass for Your Project
As you shop, always make sure you’re using materials specifically designed for glass fusing. While a piece of stained glass might look beautiful, it won’t be compatible with your COE 96 projects unless it’s also rated COE 96. Successful glass fusing requires developing disciplined working habits, and that starts with sourcing the right supplies. Pay attention to the glass’s COE to ensure compatibility, and check for a clean, consistent surface. Understanding your materials is key, as each type of glass requires a specific firing schedule to achieve the best results.
Gearing Up: Your Essential Glass Fusing Toolkit
Before you can bring your colorful ideas to life, you need to gather the right gear. Having a well-equipped studio not only makes the fusing process smoother but also opens up a world of creative possibilities. Think of it as setting up your creative command center. From the kiln that works its magic to the simple hand tools that give you precision, each piece plays a vital role. Let’s walk through the essential tools and equipment you’ll need to get started with your COE 96 glass projects. Equipping yourself properly from the start will save you headaches later and let you focus on what really matters: creating beautiful glass art.
Why Taking a Class is a Great First Step
It’s tempting to jump right in and buy all the shiny new tools, especially a kiln. But before you make that big investment, consider taking a local glass fusing class. It’s a fantastic, low-pressure way to learn the fundamentals from an experienced instructor who can guide you through the process safely. You’ll get a feel for the craft without the hefty price tag of setting up a home studio. A class gives you hands-on experience and helps you decide if this is a hobby you truly want to pursue before committing to buying your own kiln.
The real value of a class is the immediate, personalized feedback. You can ask questions and get real-time advice on your technique—something you just can’t get from an online tutorial. An instructor can help you understand the nuances of firing schedules and show you how to avoid common pitfalls that frustrate beginners. This foundational knowledge is invaluable, setting you up for success and giving you the confidence to start creating on your own. You’ll leave with a finished piece and a solid understanding of the process.
Choose the Perfect Kiln for Your Space
A glass kiln is the single most important piece of equipment in any fusing setup. This is where the transformation happens, turning separate pieces of glass into a single, stunning work of art. Selecting the right one for your space and projects is crucial for getting the results you want. Small, tabletop kilns are perfect for making jewelry or small suncatchers, while larger models can handle big plates, bowls, and wall art. Think about the scale of the projects you dream of making, and consider your available space and electrical setup. Your kiln is a long-term partner in your art, so choosing wisely is the first step toward fusing success.
Considering the Cost of Getting Started
Let’s be real, getting into glass fusing involves an initial investment. Your kiln will be the biggest purchase, but you’ll also need to budget for quality glass, cutters, and other essential tools. It can feel like a lot at first, but thinking of it as setting up a proper workshop helps. The key is to invest smartly from the beginning. Buying the right gear upfront saves you from the frustration and expense of failed projects down the line. It’s about building a solid foundation for your art, ensuring that the money you spend translates directly into beautiful, successful pieces you can be proud of.
One of the most costly mistakes new artists make is mixing incompatible glass. It might be tempting to grab a piece of glass just for its color, but if it’s not the right COE, your project is destined to crack in the kiln. Sticking with a single system, like COE 96 glass, is the smartest financial decision you can make. It guarantees that every sheet, stringer, and sprinkle of frit you buy will work together perfectly. This compatibility isn’t just a technical detail; it’s your insurance policy against wasted materials and money, allowing you to build your collection of supplies with confidence.
Essential Tools for Cutting and Handling Glass
Once you have your glass, you’ll need a few basic tools to work with it. A good glass cutter, running pliers, and breaking-groyer pliers are essential for scoring and shaping your glass. The cutter creates a score line, while the pliers help you make a clean break along that line. These tools give you the control to achieve precise cuts and manage your glass pieces effectively. Don’t forget safety glasses—they are an absolute must-have to protect your eyes from tiny glass shards. Having the right tools will make your glass fusing projects much more manageable and enjoyable, allowing you to execute your designs with confidence.
How to Use Molds to Shape Your Glass
If you want to create three-dimensional pieces, you’ll need molds. Slumping and draping molds are designed for shaping flat fused glass into plates, bowls, or other curved forms with smooth, even contours. After you’ve fused your glass flat, you can place it on top of or inside a mold and fire it again at a lower temperature. The heat will soften the glass, causing it to slump or drape into the shape of the mold. This technique opens up a whole new dimension of functional art, from soap dishes to serving platters. Using molds can enhance the creativity and functionality of your glass projects, turning a flat design into a usable object.
Common Mold Materials
When you’re ready to give your fused glass dimension, you’ll find that molds come in a few different materials, each with its own personality. The most common you’ll see are ceramic molds. They are incredibly versatile, available in countless shapes and sizes, and are quite durable if you treat them well. You’ll also find stainless steel molds, which are great for simple, clean forms and can last a very long time. Another option is fiber, which can be used for creating unique textures or custom shapes. No matter the material, all molds serve the same purpose: to provide a sturdy form that will guide your glass as it softens in the kiln, transforming it from a flat panel into a beautiful, functional object.
Slumping and Draping Methods
Once you have your mold, there are two primary ways to use it: slumping and draping. Slumping is when you place your flat, fused glass piece *inside* a concave mold, like a bowl or a platter. As the kiln heats up, gravity gently pulls the glass downward, causing it to “slump” and take the interior shape of the mold. Draping is the opposite. You place your glass *over* a convex mold, and as it softens, it drapes over the form like cloth. This is a great technique for creating pieces with soft, flowing curves. Both methods use a lower temperature than a full fuse, just enough to make the glass pliable without melting it completely, allowing you to add shape and function to your art.
Set Up a Safe and Efficient Workspace
A dedicated and organized workspace is key to both your safety and your creative flow. Keep a tidy work area with your tools in their place and electrical cords stowed away. Glass should be stored safely where it won’t get knocked over, and any chemicals should be kept away from heat. It’s also important to have good ventilation, especially when your kiln is firing. A well-organized workspace is essential for both safety and efficiency in glass fusing. When you know where everything is and your space is clear of clutter, you can focus your energy on designing and creating without any unnecessary distractions.
A Note on Handling Glass Powder Safely
Glass powder, the finest grade of frit, is fantastic for creating soft, painterly effects, but it needs to be handled with care. The particles are so tiny they can easily float in the air, and breathing them in is a serious health hazard. To stay safe, always wear a high-quality dust mask or respirator whenever you’re working with glass powder. It’s also smart to work in a well-ventilated area and to clean your surfaces with a damp cloth when you’re done to pick up any stray dust. Using a small sifter can give you better control over the powder and minimize what becomes airborne, which is a simple step to keep your studio safe and your lungs happy.
25 Inspiring Ideas for COE 96 Glass Fusing
Ready to fire up the kiln? COE 96 glass is incredibly versatile, making it the perfect medium for almost any project you can dream up. Whether you’re just starting out or looking for your next creative challenge, this glass is forgiving, vibrant, and available in a huge range of colors and styles. From tiny trinkets to large-scale art, the possibilities are truly endless. It’s a fantastic choice for artists because its compatibility across different brands (as long as they’re all COE 96) means you can mix and match colors and textures without worrying about your project cracking from stress. This freedom opens up a world of creative expression. You can layer sheets, sprinkle on frit, add delicate stringers, or incorporate shimmering dichroic pieces. Think of it as painting, but with light and color trapped in glass. You can create functional pieces that brighten your home every day, like a custom-made serving platter, or craft beautiful jewelry that shows off your unique style. You can even make art for your garden that will sparkle in the sun. In this section, we’ll explore 25 ideas to get your creativity flowing and inspire your next masterpiece, broken down into categories to help you find exactly what you’re looking for.
Just Starting Out? Try These Beginner Projects
If you’re new to glass fusing, welcome! You’ve picked an art form that offers stunning results right from the start. Begin with simple, flat projects to get a feel for how glass cuts, layers, and melts. Coasters are a classic first project—they’re small, useful, and a great canvas for experimenting with color. You could also try making suncatchers, decorative tiles, or refrigerator magnets. These projects don’t require complex shaping or slumping, allowing you to focus on the fun part: designing with colorful COE 96 glass. The key is to start small, learn the basics, and build your confidence one beautiful piece at a time.
Making Wearable Art: Pendants, Earrings, and More
There’s something special about wearing a piece of art you made yourself. With COE 96 glass, you can design jewelry that perfectly matches your style. Pendants and earrings are popular choices, and for good reason—they’re quick to make and offer endless design possibilities. Try layering small pieces of dichroic glass to create pendants that shimmer and change color in the light. You can also craft unique cabochons for rings, create colorful beads for bracelets, or design statement brooches and hair clips. Fused glass jewelry is a fantastic way to turn small scraps of glass into something truly precious and wearable.
Craft Beautiful and Useful Pieces for Your Home
Why buy generic home decor when you can make your own? Fusing lets you create beautiful, functional pieces that add a personal touch to any room. Start in the kitchen with custom spoon rests, small serving trays, or vibrant cabinet knobs. In the bathroom, a handmade soap dish can add a pop of color. You can also design larger items like decorative bowls, serving platters, or even a set of unique dinner plates. Using molds allows you to slump your flat, fused designs into three-dimensional shapes, turning a simple glass panel into a functional work of art you can use and admire every day.
Brighten Your Space with Wall and Garden Art
Take your art beyond the tabletop and bring it to your walls and garden. Fused glass is perfect for creating pieces that play with light. Design a series of small, colorful wall panels to hang as a group, or go big with a single, abstract art piece. For the outdoors, suncatchers and wind chimes are wonderful projects that will sparkle in the sunlight and add movement to your garden. You can also create decorative garden stakes to tuck among your flowers or design fused glass elements to incorporate into a mosaic stepping stone. These projects allow you to create durable, weather-resistant art that brightens your space, inside and out.
Get Festive with Seasonal and Holiday Projects
Get into the festive spirit by creating your own holiday decorations. Fused glass ornaments are a wonderful tradition to start, and they make fantastic, heartfelt gifts. Think beyond Christmas trees—you can make spooky suncatchers for Halloween, colorful eggs for Easter, or festive platters for serving holiday treats. Using precut glass shapes like snowflakes, stars, or pumpkins can make these projects even easier and more fun, especially if you’re crafting with family. Creating seasonal decor is a great way to mark the changing seasons and build a collection of cherished, handmade decorations that you can enjoy for years to come.
Essential Fusing Techniques for COE 96 Glass
Once you have your supplies, it’s time to start fusing. Creating beautiful, durable glass art is all about understanding how the material behaves under heat. Mastering a few core techniques will give you the confidence to experiment and bring your creative ideas to life. Think of these as the foundation for all your future projects. By focusing on temperature control, layering, and proper firing schedules, you’ll be able to avoid common frustrations and achieve consistently stunning results.
Getting the Heat Right: Basic Fusing and Temp Control
The magic of glass fusing happens inside the kiln, which makes temperature control one of the most important skills to learn. When glasses with different COE values are fused together, they create internal stress that leads to cracking—sometimes right away, or even weeks later. This is why sticking to compatible COE 96 glass is so important. Using the wrong firing schedule is a guaranteed way to destroy your artwork. Each stage of the heating and cooling process serves a specific purpose, from melting the glass just enough to fuse, to slowly annealing it for strength. Getting familiar with your kiln and how it works is the first step toward successful fusing.
Tack Fuse for Texture
A tack fuse is your go-to technique when you want to preserve the individual shapes and textures of your glass pieces. Fired at a lower temperature, the glass elements just barely stick together, maintaining their original height and edges. Think of it like using a tiny bit of glue—the pieces are connected, but they still look distinct. This method is perfect for creating art with a lot of surface dimension and a tactile quality. If you’re layering stringers, frit, or small cut shapes and want each one to stand out, a tack fuse will give you that beautiful, textured finish without melting everything flat.
Contour Fuse for Dimension
When you want something a little more blended than a tack fuse but not completely flat, the contour fuse is the perfect middle ground. In this process, the glass layers join together and the edges become soft and rounded, but you can still see the distinct layers. It creates a wonderful sense of depth and dimension, giving your piece a smooth, finished look while preserving the integrity of your design. This is a great choice for wall art or decorative panels where you want a cohesive, unified feel without losing the visual separation between different colors and shapes. It’s a versatile technique that offers a polished yet dimensional result.
Full Fuse for a Smooth Finish
A full fuse is what you need when you want all your glass layers to melt completely into one seamless, smooth piece. Fired at the highest temperature, this technique erases all the individual edges and textures, blending the colors and creating a single, uniform surface with a glossy finish. This is the ideal method for projects that you plan to slump into molds, like plates or bowls, because it creates a strong, even base. It’s also perfect for making jewelry cabochons or any piece where you want a sleek, polished look. A successful full fuse depends on a precise firing schedule in your kiln to ensure the glass melts perfectly and cools without stress.
How to Create Depth with Layering and Texture
Layering is where you can really start to play with depth, color, and design. But how you stack your glass matters. Beginners sometimes stack glass in a way that traps large pockets of air between layers, especially when placing small pieces between two large sheets. This can lead to distorted designs, uneven surfaces, or even cracked pieces in the kiln. To avoid this, build your layers thoughtfully, ensuring pieces have good contact with each other. You can also use different forms of glass, like frit or stringers, to add texture and intricate patterns without trapping large air bubbles. This is your chance to build a piece with real dimension and visual interest.
Adding Special Effects with Frit and Inclusions
Want to add a sprinkle of color or a delicate line to your design? Frit, stringers, and other inclusions are your best friends. These small elements allow you to add incredible detail that would be impossible with sheet glass alone. You can create painterly effects with fine frit or add bold graphic lines with stringers. Just remember that each type of glass requires a specific firing schedule to achieve the best results. Adding these smaller elements can change how the piece heats, so failing to tailor your schedule can result in over-firing or incomplete fusion. A little practice will help you understand how these additions interact with your base glass.
Understand Firing Schedules for Great Results
A firing schedule is the recipe your kiln follows to heat and cool your glass. It’s not just about reaching a top temperature; it’s about controlling the rate of heating, how long the glass “soaks” at certain temperatures, and how slowly it cools down (anneals) to prevent stress. The best place to start is your kiln’s user manual, which often provides optimal firing schedules for different types of projects. As you gain experience, you can adjust these schedules for your specific needs. A well-planned schedule is the key to preventing common issues and achieving a beautiful, professional finish on every piece you create in your kiln.
Key Fusing Temperatures to Know
Different temperatures create different results in the kiln. For most COE 96 glass, which is a type of soda-lime glass, the key fusing action happens between 1350°F and 1500°F. At the lower end of this range, you’ll achieve a “tack fuse,” where the glass layers stick together but retain their individual shapes and textures. As you approach the higher end, around 1480°F, you’ll get a “full fuse,” where the layers melt completely into one smooth, flat surface. Every kiln is slightly different, so it’s always a good idea to run a few small tests to see exactly how your specific setup and glass respond to these temperature ranges.
Example of a Basic Firing Schedule
A firing schedule is a multi-step recipe that guides your kiln. For a simple full fuse with two layers of glass, a schedule might look something like this: heat slowly to around 1250°F to prevent bubbles, hold for 30 minutes, then heat more quickly to a top temperature of 1480°F and hold for 10 minutes. After that, the kiln cools rapidly to the annealing temperature (around 950°F), holds there for about 30 minutes to relieve stress, and then cools slowly back to room temperature. This is just one example; your ideal schedule will change based on the size, thickness, and complexity of your project.
Understanding Firing Rates like “9999”
When you program your kiln, you’ll set a rate, a temperature, and a hold time for each step, or “segment.” Sometimes, you’ll see a rate listed as “9999” or “AFAP” (As Fast As Possible). This simply tells the kiln to change temperature as quickly as it can. You’ll typically use this setting to drop from the top fusing temperature down to the annealing temperature. The goal is to cool the glass fast enough to stop the melting process and “freeze” your design in place before it can over-fire, but not so fast that you cause thermal shock before you reach the critical annealing stage.
How Long Does Fusing Take?
Patience is a virtue in glass fusing, as the entire process can take several hours. A small project, like a pair of earrings or a coaster, might be finished in as little as three to four hours. However, a larger or thicker piece, like a 12-inch bowl or a piece of wall art, needs to heat and cool much more slowly to ensure the temperature remains even throughout the glass and prevent cracking. These larger projects can easily take 12 to 14 hours from start to finish. The slow, controlled cooling during the annealing phase is the most time-consuming part, but it’s absolutely essential for creating a strong, durable piece of art.
Exploring Other Kiln-Forming Techniques
Once you’re comfortable with the basics of fusing, a whole new world of creative techniques opens up. Moving beyond a simple flat fuse allows you to add professional finishes, create three-dimensional objects, and experiment with unique textures. These methods all rely on your kiln, but they use different temperatures and approaches to manipulate the glass in exciting ways. Learning these techniques will add incredible depth and sophistication to your work, allowing you to create pieces that are not just fused, but truly formed by heat and gravity.
Capping for a Polished Look
If you want to give your fused glass projects a smooth, professional finish with a sense of depth, capping is the technique to learn. It involves placing a layer of clear glass over your design before firing it. When the piece is fused, the clear cap melts over your artwork, encasing it in a perfectly smooth, glossy layer. This not only protects the design but also acts like a lens, magnifying the colors and details underneath. It’s an excellent method for making jewelry, coasters, or any piece where you want a flawless top surface. Just make sure your clear top layer is the same COE 96 glass as the rest of your project to ensure a crack-free result.
Fire Polishing for a Glossy Finish
Sometimes after a piece comes out of the kiln, or after you’ve done some cold working like grinding the edges, the surface can look a bit dull or scuffed. Fire polishing is the perfect solution. This technique is a finishing step where you heat the glass in the kiln again, but at a lower temperature than a full fuse. The goal isn’t to melt the piece completely, but just to soften the surface enough to restore its glossy, brilliant shine. It’s a quick firing that smooths out minor imperfections and makes the edges of your work look clean and professional. Think of it as the final touch that gives your art that high-quality, finished look.
Glass Casting and Pot Melts
Ready to create solid, three-dimensional objects? Glass casting is a technique where you fill a mold with glass—like frit or scrap pieces—and heat it until it melts completely, filling the entire cavity. As it cools, the glass becomes a solid object, like a paperweight, ornament, or sculptural element. This is different from slumping, where you’re just shaping a sheet of glass. A related technique is the pot melt, where you stack glass in a ceramic pot with a hole in the bottom. When fired, the glass melts and drips out onto a kiln shelf below, creating a stunning, swirled puddle of color that you can then cut up and use in other projects. Both techniques require specialized molds and offer a dramatic way to work with glass.
Advanced Techniques: Crackle and Bubble Squeezing
For those who love to experiment, there are advanced techniques that can add unique effects to your work. The crackle technique, for example, involves sandwiching a middle layer of broken glass or coarse frit between two solid sheets. When fired, this middle layer fuses into a beautiful, web-like pattern that looks like cracked ice suspended within the glass. On the more technical side, bubble squeezing is a process used to eliminate trapped air between layers. By heating the glass slowly at a lower temperature before the main fuse, you give any air bubbles a chance to escape. This is a crucial step for achieving crystal-clear results, especially when working with multiple thick layers.
How to Avoid Common Fusing Mistakes
There’s nothing more disheartening than waiting hours for your kiln to cool, only to discover your beautiful piece is cracked, cloudy, or full of bubbles. While it’s a frustrating experience, the good news is that most fusing mistakes are completely avoidable. It all comes down to understanding how glass behaves under heat and taking a few key preparatory steps.
Think of these tips as your pre-flight checklist before firing. Getting into these habits will not only save you from disappointment but also save you money on wasted materials. From ensuring your glass is compatible to dialing in the right firing schedule, a little extra care on the front end makes a world of difference in your final result. Soon, these practices will become second nature, allowing you to focus on the creative side of your work with confidence. Let’s walk through the most common pitfalls and how you can sidestep them for consistently beautiful results.
Avoid Cracks: The Importance of Compatibility Testing
This is the golden rule of glass fusing: always use glass with the same Coefficient of Expansion (COE). COE measures how much glass expands and contracts when heated and cooled. If you try to fuse a piece of COE 90 glass with your COE 96 glass project, they will fight against each other as they cool. This creates internal stress that will cause your piece to crack—sometimes immediately, and sometimes days or even weeks later. Always check the label on your glass and keep your COE 90 and COE 96 scraps in separate, clearly marked bins to avoid a costly mix-up.
Prep and Clean Your Glass Like a Pro
Dust, fingerprints, and sticker residue are the enemies of a perfect fuse. Any contaminants left on the glass can cause cloudiness, bubbles, or devitrification (a scummy, crystalline coating) during firing. Before you even think about putting your project in the kiln, give every piece of glass a thorough cleaning. A simple wash with warm, soapy water and a lint-free cloth often does the trick. For stubborn marks, a wipe-down with isopropyl alcohol works wonders. Taking just a few minutes to properly clean your glass ensures a pristine, professional-looking finish every time.
How to Fix Common Firing Schedule Problems
A firing schedule is not a one-size-fits-all recipe. Different projects—depending on their size, thickness, and desired outcome—require different heating and cooling rates. Firing too hot or too fast can cause your glass to lose its shape, while firing too low or for too short a time can result in an incomplete fuse. Start with the glass manufacturer’s recommended firing schedule and keep a detailed journal of your projects. Note the type of glass, the schedule you used, and the results. This log will become an invaluable resource as you learn how your specific kiln behaves.
How to Prevent Bubbles and Cracks
Beyond the major issue of COE incompatibility, cracks can also be caused by cooling the glass too quickly (thermal shock). This is why following a proper annealing schedule—the slow cooling phase—is so critical. As for bubbles, they are one of the most common frustrations in fusing. They’re usually just air trapped between layers of glass. To minimize them, make sure your glass pieces are stacked neatly with no gaps for air to get trapped. Firing your project slowly through the initial heating phase can also give trapped air a chance to escape before the glass seals shut.
A Simple Planning Process for Perfect Projects
A little bit of planning can make a huge difference between a project you love and a pile of cracked glass. Before you even start cutting, taking time to think through your design, materials, and process will save you a lot of frustration. It’s not about limiting your creativity—it’s about giving it the best possible chance to shine. By mapping out your project, testing your materials, and keeping track of your results, you’ll build the skills and confidence to tackle even more ambitious pieces. Let’s walk through a few simple habits that will set every project up for success.
Step 1: Sketch Your Design and Pick a Palette
Every great piece starts with an idea. Whether you sketch it out on paper or just visualize it in your head, having a clear design plan is your first step. This is when you’ll choose your colors and decide how different elements will fit together. Most importantly, this is where you double-check that all your glass is compatible. Fusing a piece of COE 90 glass with your COE 96 glass project is one of the most common mistakes, and it will almost always lead to breakage as the piece cools. Stick to one COE for each project to ensure everything fuses and cools uniformly. Think about how your colors will interact, too—some might blend beautifully, while others could become muddy.
Working with the Right Glass Thickness
Once you have your design, the next thing to consider is the thickness of your glass. For most projects, a total thickness of about ¼ inch is the sweet spot. This is typically achieved by stacking two standard 3mm sheets of glass. This two-layer structure provides the stability your piece needs to hold its shape in the kiln without becoming too fragile or overly bulky. But how you stack your glass matters. Simply placing small decorative pieces between two large sheets can trap air, leading to unwanted bubbles or an uneven surface. To create a solid, stable piece, build your layers thoughtfully to ensure good contact between all the elements, which is key for achieving a smooth, professional finish.
Why You Should Always Test a Small Sample
Have you ever pulled a piece from the kiln only to find the colors did something completely unexpected? Some glass combinations can create surprising chemical reactions when fired. That’s why testing is your best friend. Before you commit to a large project, it’s a great idea to run a small test piece first. Cut tiny squares of the glasses you plan to use, fuse them together, and see what happens. This allows you to learn which combinations create beautiful, unexpected effects—and which to avoid. It might feel like an extra step, but it’s a small investment of time and material that can save your entire masterpiece from a disappointing outcome. Think of it as a creative experiment!
Why a Project Journal is Your Secret Weapon
Your memory is good, but a project journal is better. This is one of the most powerful tools for growing as a glass artist. In a simple notebook, you can document your firing schedules, the types of glass you used, and the results of each project. Tape in a photo of the finished piece! This practice is especially helpful when you’re working with different kilns or trying new techniques. Over time, your journal will become your personal encyclopedia of glass fusing. When a project turns out perfectly, you’ll have the exact recipe to recreate it. And when something doesn’t go as planned, your notes will help you figure out why and avoid that mistake next time.
Show It Off: How to Care For and Display Your Art
Finishing a glass fusing project is such a rewarding feeling. You’ve planned your design, cut the glass, and watched it transform in the kiln. Now, you have a beautiful piece of art that deserves to be shown off and cherished. But the creative process doesn’t quite end when the kiln cools down; the final step is ensuring your work is cared for and displayed properly. This is just as important as the fusing itself.
Proper care protects your art from dust, scratches, and accidental damage, while thoughtful display can highlight its best features and make it a true centerpiece. It keeps the colors looking as vibrant as the day you made them and ensures the piece remains a lasting treasure. Taking a few extra moments to think about placement, lighting, and cleaning will ensure your creations can be enjoyed for years to come. Whether you’re decorating your own home, giving a piece as a gift, or selling your work at a market, these simple tips will help you present your art in the best possible way and give it the longevity it deserves.
Smart Ways to Display and Store Your Glass Art
Choosing the right spot for your finished piece is just as important as creating it. To protect your art from dust and accidental bumps, consider placing it inside a glass case or an acrylic vitrine. Make sure any shelf or surface you use is completely level and stable. You’ll also want to think about lighting. While a sunlit room can make your glass sparkle, be mindful of where direct sunlight falls throughout the day. Prolonged exposure can cause some colors to fade over time. This guide to art storage and display offers more great tips on this. If you store pieces between shows, clear totes lined with bubble wrap are a great solution for keeping them safe and organized.
Keep Your Glass Art Sparkling with These Cleaning Tips
When your glass art needs a little refresh, it’s best to skip the household cleaners. The chemicals in many common sprays can be too harsh and may damage the surface of your piece. Instead, a gentle dusting with a soft, lint-free cloth is usually all you need to restore its shine. If you encounter fingerprints or more stubborn spots, a simple mixture of mild soap and lukewarm water will do the trick. Gently wipe the surface, rinse with clean water, and dry thoroughly with another soft cloth. Following these simple steps on how to care for artwork will keep your fused glass creations looking pristine without risking any damage to their delicate beauty.
Frequently Asked Questions
What’s the real difference between COE 96 and COE 90 glass? Think of it like two different recipes for bread dough—they might look similar, but they rise at different rates. COE 96 glass expands and contracts slightly more than COE 90 glass when heated and cooled. While the difference seems tiny, it’s enough to create massive stress when the two are fused together, which will cause your project to crack. The most important takeaway is that they are not compatible, so you must stick to one COE family for every single element in a project.
Can I use my beautiful stained glass scraps for a fusing project? You can, but only if that stained glass is also specifically rated as COE 96 and suitable for fusing. Most traditional stained glass is not tested for fusing compatibility and will have a different COE, making it incompatible with your fusing glass. Mixing them is a recipe for a cracked project. To be safe, always keep your fusing glass and your traditional stained glass supplies in separate, clearly marked bins.
Do I really need a special kiln, or can I just use my kitchen oven? You absolutely need a kiln designed specifically for glass. A kitchen oven simply cannot reach the high temperatures required to melt glass properly. More importantly, a kiln offers precise temperature control, which is critical for the slow cooling process called annealing. This slow cool-down relieves stress in the glass, making it strong and durable. Without it, your piece would be incredibly fragile and likely break.
My fused pieces keep getting tiny bubbles trapped inside. What am I doing wrong? Those pesky bubbles are almost always caused by air getting trapped between the layers of glass. To help prevent this, make sure your glass pieces are cut cleanly and stacked as neatly as possible, with good surface-to-surface contact. Firing your kiln a bit more slowly during the initial heat-up can also give that trapped air a chance to escape before the edges of the glass seal shut.
I’m a complete beginner. What’s the best first project to try with COE 96 glass? Starting with a simple, flat project is a fantastic way to get comfortable with the process. Making a set of colorful coasters or a few suncatchers is a perfect first step. These projects allow you to practice the fundamentals of cutting, layering, and designing without the added complexity of slumping into a mold. You’ll get a feel for how the glass behaves in the kiln and gain the confidence to try more ambitious pieces.