
Ready to try your hand at stained glass? It’s a fantastic hobby, but knowing what to buy can be confusing. Maybe you’ve even looked up stained glass classes near me and wondered what equipment you’d need to practice at home. This guide is your answer. We’ve created the ultimate checklist of essential stained glass tools and supplies. Forget the guesswork. Here’s everything you need to confidently set up your workspace and start turning your creative ideas into beautiful, light-catching art.
If you are a beginner at stained glass art and interested in learning it to get command over it, this guide is for you. In this comprehensive guide, we’ll help you pick and choose the basic and essential tools you’ll need to get started with stained glass art.
Beginners can start stained glass art with low initial investment—by making less complex, smaller pieces that only require a few of the tools. You also have a choice to buy a stained glass starters kit or to handpick the required tools instead.
Basic Stained Glass Tools
The following are the most basic stained glass tools to create stained glass art. Some of these you may already own or can be easily improvised with the help of other tools.
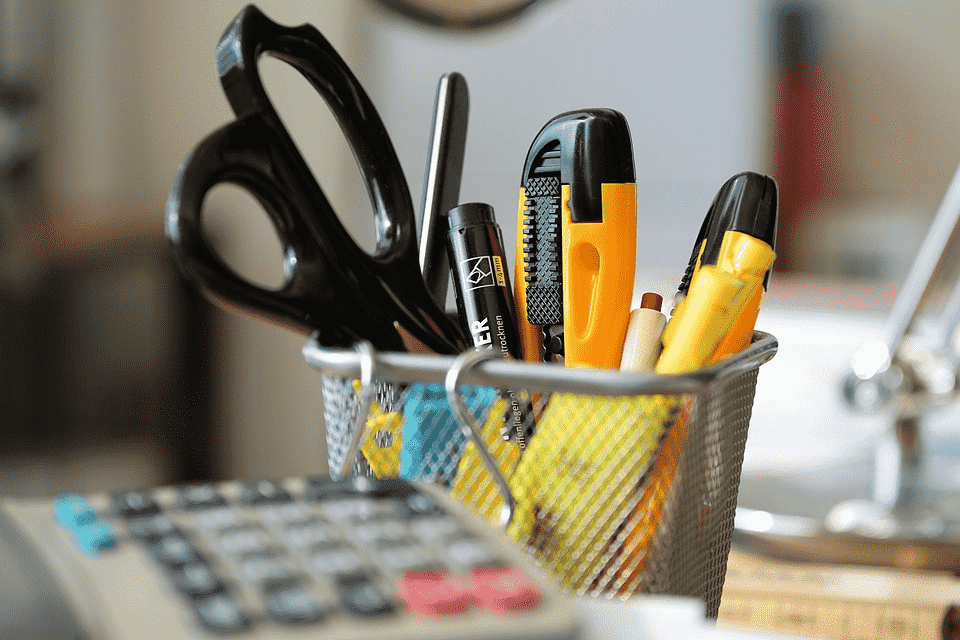
- Pencil: It is the most basic tool required to draw your own patterns.
- Permanent Marker: It helps you trace the outline of the pattern of the surface which was earlier designed by pencils.
- Masking Tape: It is a type of pressure-sensitive tape that helps you mask off areas that should not be ground.
- Scissors: These are really helpful for cutting out stained glass projects. Having double-bladed scissors can help take off excess paper and will save your grinding time.
- Tracing Paper: It is used to transfer your cut patterns to the glass.
Safety Equipment
Safety equipment is a must while working with glass projects. Even a tiny shard of glass can be a major hazard to your health. These safety wearables help you protect yourself from monetary/physical injuries.

Eyewear
Always use high-quality safety goggles as they are not only comfortable but also offer good protection when dealing with small shards of glass.
Rubber Finger Protectors
These are a little lifesaver to have if you don’t want your nails to get ground off during the grinding process.
Gloves
A sturdy pair of cut-resistant gloves help you protect from sharp glass edges which can cut extremely easily. These reduce the chances of hurting yourself while working with the acidic flux.
Dust Mask
Dust mask protects you from toxic fumes—of the soldering iron—and glass dust—caused during the cutting and grinding of the glass.
Must-Have Stained Glass Tools
If you’re looking for a minimal startup set to begin your stained glass art, here are the must-have tools you need:
Glass Cutter
A glass cutter is one of the most important tools for stained glass art to cut pieces out of your glass. It helps you make extremely precise scoring—whether freehand or guided by your traced template—of your glass pieces.
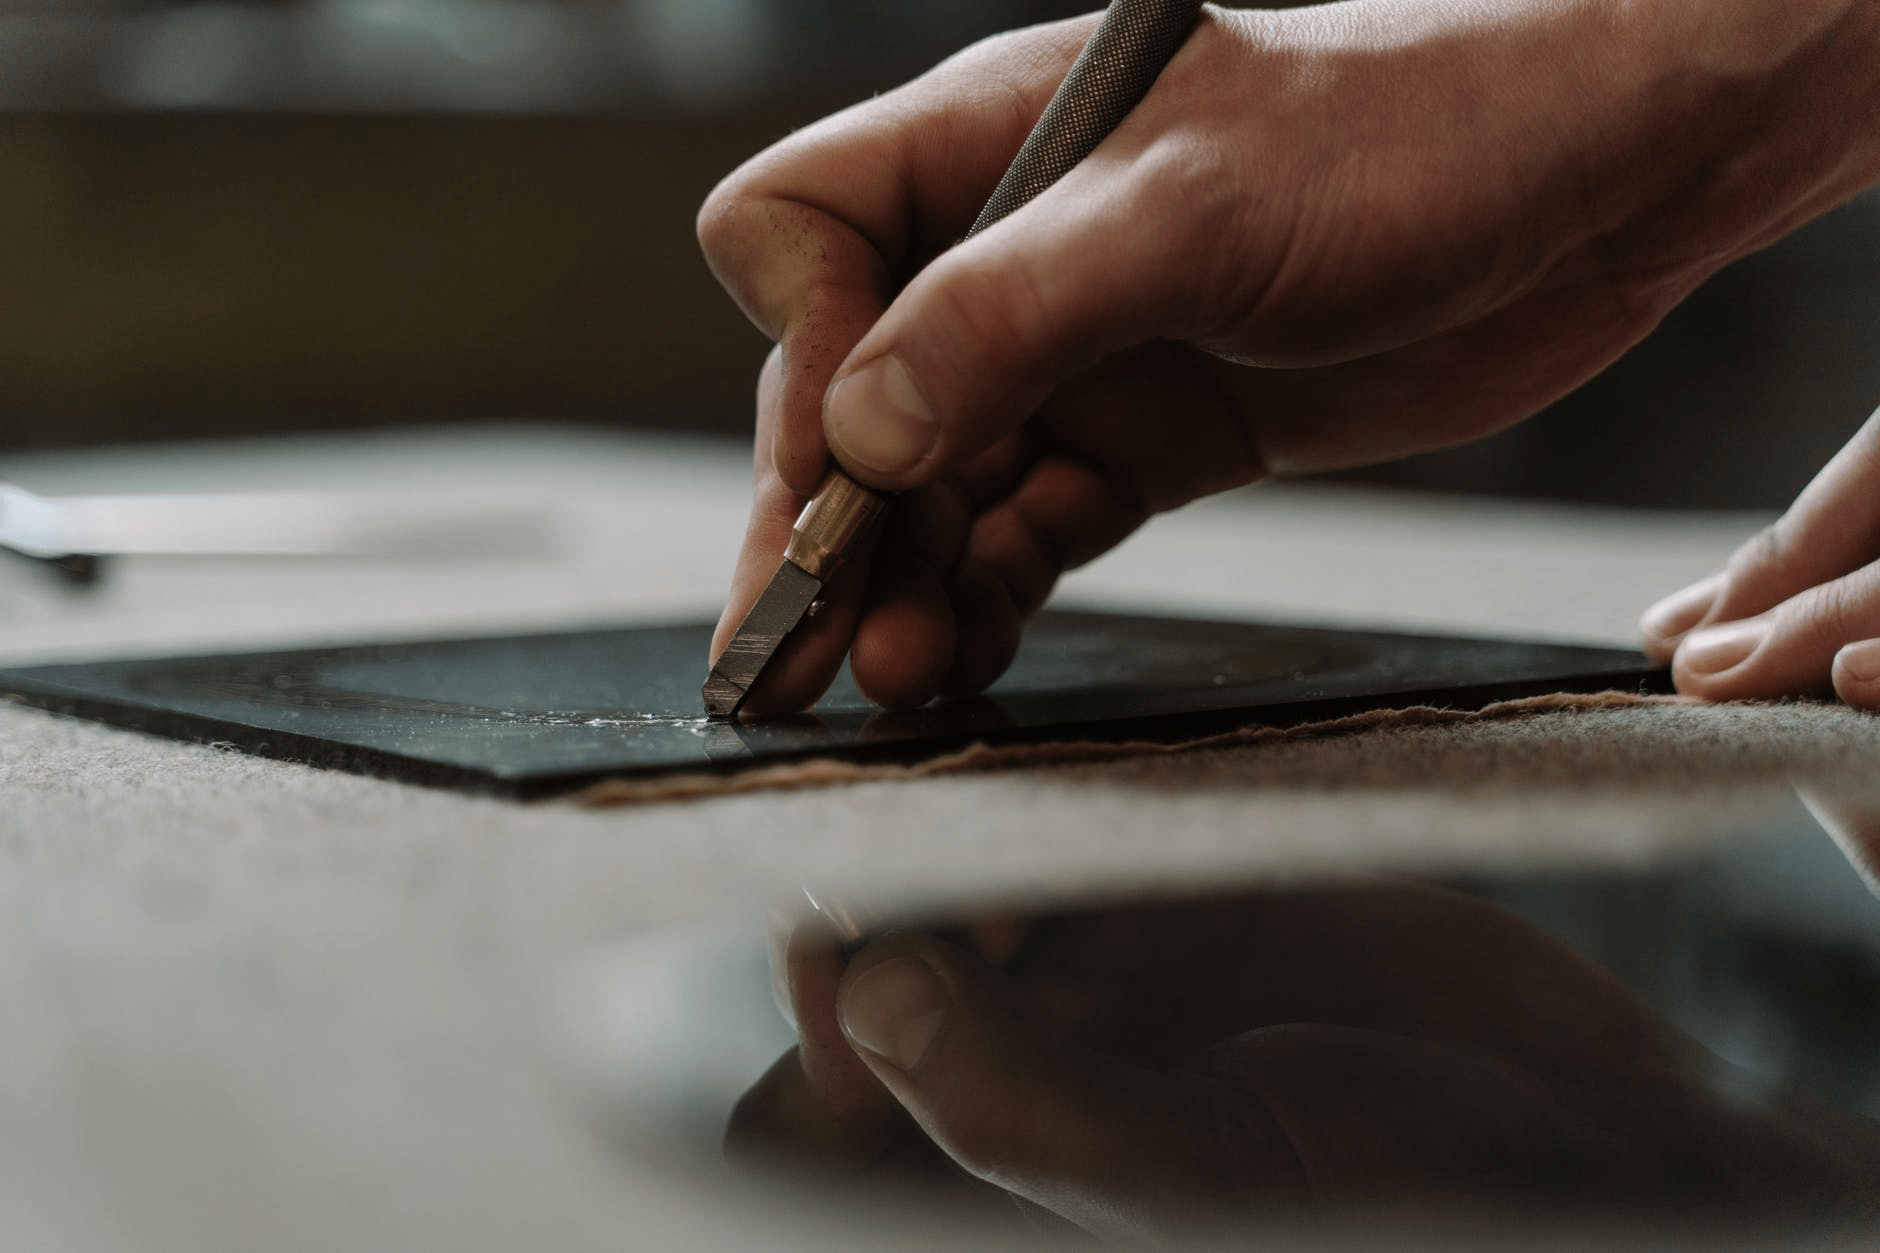
There are many different kinds of glass cutters available in the market. It is up to you to try and test some of them out. The two most common cutters are:
- Comfort Grip Supercutter which you can hold like a pen/pencil
- Pistol Grip Tap Wheel Supercutter that you can hold in your fist by placing it between your thumb and finger.
Copper Foil
Copper foil is usually a tape—copper-faced on the one side and sticky on the other—that is applied to wrap the edge of the glass pieces. It is an easy and quick way to start creating stunning stained glass for beginners. It allows you to solder two or more glass pieces together.
It comes in multiple shapes, sizes, styles, and patterns. You can also choose the color of the sticky side of your copper tape—copper, silver, and black. If you have no idea which one to choose, as a beginner, you should start with standard 1/4″ copper foil.
Came and Reinforcement Wire
While copper foil is perfect for smaller, decorative pieces, you’ll need something stronger when you start creating larger panels. That’s where came comes in. Came is a metal channel, typically made of lead or zinc, that your glass pieces slot into, acting as a sturdy frame to hold everything together. It’s essential for bigger projects like window panels and provides a classic, clean-lined finish. For even more support on very large pieces, reinforcement wire can be soldered into the lead lines to prevent the panel from bowing or sagging under its own weight over time. Using these materials correctly ensures your beautiful stained glass creations will last for years, maintaining their shape and strength.
Patina
Patina is a metallic fusing glass paint that you apply on the solder joints for an even and consistent finish. It helps you change the color of solder with a finished look in either a silver, black, brass, or copper look—depending on which color of patina you choose.
Important Tip: Make sure you thoroughly clean your copper foil panel before applying it.
Finishing Polish
Think of finishing polish as the final, satisfying step that makes your stained glass piece truly shine. After all your hard work cutting, foiling, and soldering, this is what gives your project that clean, professional look. It’s typically a wax-based compound that you apply after your piece has been completely soldered and cleaned. The polish removes any leftover flux residue, fingerprints, and marks, leaving both your glass and your solder lines looking bright and uniform. For anyone just starting, using a good polish is a simple way to make your first projects look incredibly well-crafted and complete.
Beyond just making your art look great, finishing polish adds a crucial layer of protection. It’s a compound that you buff onto your solder lines and glass after a thorough cleaning. This simple step seals the solder, which is especially important if you’ve used patina, as it prevents the finish from dulling or rubbing off. This protective barrier also helps prevent the metal from oxidizing over time, keeping your black lines black and your copper lines coppery. It also makes the glass slick, repelling dust and grime for easier future cleaning. You can find various stained glass chemicals, including finishing compounds, designed specifically for this purpose.
Glass Cutting System
An adjustable glass cutting system helps you cut the glass into desirable shapes—squares, rectangles, triangles, rhomboids, diamonds, hexagons, and more.
With innovative attachments—curves, circles, so on,—you can add or remove straight edges as required. Also, you can achieve any angle with multiple curved or straight edges at once.
Glass Cutting Oil
Glass cutting oil helps lubricate your glass piece during the cutting process. It is essential to correctly break your glass along with the scores you create. In order to use it:
- Put it in a small container
- Put a cotton ball in the solution
- Dip your glass cutter after every cut
Nowadays a majority of glass cutters have built-in internal reservoirs that hold the oil during the process.
Solder
Stained glass solder helps you melt down the solder wire along your applied copper tape lines. It helps you join all the glass pieces together. Although, there isn’t much to solder yet it is better to use a good quality solder wire.
60/40 solder wire is the best choice for soldering. It means 60% tin & 40% lead which offer a strong bond between the two metal pieces.
Running Pliers
Running pliers are one of the most valuable tools for glass cutting. These help you break the glass after scoring lines with the help of a glass cutter. All you need to do is to hold the glass with these pliers and apply little pressure on both sides of the scoreline.
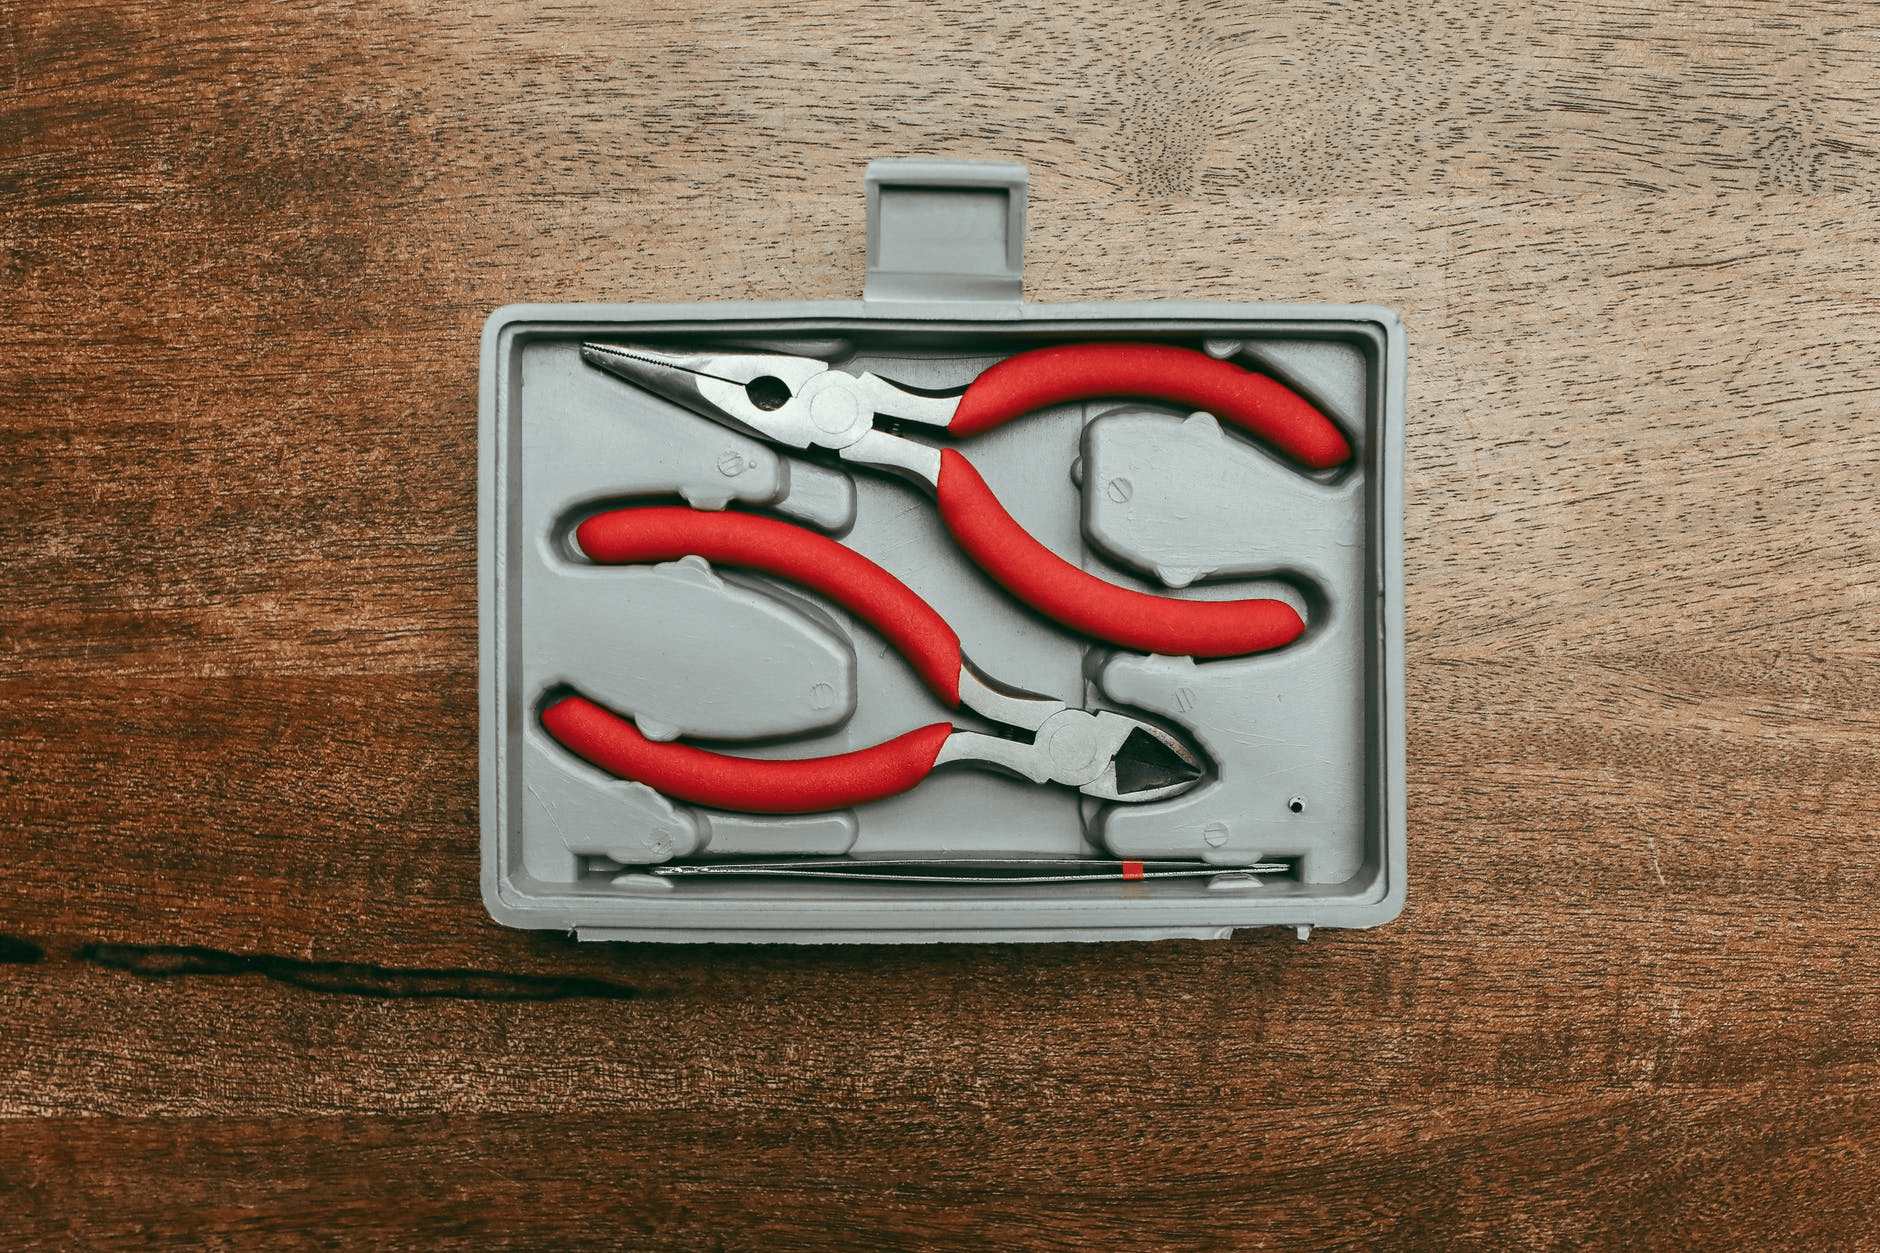
Usually equipped with a rubber tip to protect the glass, these generally have adjustable screws to accommodate glass of different thicknesses. These are ideal for both straight and curved cuts.
Grozing Pliers
Grozing pliers, also known as breaking pliers, are used to cut the glass. Looking similar to running pliers, these work in a different way. Their serrated jaws help you graze the nubs off curved & straight cuts in case of an unclean cut.
Important Tip: Use a grinder after grozing to get the smooth and safe edges.
Glass Grinder
A stained glass grinder tool is another useful tool to cut down on waste & achieve precision fits. It is a great way to get that perfect shape with minimal physical effort.
It is very useful for professional artists accomplishing considerable workload as it smooths out the rough glass edges in a jiffy. A glass grinder is also great at grinding excess glass material that you are not able to clear with your normal cutter or pliers.
Essential Workspace Supplies
Beyond the primary tools like cutters and grinders, the surfaces you work on are foundational to your success and safety. Protecting your workbench and ensuring you have a stable area for cutting and soldering prevents costly mistakes and keeps your creative flow uninterrupted. A well-prepared space allows you to focus entirely on your art, rather than worrying about damaging your furniture. Let’s look at a couple of key items that will make your workspace more efficient and secure, forming the backbone of your stained glass studio setup.
Cutting Mats
A good cutting mat is one of those things you don’t realize you need until you’ve already scratched your dining room table. It’s an essential addition to your workspace, providing a protective layer that absorbs cuts and keeps your work surface pristine. The best mats are “self-healing,” which means the surface is designed to close back up after you score across it with your cutter. This feature not only extends the life of the mat itself but also helps keep your glass cutter’s wheel sharp and your cuts precise. It creates a clean, reliable surface for every project you tackle.
Soldering Boards
When you start soldering, working on a heat-proof surface is absolutely non-negotiable for safety. This is where a dedicated soldering board comes in. Many artists rely on Homasote boards, which are made from a heat-resistant pressed fiberboard that is perfect for stained glass work. This type of board gives you a safe, stable area to assemble and solder your pieces without worrying about damaging your table or creating a fire hazard. It can handle the high temperatures from your soldering iron, ensuring your project stays securely in place while you work on creating those perfect solder lines.
Optional Stained Glass Tools
Some stained glass tools are great for saving you time and effort but are not mandatory for a beginner stained glass artist. After you have completed your beginner’s phase, and wish to take your stained glass art to the next level, these tools will definitely help you.
Copper Foiling Machine
It is certainly not a necessary stained glass tool but it makes things easier. It is a copper foil dispenser device that you load your foil rolls onto. It is a great time-saving tool for sure. All you need to do is simply slide the glass edges on the roller that has the copper foil.
Flux
Flux is another important consumable—available in both gel and liquid base—that helps the solder stick to the glass pieces and creates a stronger final product. It acts as a cleaning agent that helps remove any oxidation on the solder to provide a better point of contact.
It helps the solder flow better, and eventually, it seals the solder from the air, thus preventing further oxidation.
Specialized Hand Tools
Once you’ve got the hang of the basics and are ready to tackle more ambitious designs, a few specialized hand tools can make a world of difference. These aren’t strictly necessary for your first project, but they solve common challenges and help you achieve a higher level of precision and complexity in your work. Investing in these tools can save you time, reduce frustration, and open up new creative avenues. They help you move from simply cutting glass to truly shaping and constructing intricate pieces with a professional finish, making the entire process smoother and more enjoyable as you grow your skills.
Strip and Circle Cutters
If you need to create perfectly uniform geometric shapes, strip and circle cutters are essential. These tools give you the ability to score flawless straight lines for borders or repeating patterns, and perfect circles without any guesswork. A strip and circle cutter ensures your cuts are clean and precise, which is crucial for making sure all your pieces fit together seamlessly. This precision is especially important for geometric designs or when you’re creating multiple identical components for a larger panel. It takes the wobble out of freehand cutting and gives you consistent, repeatable results every time.
Pattern Shears
Pattern shears are a clever tool for anyone who wants to create detailed designs using the copper foil method. They look like regular scissors, but they’re designed to cut out a thin sliver of paper along with your pattern piece. This small gap perfectly accounts for the thickness of the copper foil you’ll be wrapping around your glass. Using them ensures that your glass pieces won’t be too tight when you assemble them, which can cause buckling or prevent them from lying flat. They are especially helpful for intricate patterns with many small, interlocking pieces.
Came Benders
When you’re working with lead or zinc came instead of copper foil, a came bender is a must-have for creating smooth, consistent curves. This tool allows you to easily shape the rigid metal channels to follow the contours of your design without kinking or twisting the came. Trying to bend came by hand can be difficult and often results in an uneven finish. A came bender gives you the control and leverage needed to form graceful curves and sharp angles, which is essential for building strong and beautiful panels using traditional stained glass techniques.
Advanced Power Tools
For artists who are ready to scale up their production or explore more complex artistic techniques, advanced power tools are the next logical step. While hand tools are perfect for getting started, power tools can dramatically speed up your workflow and allow you to create shapes and finishes that are difficult, if not impossible, to achieve by hand. They represent a bigger investment in your craft, but the capabilities they provide can be transformative, allowing you to work more efficiently and push the creative boundaries of what you can make with stained glass.
Ring Saws and Band Saws
Have you ever wanted to cut intricate interior curves or complex shapes that a standard glass cutter can’t handle? A ring saw or band saw is the tool for the job. These saws use a diamond-coated blade to cut through glass in any direction, giving you the freedom to create incredibly detailed designs. You can cut deep curves, sharp angles, and even shapes within a shape. This opens up a whole new world of design possibilities beyond what you can score and break. They are particularly popular for artists creating detailed mosaics or complex pictorial panels.
Belt Sanders
While a standard glass grinder is used for shaping individual pieces, a belt sander is an excellent tool for finishing the exterior edges of your completed projects. It allows you to smooth and polish the entire perimeter of a panel, giving it a uniform and highly professional look. Belt sanders are also used in coldworking, a technique for shaping and sculpting glass without heat. You can use one to create beveled edges, flatten surfaces, or shape thick pieces of glass, making it a versatile tool for artists who want to achieve a flawless finish on their work efficiently.
Expanding Your Craft: Tools for Glass Fusing
Once you’ve mastered the basics of cutting and assembling stained glass, you might feel the pull to explore new dimensions in your art. Glass fusing is a fantastic next step that lets you melt glass together to create textures, shapes, and functional pieces you can’t achieve with lead or foil alone. While your glass cutting skills will transfer perfectly, fusing requires a couple of key pieces of equipment to heat and shape the glass. This process opens up a whole new world of creative possibilities, from crafting custom jewelry to designing unique home decor.
Glass Kilns
The most essential tool for glass fusing is a kiln. This is what provides the controlled heat needed to melt glass pieces together into a single, solid form. Don’t let the idea of a kiln intimidate you; there are options for every space and budget. Smaller, tabletop kilns are perfect for beginners or artists focusing on jewelry and small decorative items. For those planning larger projects like plates, bowls, or sculptural pieces, a larger studio kiln with programmable settings offers more space and precise temperature control. Your kiln is the heart of your fusing practice, allowing you to experiment with different heating and cooling schedules to achieve unique results.
Fusing and Slumping Molds
If you want to create three-dimensional objects, you’ll need molds. Molds allow you to shape your glass as it heats in the kiln. The process of shaping glass over a convex mold or into a concave mold is called slumping. You can create everything from simple dishes and bowls to more complex, sculptural forms. Our collection of slumping and draping molds comes in countless shapes and sizes, typically made from ceramic or stainless steel. To ensure your glass doesn’t stick, you’ll prepare the mold with a separator like kiln wash or shelf paper before firing, which allows your beautiful creation to release easily once it has cooled.
Supplies for Specific Projects
With a kiln and a few molds, you’re ready to start fusing. The real fun begins when you start gathering glass and supplies for specific projects. Whether you want to make wearable art or functional pieces for your home, having the right materials on hand makes it easy to bring your ideas to life. Different projects call for different types of glass and accessories, so let’s look at what you’ll need for a couple of popular fusing creations.
Lamp and Night Light Kits
Creating a custom lamp or night light is a rewarding project that combines artistry with function. You can fuse a flat panel with an intricate design or slump a piece of glass over a mold to create a curved shade. The key is to use a compatible fusing glass, like COE96 glass, to ensure your design holds together during firing. While you can find all-in-one kits, you can also source your components separately for more creative freedom. This typically involves getting the glass, a base, and the electrical hardware to assemble your finished piece into a beautiful, light-up work of art.
Jewelry and Bevels
Glass fusing is perfect for making stunning, one-of-a-kind jewelry. Because you’re working on a smaller scale, you can experiment with intricate details using tiny glass shards, powders called frit, and thin glass rods called stringers. Dichroic glass is especially popular for jewelry because of its mesmerizing, color-shifting properties. You can create beautiful pendants, earrings, and bracelet charms using a compatible glass like COE90 glass. Once your pieces are fused and cooled, you can attach jewelry findings like bails and earring hooks to turn your miniature glass creations into wearable art.
Getting Started the Right Way
Now that you have a good idea of the tools you’ll need, let’s talk about the best way to get them and start building your skills. Kicking off a new creative hobby is always exciting, and a little planning can make the process feel smooth and rewarding right from the start. Setting yourself up for success is about more than just buying the right equipment; it’s also about finding solid guidance and learning resources to support you as you grow. This approach ensures you can focus on the fun part—making beautiful art—instead of getting bogged down by avoidable frustrations.
Beginner Tool Kits
One of the first decisions you’ll face is whether to buy a starter kit or pick out your tools one by one. A kit is a fantastic, straightforward option that bundles all the essentials together, which takes the guesswork out of your first purchase. It’s a simple way to make sure you have everything you need to complete your first project without feeling overwhelmed. On the other hand, selecting your own tools gives you more control over quality and lets you invest in specific pieces you know you’ll love for years to come. This path is great if you’ve already done some research or have specific recommendations from another artist.
The Value of Expert Advice
Never hesitate to ask for help. The world of glass art is filled with passionate people who are happy to share what they know, and tapping into that collective wisdom can save you from common beginner mistakes. Getting advice from an experienced artist or supplier can keep you from buying the wrong type of solder or struggling with a poor-quality glass cutter. Whether you’re visiting a local shop or reaching out to an online supplier, experienced staff can offer practical advice on which tools will best suit the projects you have in mind. Think of it as a shortcut to getting the right gear the first time.
Learning Resources
Your tools are only part of the equation; growing your skills is what truly brings your artistic vision to life. Luckily, there are tons of resources available to help you learn and refine your techniques as you get started.
Classes, Books, and Patterns
If you learn best in a structured environment, look for local or online stained glass classes. A good instructor can provide real-time feedback and demonstrate techniques in a way that’s easy to follow, which can really speed up your learning curve. For those who prefer to learn at their own pace, books and patterns are invaluable. They allow you to explore different styles and build your confidence by following a clear guide. Starting with a pre-made pattern is an excellent way to practice your cutting and soldering skills before you begin designing your own unique pieces from scratch.
Online Communities
Creating art can sometimes feel like a solo activity, but it doesn’t have to be. Joining an online community is a wonderful way to connect with other glass artists from all over the world. Platforms like Facebook and Reddit have dedicated groups where members share their latest projects, ask for advice on tricky cuts, and cheer each other on. Being part of a community provides a constant source of inspiration and support. It’s a place where you can celebrate your successes and get helpful feedback when you feel stuck, which is something every artist needs now and then.
Purchasing Options
Building your studio is an investment, but there are smart ways to shop for your supplies without stretching your budget too thin.
Sales and Wholesale Pricing
Always keep an eye out for deals. Many suppliers have sale or closeout sections where you can find high-quality tools and beautiful stained glass at a discount. Signing up for newsletters is also a great way to get notified about upcoming promotions. Here at ArtGlassSupplies.com, we regularly feature special offers to help make the craft more accessible to everyone. As you advance, you might also find that some suppliers offer wholesale or bulk pricing, which can be a cost-effective option if you start selling your work or taking on larger projects.
Conclusion
Stained glass art is an expensive hobby that requires accurate stained glass tools and supplies. A majority of these above-mentioned beginners’ tools can be easily available online.
Here we have explained the best of the basic, safety, must-have, and optional tools that’ll help you start stained glass art. Some of these tools are expensive but if you wish to pursue this professionally, think of your purchases as investments.
Moreover, buying premium-quality tools will ensure they outlast the alternative cheaper ones and also perform better as well.
Frequently Asked Questions
Do I really need to buy everything on this list to make my first stained glass piece? Not at all! This list is a complete overview, but you can definitely start with just the essentials. To complete your first project, you truly only need a glass cutter, running pliers for breaking the glass, copper foil, a soldering iron, and solder. You can add more specialized tools like a grinder as you get more comfortable and decide to take on more complex designs.
What’s the difference between using copper foil and lead came? Think of it this way: copper foil is a sticky-backed tape that you wrap around the edge of each glass piece, which is great for intricate designs and curvy shapes. Lead came is a rigid metal channel that your glass pieces slot into, providing strength and a classic, clean look, making it ideal for larger panels like windows. Most beginners find the copper foil method easier and more versatile to start with.
Is a glass grinder essential, or can I get by without one at first? You can absolutely complete your first few projects without a grinder. Grozing pliers will help you nibble away small bits of glass to refine the shape of your pieces. However, a grinder is often the first major tool upgrade artists make because it saves an incredible amount of time and frustration. It smooths rough edges perfectly, ensuring your pieces fit together snugly for easier foiling and soldering.
Should I buy a beginner’s tool kit or purchase my tools individually? This really comes down to personal preference. A starter kit is a fantastic, no-fuss way to get everything you need in one box so you can dive right in. If you’re someone who prefers to research and invest in high-quality tools from the start, buying them individually allows you to pick and choose items that will last for years. There’s no wrong answer, but a kit can make the first step feel less intimidating.
Besides safety glasses, what’s the most important safety practice to remember? Good ventilation is crucial, especially when you start soldering. The fumes from solder and flux aren’t something you want to be breathing in. Always work in a space with good airflow, and consider using a small fan to blow the fumes away from your face. Making this a habit from your very first project will keep you safe and healthy as you enjoy your new craft.
Key Takeaways
- Prioritize the Essentials for a Strong Start: Before you buy a full studio’s worth of equipment, focus on the foundational tools. A quality glass cutter, running pliers, copper foil, and a soldering iron—paired with proper safety gear—are all you need to complete your first beautiful piece.
- Let Your Projects Guide Your Purchases: Start with the basics for the copper foil method. As you gain confidence and want to create more complex designs, you can then invest in tools like a glass grinder for precision or came benders for structural panels.
- Combine Quality Tools with Smart Learning: The best tools work even better when you know how to use them. Take advantage of beginner kits, patterns, and online communities to build your skills and get advice, ensuring you make the most of your investment.