
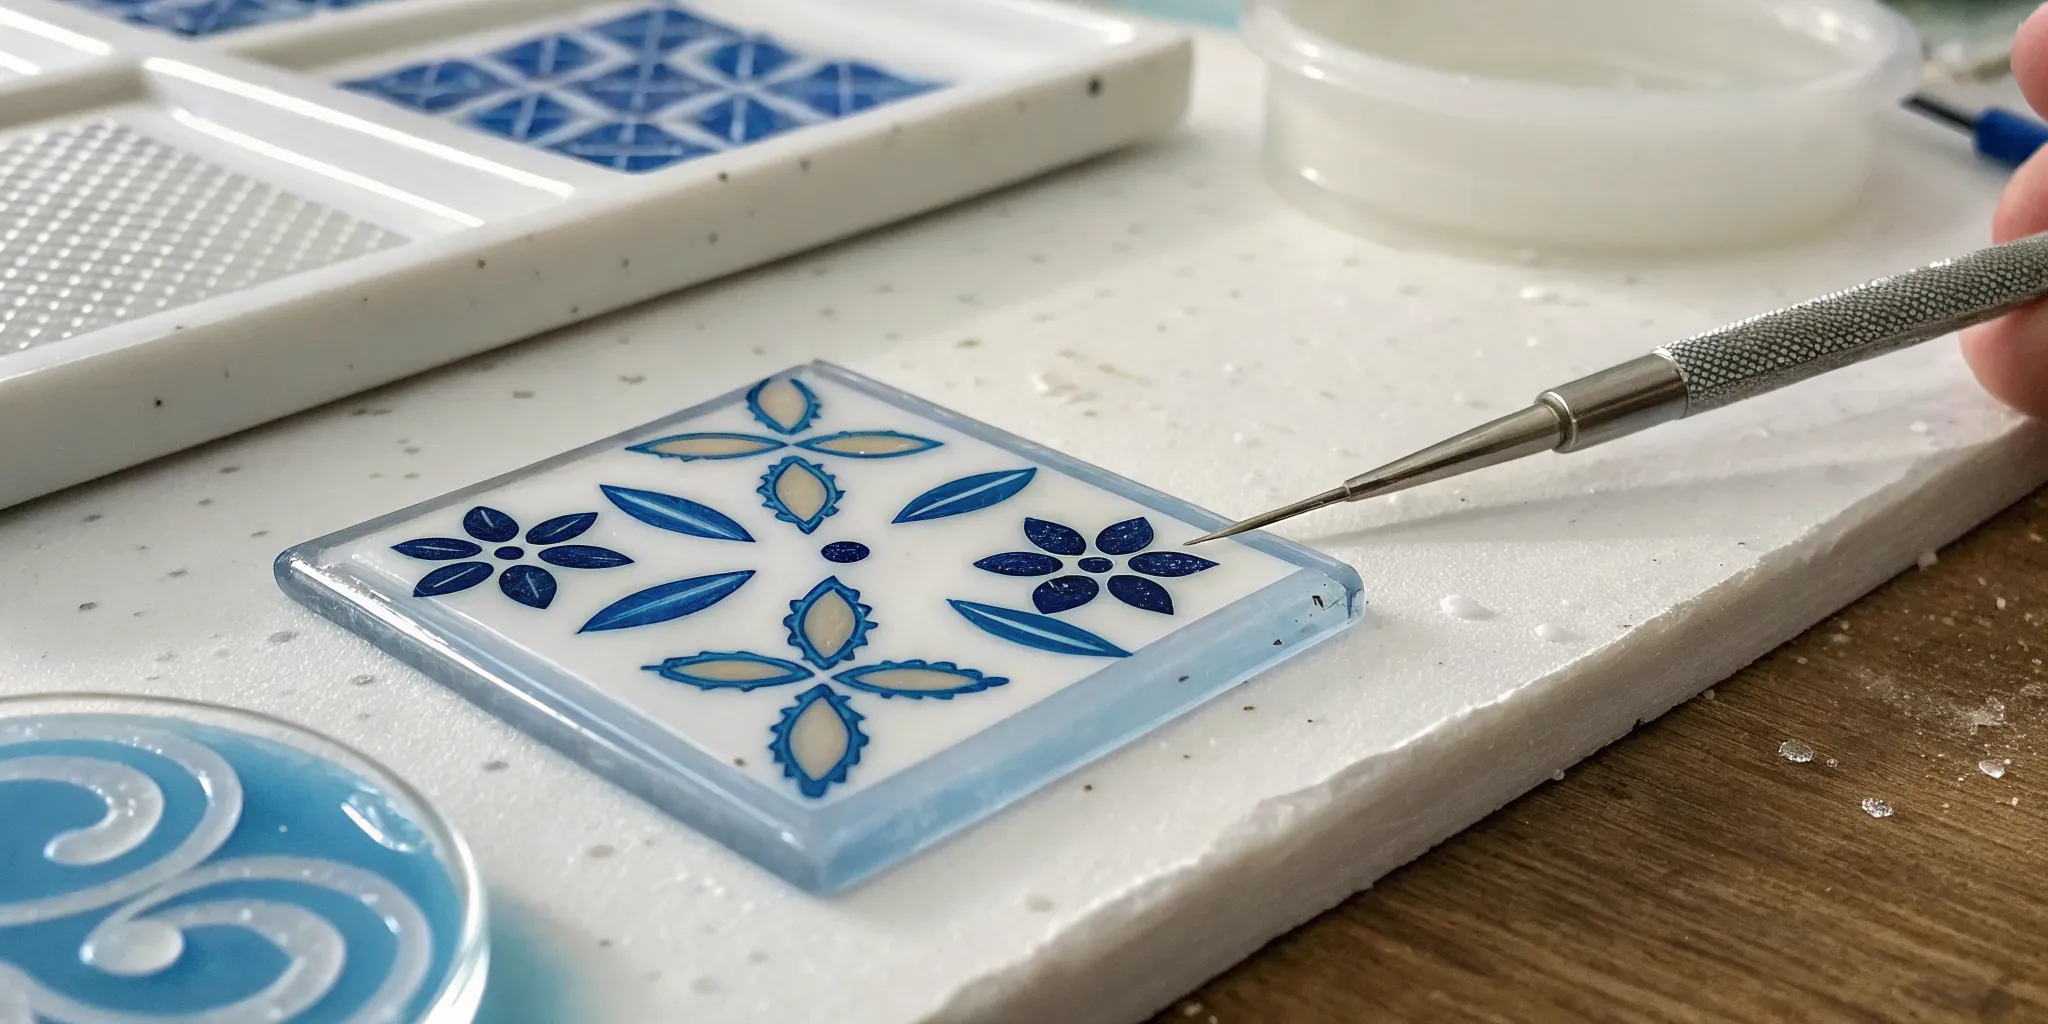
Once you’re comfortable with the basics of glass fusing, you start searching for ways to make your work stand out. That next layer of detail and personality is what makes a piece unforgettable. This is where decals for fused glass become your new best friend. They open up a world of creative options, letting you add sharp text, delicate floral patterns, or complex images with incredible ease. This guide gets you past the technical questions so you can focus on the art. We’ll cover everything from application to firing, giving you the confidence to start creating truly unique pieces with fusible decals.
Key Takeaways
- Match your decal to your glass: To prevent cracking, always ensure your decal’s COE is compatible with your glass (for example, COE90 with COE90). Also, choose between low-fire and high-fire decals based on your project’s firing schedule to achieve the best color and durability.
- A clean application is non-negotiable: Start with a spotless glass surface, then carefully squeegee out all water and air bubbles from under the decal. Most importantly, let it dry completely for at least 24 hours before it goes in the kiln.
- Fire with a precise schedule: Your kiln settings determine the final outcome. Always follow the manufacturer’s recommended temperature range and use a gradual ramp rate to permanently fuse the design without burning away the details or color.
So, What Are Fusible Decals?
If you’ve ever wanted to add intricate, consistent designs to your glass art without the stress of hand-painting, fusible decals are about to become your favorite tool. Think of them as specialized transfers made from glass enamels, created specifically to be fired permanently onto a glass surface in a kiln. These aren’t your everyday stickers; they are designed to withstand incredibly high temperatures, allowing the design to melt and fuse directly into your project.
Using glass fusing decals opens up a world of creative possibilities. You can add sharp text, delicate floral patterns, geometric shapes, or even complex images to your work with precision and ease. Whether you’re creating jewelry, plates, or decorative art, decals provide a reliable way to achieve detailed results that look professional and polished. The decal becomes an integral part of the glass, so you don’t have to worry about the design peeling or fading away. It’s a fantastic technique for both beginners looking for an easy win and experienced artists wanting to incorporate new layers of detail into their pieces.
Fusible Decals vs. Other Glass Decorations
It’s easy to confuse fusible decals with the vinyl or static cling stickers you might find at a craft store, but they are completely different materials built for different purposes. Vinyl and other adhesive-backed decals are designed for surface decoration at room temperature. If you were to put one of those in a kiln, the heat would simply destroy it, leaving behind a messy residue or nothing at all. Fusible decals are the only type made to survive the firing process. They are specifically formulated to bond with the glass, creating a permanent, durable finish that becomes one with your artwork.
How Do Fusible Decals Actually Work?
The magic behind fusible decals lies in their unique “paint,” which is made of special glass enamels. These enamels are a mixture of fine glass particles, pigments, and a binding agent that holds the design together on the paper backing. When you fire your project, the binder burns away, and the enamels melt and fuse directly into the surface of your base glass. This process is what creates a smooth, strong finish that is completely resistant to peeling, scratching, or fading. The specific composition of the enamels also determines the decal’s ideal firing temperature, which is key to achieving vibrant and lasting colors.
The Silkscreen Printing Process
Ever wonder how those intricate decal designs are made? Many are created using a technique called silkscreen printing. This process involves pushing special glass enamels through a fine mesh screen that has a design stenciled onto it. The enamel only passes through the open areas of the stencil, transferring a crisp, detailed image onto either the decal paper or directly onto a sheet of glass. This method is what allows for such precise and repeatable patterns, from delicate lines to bold graphics. For artists who want to create their own custom designs, there are even DIY silkscreen kits available that make the technique surprisingly accessible. By using compatible enamels, you can layer different screen-printed images on separate sheets of glass and then fuse them together, creating incredible depth and complexity in your final piece.
Choose the Right Fusible Decal
Picking the right decal is about more than just finding a design you love. To get the beautiful, permanent results you want, you need to think about how the decal will behave in the kiln. Fusible decals are designed to perform differently under heat, so your choice will depend on your glass, your project, and the firing temperatures you plan to use. Thinking about this ahead of time will save you from any surprises when you open the kiln door. Let’s walk through the main types so you can find the perfect match for your artwork and feel confident about your firing.
Exploring Decal Types and Designs
Once you start browsing, you’ll find a huge variety of fusible decals ready for your projects. They come in different colors, styles, and themes, giving you plenty of options to match your creative vision. The key is to understand what’s available so you can choose a decal that not only looks great but also works well with your glass and firing plan. From simple black-and-white graphics to shimmering gold accents, each type offers a unique aesthetic. Thinking about these categories will help you narrow down your search and find the perfect design to complement your work, whether you’re aiming for a subtle accent or a bold centerpiece.
Color and Finish Options
One of the best things about high-quality fusible decals is their color stability. They are made from glass enamels, which are formulated to produce strong, vibrant colors that remain true even after firing. This means the bright red you see on the decal paper is the same bright red you’ll see on your finished piece, taking the guesswork out of your color palette. This reliability is a major advantage for artists who need consistent and predictable results. The enamels are designed to mature at specific temperatures, so as long as you follow the recommended firing schedule, you can count on achieving a durable, glossy finish that looks like it was painted on by hand.
Thematic Designs
If you have a specific theme in mind, there’s a good chance a decal for it already exists. The market is filled with an incredible range of pre-made designs, making it easy to find imagery that fits your project perfectly. You can find everything from delicate floral patterns and intricate mandalas to whimsical animals and seasonal holiday graphics. This variety is a huge time-saver, allowing you to add complex details without creating the artwork from scratch. Thematic decals are also great for creating a cohesive series of work, like a set of coasters with matching botanical prints or a collection of pendants featuring celestial symbols.
Specialty Decals
Beyond standard colors, you can also find specialty decals that add unique visual effects. These are generally sorted into three main categories: black and white, full color, and metallics. Black and white decals are perfect for creating bold, graphic designs or adding crisp text with a classic look. Full-color decals offer a rich, painterly quality, ideal for detailed images like landscapes or portraits. For a touch of elegance, metallic decals in gold, silver, or copper provide a brilliant, reflective finish that can make a piece feel luxurious. These specialty options give you even more creative tools to play with, allowing you to mix and match finishes for dynamic results.
Custom Decal Options
What if you can’t find the exact design you’re looking for? You can have your own custom decals made. Many companies offer services that turn your digital artwork, logo, or photograph into a fusible decal. This opens up a whole new level of personalization, giving you complete control over the imagery in your work. It’s an excellent option for artists who want to reproduce their signature drawings, create branded merchandise, or use a specific pattern that isn’t available commercially. The process usually involves submitting a high-resolution image file and specifying the size and colors you need. The result is a one-of-a-kind decal that makes your glass art truly your own, created through a silkscreen printing process that ensures sharp, professional quality.
Choosing Low-Fire for Vibrant Color
If you want your colors to be as bright and punchy as possible, low-fire decals are your best friend. These decals are formulated to mature at lower temperatures, typically around 1225°F, which aligns with a fire polish schedule. Firing them in this range keeps the colors true and vibrant, making them perfect for surface decoration where you want the design to pop. Just be mindful that if you fire them too hot, you’ll notice the colors start to fade or wash out completely. For projects where color is the star, stick with a low-fire decal and a gentle firing schedule.
Choosing High-Fire for Lasting Durability
For pieces that need to withstand higher temperatures, or if your design involves a full fuse, high-fire decals are the way to go. These are built to be tough. They maintain their color and sharp lines even when fired up to around 1425°F, which gives you much more flexibility. This makes them incredibly versatile for a wider range of projects, including those that are slumped into molds after the initial fuse. While the colors will eventually start to burn away at very high temperatures, their resilience lets you incorporate detailed designs into more complex, multi-stage projects without worry.
Does COE Matter? Matching Decals to Your Glass
This is a big one: you absolutely have to match your decal to your glass. Fusible decals are made from glass enamels, so they need to expand and contract at the same rate as the glass they’re on. This is known as the Coefficient of Expansion, or COE. If you use a decal designed for COE90 glass on a piece of COE96 glass, the mismatch can cause cracking or stress fractures. Always check the product description to ensure your decal and glass are compatible. And just to be clear, these are not regular stickers; only use decals specifically made for kiln firing.
Applying Fused Glass Decals: A Step-by-Step Guide
Applying fusible decals is a straightforward process that adds incredible detail to your work. The key is patience and a methodical approach. Rushing can lead to bubbles or misplaced designs, so follow these four steps for a clean, professional application.
Step 1: Prep Your Glass Surface
This first step is crucial for a flawless finish. Before you do anything else, clean the glass surface very well. Any fingerprints, dust, or oils can prevent the decal from adhering properly and may cause issues during firing. I recommend using isopropyl alcohol and a lint-free cloth to wipe down your COE90 glass until it’s perfectly clean. Let it dry completely before moving on. This clean foundation ensures your decal fuses beautifully.
Step 2: Soak and Slide Your Decal into Place
Now for the application. First, cut out your decal, leaving a small border around the design. Put the cut-out decal in a shallow bowl of warm water for about 30 seconds. Once it slides freely on the paper backing, it’s ready. Gently lift it from the water and carefully slide the decal off its backing paper directly onto the glass. Make sure the printed side faces up. Use a small, soft brush or your fingertip to gently guide it into position.
Step 3: Smooth It Out and Remove Bubbles
With your decal in place, it’s time to remove trapped water or air bubbles. Use a small wiper (like a squeegee) to gently push out extra water and air, working from the middle outwards. This step ensures the decal makes full contact with the glass, which is essential for a successful firing. Be gentle, as you don’t want to tear the delicate design. A soft, flexible silicone tool works best for this. The goal is a completely smooth, bubble-free surface.
Step 4: Let It Dry Completely (Don’t Rush This!)
Patience is crucial in glass art. Once your decal is perfectly smooth, you must let it dry completely overnight before firing. Don’t try to speed this up with a heat gun. Letting it air dry ensures all moisture evaporates evenly. If you fire it while it’s still damp, the trapped water will turn to steam and create bubbles or even blow the decal off your glass. A full 24 hours is a good rule before you program your kiln.
Fire Your Decals Correctly
Once your decal is perfectly dry, it’s time for the most exciting part: firing it in the kiln. This is where the magic happens, as the heat permanently fuses the decal’s design onto your glass. But getting it right requires a bit of precision. Firing isn’t just about heat; it’s about the right amount of heat, applied at the right speed, for the right amount of time. A successful firing schedule ensures your decal melts smoothly into the glass without burning, cracking, or losing its vibrant color. Let’s walk through the key steps to make sure your piece comes out of the kiln looking exactly as you envisioned.
Finding the Perfect Firing Temperature
First things first, you need to know your decal’s ideal temperature. Fusible decals come in two main types: low-fire and high-fire. Low-fire decals are perfect for adding a final decorative touch to an already fused piece, as they mature at a lower temperature, typically between 1034°F and 1074°F. High-fire decals, on the other hand, are more durable and need to be fired at hotter temperatures, usually between 1300°F and 1425°F. Always check the manufacturer’s instructions for your specific decal. The enamels used in the design determine how much heat it can handle, so matching the temperature to the decal is essential for achieving brilliant, lasting colors.
Common Firing Temperatures
Your firing schedule will depend entirely on whether you’re using a low-fire or high-fire decal. Low-fire decals mature at cooler temperatures, typically between 1034°F and 1074°F. This range is perfect for a tack fuse or fire polish, where you want the design to sit on the surface with crisp lines and vibrant colors. It’s the ideal choice for adding a final decorative layer to a piece that has already been fused. High-fire decals are designed for durability and mature at hotter temperatures, usually between 1300°F and 1425°F. This higher heat allows the decal to sink into the glass, creating a permanent bond that can withstand subsequent firings, like slumping the piece into a mold. No matter which you choose, always check the manufacturer’s recommended temperature range to get the best results from your kiln.
Setting Your Firing Schedule and Ramp Rate
Your firing schedule is your roadmap for the kiln. It tells the kiln how quickly to heat up (the ramp rate), how long to hold at the target temperature, and how to cool down. A schedule that’s too fast can cause your glass to crack from thermal shock. For most decals, a fire polish schedule that peaks around 1225°F or a slump schedule reaching 1335°F works beautifully. The key is to increase the temperature gradually, allowing the decal to fuse properly without burning away the delicate design. This slow and steady approach ensures the decal becomes a permanent, seamless part of your COE90 glass project.
Planning for Hold Times and Annealing
After reaching the peak temperature, the process isn’t over. The cooling phase, or annealing, is just as important as the heating phase. This is where the glass stabilizes, relieving internal stress that could cause it to crack later. The rule of thumb is simple: the thicker your glass piece, the longer it needs to cool. Follow a proper annealing schedule for your glass thickness to ensure its strength and durability. It’s also a good idea to ensure your kiln has proper ventilation, especially when firing decals with metallic finishes like gold or silver, as good airflow helps the metallic sheen develop correctly.
Avoid These Common Decal Mistakes
Working with fusible decals is incredibly rewarding, but a few common slip-ups can turn a great idea into a frustrating learning experience. The good news is that these mistakes are easy to avoid once you know what to look for. Paying attention to your materials, preparation, and firing schedule will make all the difference in achieving a clean, professional finish. Let’s walk through the most frequent issues artists run into and how you can sidestep them from the start, ensuring your designs come out of the kiln looking just as you imagined.
Mistake: Using a Non-Kiln-Safe Decal
This might seem obvious, but it’s a critical first step. Always use decals specifically made for kiln firing when creating fused glass art. Regular stickers or vinyl decals are not designed to withstand the intense heat of a kiln and will simply melt, burn, and ruin your project. Fusible decals are made with special enamels that permanently bond with the glass during firing. Before you buy, double-check that the product description confirms the decals are kiln-safe and suitable for glass fusing. This simple check ensures your design becomes a permanent, beautiful part of the glass.
Mistake: Rushing the Prep or Drying Time
Patience during preparation is key to a flawless application. Before you do anything else, clean the glass surface thoroughly with a lint-free cloth and glass cleaner to remove any dust, fingerprints, or oils. Any residue left on the glass can prevent the decal from adhering properly. After applying the decal, you must allow it to dry completely before firing. It’s best to let it sit overnight. If you fire a piece while the decal is still wet, the trapped moisture will turn to steam in the kiln, creating bubbles or causing the decal to shift or flake off entirely.
Mistake: Firing Too Hot or Too Cold
Not all decals are created equal, and they don’t all fire at the same temperature. Firing a decal outside its recommended temperature range can lead to disappointing results. Low-fire decals, which mature between 1034-1074°F, are perfect for adding a final layer of detail to an already fused piece. High-fire decals, fired between 1300-1425°F, are more durable and can be incorporated earlier in the fusing process. Firing too low may cause the decal to not fuse properly, while firing too high can burn the design away or cause the colors to fade. Always read the manufacturer’s instructions for the correct firing schedule.
Mistake: Overlapping Decals the Wrong Way
When you apply a decal, especially if you are layering multiple designs, it’s easy to trap tiny air bubbles or pockets of water underneath. These imperfections can cause big problems in the kiln, leading to an uneven or blistered surface. To prevent this, use a small rubber squeegee to gently push out any extra water and air bubbles. Always work from the center of the decal outwards to ensure a smooth, flat application. Taking a few extra moments to squeegee carefully ensures your design lies perfectly flat against the COE90 glass and fires without any blemishes.
Mistake: Capping Your Decal with Glass
It might seem like a good idea to protect your beautiful decal by capping it with a layer of clear glass, but this is one of the most common ways to ruin a piece. Fusible decals are specifically designed to be the top layer of your project. When you cover them with more glass, you trap tiny amounts of air and moisture between the layers. As your piece heats up in the kiln, that trapped moisture turns to steam and the air expands, creating bubbles that can distort or even detach the decal from the surface. Capping also interferes with the heat distribution, which can cause the decal’s colors to fire incorrectly or fade. For the best results, always apply your decal to the top surface of your glass and leave it uncapped so it can fuse directly and cleanly.
Creative Ideas for Your Fusible Decals
Once you’ve mastered the application basics, you can explore the real fun of fusible decals. Think of them as a powerful tool in your artistic arsenal, ready to add detail, depth, and personality to your glasswork. They open up creative possibilities that go far beyond simple decoration. Whether you want to create a complex pattern, build a layered scene, or complement your other fusing work, decals give you a new way to express your vision in glass.
Add Intricate Details with Ease
If you’ve ever struggled to paint a perfect line or tiny detail, you’ll love what decals can do. They let you add incredibly intricate designs to your glass projects with ease. These aren’t just stickers; they are made from special glass enamels designed to permanently fuse with your artwork inside the kiln. When fired, the design melts right into the glass, becoming an integral part of the piece. This process ensures your detailed patterns or delicate script won’t chip or fade, giving your work a professional, polished finish that lasts.
Perfect for Jewelry and Small Items
When you’re working on a smaller scale, like making pendants, earrings, or small decorative pieces, every detail matters. This is where fusible decals really shine. They give you the power to add incredibly precise and intricate designs that would be nearly impossible to paint by hand on such a small surface. Think of delicate floral patterns on a pair of earrings or a crisp, clean geometric design on a pendant. Because the decal fuses directly into the glass during firing, the design becomes a permanent part of your piece. It won’t scratch off, peel, or fade, which is especially important for jewelry that will be worn and handled. This durability, combined with the ease of application, allows you to create professional-quality small items with consistent, beautiful results every time you open your kiln.
Create Layered Effects and Themed Pieces
Decals are fantastic for building depth and telling a story with your glass. Because the designs melt smoothly into the surface, you can easily create layered effects. Imagine placing a decal of a tree, firing it, and then adding smaller decals of leaves in a second firing to create a dimensional scene. This technique is perfect for making themed art. You can combine floral, animal, or geometric decals to develop a cohesive collection of plates or jewelry. The durable, fused finish means your layered creations will remain vibrant and scratch-resistant, preserving your artistic vision.
Combine Decals with Other Fusing Techniques
Fusible decals play well with others. You can seamlessly integrate them with your favorite fusing techniques to produce unique art. Try applying a decal onto a base of colorful COE90 glass or a piece you’ve already shaped using slumping molds. You can also combine them with elements like frit or stringers to add texture and complexity. Just remember to always use decals made for kiln firing. Regular stickers will burn away and can ruin your project. By pairing the right decals with other glass fusing methods, you can expand your creative range and produce stunning, multi-dimensional artwork.
Making Food-Safe Functional Art
One of the best parts of glass fusing is creating beautiful, functional pieces you can use every day. When you’re making plates, bowls, or platters, the big question is always about food safety. The great news is that most fusible decals are perfectly safe for functional ware once they’re fired correctly. During firing, the glass enamels in the decal melt and permanently fuse into the glass surface, becoming an integral part of the piece. This means the design won’t chip, peel, or leach into food. However, it’s always a smart habit to check the manufacturer’s specifications, as some specialty decals, like those with a high metallic content, may not be recommended for food-contact surfaces. When you’re designing a set of custom plates using slumping molds, choosing a decal specifically labeled as food-safe ensures your functional art is both stunning and practical.
What You’ll Need to Get Started
Before you can bring your decal designs to life, you need to get your workspace ready. Having the right tools on hand makes the whole process smoother and much more enjoyable. Think of it as setting your future self up for success. Let’s walk through exactly what you’ll need to gather before you start applying and firing your fusible decals.
Your Kiln and Glass Essentials
First things first, you need the major players: your glass and a kiln. It’s crucial to use decals specifically designed for kiln firing. Regular stickers will just burn away in the heat and can ruin your entire project, so make sure you’re working with true fusible decals. These are made with glass enamels that permanently fuse to your piece.
You’ll also need a reliable kiln that can handle the specific temperature requirements for your decals and glass. And speaking of glass, your choice matters. Whether you’re working with COE90 or COE96 glass, you’ll want to ensure your decals are compatible to avoid any cracking or other issues during firing.
Tools for a Flawless Application
Applying decals is a delicate process, but the right tools make it simple. You don’t need anything too fancy, just a few key items. Start with a small bowl of warm water, which you’ll use to soak the decal for about 30 seconds to release it from its paper backing. You’ll also want a pair of sharp scissors to neatly cut your chosen design from the decal sheet.
Once the decal is on the glass, a small, soft squeegee is your best friend. Use it to gently push out any water and trapped air bubbles, working from the center of the decal outwards. This step is key to getting a perfectly smooth, professional finish. Keep a few paper towels or a soft cloth nearby to blot up any excess water.
Safety Gear and Testing Supplies
Proper preparation and a little bit of testing will save you a lot of headaches later. Before you even think about applying a decal, make sure your glass surface is perfectly clean. Use isopropyl alcohol or a dedicated glass cleaner with a lint-free cloth to wipe away any fingerprints, dust, or oils. Any residue left on the glass can interfere with the decal’s adhesion and cause blemishes after firing.
I also highly recommend testing your decals on a small scrap piece of glass before committing to your main project. Sometimes the firing results can be a little different than expected. A quick test run helps you confirm your firing schedule and ensures the colors turn out exactly as you envisioned.
Shopping for Fusible Decals
When you start shopping for fusible decals, you’ll quickly see there’s a whole world of designs out there. It’s exciting, but it can also be a little overwhelming. The key is to look beyond just the pattern and think about how the decal will work for your specific project. You’ll want to consider the size of the decal sheet, the cost, and the variety of designs available. Thinking about these practical details ahead of time helps you choose decals that not only look great but are also the right fit for your budget and artistic goals. It’s all about finding that perfect intersection of inspiration and practicality.
Understanding Cost and Sheet Size
One of the best things about fusible decals is that they are a really affordable way to add a professional touch to your work. Most decal sheets cost between $2 and $12, making them an accessible tool for artists at any level. The sheets typically come in standard sizes, like 4×4 or 5×5 inches, which might contain one large design or a collection of smaller ones. It’s important to check the dimensions of the individual decals on the sheet to make sure they fit the scale of your project. A tiny 1.25-inch decal might be perfect for jewelry, but you’d need something much larger for a decorative plate.
Finding a Wide Selection
The variety of decal designs available is truly amazing. You can find everything from delicate floral patterns and intricate mandalas to whimsical animals and bold geometric shapes. Many suppliers offer themed sheets for holidays, seasons, or specific artistic styles like ancient art or modern graphics. This huge selection means you can find the perfect decal to complement your existing work or inspire a whole new project. Take some time to browse different collections and think about how you could use these designs to tell a story or add a unique signature to your glass art.
Where to Find Decals and Other Supplies
Once you know what you’re looking for, the next step is finding a reliable place to buy your decals and other glass fusing supplies. While you can find decals from various online sellers, there’s a huge advantage to sourcing them from a specialized glass art supplier. A dedicated retailer not only offers a curated selection of high-quality, kiln-safe decals but also provides the other materials you need to complete your project. This saves you the hassle of placing multiple orders and ensures that all your supplies, from your glass to your tools, are designed to work together seamlessly. Finding a supplier you trust can become a valuable partnership in your artistic journey.
One-Stop Shops for Glass Artists
Finding a one-stop shop for all your glass fusing needs makes life so much easier. At places like ArtGlassSupplies.com, you can find a wide range of fusible decals alongside everything else on your list. This is incredibly helpful because you can get your decals, your COE90 glass, and any tools you need all in one order. It also means you have access to a team that understands how all these products work together. Whether you’re looking for a specific color of frit to match a decal or need a new slumping mold for your next project, having it all in one place streamlines your creative process.
Educational and Inspirational Resources
The best suppliers do more than just sell products; they support your growth as an artist. Look for companies that offer educational resources like blogs, tutorials, and project guides. This kind of support is invaluable, especially when you’re trying a new technique like working with decals. Having access to clear instructions and creative inspiration can give you the confidence to experiment and push your skills further. When a supplier invests in educating its customers, it shows they are passionate about the art form and dedicated to helping you succeed. It’s a great sign that you’ve found a true partner for your creative work.
Related Articles
- A Beginner’s Guide to Using Glass Decals
- The Complete Guide to COE 90 Fusing Glass Supplies
- COE Glass Meaning: A Beginner’s Guide to Fusing
- COE 90 vs 96: Which Glass Should You Choose?
- The Artist’s Guide to Spectrum Glass System 96
Frequently Asked Questions
What happens if I fire my decal at the wrong temperature? Firing temperature is everything when it comes to decals. If you fire a decal too low, its enamel design won’t properly melt and fuse into the glass, which can leave it looking dull or cause it to flake off later. On the other hand, firing a decal too hot will cause the colors to fade, wash out, or even burn away completely, leaving you with a faint ghost of your original design. Always follow the manufacturer’s recommended temperature range for the specific decal you’re using.
Can I use a hairdryer to speed up the drying process? I know it’s tempting to try and speed things up, but you should never use a heat gun or hairdryer on your decal. Forcing it to dry too quickly can trap microscopic water pockets beneath the surface. When you fire the piece, that trapped moisture turns into steam and can create bubbles, blisters, or even blow parts of the decal right off your glass. The best and safest method is to let it air dry overnight, or for a full 24 hours, to ensure every bit of moisture has evaporated naturally.
Why is it so important to match the decal’s COE to my glass? Matching the COE (Coefficient of Expansion) is non-negotiable for a successful project. Think of it this way: both the decal and the glass expand when heated and shrink when cooled. If they don’t do this at the same rate, they fight against each other. Using a COE90 decal on COE96 glass, for example, will create immense stress within the piece. This mismatch will almost certainly cause the glass to crack, either during the cooling process or even weeks later.
Can I layer multiple decals in one project? Absolutely! Layering is a fantastic way to create depth and more complex imagery. The key is to ensure each layer is applied perfectly. You must squeegee the first decal until it is completely smooth and bubble-free before placing the second one on top. Some artists prefer to do a low-temperature fire to set the first decal in place before adding the next layer, which can help prevent the bottom design from shifting during application.
My decal came out with bubbles or blisters. What did I do wrong? Bubbles are almost always caused by trapped air or moisture. This usually happens for one of two reasons. First, you may not have been thorough enough when squeegeeing the decal, leaving tiny pockets of water or air underneath. Second, you might have fired the piece before the decal was completely dry. Both issues result in the trapped air or water expanding in the kiln, which pushes the decal away from the glass and creates those frustrating blisters.