
As a glass artist, you know the challenge of creating intricate, repeatable designs. Hand-painting fine lines or complex patterns requires a steady hand and immense patience. What if there was a way to add perfect, detailed imagery to your work every single time? That’s where glass decals come in. These aren’t your average stickers; they are specialized tools designed to be permanently fired onto your glass projects in a kiln. They open up a new world of creative possibilities, allowing you to incorporate everything from delicate floral patterns to crisp text. This guide will walk you through exactly what they are and how to use them.
Are you an avid glass artist looking for new marketing ideas? Guess what! You have just hit the right link. In this blog, we will share a fascinating idea for you to demonstrate your glass art skills. *Drumrolls* ‘Glass Decals’.
Know everything about glass fusing decals, how to use them, and the uses of glass decals on windows. Without any further ado, let’s start the blog. 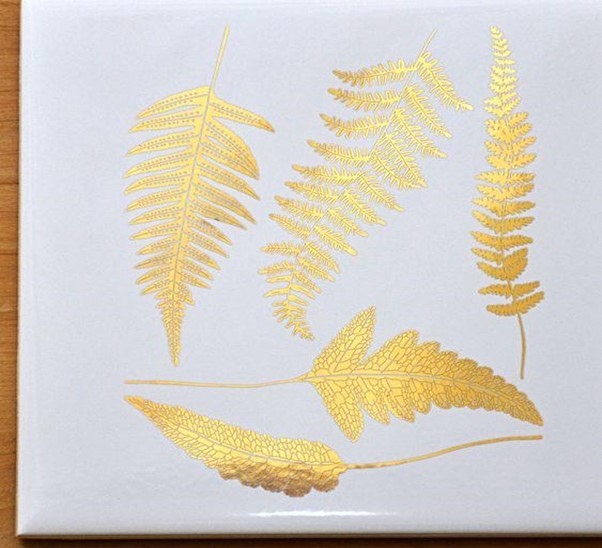
So, What Exactly Are Glass Decals?
In simple words, glass decals are stickers that can be pasted on plain glass. These stickers come in different designs, images, writings, graphics, and more. It is a strong adhesive material in the form of a design on durable vinyl sheets. These are most commonly used for windows to either perk up the plain glass or provide privacy. Glass fusing is done to transfer the design from the sticker to the glass surface.
Types of Window Decals
Not all window decals are created equal. The right one for you depends entirely on your project’s goal, from creating a permanent piece of art to adding a temporary decorative touch. Understanding the different types is the first step to making a great choice. Some are designed for artists who work with heat and glass, while others are simple, adhesive solutions for quick application. Let’s walk through the most common options so you can find the perfect match for your creative vision or practical needs. Each type has its own unique properties, application methods, and ideal uses, whether you’re decorating a storefront, adding privacy to a bathroom, or crafting a beautiful fused glass panel.
Glass Fusing Decals
As specialists in supplies for glass artists, this is our favorite type. These decals are designed to be permanently fired onto glass in a kiln, becoming part of the glass itself. They are perfect for creating detailed, lasting artwork on fused glass projects. Unlike a simple sticker, a fusing decal’s design is made from glass enamels that melt and bond with the base glass during the firing process. This creates a smooth, durable finish that won’t peel, fade, or scratch off. They are ideal for adding intricate patterns, images, or text to your work that would be difficult to achieve by hand. Whether you’re working with COE90 or COE96 glass, these decals allow you to introduce a new layer of detail and professionalism to your art.
Vinyl Decals
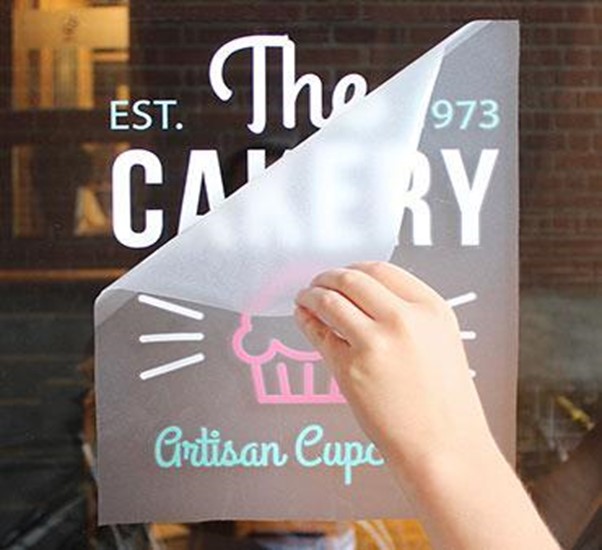
Vinyl decals are probably the most common type you’ll see out in the world. Think of them as high-quality, durable stickers. According to experts at Ask Print Shop, they are strong, long-lasting, and can handle various weather conditions, making them suitable for both indoor and outdoor use. They’re often used for business logos on storefronts, lettering on vehicles, or decorative graphics in homes. Vinyl decals are applied directly to the surface of the glass and adhere with a strong adhesive. While they are built to last for years, they are a surface application and don’t integrate into the glass itself, unlike fusing decals. They offer a great solution for signage and decoration but are a different medium from what a kiln-forming artist would use to create integrated glass art.
Static Cling Decals
If you need a non-permanent solution, static cling decals are your best friend. These decals stick to glass using static electricity instead of adhesive. This means there’s no sticky residue left behind, and you can easily remove, reposition, and even reuse them. This makes them perfect for temporary applications like seasonal decorations for holidays, short-term promotions in a retail setting, or privacy films in a rental apartment where permanent changes aren’t allowed. Because they don’t use glue, their grip isn’t as strong as vinyl, so they are best suited for interior windows where they won’t be exposed to harsh weather. They offer maximum flexibility for anyone who likes to change up their decor frequently.
Perforated Decals
Have you ever seen a bus or storefront window completely covered in an advertisement, yet you can still see through it from the inside? You were likely looking at a perforated decal. Often called “one-way vision” decals, these are a clever solution for advertising while maintaining visibility. The decal is made of vinyl material with thousands of tiny, evenly spaced holes. From the outside, your eye focuses on the printed graphic, making it look like a solid image. From the inside, however, you can see straight through the holes. This makes them an excellent choice for businesses that want to use their window space for marketing without making the interior feel dark or closed off.
Etched or Frosted Decals
Etched or frosted decals provide the elegant look of sandblasted or acid-etched glass without the high cost or permanence. These vinyl decals mimic the translucent, frosted appearance of textured glass, offering a simple way to add privacy and style to any window or glass partition. They are commonly used on bathroom windows, office doors, and glass dividers to obscure the view while still allowing light to pass through. For glass artists, these decals can be a source of inspiration. While they are a surface application, you can achieve a similar, permanent effect by sandblasting your glass or working with specialty stained glass that has an etched or frosted finish from the start.
How to Choose the Right Window Decal
With a clear understanding of the different types of decals available, you can now think about which one is right for your specific project. The best choice comes down to a few key factors: your purpose, your design, the material’s properties, and the size of your space. Answering a few simple questions about your goals and needs will quickly point you in the right direction. Taking a moment to plan will ensure you’re happy with the final result, whether you’re creating a permanent art piece, decorating your studio, or adding a functional element to your home. Let’s break down the decision-making process into four simple steps.
Define Your Goal
First, ask yourself what you want to accomplish. What is the primary purpose of the decal? Are you creating a piece of fine art that will be sold or displayed in a gallery? In that case, a permanent glass fusing decal is the obvious choice. Are you looking to advertise your business on a storefront window? A durable vinyl or a perforated decal would be a great fit. If you’re just adding a festive touch for a holiday or a temporary promotion, a static cling decal offers the flexibility you need. Defining your goal—whether it’s artistic expression, marketing, decoration, or privacy—is the most important step in selecting the right type of decal for the job.
Consider the Design
Your design’s complexity, color, and style will also influence your choice. For glass artists using fusing decals, the design is a critical artistic element that becomes a permanent part of the piece. You’ll want to choose a decal that complements the color and shape of your glass. For other types of decals, think about the overall aesthetic. Do you want something bold and eye-catching or subtle and elegant? Bright colors will grab attention, while a frosted or etched design offers a more understated look. Make sure the design’s style and colors align with your brand, your home’s decor, or the artistic statement you want to make.
Choose the Right Material
Once you know your goal and have a design in mind, choosing the right material becomes much easier. This choice often comes down to permanence versus flexibility. If you are creating a lasting piece of art or need a long-term outdoor sign, you need a material built for durability. Glass fusing decals offer the ultimate permanence for art, while high-quality vinyl is the standard for long-lasting signage. If your needs are temporary, a static cling decal is the ideal choice because it can be easily removed and reused. The material dictates the decal’s lifespan, application method, and overall function, so match it to the demands of your project.
Measure Your Space
This might seem obvious, but it’s a step you can’t afford to skip. Carefully measure the window or glass surface where the decal will be applied. An ill-fitting decal can look unprofessional and ruin the effect you’re going for. For artists working on a specific piece of glass, consider the scale of the decal in relation to your project. A small decal might get lost on a large panel, while a large one could overwhelm a delicate suncatcher. Think about proportion and balance to ensure the final result looks intentional and well-composed. Taking precise measurements ensures your decal will fit perfectly and achieve the visual impact you envision.
How Do You Apply Glass Decals?
Using glass decals is not a child’s play. Read this step-by-step procedure to learn the correct way to use glass decals.
Gathering Your Supplies
- Soft tissue paper
- Scissors
- Clean warm water in a clean bowl
- Small wiper
- Smooth, lint-free fabric
- Piece of glass or window
- Kiln
The Step-by-Step Process
- Step 1 – Clean the surface before beginning. Lay a clean towel on a flat surface. Place all the above-mentioned tools on the towel.
- Step 2 – Clean the glass or window using warm water.
- Step 3 – Peel off the wax protective sheet from the decals.
- Step 4 – With the help of scissors, precisely cut out the decals from the sheet.
- Step 5 – Put these cut-outs in warm water for half a minute.
- Step 6 – Take the decal out of the water and wait for a few seconds. With your fingers, gently slide it away from the backing paper.
- Step 7 – Slide the decal directly on the glass surface without flipping it over. The printed side should remain facing upwards.
- Step 8 – Hold the decal firmly and then use the little wiper over it to get rid of excess water and air bubbles. To do it the right way, start from the center and move the wiper outwards. Slowly rotate the glass to remove air bubbles and water from all the edges.
- Step 9 – Take a dry lint-free fabric and work it on the decal from center to outward edges. Use very gentle pushing motions.
- Step 10 – Leave the decal to dry overnight and then fuse it according to the advised temperature.
Tips for Perfect Glass Fusing
First, determine the decals and glass you are purchasing. Fusing can be done in low and high temperatures depending on the decals. Low glass fusing decals are fired between 1034-1074 degrees Fahrenheit. High glass fusing decals are fired between 1300-1425 degrees Fahrenheit. Other than temperature, keep in mind that some materials need to be fused very slowly and gradually. It is also very important to maintain ventilation for a perfect silver or gold finish.
Application and Removal of Common Decals
While the process for kiln-fired decals is unique, many artists also work with common vinyl or static cling decals for temporary projects, studio signage, or market displays. The good news is that applying these is much simpler and doesn’t require a kiln. The key to a professional, bubble-free finish is a clean surface and a bit of patience. Whether you’re decorating your studio window or creating a temporary installation, mastering the application and removal of these decals is a useful skill. The following methods are tried-and-true for most standard window decals you’ll encounter, ensuring your designs look exactly as you envisioned them.
The “Wet Application” Method
For a flawless, repositionable application, the “wet method” is your best friend. Start by thoroughly cleaning the glass to remove any dust or grime. Next, lightly spray the window with a solution of warm water and a few drops of dish soap. This simple trick prevents the decal from sticking immediately, giving you time to position it perfectly. After peeling the decal from its backing, place it on the wet surface. You can then use a flat, rigid edge, like a squeegee or a credit card, to smooth it out. Work from the center outwards to push any water and air bubbles to the edges, leaving a smooth, secure finish.
Ideal Conditions for Application
Timing your decal application can make a difference. It’s best to apply decals in mild weather, as extreme temperatures can affect the adhesive and the vinyl itself. While the material is durable enough to handle a wide temperature range once applied—often from a frigid -40° F to a sweltering 225° F—the initial application goes smoothest when the glass isn’t too hot or cold. If you work in a climate with dramatic temperature swings, aim for a temperate day to ensure the decal adheres properly without any issues, giving you the best possible result for your efforts.
How to Remove Decals
When it’s time for a change, removing old window decals is usually a straightforward process. Begin by carefully lifting one of the corners with your fingernail or a plastic scraper to avoid scratching the glass. Once you have a good grip, you should be able to peel the rest of the decal off slowly. If it has been on for a long time, it might tear or leave behind a sticky residue. To clean up any leftover adhesive, simply apply a bit of rubbing alcohol or a citrus-based cleaner to a soft cloth and gently wipe the area until the glass is clean and clear again.
Design, Customization, and Limitations
Designing a decal offers a fantastic canvas for your creativity, but it’s a medium with its own set of rules. Unlike the intricate details possible with COE90 glass fusing, decal production has specific technical constraints you need to consider. Understanding these limitations from the start will help you create a design that not only looks great on screen but also translates perfectly to the final printed product. From shape and size to color and placement, knowing your options allows you to make informed decisions that bring your artistic vision to life effectively and without any production hiccups.
Customization Options
Most decal producers offer a wide range of customization options to fit your project’s needs. You aren’t limited to basic squares and circles; you can often order decals in completely custom shapes that follow the outline of your design. This freedom allows for more dynamic and integrated artwork on any glass surface. Beyond the shape, you also have control over the size and the type of material used, which directly impacts the final look and feel of your piece. These choices are the foundational elements that will define your decal’s appearance.
Shape, Size, and Color
When it comes to specifics, you can typically choose from standard shapes like squares, rectangles, and ovals, or you can upload a custom shape. Sizes are also flexible, ranging from small accents just a few inches wide to large pieces that can cover an entire window. For the material itself, the most common options are a clear film, which gives the impression that your design is printed directly on the glass, or an opaque white film, which provides a solid background for your artwork and makes colors appear more vibrant and bold.
Placement Options
Another key choice is deciding where the decal will be placed. You can have your design printed for application on the outside of the window, which is the standard option, or you can choose an “inside glass” option. This reverse-printed decal is applied to the interior of the window but faces outward. Placing a decal on the inside is a great way to protect it from weather, potential vandalism, or wear and tear, ensuring your artwork stays pristine for as long as possible while still being perfectly visible to people outside.
Design Tips and Limitations
When creating your artwork for a custom-shaped decal, it’s important to think about the cutting process. Designs with very thin, delicate lines or small, separate floating pieces can be difficult to produce and apply cleanly. It’s better to keep your outlines smooth and ensure all parts of your design are connected. Using high-quality, high-resolution artwork is also crucial for a crisp, professional result. Just as you would select the right stained glass for a project, choosing a strong, simple silhouette for your decal will ensure it looks its best.
Creative Ways to Use Decals on Windows
Glass decals have multiple uses, but window decals top the list. These have been in use for a long time, however recently the art has become better, tidier, and more precise. You can even select any shape, color, or design. Read some of the common ways of using decals on windows.
- Privacy – Window decals on one side of the window can help ensure privacy for businesses on roadsides, banks, real estate offices, jewelry shops, dentists, and more. Inside and outside window decals, both work fine. These ensure the privacy of sensitive business workings while keeping the business in the eyes of the passersby.
- Scannable QR Codes – Covid times have opened the way for a lot of technology. Scannable QR code window decals are now found at every business’ door or window. These help in accessing the business’ website, products, payment method, and more. Customers can also check offers and schemes by scanning these QR codes.
- Engaging Illusionary Decals – Optical illusionary window decals engage the passers-by. These can be fused on the glass windows of businesses.
- Advertisements – Window decals are a great way to advertise the business on the go. For example, window decals on your car’s window tell about your brand and its product.
Sun and Heat Control
Beyond their artistic appeal, some window decals serve a very practical purpose. Certain types, often called window films, are specifically designed to manage sunlight. They can help reduce glare and block harmful UV rays, which not only protects your furniture and art from fading but also helps keep rooms cooler during sunny days. While our focus as artists is often on creating beauty with fused decals, it’s helpful to know about these functional applications, especially for a studio space that gets a lot of direct sun.
Safety and Information
Decals can also play a role in safety and communication. Have you ever heard that heartbreaking thud of a bird flying into a clean window? Special decals, often with UV-reflective patterns visible to birds but not humans, can help prevent these collisions. On a more commercial note, businesses use window decals to display crucial information like logos, hours of operation, or contact details. It’s a simple yet effective way to communicate with customers before they even step inside.
Inspiration and Art
This is where the real fun begins for us. Think of a plain window as a blank canvas waiting for your creative touch. You can use decals to create stunning, intricate designs that mimic the look of etched or stained glass without the intensive labor. For glass fusers, high-quality decals offer a way to add incredibly detailed imagery, text, or patterns to your work that would be difficult to achieve by hand. They can be the centerpiece of a design or a subtle accent that completes a larger fused glass project.
Seasonal Decor
One of the most enjoyable ways to use decals is for seasonal decoration. Because many types, like static clings, are easy to apply and remove, you can effortlessly switch up your decor for holidays, seasons, or special events. Imagine adding delicate snowflakes to your studio windows in the winter or vibrant floral designs in the spring. It’s a low-commitment, high-impact way to celebrate the time of year and keep your creative space feeling fresh and inspiring.
Maintenance and Care
Once you’ve applied your decals, you’ll want to keep them looking their best. The right care depends on the type of decal you’re using. A decal that has been permanently fired onto a piece of glass in a kiln becomes part of the glass itself; you can clean it just as you would any other glass art. However, for temporary or surface-applied decals like vinyl or static clings, a little extra care is needed to ensure they last as long as possible. Following a few simple guidelines will protect your designs from peeling, fading, or damage.
Regular Cleaning
To clean surface-applied window decals, always opt for a gentle approach. Mix a simple solution of mild soap and water, or use a gentle, ammonia-free glass cleaner. Apply it with a soft, lint-free cloth or microfiber towel. It’s important to avoid using harsh chemicals, abrasive scrubbers, or pressure washers, as these can easily lift the edges of the decal or scratch the surface. Gently wipe the decal and the surrounding glass, and then dry it with a clean cloth to prevent water spots.
Storing Reusable Decals
If you’re using seasonal or reusable decals like static clings, proper storage is key to using them year after year. When you take them down, try to place them back on the original backing paper they came with. If you no longer have it, a piece of wax paper will work just as well. Roll the sheet loosely—never fold it, as this can create permanent creases. Store the rolled decals in a clean, dry place that’s protected from direct sunlight and extreme temperatures to keep them in perfect condition for their next use.
Ready to Start Your Next Project?
So, now you have one more thing to experiment with your glass art skills. This can definitely be fun and helpful if you are working on window decals. Just ensure your safety in the fusing part of the process. At art glass supplies, you can procure the best kilns, decals, glass, and much more that you need for your project.
Frequently Asked Questions
What’s the main difference between a glass fusing decal and a regular vinyl sticker? Think of it this way: a glass fusing decal is made of glass enamels designed to become a permanent part of your art. When fired in a kiln, it melts and bonds directly with the glass surface, creating a smooth, durable design that won’t scratch or peel. A vinyl sticker, on the other hand, is simply a piece of plastic with an adhesive backing that sits on top of the glass and would be completely destroyed by the heat of a kiln.
Can I use any decal I find in my kiln? Absolutely not. It is critical that you only use decals specifically made for firing in a kiln. These are often labeled as “glass fusing decals” or “kiln-fire decals.” Using a standard vinyl or static cling decal in your kiln will ruin your project, as they will melt and burn, potentially releasing unpleasant fumes and leaving a mess on your glass. Always be sure you’re working with the correct materials for kiln forming.
Do I have to fire my project immediately after applying the decal? It’s actually best to wait. You should let the decal dry completely on the glass, which usually takes at least a few hours but is best left overnight. This allows all the water trapped underneath to evaporate. Firing a project while the decal is still wet can cause the water to turn into steam, which can create bubbles or even shift your design out of place during the firing process.
My decal wrinkled when I tried to squeegee out the water. How can I prevent this? Wrinkling is a common issue, and it usually happens when too much pressure is applied too quickly. The key is to use a gentle but firm touch with your squeegee or wiper. Always start from the center of the decal and work your way smoothly to the outer edges. If a small wrinkle does appear, you can sometimes carefully lift the edge of the decal, allow a bit of water back underneath, and then gently smooth it out again.
What’s the difference between low-fire and high-fire decals? The difference comes down to the temperature at which the decal’s design matures and bonds with the glass. Low-fire decals are perfect for adding a final decorative layer to a piece that has already been fused, as they fire at a temperature that won’t significantly alter the shape of your project. High-fire decals are designed to withstand a full fuse temperature, meaning you can incorporate them into the initial layers of your glass piece before its main firing.
Key Takeaways
- Choose the Right Decal for the Job: For permanent, detailed artwork that becomes part of the glass, always use kiln-fired fusing decals. For temporary needs like studio signage or seasonal decor, surface-applied vinyl or static cling decals offer flexibility without the commitment.
- A Clean Surface is Non-Negotiable: The secret to a perfect, bubble-free application is starting with impeccably clean glass. Whether you’re preparing a piece for the kiln or applying a vinyl sticker, removing all dust and oils ensures your decal adheres smoothly and professionally.
- Think Beyond Purely Decorative Designs: Decals are a powerful tool for both art and function. Use them to add intricate patterns to your fused pieces, create elegant privacy screens that mimic etched glass, or add practical information to your work for art shows.
Related Articles
- Colorful Hummingbirds Decal Sheet | Art Glass Supplies – Decals
- Friezes Decal Sheet | Art Glass Supplies – Decals
- Butterflies Decal Sheet | Art Glass Supplies – Decals
- Colored Peacock Decal Sheet | Art Glass Supplies – Decals
- Large Feathers Decal Sheet | Art Glass Supplies – Decals