
We’ve all been there: pulling a project from the kiln only to find a heartbreaking crack. This frustration almost always comes down to one thing: incompatible glass. The secret to strong, stable fused pieces lies in the Coefficient of Expansion (COE). Getting this right is the foundation of every successful project. This guide cuts through the technical jargon in the COE 90 vs 96 debate. We’ll explore the unique personality of each glass system, helping you choose the right materials and firing schedules to bring your creative vision to life—flawlessly.
Key Takeaways
- Commit to a Single COE for Each Project: Mixing COE 90 and 96 glass is the number one cause of cracks because they expand and contract differently under heat. Keep your glass types completely separate to guarantee your work is strong and stable.
- Choose Your COE Based on Your Artistic Goals: Select COE 90 for its rich, painterly colors and stability in complex designs. Opt for COE 96 when you need bright, bold colors and a more budget-friendly option for learning or large-scale work.
- Use the Right Firing Schedule for Your Glass: Your kiln settings are just as important as the glass itself. Always use a firing schedule recommended for your specific COE and project size to properly anneal the glass and prevent stress.
What is COE in Glass Fusing?
If you’ve spent any time looking at glass for fusing, you’ve definitely seen the term “COE” followed by a number, usually 90 or 96. It might seem like just another piece of jargon, but understanding COE is one of the most important things you can learn in glass art. Think of it as the golden rule of fusing. Getting it right means your projects will be strong and beautiful. Getting it wrong can lead to cracked, broken pieces and a lot of frustration. Let’s break down exactly what COE is and why it matters so much for your work.
What is the Coefficient of Expansion?
COE stands for Coefficient of Expansion. In simple terms, it’s a measurement of how much a piece of glass expands when it gets hot and shrinks as it cools down inside your kiln. Every material changes size with temperature, and the COE number tells you exactly how much. While the measurement itself is microscopic, those tiny differences have a huge impact on your finished piece. A higher COE number means the glass expands and contracts more dramatically, while a lower number indicates less movement. Understanding this basic principle is the first step to creating stable, long-lasting glass art.
The Science Behind the Number
So, what does that number—the 90 or 96—actually mean? It’s a shorthand for a very long decimal that measures the rate of expansion. For example, COE 90 glass expands by 0.0000090 inches for every inch of glass, for every degree Celsius it’s heated. It’s a tiny, almost imperceptible change, but inside a kiln where temperatures soar, these tiny movements add up. A higher number, like 96, signifies that the glass expands and contracts just a little bit more than a glass with a lower number. This difference is the root cause of incompatibility issues. When two pieces of glass try to move at different rates while fused together, it creates immense stress, which is what leads to those dreaded cracks.
How Glass Gets Its COE
Glass manufacturers create a specific COE by carefully controlling the chemical “recipe” of the glass. The primary ingredients are usually sand, soda ash, and limestone, but adding or adjusting other chemicals changes how the glass behaves under heat. Think of it like baking: a little more or less of one ingredient can completely change the texture of a cookie. By sticking to a precise formula, companies like Bullseye produce consistent COE 90 glass, while others like Wissmach and Spectrum specialize in COE 96 glass. This is why mixing glass from different COE families is a recipe for disaster. They are fundamentally different materials designed to move at their own specific rates, and forcing them together will only cause them to pull apart as they cool.
Why You Can’t Ignore COE Compatibility
Here’s why that number is so important: when you fuse multiple pieces of glass together, they must all have the same COE. If you try to fuse glass with different COE ratings, they will expand and shrink at different rates. As the piece cools, this creates immense stress within the glass. The result? Your beautiful creation will crack or even shatter. This is called incompatibility, and it can happen right away in the kiln or, heartbreakingly, weeks, months, or even a year later. Sticking to one COE for a project is the best way to ensure your artwork lasts.
A Quick Guide to Common Glass COEs
In the world of warm glass, you’ll primarily work with two types: COE 90 glass and COE 96 glass. The numbers refer to their specific expansion rates. For example, COE 90 glass expands 0.0000090 inches for every degree Celsius it heats up. While the technical difference is small, it’s more than enough to cause incompatibility. Generally, artists find COE 90 to be very stable and reliable, offering a sophisticated color palette. On the other hand, COE 96 is known for its bright, vibrant colors and slightly more fluid nature in the kiln, which some artists love for creating bold designs.
COE 90 vs. COE 96: What’s the Difference?
At first glance, the difference between COE 90 and COE 96 seems tiny. It’s just a few decimal points, right? But in the world of glass fusing, that small difference is everything. It affects how your glass behaves in the kiln, the colors you can achieve, and even your project budget. Think of it as the DNA of your glass—it dictates how it will grow, change, and interact with other pieces under heat. Choosing one over the other isn’t about right or wrong; it’s about matching the glass to your artistic vision and practical needs. For example, one might offer the perfect shade of blue you’ve been dreaming of, while the other is more budget-friendly for a large platter you want to make. This is one of the first major decisions you’ll make for any fusing project, and getting it right sets you up for success from the start. It prevents the heartbreak of a cracked piece and ensures your finished work is strong and stable for years to come. Below, we’ll explore the specific working properties, color palettes, costs, and major brands associated with each COE. This will help you make an informed decision for your next project and avoid the common pitfalls that can lead to disappointment. Let’s break down exactly what sets these two popular glass types apart so you can choose with confidence.
Comparing Firing Temperatures & Properties
The core difference lies in how much the glass expands when heated. COE 90 glass expands 0.0000090 inches for every degree Celsius it heats up, while COE 96 expands just a bit more, at 0.0000096 inches. This might seem insignificant, but inside a kiln reaching over 1400°F, it’s a game-changer. Because COE 96 glass moves a little more, it can sometimes be more forgiving for beginners. However, this difference in movement is precisely why you can never mix the two. As they cool and shrink at different rates, the stress will cause your beautiful piece to crack.
Physical Properties: Soft vs. Hard Glass
The terms “soft” and “hard” glass refer to how each type behaves under heat, not their physical texture. The main difference is that COE 96 is generally a “softer” glass, meaning it becomes more fluid and fuses at slightly lower temperatures than the “harder” COE 90. This fluidity makes COE 96 glass great for achieving smooth, rounded edges and can be more forgiving for artists just starting out. On the other hand, the stability of a harder glass like COE 90 glass is a major advantage for intricate work. It holds its shape and maintains crisp details better during firing, making it ideal for complex patterns or painterly designs. This fundamental difference in behavior is why each type requires its own specific firing schedule to get the best results.
Which COE Offers More Color Options?
Your choice of COE will also influence your artistic palette. Generally, COE 96 glass is known for its bright, vibrant, and extensive color selection. If you’re looking for bold, poppy colors that make a statement, you’ll find a huge range to work with. On the other hand, COE 90 glass is often celebrated for its rich, deep, and nuanced hues. Artists often describe the Bullseye palette, a COE 90 staple, as more “painterly,” offering subtle variations perfect for creating depth and sophisticated designs. Neither is better—it just depends on the look you want to achieve.
The COE 90 “Hot” Palette
While both glass types offer a rainbow of choices, COE 90 glass is famous for its unique and sophisticated color palette. It’s particularly known for producing stunning “hot” colors—like rich cranberry, deep ruby, and vibrant pinks—that are difficult to replicate in other glass formulas. This makes it a favorite among artists who want to create detailed, painterly effects in their work. Because COE 90 is incredibly stable and predictable in the kiln, it’s the perfect medium for intricate designs, delicate jewelry, and complex sculptural pieces where every line and shade matters. If your work relies on subtle color shifts and a rich, artistic feel, the COE 90 palette will give you the control and depth you need to bring your vision to life.
Dichroic Glass and COE 96
If you’ve ever been mesmerized by glass that shimmers and changes color in the light, you’ve experienced the magic of dichroic glass. This captivating effect is most commonly found on COE 96 glass. The brilliant, clean colors of the COE 96 base make the dichroic coating pop, creating that dazzling, eye-catching look. Beyond its beauty, COE 96 is often a more budget-friendly option, making it a popular choice for artists creating larger pieces or for those who are still learning and experimenting with their kiln. Its slightly softer nature in the kiln can also be more forgiving. For artists who love bold, bright, and dynamic results, especially with the added sparkle of dichroic coatings, COE 96 is the clear winner.
Does COE 90 or 96 Cost More?
If you’re watching your budget, especially when starting out or creating large-scale pieces, cost is an important factor. Typically, COE 96 glass is more affordable than COE 90. This makes it a fantastic choice for hobbyists, students, or anyone who plans to do a lot of experimenting without breaking the bank. While COE 90 can be more of an investment, many professional artists consider it well worth the price for its specific working properties and unique color palette. Your project goals and budget will help guide you to the right choice.
How It’s Sold: By the Pound vs. Square Foot
When you’re shopping for glass, you might notice that prices are listed in different ways, which can make it tricky to compare costs directly. This is another key difference between the two systems. COE 90 glass, especially from brands like Bullseye, is often sold by the pound. In contrast, you’ll usually find COE 96 glass priced by the square foot or in specific pre-cut sizes. So, how do you compare apples to apples? A great rule of thumb is to multiply the price per pound of COE 90 glass by 1.6 to get a rough estimate of the price per square foot. This simple calculation helps you see the true cost difference and make a more informed decision for your project budget, ensuring you’re getting the best value no matter which type you choose.
Which Brands Make Which COE?
Knowing which manufacturers produce each COE helps you shop smarter and keep your glass organized. The most prominent name in COE 90 is Bullseye Glass Company; they have built their entire system around this standard. For COE 96, you have more variety. Brands like Wissmach, Spectrum, and Uroboros (with Spectrum and Uroboros now produced by Oceanside Glass & Tile) are the go-to sources. Keeping your studio stocked with glass from one COE family is the easiest way to ensure every piece you create is compatible and built to last.
Your Go-To Compatibility Cheat Sheet
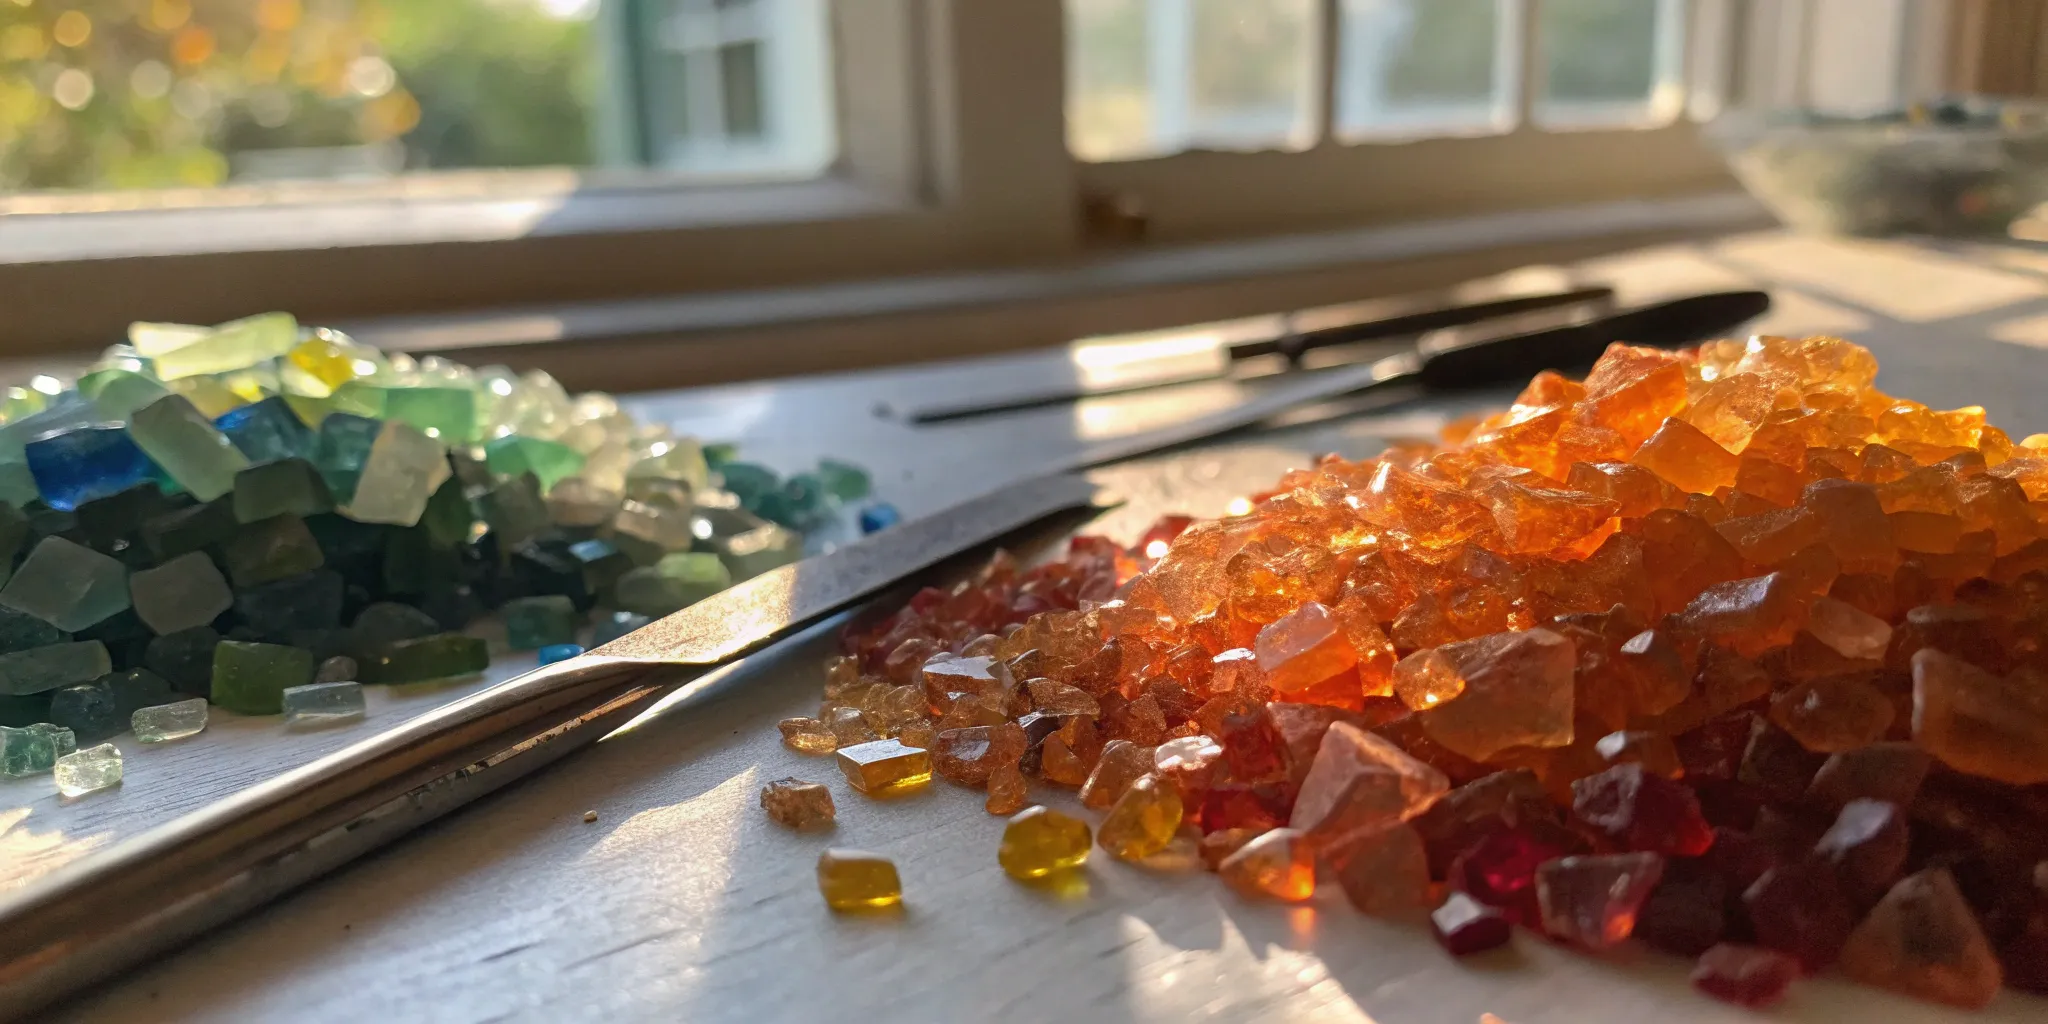
This is the most important rule in glass fusing: never mix COE 90 and COE 96 glass in the same project. Not even the tiniest shard or sprinkle of frit. Because they expand and contract at different rates, the internal stress created during the cooling process will inevitably cause your piece to crack. Think of it as a delayed self-destruct sequence. To avoid heartbreak, dedicate separate, clearly labeled containers for your COE 90 and COE 96 scrap glass and powders. Always double-check your materials before they go into the kiln.
Texture, Cutting, and Sheet Size Differences
Beyond the chemistry, the physical feel and workability of these two glass types are quite different. Think of COE 90 glass, especially from Bullseye, as having a handmade character. It often has a distinct texture—one side might be perfectly smooth while the other has a slight ‘orange peel’ feel. For the cleanest score, you’ll always want to cut on the smoother side. In contrast, COE 96 glass is typically machine-rolled, giving it a consistently smooth surface on both sides, which makes it a bit more straightforward to cut. Sheet sizes also play a role. While both come in various dimensions, COE 96 is often available in larger standard sheets, a practical advantage for big projects or for getting the most out of your material. These physical differences are key to choosing the right glass for your workflow and artistic goals.
How to Choose: COE 90 or COE 96?
Deciding between COE 90 and COE 96 glass can feel like a big commitment, but it really comes down to your project’s goals and your personal style. There’s no single “best” option—only the one that’s best for what you want to create. Think about the colors you’re drawn to, the complexity of your design, and your budget. Let’s walk through the strengths of each type to help you find the perfect fit for your next piece.
The Best Projects for COE 90 Glass
Think of COE 90 glass as your reliable, sophisticated choice. Because it expands and contracts less when heated, it’s incredibly stable and forgiving during complex firings. This makes it a favorite for intricate kiln-forming work where precision is key. The color palette tends to be rich and deep, offering a huge range of textures and styles, including beautiful iridized and dichroic options. If your project calls for subtle, nuanced colors and you need a glass that can handle detailed designs and multiple firings without stress, COE 90 is an excellent partner in the studio. It’s a true workhorse for artists who love to push creative boundaries.
Projects Requiring Strength and Detail
When your design involves lots of small pieces, intricate patterns, or requires multiple trips to the kiln, stability is your best friend. This is where COE 90 glass truly shines. Because it expands and contracts less than COE 96, it handles thermal changes with remarkable resilience, reducing the risk of stress fractures in complex work. This stability makes it the preferred choice for artists creating detailed glass mosaics, layered sculptural pieces, or anything that needs to be structurally sound. If you’re planning a project that demands precision and strength, working with COE 90 glass gives you the confidence that your detailed efforts will result in a strong, cohesive final piece.
Using Texture for Artistic Effects
One of the unique characteristics of COE 90 glass, particularly from handmade sheets, is its inherent texture. You’ll often find that one side is perfectly smooth while the other has a subtle “orange peel” or patterned finish from the manufacturing process. For the cleanest cut, always score the smoother side of the glass. But don’t think of this texture as a challenge—think of it as a feature. It can add incredible depth and visual interest to your work, catching the light in unique ways that a perfectly flat surface can’t. This quality is something many artists also look for when selecting stained glass, as texture can completely transform the look and feel of a finished panel.
The Best Projects for COE 96 Glass
If you want your art to pop with brilliant, eye-catching color, COE 96 glass is your go-to. This glass is known for its bright, vivid, and often playful color selection that really stands out. It’s also a fantastic starting point for beginners. Why? It’s generally more affordable, which takes some of the pressure off when you’re learning. Its slightly higher expansion rate makes it a bit more fluid in the kiln, which can be very forgiving. For projects like suncatchers, simple fused plates, or jewelry where you want bold, immediate impact without breaking the bank, COE 96 delivers every time.
Glass Blowing, Casting, and Mosaics
The golden rule of COE isn’t just for fusing—its principles are essential in other glass art forms, too. In glass blowing, adding decorative elements like cane or murrine requires perfect COE compatibility with the base vessel to prevent cracking. Similarly, in kiln casting, filling molds with different types of glass frit or billets will create a weak, stressed piece doomed to fail. Even in mosaics, COE matters if you plan to fuse the final piece for a smooth, groupless finish. In any process where different pieces of glass are heated together until they are molten, they must share the same COE. The fundamental rule remains the same: mixing expansion rates creates stress, and stress is the enemy of strong, lasting glass art.
How to Match Your COE to Your Project
Choosing your COE is one of the first and most important decisions you’ll make. Before you even add glass to your cart, picture your finished piece. Are you creating a detailed landscape that requires subtle shading, or a vibrant, abstract piece that needs bold colors? Your answer will point you toward either COE 90 or 96. This choice affects everything that follows, from the specific glass sheets you buy to the frit and stringers you use for decoration. Sticking to one COE from the start ensures all your components will fuse together harmoniously in the kiln, preventing any costly or heartbreaking surprises later on.
The Golden Rule: Never Mix COEs
This is the most important rule in glass fusing: never, ever mix glass with different COE values in a single project. If you try to fuse a piece of COE 90 glass to COE 96, their different rates of expansion and contraction will create immense stress as the piece cools. This tension will cause the glass to crack—a problem called incompatibility. The break might happen immediately in the kiln, or it could happen hours, days, or even a year later. To avoid this, keep your glass organized and clearly labeled. Dedicate separate storage bins for your COE 90 and COE 96 scraps to ensure you never accidentally mix them.
How to Get Great Results with COE 90 & 96
Once you’ve chosen your glass, the real fun begins in the studio. Fusing is a beautiful blend of art and science, and a few key practices can make all the difference between a stunning piece and a frustrating learning experience. Getting consistent, crack-free results comes down to understanding your materials and your equipment. These tips will help you handle both COE 90 and COE 96 glass with confidence, ensuring your creative vision comes to life just as you imagined.
Master Your Kiln Temperatures
Think of your kiln as your creative partner—the more you understand it, the better you’ll work together. Different types of glass melt at slightly different temperatures. For example, COE 96 glass typically tack fuses around 1350°F, while COE 90 needs a little more heat, tack fusing closer to 1370°F. This small difference is significant. Always start with the manufacturer’s recommended firing schedule for the specific glass you’re using. Keep a log of your firings, noting the schedule, the type of glass, and the results. Over time, you’ll learn the unique personality of your specific kiln and be able to fine-tune your schedules for perfect results every time.
How to Test for Compatibility
What do you do with that mystery scrap of glass in your studio? While it’s tempting to use it, fusing with unlabeled glass is a gamble. You can try to check for compatibility using two polarized lenses, but it’s not a foolproof method for determining an exact COE. The best and safest approach is to work with clearly labeled glass from the start. When you buy new sheets, immediately mark them with a permanent marker. This simple habit prevents accidental mixing and protects your projects from developing stress cracks due to incompatible glass. If you’re ever in doubt, it’s better to set the mystery piece aside for a mosaic project instead of risking it in the kiln.
Testing Compatibility Between Different Brands
Even when you stick to a single COE, you might wonder if it’s safe to mix brands—for example, using Wissmach and Spectrum glass together in a COE 96 project. Generally, manufacturers design their glass to be compatible with others of the same COE, so it’s usually fine. However, for a critical project or if you’re working with older glass where manufacturing processes may have changed, it’s never a bad idea to run a small test first by fusing a scrap from each brand together. The non-negotiable rule, though, is to keep your COE 90 glass completely separate from your COE 96 glass. Their expansion rates are fundamentally different, and mixing them will introduce stress that leads to cracking. Always double-check your materials before they go into the kiln to ensure a strong, stable result.
Using a Fuse It Test Card
If you have an unlabeled piece of glass and want to determine its compatibility, you can perform a simple test. Cut a small, thin strip of your mystery glass and lay it across a strip of known COE 90 or 96 glass, then fuse them together in your kiln. Once it has cooled completely, you can check for stress by viewing the piece through two polarized lenses or a “Fuse It Test card.” If you see a bright halo or glowing lines around the area where the two glasses meet, they are incompatible. If you see no halo, they are likely compatible. This is a great way to identify those mystery scraps, but the most reliable method is always to work with clearly labeled glass from the start to avoid any guesswork.
Keeping Your Glass Safe: Storage & Handling
An organized studio is a happy studio, and it’s also crucial for successful fusing. The number one rule is to keep your COE 90 and COE 96 glass completely separate. Designate different shelves, bins, or even sides of your studio for each type. Label everything clearly—not just the glass sheets but also your scrap bins. A small, unlabeled shard of the wrong COE can ruin an entire piece. Making a habit of organizing your glass as soon as it comes into your studio will save you from future headaches and costly mistakes. Think of it as setting up your future self for success.
A Simple Tip for Organizing Your Glass
Here’s a super simple trick that has saved me more times than I can count: the color-coding system. Grab two different colored permanent markers—say, red and blue. Assign one color to each COE. For example, every piece of COE 90 glass gets a red dot on the corner, and every piece of COE 96 glass gets a blue dot. Do this the moment new glass comes into your studio. This visual cue extends to your scrap bins too—a big red label on your COE 90 scrap bin and a blue one on your COE 96 bin. This way, even when you’re just grabbing a tiny shard for a project, a quick glance is all you need to confirm you have the right type. It’s a small habit that takes seconds but completely removes the guesswork and protects your work from incompatibility issues.
Program Your Kiln Like a Pro
The magic of COE is all about how glass expands and contracts with heat. When you mix COEs, the different glasses fight against each other as they cool, leading to stress, and eventually, cracks. This is why it’s so important to program your kiln with a firing schedule designed specifically for the COE you are using. Don’t assume one schedule fits all. A proper schedule controls the rate of heating and, most importantly, cooling (annealing) to ensure the final piece is strong and stable. Always refer to the glass manufacturer’s guidelines and don’t be afraid to adjust based on the size and thickness of your project.
Improving Compatibility with Your Firing Schedule
Your kiln settings are just as important as the glass itself. Think of a firing schedule as a recipe that’s perfectly calibrated for your ingredients. Because COE 90 and COE 96 glass expand and contract differently, they require slightly different recipes to ensure they cool down without stress. Always use a firing schedule recommended for your specific COE and project size to properly anneal the glass. You can find these schedules from the glass manufacturer. Keeping a simple log of your firings—noting the schedule, glass type, and results—is a fantastic habit. It will help you get to know your specific kiln and empower you to achieve consistent, beautiful results every time.
Firing Different COEs in the Same Kiln Load
This is the most critical rule in glass fusing, so it bears repeating: never mix COE 90 and COE 96 glass in the same project. Not even a tiny, forgotten shard or a light dusting of frit. As the piece cools, the two types of glass will shrink at different rates, creating a microscopic tug-of-war that the glass will always lose. This internal stress will cause your project to crack, sometimes long after it has left the kiln. To prevent this heartbreak, the best practice is to maintain strict separation in your studio. Use clearly labeled, dedicated containers for your COE 90 and COE 96 scrap glass and powders. Always double-check your materials before they go into the kiln.
What to Look for After Firing
Before you commit hours of work and beautiful sheets of glass to a large project, run a small test. Firing a few small pieces of your chosen glass together is a brilliant way to confirm compatibility and see how your colors will look after firing. This is especially important when you’re trying a new brand of glass, a new color combination, or want to see how the glass behaves in a new mold. A quick test firing can save you a lot of time, material, and heartache. It builds your confidence and ensures that when you do go for that big, ambitious piece, you know exactly what to expect.
Understanding and Preventing Devitrification
Have you ever opened your kiln to find a hazy, scummy film on what should have been a glossy, beautiful piece? That frustrating cloudiness is called devitrification, or “devit” for short. It happens when crystals form on the surface of the glass, usually because it was held at a high temperature for too long. Certain colors can be more prone to it, and even dust or fingerprints can give those crystals a place to start growing. The best defense is a good offense. Always start by thoroughly cleaning your glass before firing. Using a well-tested firing schedule designed for your specific COE is also critical to move through the devitrification temperature range efficiently. As some manufacturers note, proper cleaning is one of the best ways to prevent it. For extra insurance, especially on long firings or with sensitive glass, a light coat of an anti-devit spray can work wonders to keep your finish perfectly clear and glossy.
Fusing Safely: Your Studio Checklist
Creating beautiful fused glass art is incredibly rewarding, but it all starts with a safe and organized studio. Think of these safety practices not as rules, but as habits that empower you to create with confidence. When your workspace is set up for success, you can focus on what really matters: bringing your artistic vision to life. Let’s walk through a simple checklist to make sure your studio is a safe haven for your creativity.
Gear Up: Essential Safety Equipment
Before you even touch a piece of glass, let’s talk about your gear. Always wear protective eyewear. It’s a non-negotiable for protecting your eyes from tiny glass shards that can fly up when cutting or grinding. Keep a pair of comfortable, cut-resistant gloves handy for handling larger sheets of glass. When you’re working with glass powders or applying kiln wash, a dust mask is a must to avoid inhaling fine particles. And when it’s time to load or check the kiln, be sure to wear heat-resistant gloves. It’s a simple setup that makes a world of difference.
How to Set Up a Safe Fusing Workspace
An organized studio is a safe studio. The most important rule here is to keep your glass separated by its COE. Create dedicated, clearly labeled storage areas for your COE 90 and COE 96 glass. This simple habit prevents the heartbreaking discovery that your project has cracked because of an accidental mix-up. Keep your work surfaces clean and uncluttered to minimize the risk of knocking over a project or misplacing a tool. A little organization goes a long way in preventing mistakes and accidents.
Why Ventilation is Non-Negotiable
When you fire glass in a kiln, binders and other substances can burn off, creating fumes you don’t want to breathe. That’s why proper ventilation is crucial. Your studio should have good airflow, whether it’s from an open window with a fan, an exhaust fan, or a dedicated kiln ventilation system. This is especially important if you’re working in a smaller space like a garage or basement. Operating your kiln in a well-ventilated area ensures a healthier environment for you and better results for your art.
Handle Glass with Confidence
The way you handle your glass before it even enters the kiln can impact the final result. Always clean your glass thoroughly with a lint-free cloth and a good glass cleaner to remove any oils or residue. This simple step is your best defense against devitrification—that cloudy, scummy look that can ruin a piece. After cutting, you can lightly sand the edges to make them safer to handle. When moving your projects, always use two hands and walk carefully. Treat every piece of stained glass with care, and it will reward you in the end.
Kiln Safety 101: What to Watch For
Your kiln is the heart of your studio, so treat it with respect. Never leave a running kiln unattended for long periods, and make sure the area around it is completely clear of flammable materials. Before you press start, double-check that you’ve programmed the correct firing schedule for your specific project and glass type. And remember the golden rule: never mix COEs. Mixing different coefficients will cause stress in the glass as it cools, leading to cracks that can appear immediately or even months later. A little diligence with your kiln ensures every firing is a safe one.
Frequently Asked Questions
What’s the easiest way to tell my COE 90 and COE 96 glass apart? Honestly, you can’t tell them apart just by looking. The best habit you can build is to label your glass with a permanent marker the moment you get it. If you have a piece of unknown glass, there isn’t a simple, foolproof way to identify its COE at home. To avoid risking an entire project, it’s safest to keep your glass clearly marked and separated from the very beginning.
I have some beautiful stained glass. Can I use it in my fusing projects? This is a common question, especially for artists who love both crafts. Most glass made for traditional stained glass work is not tested for COE compatibility and is not designed to withstand kiln temperatures. While you might get lucky with a small piece, it’s a huge gamble that will almost certainly result in cracking. For fusing, you should always stick with glass specifically labeled as COE 90 or COE 96.
Do I really need different firing schedules for COE 90 and COE 96? Yes, you do. While the overall process of heating and cooling is similar, the specific target temperatures for tack, contour, and full fuses are slightly different for each type. Generally, COE 96 glass matures at slightly lower temperatures than COE 90. Always start with the firing schedule recommended by the glass manufacturer and keep a log to learn how your specific kiln behaves.
Why is one COE more expensive than the other? Does that mean it’s better quality? The price difference isn’t about one being better than the other. It comes down to the raw materials and manufacturing processes used to create the glass and its specific color palette. COE 90, particularly from Bullseye, has a long history of rigorous testing and a unique range of colors that contribute to its cost. Think of it as choosing between two different, high-quality brands of paint—you select the one that fits your budget and gives you the colors you need for your vision.
I accidentally mixed my COE 90 and COE 96 scrap glass. Is it all useless now? Don’t panic! While that bin of scrap is no longer safe for fusing projects, it is far from useless. Mixed-COE scrap is perfect for other art forms. You can use the pieces for beautiful mosaic work where they won’t be heated, or put them in a rock tumbler to create smooth, sea-glass-like gems for jewelry or decoration. It’s a frustrating mistake, but it can also open the door to new creative possibilities.