
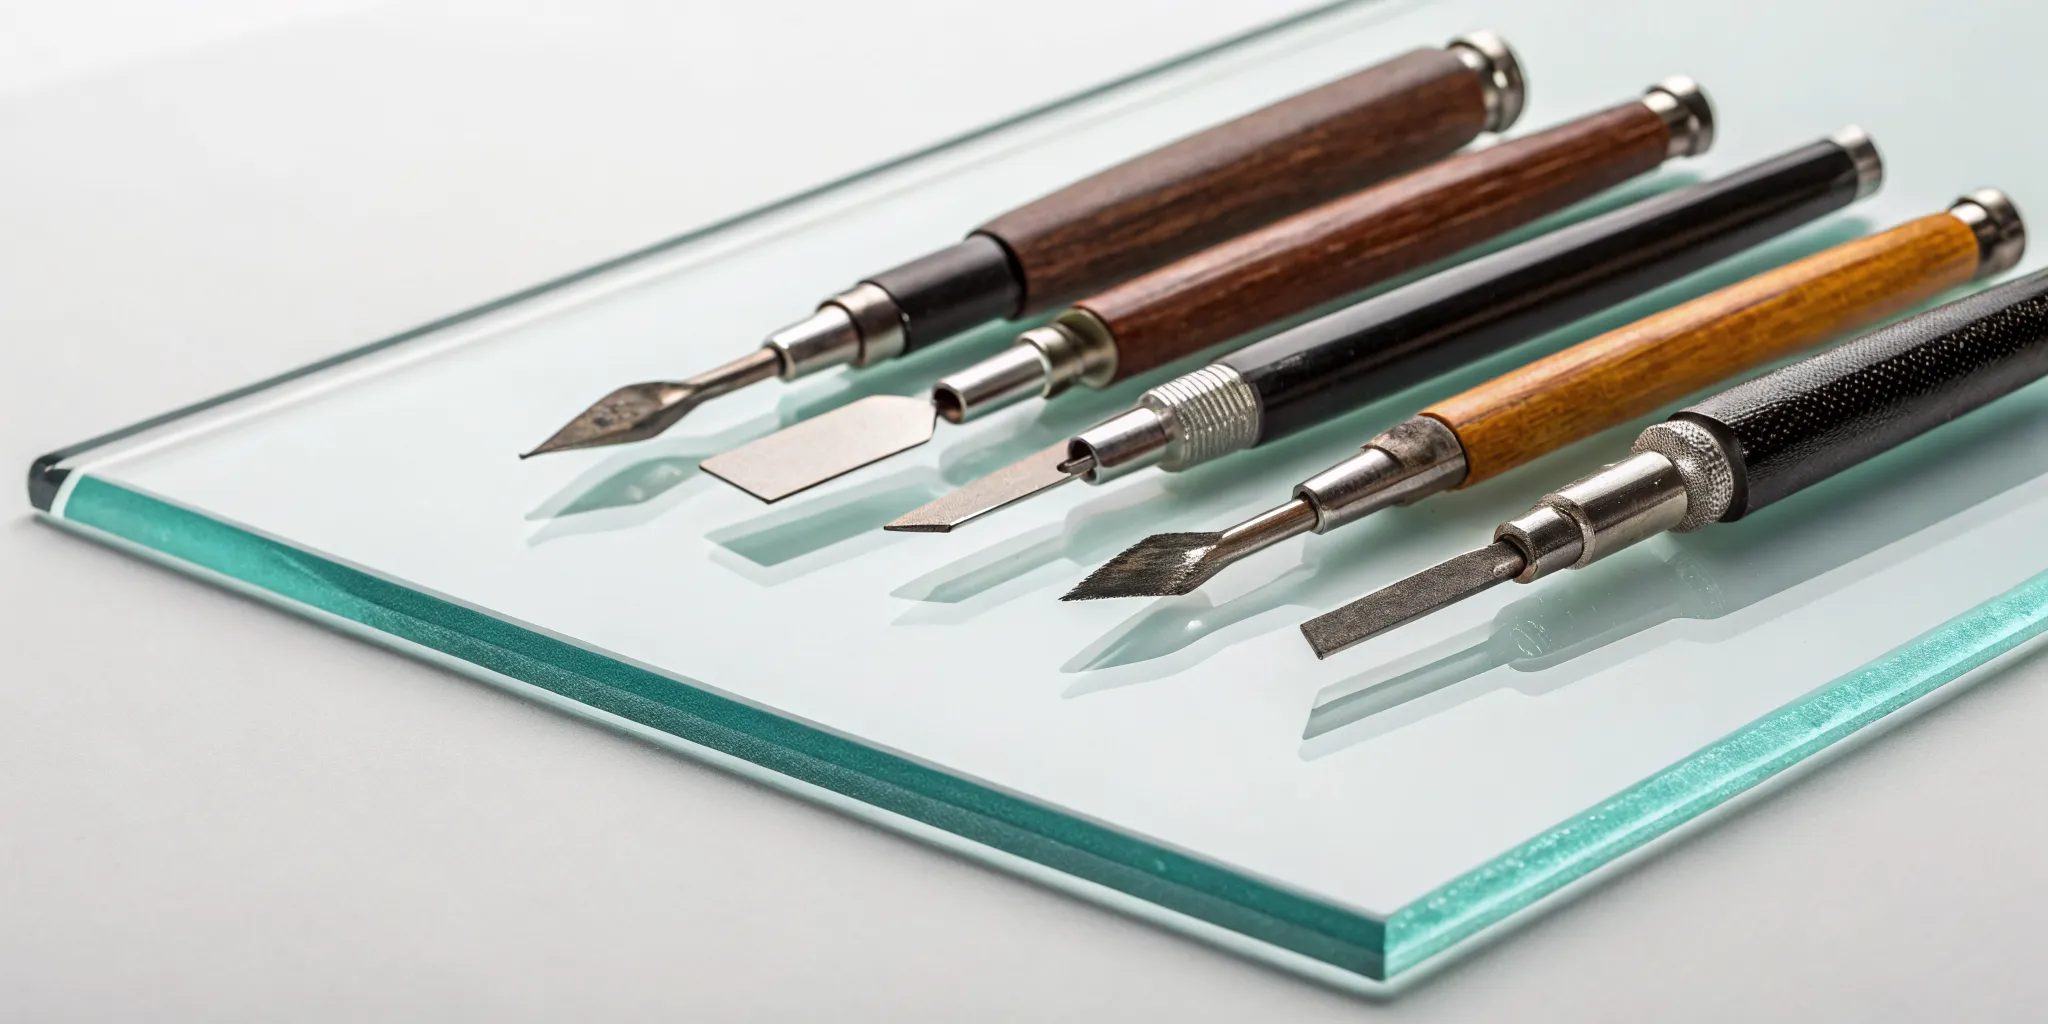
We’ve all been there. You line up the perfect score on a beautiful sheet of glass, take a deep breath, and then… crunch. That dreaded sound instead of a clean zip. The break runs wild, ruining the piece and your patience. But the problem often isn’t your technique; it’s the tool in your hand. A cheap glass cutter leads to wasted glass and frustration. The best glass cutting tool, however, gives you the precision for a clean break every time. This guide will walk you through finding the right professional glass cutter for your studio.
Key Takeaways
- Match your cutter to your project: Select your tool based on the cuts you need to make. Use a handheld cutter for straight lines and simple curves, an electric saw for complex shapes, and a heavy-duty model for thick glass.
- Focus on features that ensure clean breaks: A quality tungsten carbide wheel is non-negotiable for a smooth score. Paired with a comfortable grip and cutting oil, these features give you the control needed to prevent wasted glass.
- Invest in a tool that lasts: Choosing a durable cutter from a trusted brand is more cost-effective over time. A reliable tool that feels good in your hand will give you consistent results and save you from the frustration of cheap alternatives.
What Makes a Glass Cutter “Professional”?
Let’s start with the basics. A professional glass cutter isn’t about being overly complicated; it’s about precision. These are specialized tools designed to create a clean, consistent score on a glass surface. Think of it less like cutting through the glass and more like creating a perfect, controlled weakness. This score line is exactly what allows you to make a clean, accurate break right where you want it. Using the right tool is the difference between a beautiful, crisp edge and a frustrating pile of wasted stained glass.
The term “professional” covers a wide range of tools, from simple handheld cutters to powerful electric saws. You’ll find pencil grips, pistol grips, and custom grips, each designed for comfort and control. What truly sets them apart from basic craft store options is the quality of their components. They often feature durable carbide steel wheels that stay sharp longer, ergonomic handles that reduce hand fatigue during long sessions, and sometimes even internal oil reservoirs to keep the wheel lubricated for the smoothest possible score.
These advanced features are designed to handle the specific demands of different projects. Whether you’re working with thin, delicate COE90 glass for fusing or tackling thicker sheets for a large architectural piece, there’s a professional cutter built for the job. The goal is always the same: to give you the control and reliability you need to bring your vision to life accurately and efficiently. Choosing the right one simply comes down to understanding your project’s needs and your own working style.
Why Learn to Cut Your Own Glass?
If you’ve only ever worked with pre-cut glass, you might be wondering if learning to cut it yourself is worth the effort. The short answer is: absolutely. Mastering this skill opens up a whole new world of creative possibilities and is more practical than you might think. It’s the difference between following a recipe and creating your own. When you can cut any shape you imagine, you’re no longer limited by what’s available off the shelf. This skill gives you the freedom to design intricate patterns, create custom-fit pieces for unique projects, and truly make your art your own. Plus, there’s a deep satisfaction that comes from handling the material from start to finish, transforming a simple sheet of glass into something beautiful.
Creative Control and Customization
The biggest advantage of cutting your own glass is the complete creative freedom it gives you. You can bring any design to life, from the sweeping curves in a stained glass panel to the precise geometric shapes needed for a fused glass mosaic. You’re not confined to standard squares or circles; your imagination is the only limit. This level of control is essential for creating truly unique art. Of course, achieving that perfect cut depends heavily on your tool. As we’ve discussed, using the right tool is the difference between a beautiful, crisp edge and a frustrating pile of wasted stained glass. With a quality cutter in hand, you can confidently execute your vision.
The Cost Benefits of DIY Glass Cutting
Beyond the artistic benefits, cutting your own glass is also much more economical. Buying full sheets of COE90 or COE96 glass and cutting them down to size is significantly cheaper than purchasing pre-cut pieces. This approach also minimizes waste, as you can save the scraps for smaller projects like jewelry or mosaic details. Over time, these savings really add up, allowing you to invest more in your materials or even a new kiln. Investing in a durable, reliable cutter from a trusted brand is more cost-effective in the long run, as it will last for years and save you from replacing cheap tools that break or dull quickly.
How to Cut Glass: A Step-by-Step Guide
Ready to give it a try? Cutting glass is a skill that anyone can learn with a little practice and the right approach. It’s less about brute force and more about technique and precision. The process boils down to four main actions: preparing your space, scoring the glass, breaking the glass along the score, and smoothing the edges. It might sound intimidating, but once you get the hang of it, you’ll find a rhythm that feels natural. We’ll walk through each step together to make sure you feel confident and prepared to make your first clean cut.
Preparation and Safety First
Before you even think about scoring a piece of glass, it’s crucial to set yourself up for success and safety. A little prep work goes a long way in preventing accidents and ensuring your cuts are accurate. Taking a few minutes to prepare your workspace and gather your gear will make the entire process smoother and more enjoyable. Don’t skip these steps—they are the foundation of good glass cutting habits and will help you work safely and efficiently every time you step into your studio.
Gather Your Protective Gear
Safety is the most important part of working with glass. Tiny, sharp shards can fly off during cutting and breaking, so protecting yourself is non-negotiable. Always wear safety glasses to shield your eyes. It’s also a good idea to wear closed-toe shoes and consider wearing thin, well-fitting gloves to protect your hands from sharp edges without sacrificing your grip and dexterity. Keep a first-aid kit nearby just in case.
Prepare Your Workspace and Glass
Your cutting surface should be flat, stable, and clean. A dedicated cutting mat is ideal, but any sturdy table covered with a soft cloth or a piece of cardboard will work. Before you start, always clean the glass surface thoroughly with a lint-free cloth and glass cleaner. Any dirt or grit on the glass can interfere with the cutting wheel and cause your score to skip, leading to a messy break.
The Four Steps to a Clean Cut
With your safety gear on and your workspace ready, you’re set to make your cut. The process is straightforward: place and measure, score with light pressure, snap along the line, and smooth the new edge. Each step is equally important for achieving a clean, professional-looking result. Follow them in order, and you’ll be breaking glass like a pro in no time. Remember, the goal is a controlled break, not a forceful cut, so focus on being smooth and consistent.
Step 1: Place and Measure Your Glass
Lay your clean sheet of glass on your prepared surface. Use a ruler or a straightedge to measure and mark your cut line. For straight cuts, you can score directly against the ruler to ensure a perfectly straight line. Make sure your ruler has a non-slip backing or hold it firmly in place so it doesn’t shift while you’re scoring the glass.
Step 2: Score the Glass with Light Pressure
Dip your glass cutter in cutting oil or make sure its internal reservoir is full. Place the cutting wheel on the edge of the glass, and with light, consistent pressure, roll it across the surface in one smooth motion. You should hear a continuous “zip” or “hissing” sound—that’s the sound of a perfect score. You are only trying to create a scratch on the surface, not cut all the way through it.
Step 3: Snap the Glass Along the Score Line
There are a few ways to break the glass. You can place the glass on the edge of your table with the score line just over the edge and apply firm, downward pressure on the overhanging piece. Alternatively, you can use running pliers, which apply even pressure on both sides of the score to create a clean break. For smaller pieces, you can simply hold the glass with both hands and snap it apart with your thumbs.
Step 4: Smooth the Sharp Edges
After the break, the new edges will be extremely sharp. To make them safe to handle, you need to smooth them down. You can use a carborundum stone, a diamond hand pad, or fine-grit sandpaper to gently sand the edges. If you have one, a glass grinder makes this process much faster and gives you a perfectly smooth, professional finish, which is especially important for pieces that will be handled often or used in molds.
Pro Tips for Beginners
Like any new skill, cutting glass takes a bit of practice to master. Don’t get discouraged if your first few attempts aren’t perfect. Every artist starts somewhere, and building muscle memory is part of the process. These simple tips will help you get through the learning curve a little faster and build your confidence. Keep them in mind as you practice, and soon enough, you’ll be cutting glass with ease and precision.
Practice on Scrap Glass First
Before you start cutting into that expensive sheet of dichroic glass, grab some cheap scrap glass to practice on. This allows you to get a feel for the right amount of pressure and the sound of a good score without the fear of wasting valuable material. Experiment with straight lines and gentle curves until you feel comfortable with your tool and technique.
Don’t Press Too Hard
One of the most common mistakes beginners make is applying too much pressure. Remember, you are only scoring the glass to create a weak point, not trying to cut through it. Pressing too hard will create tiny fractures along the score line, which can cause your break to run off course. A light, even pressure is all you need for a clean, controlled snap.
Your Guide to the Different Types of Glass Cutters
Choosing the right glass cutter can feel like a big decision, but it really comes down to the kind of work you want to do. Just like a painter has different brushes for different strokes, a glass artist needs a few types of cutters in their toolkit. Whether you’re making simple, straight cuts for a stained glass panel or tackling an intricate mosaic, there’s a tool designed specifically for that job. Let’s walk through the main categories of glass cutters so you can find the perfect match for your projects. Understanding the purpose of each one will help you make cleaner cuts, waste less glass, and bring your creative vision to life more easily.
The Go-To: Handheld Glass Cutters
Handheld cutters are the foundation of any glass artist’s toolkit. They are perfect for making straight scores and gentle curves, making them a must-have for stained glass work. You’ll generally find them in two main styles: pencil grip and pistol grip. A pencil grip cutter is held just like a pen, offering a familiar feel and fine control. A pistol grip cutter has a larger handle that you squeeze, which can provide more leverage and reduce hand fatigue during long cutting sessions. Both are fantastic options, and the best one for you often comes down to personal comfort and the kind of pressure you prefer to apply.
For Curves and Power: Electric Glass Saws
When your designs get more complex, an electric glass saw is your best friend. These powerful tools, like ring saws or band saws, are designed to handle intricate shapes and tight curves that would be nearly impossible with a handheld cutter. Think of them as the scroll saw of the glass world. They allow for incredible precision, which means you can execute detailed patterns with confidence and accuracy. Using an electric saw also helps minimize accidental breaks and wasted glass, which is a huge plus when you’re working with expensive or unique sheets. They are a significant investment, but for artists who frequently cut complex shapes, they are invaluable.
Tackling Thick Glass with Heavy-Duty Cutters
Not all glass is created equal, and thicker sheets require a tool with more muscle. That’s where heavy-duty cutters come in. These tools are specifically engineered to score tougher, thicker glass that a standard cutter can’t handle. You’ll find several types, including oil-fed cutters with durable carbide wheels and even diamond-tip models for the toughest jobs. If you’re working with architectural glass or thick sheets of COE90 glass for fusing projects, a heavy-duty cutter is essential for getting a clean, deep score that will break exactly where you want it to.
Beyond the Basics: Specialized Cutting Tools
Beyond the basics, there’s a whole world of specialized tools designed to make specific cuts perfectly every time. Circle cutters, for example, are brilliant for creating flawless circles and arcs without any guesswork. Strip cutters guide your handheld tool to produce perfectly straight, uniform strips, which is a lifesaver for geometric patterns and borders. You can also find ergonomic tools like palm-fit cutters that are designed for comfort during extended use. These specialty tools help you achieve a level of precision and consistency that can really refine your work, especially when you’re creating pieces that will be shaped using molds.
Bottle Cutters
If you’ve ever wanted to upcycle old wine or beer bottles into drinking glasses, candle holders, or unique art pieces, a bottle cutter is the tool for the job. These are specialized devices designed specifically to score and cut round glass bottles. Most models work by securing the bottle and rotating it against a cutting wheel to create a perfectly even score line all the way around. After scoring, you typically apply alternating hot and cold water to the score line, which causes the glass to separate cleanly. It’s a fantastic way to give new life to beautiful bottles that would otherwise be recycled.
Glass Cutting Kits
For anyone just starting out or looking to build their toolkit, a glass cutting kit is an excellent choice. Instead of buying each tool individually, many products come as a set that includes the cutter along with other essentials. A good kit will often bundle a quality cutter with breaking pliers, cutting oil, and sometimes even extra cutting heads for longevity. This approach is not only convenient but can also be more cost-effective. It ensures you have all the basic components you need to go from scoring to snapping your glass, making it a great all-in-one solution for tackling your first few projects with confidence.
Essential Companion Tools for Glass Artists
A great glass cutter is the star of the show, but it can’t perform without a strong supporting cast. The process of creating a finished piece of glass art goes beyond just scoring a line. You need the right tools to help you cleanly break the glass, refine the shape, and smooth the edges for a perfect fit and a professional finish. These companion tools are what give you control over the entire process, from the initial measurement to the final polish. Investing in a few key accessories will not only make your work easier and safer but will also significantly improve the quality of your results, ensuring your finished pieces look exactly as you envisioned them.
Breaking Pliers and Running Pliers
Once you’ve made a score, you need to break the glass, and doing it with your hands can be unpredictable. That’s where breaking and running pliers come in. Running pliers are designed to “run” the score across the glass by applying gentle, even pressure on both sides of the line, encouraging a clean snap. They are perfect for long, straight cuts. Breaking pliers, sometimes called grozing pliers, are used to grip and snap off smaller pieces or to nibble away at edges for a more precise fit. For any project, especially stained glass or mosaics, these pliers are essential for helping you snap the glass cleanly right after you score it.
Nippers and Grinding Tools
Sometimes you need to shape glass in ways a straight score can’t achieve. Glass nippers are perfect for this, allowing you to bite off small chunks of glass to create curves or fit pieces into irregular spaces, making them a must-have for mosaic artists. After any cut or break, however, you’ll be left with sharp edges. A glass grinder is the tool you need to smooth and shape those edges perfectly. Grinding not only makes your pieces safe to handle but also ensures they fit together snugly in your design. It’s the key to achieving that polished, professional look in your finished work.
Rulers and Straight Edges
Precision starts before the cutter ever touches the glass. For any project involving geometric shapes or uniform strips, a high-quality straight edge is non-negotiable. While any ruler can measure, specialized glass cutting rulers and straight edges are designed for the job. They often feature a non-slip cork backing to keep them firmly in place on the slick glass surface and a raised edge to guide your cutter smoothly. Using a proper straight edge ensures your score is perfectly straight every time, which is the foundation for a clean, accurate break. This simple tool is fundamental for creating crisp lines and professional-looking results.
The Best Brands for Professional Glass Cutter Tools
When you’ve been working with glass for a while, you start to notice the names that pop up again and again in studios and workshops. Certain brands have earned a solid reputation for a reason. They consistently deliver tools that are reliable, comfortable, and built to last. While the “best” brand often comes down to personal preference and the kind of work you do, there are a few industry leaders known for their exceptional quality and innovative designs. These are the companies that invest in better materials for their cutting wheels, ergonomic grips that reduce hand fatigue, and oil-feed systems that just work, every single time.
Choosing a tool from a trusted brand means you’re not just buying a piece of equipment; you’re investing in consistency for your art. A great cutter from a reputable manufacturer provides a predictable, clean score that makes breaking the glass much easier and more precise. This is crucial whether you’re cutting simple strips for a fused glass project or navigating the complex curves of a detailed stained glass panel. In the following sections, we’ll walk through the brands that we and other glass artists consistently rely on for professional-grade results.
Our Team’s Favorites at ArtGlassSupplies.com
Here at ArtGlassSupplies.com, we’ve seen, tested, and used a lot of glass cutters. Over the years, we’ve developed a clear sense of which brands truly stand out from the pack. The names on this list are our go-to recommendations for artists at every level who are serious about their craft. These are the brands we trust for their durability, precision, and smart design. Whether you need a workhorse tool for daily use in a busy studio or a specialized cutter for a unique project, you’ll find a reliable option here. We’ve chosen these brands because they help make the cutting process smoother and more intuitive, letting you focus on your creative vision.
Toyo: The Industry Standard
Toyo is a name that’s practically synonymous with quality in the glass world. They are especially famous for their self-oiling cutters, which feature a reservoir in the handle to keep the cutting wheel lubricated for a perfect score every time. One of their most popular models, the Supercutter, comes in various grip styles, including the comfortable pistol grip that gives you excellent leverage and control with less hand strain. Artists love Toyo cutters for their incredibly hard tungsten carbide wheels that stay sharp for what feels like forever. This longevity and consistent performance make Toyo tools a fantastic investment for anyone who cuts glass regularly.
Fletcher-Terry: Built for Pros
Fletcher has been a trusted name in the glass industry for generations, and their tools have a reputation for being absolute workhorses. Many seasoned artists learned to cut with a Fletcher tool and still swear by them today. Their designs are often simple, classic, and incredibly effective. Known for their durability, Fletcher cutters are built to withstand the demands of a professional studio environment. They offer a range of cutters with high-quality steel or carbide wheels designed for different types of stained glass and art glass. If you’re looking for a no-fuss, reliable tool that will last for years, Fletcher is an excellent choice.
Glastar: Innovation in Every Cut
While Glastar is well-known for its top-tier glass grinders and bandsaws, their handheld cutting tools are crafted with the same commitment to quality and performance. Glastar tools are designed for the serious artist who needs equipment that can keep up with their ambitions. Their cutters often feel substantial and well-balanced in your hand, providing the stability needed for making long, straight cuts or scoring thick glass. Many professionals appreciate the sturdy construction and reliable performance that Glastar brings to all its products, from their powerful kilns to their precision cutters. They are a solid choice for artists who want professional-grade equipment across their entire studio.
Inland: Reliable Tools for Every Artist
Inland is a fantastic brand that offers a wide variety of user-friendly tools perfect for both hobbyists and seasoned professionals. They are known for creating high-quality, accessible products that provide great value. Inland offers an impressive range of cutter styles, from simple pencil grips to ergonomic handles, ensuring you can find a tool that feels comfortable for your cutting style. Their cutters are celebrated for their reliability and ease of use, making them a popular choice in classrooms and workshops. Whether you’re just starting your glass art journey or looking for a dependable backup tool, Inland’s selection offers quality performance without a hefty price tag.
Gryphon: Precision Diamond Saws
Gryphon is a brand that excels in creating tools for tackling the toughest glass cutting challenges. They are famous for their diamond-coated saws and grinders, and they bring that same powerful technology to their handheld tools. While not a traditional scoring tool, a Gryphon hand-held diamond saw can be indispensable for making intricate internal cuts and shaping glass in ways that are impossible with a standard cutter. For artists who work with complex patterns or frequently need to cut difficult shapes, Gryphon provides specialized solutions that open up new creative possibilities. Their tools are designed for precision and power, making them a key asset for advanced glass work.
How to Choose the Right Glass Cutter for You
Picking the right glass cutter is a lot like finding the perfect pen; what works for one person might not work for another. The best tool for you depends on your projects, your cutting style, and what feels most comfortable in your hand. A cutter that fits you well will feel like a natural extension of your arm, giving you the control you need to make clean, precise scores every time.
When you’re ready to choose a cutter, think about the kind of work you do most often. Are you cutting long, straight lines for architectural panels, or are you navigating the tight curves of a Tiffany-style lampshade? Do you work with thin, smooth stained glass or thick, textured art glass? Answering these questions will help you narrow down your options. We’ll walk through the key features to consider, from the quality of the cutting wheel to the style of the grip, so you can find a tool that will serve you well for years to come.
The Cutting Wheel: Why Quality Matters
The cutting wheel is the single most important part of your glass cutter. It’s the part that does all the work, creating a precise score line that allows the glass to break exactly where you intend. A low-quality wheel can skip, drag, or create a jagged score, leading to frustrating, uneven breaks that can ruin a valuable piece of glass. The stress from a bad score can even cause the glass to fracture in unexpected directions, wasting both time and material.
High-quality cutting wheels are typically made from tungsten carbide, an extremely hard and durable material that holds a sharp edge for a long time. A sharp, well-made wheel glides smoothly across the glass, creating a deep and consistent score with minimal pressure. This not only makes the cutting process easier but also gives you a much cleaner break. Investing in a cutter with a quality wheel is one of the best things you can do to improve your glass art.
Diamond vs. Carbide vs. Steel Wheels
When you’re looking at cutters, you’ll see wheels made from steel, carbide, or diamond, and the material you choose really impacts your cut. Steel wheels are the most basic and are often found on budget-friendly tools. They work fine for standard, thin annealed glass but tend to dull more quickly. On the other end of the spectrum, diamond wheels are the toughest and sharpest, designed to score very thick or difficult glass, but they’re often more than you need for typical art glass projects. For most artists working with stained glass or fusing glass, the sweet spot is tungsten carbide. This material is incredibly hard and durable, holding a sharp edge for a long time. It gives you that smooth, consistent score you need for a clean break, making it the reliable standard for a reason.
Comfort and Grip: Finding the Perfect Fit
Finding a cutter with the right grip will make a world of difference in your ability to make consistent and accurate scores. If a tool is uncomfortable to hold, you’ll find yourself fighting it with every cut, which often leads to wobbly lines and wasted glass. The goal is to find a cutter that feels balanced and secure in your hand, allowing you to focus on your design instead of your tool.
Glass cutters come in several grip styles. The most common are pencil grips, which you hold just like a pen, and pistol grips, which have a larger handle that you grasp with your whole hand. Pistol grips are often favored by artists who need to apply more pressure for thicker glass or by those who experience hand fatigue. Some cutters also feature custom or ergonomic grips designed to fit the contours of your hand. The best way to know what works for you is to try a few different styles and see what feels most natural.
Does Your Cutter Match Your Glass?
Not all glass is created equal, and your cutter needs to be up to the task. The type and thickness of the glass you’re working with will play a big role in determining the right tool for the job. A standard cutter that works beautifully on 3mm stained glass might struggle to score a piece of 6mm fusible glass or heavily textured architectural glass. This is because different cutters have wheels with different hone angles, which are optimized for specific glass thicknesses.
For general-purpose work with COE90 or COE96 fusible glass, a standard carbide wheel cutter is usually sufficient. However, if you frequently work with thicker glass, you may want to invest in a heavy-duty cutter designed to handle the extra pressure. Some specialized cutters even feature interchangeable heads with different wheel angles, giving you the versatility to tackle any project that comes your way.
What’s an Oil-Fed Glass Cutter?
You might notice that many professional glass cutters have a reservoir in the handle for cutting oil. This isn’t just a fancy feature; it serves a critical purpose. The oil lubricates the cutting wheel, which reduces friction and allows it to roll smoothly across the glass. This results in a cleaner score and also extends the life of your cutting wheel. The oil also seeps into the score line, keeping it “open” and making the glass easier to break.
Some cutters have an automatic oil-fed system that continuously lubricates the wheel as you work. Others are simpler and require you to dip the wheel in a small pot of oil before each cut. Oil-fed cutters are incredibly convenient and ensure consistent lubrication, but some artists prefer the control of dipping the cutter themselves. Either way, using cutting oil is a non-negotiable step for achieving professional results.
Using Cutting Oil and Common Alternatives
While it might seem like an optional step, using cutting oil is one of those small habits that makes a huge difference in your results. The oil serves a critical purpose by lubricating the cutting wheel, which reduces friction and allows it to roll smoothly across the glass surface. This simple action not only results in a cleaner, deeper score but also significantly extends the life of your cutting wheel. The oil also seeps into the new score line, keeping it ‘open’ for a few crucial moments. This makes the glass much easier to break along your intended line, giving you that satisfying snap instead of a frustrating crack.
Specialized glass cutting oils are always the best choice, as they are formulated to have the perfect viscosity for the job. They are also designed to be easy to clean off or to burn away cleanly in a kiln, which is essential if you’re working with fusible glass. However, in a pinch, many artists have found success with common alternatives. Light machine oil, sewing machine oil, and even some mineral oils can provide the necessary lubrication. The key is to use a light-bodied oil that can flow easily and won’t gum up your cutter’s wheel, but be aware that these alternatives weren’t designed for glass art and can have drawbacks.
If you do opt for an alternative, it’s important to be aware of potential downsides. Some household oils can leave behind a greasy residue that is difficult to clean and can interfere with the adhesion of your copper foil or the flow of your solder in stained glass projects. For fusing artists, this residue can cause surface blemishes or devitrification when the piece is fired. No matter what you use, always make sure to clean your glass thoroughly with isopropyl alcohol before foiling, soldering, or firing to ensure a flawless final product. This extra step is well worth the effort for a professional finish.
Need Precision? Look for These Features
A great glass cutter is designed to help you achieve the cleanest, most accurate cuts possible. One key feature to look for is the cutting head. Some heads are fixed, which is ideal for cutting straight lines with a ruler. Others have a swiveling head, which gives you more freedom and control when cutting intricate curves and complex shapes. The ability to follow a pattern smoothly without lifting the cutter is a huge advantage for detailed work.
Ultimately, precision comes down to technique, but a good tool makes proper technique easier to master. When you score glass, you should hold the cutter at roughly a 45-degree angle and apply firm, even pressure from start to finish. A well-balanced cutter with a comfortable grip and a smooth-rolling wheel will help you maintain that consistent pressure, giving you a perfect score line every time.
Built to Last: Durability and Materials
A professional glass cutter is an investment, so you want to choose one that is built to last. The durability of a cutter comes down to the quality of its materials and construction. As we’ve mentioned, the cutting wheel should be made of a hard material like tungsten carbide to ensure it stays sharp through many projects. A dull wheel is a recipe for bad cuts, so a durable wheel is essential.
Look at the body of the cutter as well. Many high-quality cutters are made from solid brass, which gives them a nice weight and balance in the hand. Others use lightweight, durable plastics or comfortable composite materials for the handle. Another great feature to look for is a replaceable cutting head or wheel. This allows you to simply swap out the old, dull wheel for a new one instead of having to buy an entirely new tool, saving you money in the long run.
Techniques for Cutting Different Types of Glass
Once you have a great cutter, the next step is understanding that not all glass behaves the same way. A technique that works perfectly on a smooth sheet of COE96 glass might not work on a thick, textured piece. Different types of glass have unique properties that call for specific tools and approaches. Knowing how to adapt your technique is key to getting clean breaks and avoiding frustration. From thick architectural glass to delicate mosaic tiles, each material presents its own challenge. Let’s go over some proven methods for handling these different scenarios so you can cut with confidence, no matter what your project demands.
Tips for Cutting Thick Glass
Working with thick glass can feel intimidating, but it’s completely manageable with the right approach. For this job, you’ll want a heavy-duty cutter with a tungsten carbide or diamond wheel that can create a deep, decisive score. Before you start, apply a line of mineral oil along your intended cut; this lubricates the wheel and helps ensure a smoother score. Some artists also use thermal shock to their advantage by gently heating the score line and then applying a cold, damp cloth. This sudden temperature change can help weaken the glass along the score, making it easier to break cleanly. When you’re ready to snap it, use running pliers or place the glass on the edge of your table with clamps to get a clean, controlled break.
How to Cut Laminated Glass
Laminated glass is a safety glass made of two layers of glass with a plastic interlayer, which is what you’ll find in car windshields. This plastic layer makes it incredibly tricky to cut because it bends instead of snapping. Cutting laminated glass requires a specialized approach. You need to score and break each side of the glass separately, then carefully cut the plastic layer in between with a utility knife. Professionals often use special cutters with diamond wheels at a very low speed to prevent heat from building up and melting the plastic. For most art projects, you won’t encounter laminated glass, but it’s helpful to know why it requires such a different process.
Scoring Tempered Glass
Here’s the short answer: you can’t really cut tempered glass. This type of glass is heat-treated to be incredibly strong, and it’s designed to shatter into small, relatively harmless pieces when it breaks. Any attempt to score it will likely cause the entire sheet to explode. If you need a piece of tempered glass in a specific size, it has to be cut to those dimensions *before* it goes through the tempering process. While some online tutorials might suggest methods using a diamond blade, the risk of the glass shattering is extremely high. For safety and predictable results, it’s best to leave tempered glass to the professionals and stick to materials designed for artists, like our beautiful sheets of stained glass.
Working with Glass Mosaic Tile
Glass mosaic tiles are small, delicate, and often come attached to a mesh backing. Because of their size, they require a gentle touch and the right tool. A pair of small, wheeled glass cutters or nippers is perfect for this job. To avoid chipping the colorful surface of the tile, it’s often best to score it lightly on the back. Place the tile on a stable, flat surface—you can even use clamps to hold it steady if needed. After making your score, a gentle snap should give you a clean break. This technique gives you precise control, allowing you to create the intricate shapes needed for detailed mosaic work without damaging the delicate tiles.
Handling Difficult Art Glass
Art glass comes in a stunning variety of textures, thicknesses, and coatings that can make cutting a challenge. Heavily textured or iridescent glass, for example, can be tough for a cutting wheel to navigate smoothly. The key is to adjust your pressure and speed. For textured glass, try to score on the smoothest side possible and apply firm, consistent pressure to ensure the wheel stays in contact with the surface. For iridescent or coated glass, a fresh, sharp wheel is essential to cut through the coating cleanly without flaking. Always remember that what works for one sheet might not work for the next. Be prepared to adapt your technique and always test your cutter on a small scrap piece first.
How to Cut Glass Without a Specialized Cutter
While a professional glass cutter is always the best tool for the job, there might be times when you need to make a simple cut and don’t have one on hand. Or maybe you just want to experiment with upcycling a glass bottle or jar for a fun project. There are a few clever methods that use basic physics—specifically thermal shock—to break glass along a desired line. These techniques are less precise than using a proper cutter and are best suited for thin, non-tempered glass like bottles. They can be a fun way to repurpose materials, but always remember to prioritize safety by wearing protective gloves and eyewear.
The String Method for Bottles and Jars
The string method is a classic DIY trick for cutting bottles. First, make sure the bottle is clean and dry, then mark a straight line where you want the cut. Take a piece of cotton string, soak it in nail polish remover or acetone, and wrap it tightly around the marked line three or four times. With the bottle held horizontally, carefully light the string on fire and rotate the bottle slowly to heat the glass evenly. After about 30 seconds, immediately plunge the bottle into a sink or bucket of ice-cold water. The sudden temperature change should cause the glass to break neatly along the heated line. Be sure to smooth the sharp edge with sandpaper afterward.
Using Thermal Shock to Create a Break
This technique works on the same principle as the string method but can be used on flat pieces of thin glass. Start by making a score line with a sharp, hard tool like a nail or a carbide scribe—anything that can create a scratch on the surface. Next, carefully pour a thin stream of very hot water directly over the score line. Immediately follow that with a stream of very cold water. The rapid expansion and contraction of the glass will create stress along the weakened score line, often causing it to break. This method is less reliable than using a proper cutter but can work in a pinch for simple, straight breaks.
Other Tools for Cutting Thin Glass
If you have other workshop tools, you might be able to use them for cutting or shaping glass. A grinder fitted with a diamond or carbide wheel can be used to slowly shape the edge of a piece of glass or even cut through it. Mark your line clearly and move the grinder slowly and steadily, letting the tool do the work without applying too much pressure. Pushing too hard can cause the glass to heat up and shatter. This method is better for shaping curves or making small adjustments than for making long, straight cuts, but it’s a useful technique to have in your back pocket for custom projects, especially when you need to fit a piece into a specific shape for one of your molds.
Common Mistakes to Avoid When Buying a Glass Cutter
Choosing a new glass cutter can feel like a big commitment, but avoiding a few common pitfalls will make the process much smoother. The right tool should feel like an extension of your hand, helping you create clean, precise scores every time. Let’s walk through the mistakes I see artists make so you can invest in a tool that truly supports your work.
Choosing a Grip That Doesn’t Fit Your Hand
Finding a glass cutter that feels comfortable in your hand is essential for making consistent and accurate scores. A grip that doesn’t suit your cutting style can lead to hand fatigue and sloppy results. For example, some artists love the control of a pencil grip, while others prefer the leverage of a pistol grip. I once tried a cutter that I could brace against my palm, which was great for short cuts but started to dig in during longer sessions. Think about your projects. Do you make long, sweeping cuts or intricate, detailed ones? Your answer will help you choose a grip that supports your specific movements.
Prioritizing Price Over Performance
It’s tempting to grab the cheapest tool on the shelf, but a low-quality cutter often costs more in the long run. A cheap cutting wheel can dull quickly, create a rough score, and lead to frustrating breaks. This means you’ll waste more material, which is especially painful when you’re working with beautiful sheets of COE90 glass. Think of a quality glass cutter as an investment in your craft. A well-made tool from a trusted brand will not only last longer but will also give you the clean, reliable scores you need to bring your creative vision to life without wasting precious glass.
Ignoring Future Maintenance Needs
Even the best glass cutter needs a little TLC to perform at its best. A common mistake is treating it like a tool you can just toss in a drawer and forget about. The cutting wheel is a delicate component; dropping it or hitting it against a hard surface can create flat spots that ruin its ability to score properly. Always use cutting oil to keep the wheel lubricated, and wipe it down after use to prevent glass dust from building up. Proper care ensures your tool will last for years and continue to make the clean cuts you depend on for your stained glass projects.
Skipping the “Try Before You Buy”
Ideally, you should always try a tool before you buy it, but that’s not always possible when shopping online. It’s hard to know how a cutter will feel just from a picture. Without holding it, you can’t tell if the weight is balanced or if the grip will become uncomfortable after an hour of work. If you can’t test a tool in person, do the next best thing: read reviews from fellow artists and watch video demonstrations. Pay attention to comments about comfort, ease of use, and how it handles different types of glass. This research will give you a much better sense of whether a particular cutter is the right fit for you.
Forgetting to Check for Safety Features
When we think about safety, we usually think of gloves and glasses, but your cutter plays a role, too. A tool with a poor grip can slip, while a dull wheel requires more force, increasing the risk of an accident. One of the most overlooked safety steps is using cutting oil. Oil does more than just help you get a clean score; it also minimizes fine glass dust and helps prevent the score from prematurely “healing” itself. Using cutting oil is a simple step that makes the entire process safer and more effective, ensuring your glass breaks exactly where you want it to.
Comparing Performance: What Really Matters?
When you’re ready to invest in a professional glass cutter, it’s easy to get caught up in brand names and price tags. But what truly separates a great tool from a mediocre one are the results it delivers. A high-performing cutter feels right in your hand, scores glass effortlessly, and stands up to years of use in your studio. Let’s break down the key performance factors that genuinely make a difference in your work.
Achieving That Perfect, Clean Break
The single most important job of a glass cutter is to create a clean, consistent score line. This is the foundation for a perfect break. A high-quality cutter glides across the glass, leaving a precise score that encourages the glass to snap exactly where you want it to. This not only makes your work more accurate but also saves you money and frustration by reducing the amount of wasted stained glass. When your tool performs reliably, you can confidently tackle intricate curves and long, straight cuts without worrying about your score line skipping or flaking.
How It Feels: Comfort and Ease of Use
Think about how many hours you spend with a cutter in your hand. If it’s not comfortable, your work will suffer, and so will your wrist. Ergonomics are incredibly important. The right tool should feel like a natural extension of your hand, not a clunky piece of equipment you have to fight with. This is why so many different grip styles exist, from pencil grips to pistol grips. A comfortable cutter allows you to work longer without fatigue, giving you better control and precision for every single cut. The goal is to find a tool that fits you personally.
Long-Term Value: Durability and Upkeep
A professional glass cutter is an investment, and it should be built to last. Durability comes down to the quality of the materials, from the handle to the cutting head. Look for cutters with carbide steel wheels, as they hold their edge much longer than standard steel. A well-built tool can withstand the daily demands of a busy studio for years. While a cheaper tool might save you a few dollars upfront, you’ll likely spend more in the long run on replacements. A durable, reliable cutter is a true partner in your art.
Finding the Best Value, Not Just the Best Price
Ultimately, the best value comes from a tool that helps you work efficiently and effectively. This means finding a cutter that matches the type of work you do. The perfect tool for cutting thin COE90 glass for fusing projects might not be the best choice for scoring thick architectural glass. The best performance for your money is a combination of all these factors: a tool that gives you clean breaks, feels comfortable for long sessions, and is durable enough to last. It’s about finding that sweet spot where quality and function align with your specific artistic needs.
Where to Buy a Professional Glass Cutter
Finding the right glass cutter often comes down to knowing where to look. The best place to buy your tools depends on your project needs, your budget, and whether you prefer to shop in person or online. From local specialty stores to large online retailers, each option offers unique benefits. Here’s a breakdown of where you can find quality tools and get the best value for your money.
Your Local Specialty Glass Shop
Think of specialty glass supply shops as your creative headquarters. These stores are dedicated to the art of glasswork, so their staff usually has hands-on experience and can offer incredible advice. You can find a curated selection of tools perfect for stained glass and fusing, from simple handheld cutters to more advanced electric saws. It’s a great environment to ask questions, compare different grips in person, and find tools that are vetted by fellow artists. Many artists build long-term relationships with their local shops, which is a huge plus for getting support and staying updated on new tools.
Online Glass Tool Retailers
For the best selection and competitive pricing, online retailers are hard to beat. Websites dedicated to glass art often carry a massive inventory from top brands like Toyo, Glastar, and Inland, giving you plenty of options to compare. Shopping online allows you to read reviews from other artists and find specific models that might not be available locally. Many online stores, including our own, offer a huge variety of supplies beyond tools, so you can stock up on everything from COE90 glass to fusing materials in one order. The convenience of having everything delivered right to your studio is a major advantage.
A Warning About Buying from Online Marketplaces
While large online marketplaces can seem like a great place to find a deal, it’s important to be cautious. These platforms often host third-party sellers, and it can be difficult to verify the authenticity of the tools they offer. You might think you’re buying a genuine Toyo cutter, but you could end up with a low-quality counterfeit that won’t perform as expected. A fake tool often means a dull wheel and poor construction, leading to wasted glass and a higher risk of accidents. When you purchase from a dedicated glass supply store, you can be confident that you’re getting a genuine, high-quality tool that has been vetted by people who understand the craft. It’s a small difference in where you shop that makes a huge impact on your results.
Buying Direct from Professional Distributors
If you’re working with thick glass or need industrial-strength tools, a professional equipment distributor is your best bet. These suppliers cater to professionals who need heavy-duty cutters that can handle demanding jobs. You’ll find brands like Fletcher and Silberschnitt that are known for their durability and precision with thick materials. While their primary customers are often commercial glass shops, they are an excellent resource for serious hobbyists or artists scaling up their production. They are also the go-to source for larger equipment, including high-quality kilns and molds for ambitious projects.
Related Articles
- A Guide to the Different Types of Glass Cutters
- How to Use a Glass Cutter Tool: Step-by-Step
- Borosilicate Glass Sheet: The Ultimate Guide
Frequently Asked Questions
What’s the most important thing to look for when buying my first professional glass cutter? The two most important factors are the quality of the cutting wheel and how the grip feels in your hand. A high-quality tungsten carbide wheel will stay sharp and create a clean, consistent score with less effort. Just as important, the cutter should feel comfortable and balanced. If you’re fighting an awkward grip, you’ll never get the control you need for a perfect cut.
Do I really need to use cutting oil with my glass cutter? Yes, you absolutely do. Using cutting oil is a non-negotiable step for getting professional results. The oil lubricates the wheel, which allows it to glide smoothly across the glass for a deeper, cleaner score. It also helps preserve the life of your cutting wheel and keeps the score line from “healing” before you can make the break. It’s a small step that makes a huge difference.
How can I tell when it’s time to replace my cutting wheel? You’ll know your wheel is getting dull when you start hearing a gritty, sandy sound instead of a crisp, clean “zzzip” as you score the glass. You might also notice that your score line looks flaky or seems to skip in places. If you find you have to press much harder than usual or your glass isn’t breaking cleanly along the score, it’s definitely time for a new wheel or cutting head.
Which is better for a beginner: a pencil grip or a pistol grip cutter? Neither one is inherently better; it all comes down to personal comfort. A pencil grip feels very natural if you’re used to drawing, offering excellent control for intricate curves. A pistol grip allows you to use more leverage from your arm and can reduce hand fatigue, which is helpful for long cutting sessions or for scoring thicker glass. If you have the chance, try holding both to see which feels more like a natural extension of your hand.
What’s the real difference between a cheap cutter and a more expensive one? The difference comes down to the quality of the materials and the precision of the design. A more expensive tool typically has a superior tungsten carbide wheel that holds its edge much longer, meaning you get more consistent scores for a longer time. You’re also paying for better ergonomics, a more reliable oil-feed system, and overall durability. A quality cutter is an investment that pays for itself through less wasted glass and far less frustration.