
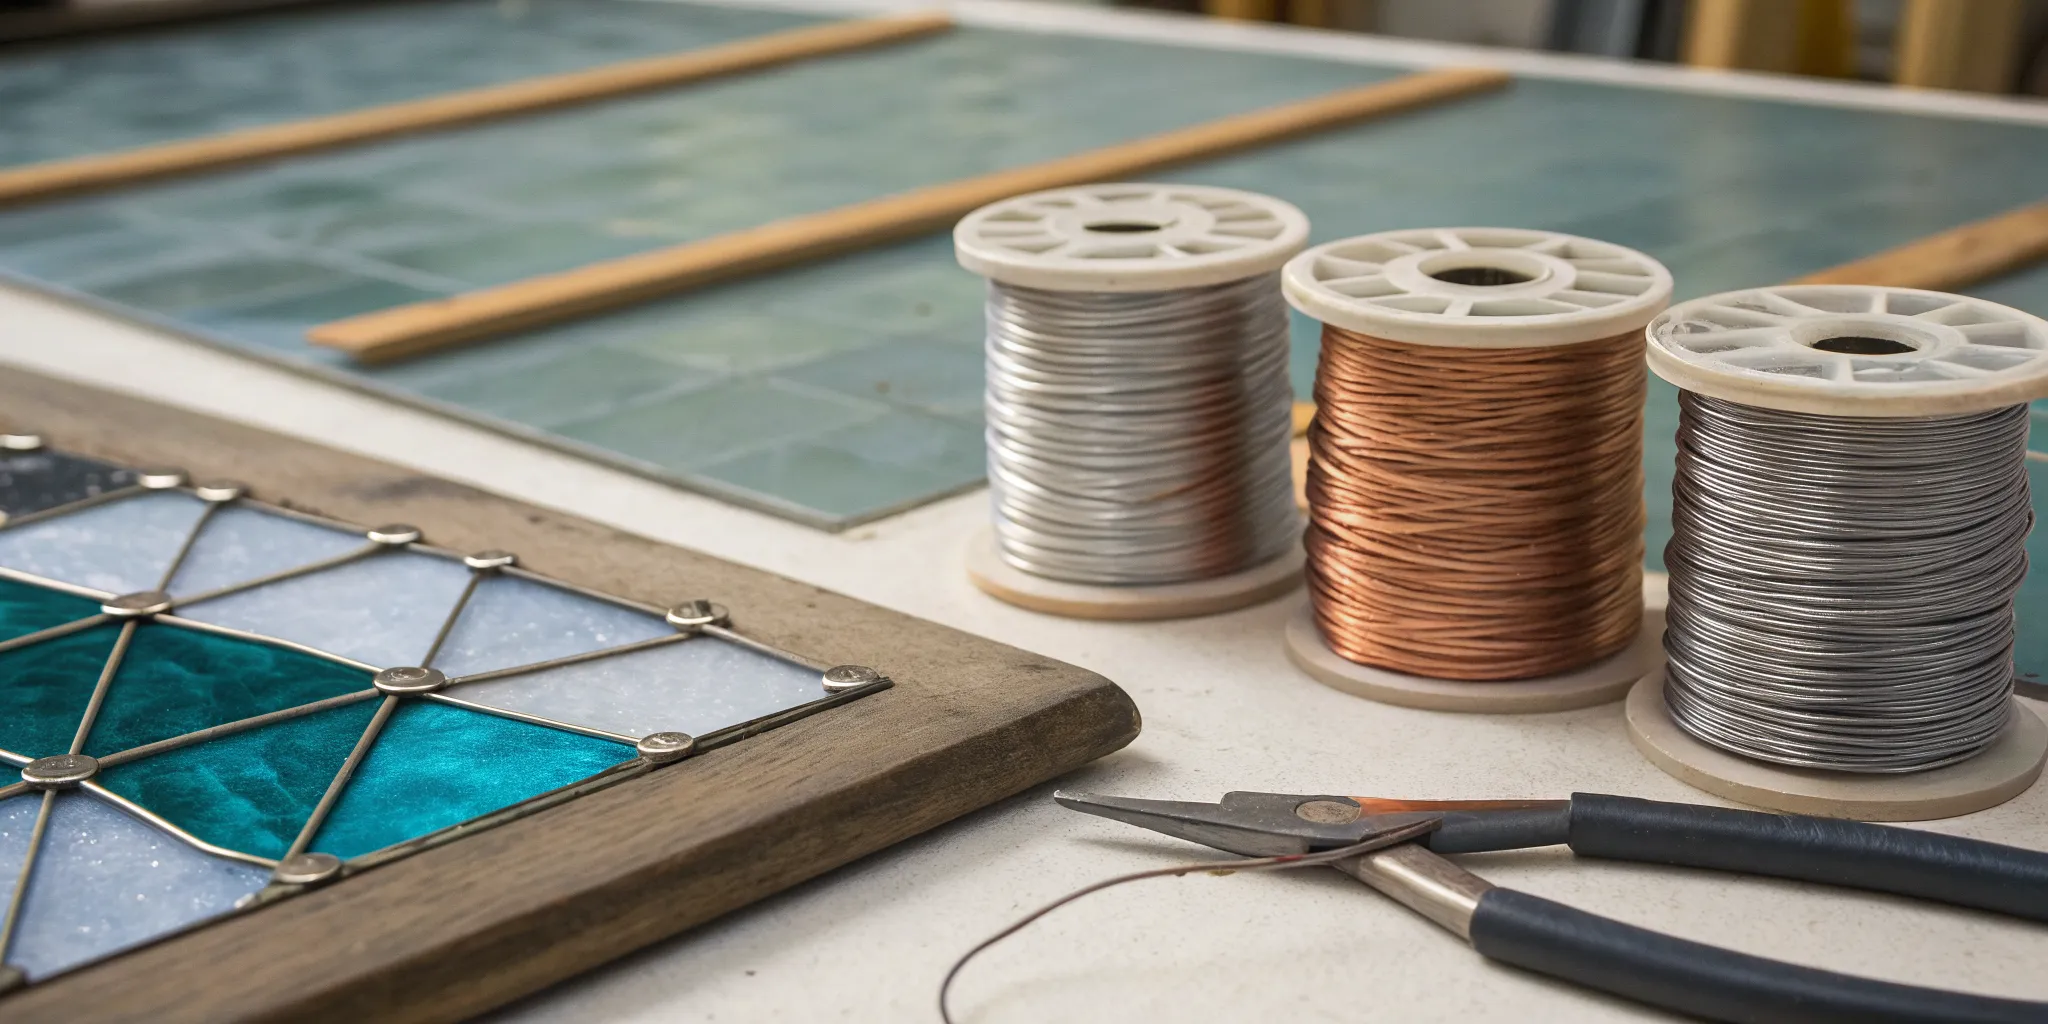
Think wire is just for making hanging loops? You’re missing out on one of the most versatile tools in your studio. It’s so much more than a simple accessory; it’s a fundamental part of both your work’s structure and artistry. A single spool of tinned copper wire for stained glass can reinforce a large panel, add delicate vine-like tendrils, or even repair a cracked piece. This guide explores the full potential of this essential supply. We’ll walk you through choosing the right thickness and share techniques for strengthening and embellishing your projects, whether you’re using pre tinned wire for stained glass or tinning it yourself.
Key Takeaways
- Build stronger art that lasts: Using tinned copper wire reinforces your projects from the inside out, preventing sagging and creating much stronger solder joints for a piece that stands the test of time.
- Choose the right wire for the right task: Remember that lower gauge numbers mean thicker wire, so use a sturdy 14 gauge for heavy-duty support and a flexible 20 gauge for fine, artistic details.
- Master the small steps for a big impact: A professional finish comes from good habits, so always wipe your wire clean, tack it in place before soldering, and scrub away all flux before applying patina for a perfectly even color.
What is Tinned Copper Wire?
If you’ve spent any time in a stained glass studio, you’ve likely come across tinned copper wire. So, what is it exactly? At its core, tinned copper wire is simply a bare copper wire that has been coated with a thin layer of tin. This simple addition makes a world of difference in your finished pieces. The tin coating acts as a protective shield, helping the wire resist the rust and corrosion that can happen over time. This makes it an ideal choice for projects that might be exposed to moisture or humidity, like a suncatcher in a kitchen window or a panel near a bathroom, ensuring your beautiful stained glass art lasts for generations.
Think of it as a built-in insurance policy for your work. While bare copper is a great conductor and easy to work with, it’s susceptible to oxidation, which is what causes that greenish patina to form over time. The tinning process stops that oxidation in its tracks, keeping the wire strong and stable within your solder lines. This durability is why it’s the standard for reinforcing stained glass panels, adding delicate decorative details, and creating sturdy hanging loops. It provides the essential strength of copper with the impressive longevity of tin, giving you the best of both worlds for creating professional, long-lasting artwork that you can be proud of. It’s a small detail that has a huge impact on the quality and lifespan of your creations.
How is Copper Wire Tinned?
The magic behind tinned copper wire is a straightforward process called, you guessed it, tinning. This is simply the method of coating bare copper wire with a thin, even layer of tin. The primary purpose is to protect the copper from oxidation and improve its solderability. When copper is exposed to air, it naturally begins to oxidize, which can create a barrier that makes it difficult for solder to adhere properly. A weak solder joint can compromise the structural integrity of your entire piece, and nobody wants that.
By coating the wire in tin, manufacturers essentially pre-clean and prep the surface for you. The tin layer creates a clean, uniform surface that solder loves to bond with. This means you get a smoother, stronger, and more reliable connection every time you fire up your soldering iron.
Tinned vs. Bare Copper Wire: What’s the Difference?
When choosing a wire for your project, the main decision is between tinned and bare copper. The most significant difference is durability. Tinned copper resists rust much better, while bare copper can corrode easily when exposed to the elements. This is a critical factor for the longevity of your art. While tinned copper is slightly more expensive, its resistance to corrosion makes it a worthwhile investment for pieces you want to last.
When it comes to soldering, both are good options, but tinned copper often makes the job easier because it’s already coated and ready to go. The pre-tinned surface helps the solder flow evenly, creating stronger and cleaner joints with less effort. For beginners, this can make a huge difference in achieving a professional finish. For experienced artists, it saves time and ensures consistent, high-quality results for all your stained glass projects.
Why Use Tinned Copper Wire for Stained Glass?
When you’re creating a stained glass piece, every material choice matters. Tinned copper wire is one of those small details that makes a huge difference in the quality and longevity of your work. It’s more than just a decorative element; it’s a fundamental component that adds strength, simplifies your soldering process, and gives your final piece a clean, professional finish. Think of it as the hidden framework that holds your art together, ensuring your vision stands the test of time. Many artists consider it an indispensable part of their toolkit for this very reason.
Using tinned copper wire helps you build with confidence. It integrates seamlessly into your solder lines, reinforcing the entire structure without adding bulk or disrupting your design. The tin coating also makes soldering a much smoother process, as it prevents the copper from oxidizing and helps the solder flow evenly. This means stronger joints and less time spent on cleanup. From a purely aesthetic standpoint, tinned wire accepts patina just like your solder, ensuring a uniform color and a polished look. Whether you’re reinforcing a large panel or adding delicate details, it’s an essential supply for any serious stained glass artist looking to create durable, beautiful pieces.
Build Stronger, Longer-Lasting Projects
One of the biggest benefits of tinned copper wire is the structural integrity it adds to your work. When you embed wire along the solder lines of your project, you’re essentially creating an internal skeleton. This reinforcement makes your piece significantly more durable and capable of withstanding the stress of its own weight, especially for larger panels or suncatchers that will be hung. The wire distributes the tension across the entire piece, preventing individual solder joints from taking on too much strain. This simple step ensures your beautiful creation will last for years to come without sagging or developing stress fractures.
Solder with Ease
If you’ve ever struggled to get solder to flow smoothly, tinned copper wire will feel like a game-changer. The thin layer of tin acts as a perfect primer for solder. It prevents the copper core from oxidizing, which means you don’t have to worry about cleaning or scrubbing the wire before you begin. Solder adheres to the tinned surface quickly and cleanly, creating a strong, seamless bond with minimal effort. This not only saves you time and frustration but also results in neater, more consistent solder beads. For both beginners and experienced artists, this improved solderability makes the entire process more enjoyable and yields a much higher-quality result.
Get That Polished, Professional Finish
Consistency is key to a professional-looking stained glass piece, and tinned copper wire helps you achieve just that. Because the wire is coated in tin, it has the same silvery finish as your solder lines. This creates a cohesive look before you even apply patina. When you are ready to add a finish, the tinned wire will accept black, copper, or antique patina just as readily as the solder. This ensures that any visible wire elements, whether decorative or structural, blend in perfectly with the rest of your project. You won’t have to deal with the mismatched look of bare copper, which doesn’t take patina and can tarnish unevenly over time.
Add Support Without Extra Reinforcement
Tinned copper wire is perfect for reinforcing delicate areas without resorting to bulky external framing. If your design includes long, narrow pieces of glass, deep curves, or intricate shapes, it can be vulnerable to cracking under pressure. By running a strand of tinned copper wire along the edge of these fragile pieces and embedding it in the solder line, you provide targeted support right where it’s needed most. This technique is invaluable for preserving the graceful lines of your design while ensuring it has the strength to last. It’s a subtle but powerful way to add stability and protect your hard work.
Which Wire Gauge Is Right for Your Project?
Choosing the right wire gauge can feel a bit backward at first, but once you get the hang of it, you’ll be able to pick the perfect wire for any project. The key is to match the wire’s thickness and strength to the demands of your design, whether you’re building a large, supportive frame or adding tiny, decorative details. Let’s walk through the most common gauges so you can select your wire with confidence.
How to Choose the Right Wire Gauge
When it comes to wire, the sizing system is given in “gauges.” Here’s the most important thing to remember: the smaller the gauge number, the thicker and stronger the wire. So, a 14 gauge wire is much thicker than a 20 gauge wire. This might seem counterintuitive, but it’s the standard system used for all types of wire. Understanding this simple rule is the first step to mastering wirework in your glass art. Think of it this way: a lower number means fewer wires can fit into a one-inch space, so each individual wire must be thicker. It’s a small detail that makes a big difference in your project’s final structure and appearance.
Understanding Wire Temper: What “Dead Soft” Means
Beyond its thickness, another important characteristic of wire is its “temper,” which simply refers to its hardness or softness. You’ll often see wire described as “dead soft,” and it’s exactly what it sounds like: the most flexible, pliable wire available. This type of wire has been fully annealed, a heat-treating process that softens the metal, making it incredibly easy to bend and shape with minimal effort. This makes dead soft wire the perfect choice for creating delicate, intricate details and decorative overlays in your work. While there are several different wire tempers, dead soft is ideal for forming tight curls and complex patterns without snapping. However, that same flexibility means it doesn’t offer much structural support, so it isn’t the best choice for projects that need to bear weight.
14 Gauge: For Heavy-Duty Support
If you’re working on a large stained glass panel or a piece with heavy glass that needs serious structural support, 14 gauge wire is your best friend. Its thickness provides the strength required to hold everything together securely and prevent sagging over time. This is the wire you reach for when you need to build a sturdy frame or reinforce the outer edges of a big project. Using 14 gauge gives you peace of mind that your beautiful stained glass creation will remain stable and strong for years to come. It’s less flexible, so it’s not for intricate details, but for pure strength, it can’t be beaten.
Technical Specs: Strength and Thickness
Let’s break down what “gauge” really means for the strength of your wire. The gauge number tells you the wire’s thickness, and here’s the part that can feel a bit backward: the numbers work in reverse. A low number like 14 gauge is thick and robust, while a higher number like 20 gauge is much thinner and more flexible. This thickness directly translates to structural integrity. When you embed a heavy-duty 14 gauge wire into your solder lines, you’re creating an internal framework for your piece. This “skeleton” distributes the weight of the glass evenly, preventing the dreaded sag that can happen over time with larger panels. This reinforcement is what gives your stained glass artwork the durability to last for decades, ensuring your solder joints remain strong and your design stays true to its original shape.
16-18 Gauge: Your All-Purpose Choice
Think of 16 and 18 gauge wires as your everyday go-tos. They offer the perfect balance of strength and flexibility, making them incredibly versatile for most stained glass projects. These gauges are strong enough to frame medium-sized panels and suncatchers but still pliable enough to bend into decorative shapes and patterns without too much effort. Because they hit that sweet spot, they are excellent for creating hanging loops, reinforcing internal solder lines, and adding moderate decorative elements. If you’re just starting to build your supply collection or need a reliable wire that can handle a variety of tasks, keeping 16 and 18 gauge wire on hand is always a smart move.
Technical Specs: Strength and Thickness
Let’s break down what “gauge” really means for the strength of your wire. The gauge number tells you the wire’s thickness, and here’s the part that can feel a bit backward: the numbers work in reverse. A low number like 14 gauge is thick and robust, while a higher number like 20 gauge is much thinner and more flexible. This thickness directly translates to structural integrity. When you embed a heavy-duty 14 gauge wire into your solder lines, you’re creating an internal framework for your piece. This “skeleton” distributes the weight of the glass evenly, preventing the dreaded sag that can happen over time with larger panels. This reinforcement is what gives your stained glass artwork the durability to last for decades, ensuring your solder joints remain strong and your design stays true to its original shape.
20 Gauge: For Delicate Details
When your design calls for fine lines and intricate details, 20 gauge wire is the ideal choice. Because it’s much thinner, it allows for more precise and delicate work. Use it to add elegant swirls, tiny loops, or other decorative embellishments that give your piece a unique, artistic flair. This gauge is perfect for smaller projects or for adding detail to fused pieces made with COE90 glass. It’s easy to shape, solders cleanly, and lets you bring the most detailed parts of your creative vision to life without adding bulk. It’s the wire you use when the art is in the details.
Exploring Different Types of Wire for Glass Art
Once you’ve got a handle on gauges, you can start exploring the different types of wire available. While standard tinned copper wire is the workhorse of stained glass, it’s not the only option in your toolkit. The right choice depends entirely on your project and the techniques you’re using, as different wires serve very different purposes. For traditional stained glass, your main choice will be between a smooth, standard wire for hidden strength or a decorative twisted wire that adds visible texture and flair to your solder lines. Each offers a unique finish and function, allowing you to customize the final look and feel of your piece.
However, if you’re venturing into the world of glass fusing, you’ll need a completely different material that can withstand the intense heat of a kiln. Tinned copper wire simply can’t take the heat and would melt, potentially ruining your entire project. This is where high-temperature wire comes in, specifically designed for artists who slump, drape, and fuse glass. Understanding these key distinctions is crucial for selecting the perfect wire to bring your artistic vision to life, whether you’re reinforcing a delicate stained glass panel or creating a fused glass pendant with an embedded hanger.
Standard vs. Twisted Tinned Copper Wire
Your two main options for stained glass work are standard and twisted tinned copper wire, and the choice comes down to function versus fashion. Standard wire is smooth and designed to disappear into your solder lines, providing invisible strength. It’s the perfect choice for reinforcing long, narrow pieces or delicate curves that might be vulnerable to stress cracks. By embedding it along the edge of a fragile piece, you give it the internal support it needs without adding any bulk. Twisted wire, on the other hand, is all about aesthetics. It has a beautiful, rope-like texture that’s meant to be seen, adding a decorative border that can beautifully frame a piece or highlight specific design elements. Think of standard wire as the hidden skeleton and twisted wire as the beautiful jewelry.
High-Temperature Wire for Kiln Fusing
When you’re working with a kiln, tinned copper wire is off the table. The extreme temperatures required for fusing glass will cause it to melt and potentially fuse to your piece in an undesirable way. For any kiln-related projects, you need to use high-temperature wire. This specialty wire is made from a nickel-chromium alloy that can withstand temperatures well over 2000°F without breaking down. It’s essential for creating hanging loops that you can embed directly into your glass art, like pendants or ornaments. You can also use it to support glass elements during firing or to create intricate patterns within your fused designs. Whether you’re slumping glass over molds or creating detailed jewelry with COE90 glass, high-temperature wire is a non-negotiable supply for any glass fusing artist.
Where to Find Quality Tinned Copper Wire
Why We Stand By Our Tinned Copper Wire
Finding a reliable source for your materials is just as important as mastering your technique. When you’re looking for tinned copper wire, you need a supplier that understands the needs of a glass artist. Here at ArtGlassSupplies.com, we take that responsibility seriously. We stock a carefully selected range of metal art wire, including the
How to Spot High-Quality Wire
Not all wire is created equal, and knowing what to look for can save you a lot of frustration. High-quality tinned copper wire is essential for creating strong, beautiful stained glass pieces that last. The key is in the tinning. This protective coating is what makes the wire easy to solder and resistant to corrosion. When you’re shopping, always check that the product is specifically labeled as “tinned copper wire.” A good quality wire will have a smooth, even coating without any bare spots. This ensures a clean solder joint and a professional finish. Investing in the right wire means your decorative details and structural supports will be both beautiful and durable.
What to Look For in a Good Supplier
When you’re choosing where to buy your supplies, a few key things can make all the difference. A reputable supplier will not only offer quality products but will also provide the variety you need. Look for a shop that carries a range of tinned copper wire gauges, so you can always find the right thickness for any project, from delicate overlays to heavy-duty reinforcement. Clear, detailed product descriptions are also a must, as they help you make an informed choice. Finally, great customer support is invaluable. Having a knowledgeable team you can turn to with questions ensures you get the perfect stained glass supplies for your vision.
How to Work with Tinned Copper Wire
Working with tinned copper wire is a fantastic way to add strength and intricate details to your stained glass projects. Once you get the hang of a few basic techniques, you’ll find it’s an incredibly versatile material. Let’s walk through the steps to handle, solder, and finish your wirework like a seasoned pro.
How to Handle and Store Your Wire
Your tinned copper wire is your partner in creating beautiful art, so it’s best to treat it well from the start. Tinned wire is the top choice for stained glass because its protective tin coating helps it resist corrosion and take patina beautifully. To keep it in prime condition, store your wire in a cool, dry place, preferably coiled in a bag or container to keep it free from dust and workshop debris. Before you start bending and soldering, it’s a good idea to wipe the wire down with a clean cloth to remove any oils from your hands. This simple step ensures you’ll get a strong, clean solder joint every time.
Choosing Spool Sizes and Preventing Tangles
Tinned copper wire typically comes on 4-ounce spools, which is a great size for most studios and gives you plenty of material to work with across several projects. You can find these spools in all the key gauges, from a sturdy 14 gauge to a delicate 20 gauge. But let’s be honest, nothing stops a creative flow faster than a tangled mess of wire. To avoid this frustration, always pull the wire from the outside of the spool, and only unroll the length you need for the task at hand. When you’re done, secure the loose end to the spool with a piece of tape. For long-term care, proper storage is key—keep your spools in a bag or container to protect them from dust and moisture, which will ensure your wire is clean and ready to go for your next project.
Solder for Clean, Strong Joints
One of the best things about tinned wire is how easily it solders to your copper foil. To begin, lay your shaped wire onto your fluxed foil lines and tack it in place with a few small dots of solder. Once it’s secure, you can run a smooth, consistent bead along the entire length of the wire. Using wire can also be a clever design shortcut. For example, adding wire for decorative lines in a pattern can save you from cutting and grinding many tiny, difficult glass pieces. This not only adds structural integrity but also streamlines your entire creative process, letting you focus more on the art and less on the tedious work.
Shape and Bend Wire Like a Pro
Getting those perfect curves and angles is all about practice and the right tools. A good pair of needle-nose or round-nose pliers will give you excellent control for creating everything from gentle sweeps to tight curls. You have two main approaches here: you can bend the wire into your desired shape first and then solder it into place, or you can tack a straight piece of wire down and gently form it along your glass piece. For intricate designs, bending the wire beforehand often gives you more precision. I recommend playing with a few scrap pieces to get a feel for how the wire responds before moving on to your final project.
Essential Tools for Cutting and Shaping
To get those clean cuts and precise shapes, you’ll want a few specific tools in your collection. A good pair of wire cutters is non-negotiable for making flush cuts that will sit neatly against your glass. For the actual shaping, a set of pliers is your best friend. Needle-nose pliers are perfect for tight bends and holding the wire steady, while round-nose pliers will help you create beautifully consistent loops and curves. I also like to keep flat-nose pliers on hand for making sharp, angular bends and for straightening out any kinks. Having the right set of tools makes the process so much smoother and gives you the control you need to bring your creative ideas to life.
Apply Patina for a Flawless Finish
Applying patina is the final touch that brings your whole piece together, giving it a polished, professional look. Before you even think about patina, make sure your project is completely clean. Scrub all your solder lines with a good flux remover to avoid a splotchy finish. Once it’s clean and dry, apply your black or copper patina with a small brush or cotton ball, making sure to cover all the solder and wire evenly. The tin coating on the wire is key here, as it ensures the patina develops a consistent color that perfectly matches the rest of your solder lines. After the patina has set, just neutralize, clean, and polish your piece to a beautiful shine.
Are You Making These Tinned Wire Mistakes?
Working with tinned copper wire can transform your stained glass projects, but a few common slip-ups can get in the way of a perfect finish. We’ve all made these mistakes at some point, so don’t worry. The key is to learn from them so you can create beautiful, durable art every time. Let’s walk through some of the most frequent errors and how you can easily sidestep them, from picking your materials to putting on the final polish.
Understanding Potential Drawbacks
While tinned copper wire is a fantastic tool, it’s smart to be aware of a few potential considerations. Knowing the full picture helps you make the best choices for your specific project and avoid any surprises. First, tinned wire is a bit more of an investment than bare copper, but most artists agree the superior corrosion resistance is worth it for a piece that lasts. You also have to consider the trade-off between strength and flexibility. A sturdy 14 gauge wire is perfect for reinforcing a large panel, but it won’t bend easily into the tight, decorative curls that a 20 gauge wire can handle. Finally, while the tin coating makes soldering easier, it doesn’t replace the need for good technique. A weak solder joint can still compromise your piece, so it’s always important to master your wirework for a strong and stable result.
Common Beginner Mistakes
When you’re just starting, it’s easy to overlook a few key details. First, make sure you’re using the right type of stained glass for your project. Some glass types are more difficult to work with, and compatibility is crucial for strong solder joints. Another common issue is poor soldering technique. If your solder isn’t flowing correctly, you can end up with weak connections that compromise your entire piece. Practice on scrap glass to get a feel for the heat and flow. Also, don’t be shy with your solder. Applying too little will create brittle joints that can easily break. A nice, rounded bead of solder is what you’re aiming for.
Simple Safety Tips for Your Studio
Your health and safety should always come first. Soldering involves heat and chemicals, so it’s essential to work in a well-ventilated area to avoid inhaling fumes from flux and solder. Always wear safety glasses to protect your eyes from any potential splashes. After you’ve applied flux and patina, it’s tempting to call it a day, but don’t skip the cleanup. Any leftover residue can cause corrosion over time, which will dull your solder lines and can even damage the glass. A thorough cleaning with a good flux remover ensures your piece will look great for years to come.
The Final Inspection for a Perfect Piece
The final details are what separate a good piece from a great one. Before you even start soldering, check for mismatched or uneven edges on your glass pieces. A tight fit is essential for a strong final product. As you apply your copper foil, make sure it’s centered and smooth. Uneven foil leads to weak, lumpy solder lines. Finally, don’t skip the final wax and polish. This last step does more than just make your project shine; it protects the solder and patina from oxidation, keeping your artwork looking vibrant and new. A quick polish is all it takes to give your piece a professional, long-lasting finish.
Pro Tips for Using Tinned Copper Wire
Once you get the hang of the basics, you can start using tinned copper wire in more advanced ways. It’s not just for structure; it’s a versatile tool that can add both strength and beauty to your work. Think of it as your secret weapon for creating more durable and detailed stained glass art. From reinforcing large panels to adding delicate, decorative swirls, a little bit of wire can make a huge difference in your final piece. Let’s explore a few pro tips to help you get the most out of this essential material.
Reinforce Your Panels for Lasting Strength
One of the most practical uses for tinned copper wire is to make your projects stronger. For larger stained glass panels or pieces with long, straight solder lines, embedding wire can prevent sagging over time. Simply lay the wire along the seam before you solder. As you apply solder, the wire becomes part of the joint, creating a rigid backbone for your panel. This technique is especially useful for strengthening delicate areas or pieces with unusual shapes that might have weak points. It’s a simple step that adds incredible durability, ensuring your beautiful stained glass art will last for years to come.
Get Creative with Decorative Wirework
Beyond its structural benefits, tinned copper wire is fantastic for adding creative details. You can easily bend and shape it to create intricate designs, like vines, swirls, or lettering, right on the surface of your glass. Because the wire is pre-tinned, you can use your soldering iron to attach it directly onto your foil lines. This allows you to add texture, dimension, and a personal touch to your work. The best part is that the wire takes patina just like your solder lines, so your decorative elements will blend seamlessly into the overall design for a polished, cohesive look.
Making Jump Rings for Hanging and Embellishing
One of the most satisfying final steps is adding a way to hang your finished piece. A simple, sturdy jump ring is the perfect solution, and making your own from tinned copper wire gives you complete control over the size and placement. These small loops are essential for hanging suncatchers, but they can also double as decorative elements within your design. Tinned copper wire is the go-to material for a simple reason: its tin coating prevents the copper from oxidizing, ensuring your hanging loops stay shiny and strong for years. It also creates an ideal surface for solder to bond with, making it incredibly easy to attach them securely to your project.
Creating your own jump rings is surprisingly simple. Start by choosing the right wire gauge for the job; a sturdy 16 or 18 gauge wire is perfect for most suncatchers, providing plenty of strength without being too bulky. For smaller, more delicate pieces, a 20 gauge wire works beautifully. Just snip a short piece of wire and use round-nose pliers to wrap it around the tip, forming a clean, closed loop. For extra security, you can solder the ends of the ring together. To attach it, apply a bit of flux to the spot on your solder line where you want the ring, hold it in place with pliers, and create a solid solder joint to secure it. This straightforward technique provides a strong, integrated hanging point that looks completely professional.
How to Use Wire for Repairs and Restoration
Tinned copper wire is a lifesaver when it comes to repairing cracked or broken stained glass. If you have a piece with a hairline crack, you can carefully lay a thin gauge wire over the fracture and run a bead of solder to create a strong, discreet bridge. This technique stabilizes the glass and prevents the crack from spreading without requiring you to replace the entire piece. It’s also perfect for reinforcing weak or failing solder joints on older, antique panels. By adding wire to these vulnerable spots, you can restore the structural integrity of the piece and preserve its original beauty.
Related Articles
- Soldering Glass: A Step-by-Step Guide for Artists
- What Is Stained Glass Art? A Complete Guide
- 50/50 vs 60/40 Solder: Which One Should You Use?
Frequently Asked Questions
Is it really necessary to use tinned copper wire, or can I just use bare copper? While you can technically use bare copper, I always recommend tinned wire for stained glass. The tin coating prevents the copper from oxidizing, which means your solder joints will be stronger and your finished piece will resist corrosion over time. Think of it as a small investment that protects the longevity of your artwork and makes the soldering process much smoother.
If I’m just starting out, what’s the best all-purpose wire gauge to buy? If you’re only going to stock one or two sizes, go for 16 or 18 gauge. These gauges hit the sweet spot between being strong enough to reinforce medium-sized projects and flexible enough to bend into decorative shapes. They are incredibly versatile and will cover most of your needs, from making hanging loops to adding structural support.
Do I need to do any special prep work on the wire before I solder it? One of the best things about tinned copper wire is that it’s pretty much ready to use right away. The tin coating acts as a primer for the solder. However, I always suggest giving the wire a quick wipe with a clean cloth before you start. This removes any dust or oils from your hands, ensuring you get the cleanest possible solder connection.
My patina looks splotchy on the wire. What did I do wrong? A splotchy patina is almost always caused by leftover flux residue. Before you apply any patina, you have to scrub your project thoroughly with a good flux remover and warm, soapy water. If any flux is left on the solder lines or wire, it will block the chemical reaction, resulting in an uneven finish. A deep clean is the key to a perfect, consistent patina.
Can I use tinned copper wire to make the hanging loops for my suncatcher? Yes, absolutely! Tinned copper wire is perfect for creating strong, reliable hanging loops. I recommend using a thicker gauge, like 16 or 18, to ensure the loop can easily support the weight of your finished piece. Just shape the wire, solder the ends securely into your frame’s solder line, and you’ll have a durable hanger that blends in perfectly.