
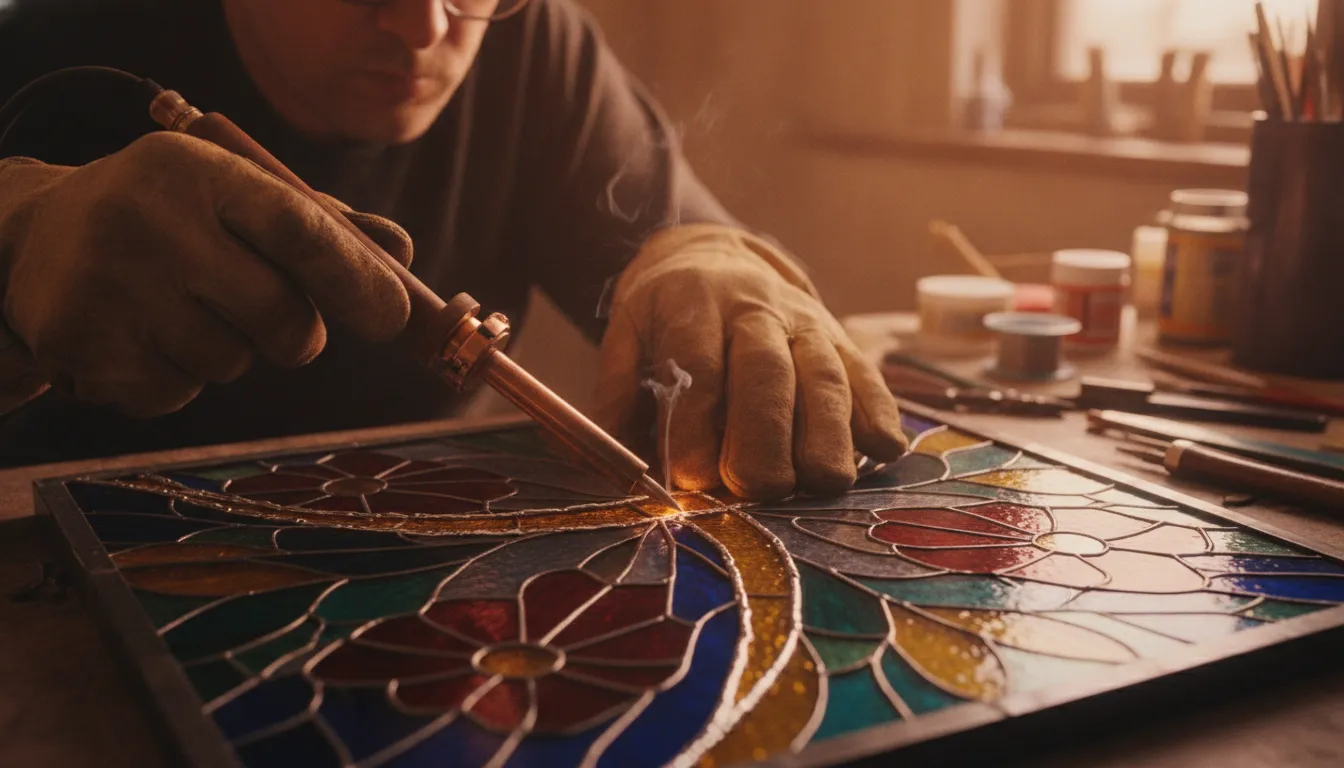
Achieving clean, professional solder lines on a stained glass panel requires precise heat management and reliable tools.
A stained glass soldering iron guide explains that you need a temperature-controlled 100-watt iron with rapid heat recovery for smooth, strong seams. Matching tip shape, temperature, and technique to your project prevents heat cracks and cold joints while producing professional results every time.
Before you start soldering, you need to find the right equipment for your studio workspace. Understanding what to look for in a stained glass soldering iron will help you choose an iron that fits your specific project needs. Here is how to select the best iron for your glass crafting.
Shop our selection of professional soldering irons for stained glass , with next-day shipping available on all in-stock tools.
Stained Glass Soldering Iron Guide: What to Look for in a Stained Glass Soldering Iron
Choosing the right stained glass soldering iron is the most critical tool decision you will make. A high-quality iron ensures smooth, even solder lines and prevents damage to your glass from heat shock. When evaluating options, you must focus on five core factors: wattage, temperature control, tip system, ergonomics, and durability. To learn more about setting up your workspace, check out our comprehensive guide to essential stained glass tools and supplies.
Power and Wattage Requirements
Unlike electronics work that uses low-wattage irons, stained glass needs a powerful heat source. You should look for an iron with at least 80 to 100 watts of power. High wattage is not about getting hotter, but about recovering heat fast. Glass and copper foil pull heat away from the tool very quickly as you work. A low-wattage iron will cool down as you solder, which leads to bumpy, rough seams. A strong 100-watt tool can keep up a steady temperature, so you get clean, shiny, flat lines. The National Institutes of Health provides helpful safety resources regarding ventilation and tool handling at nih.gov.
The Value of Temperature Control
Steady heat control is vital for great stained glass work. Traditional irons get hotter the longer they stay plugged in, which can burn your flux or crack the glass. You want a tool with built-in thermal control or a dial that lets you set the heat. Excellent models like the Hakko FX-601 use advanced ceramic heaters and electronic sensors to adjust the temperature instantly. This type of tool lets you work on delicate foil or thick lead came without changing tools. It saves time and protects your project from thermal shock.
Tip Selection and Maintenance
A good iron must have a solid, solid-copper tip that is plated with iron or nickel. You need a tool that lets you swap tips easily. Stained glass artists usually use a 3/16-inch or 1/4-inch chisel tip for standard copper foil seams. For fine decorative lines or tight spaces, a smaller cone tip works best. Make sure the model you choose has replacement parts that are easy to buy. Plated tips last a long time if you keep them clean with a damp sponge or brass wire coil.
Body Design and Comfort
Stained glass projects often take hours of steady work. A heavy or poorly balanced iron will tire your wrist and hand very quickly. Look for an iron with a slim, heat-resistant handle and a lightweight cord. The cord should be flexible so it does not pull against your hand as you guide the tip. Ceramic heating elements help keep the handle cool and make the tool lighter than older, coil-style irons. Good grip design lets you solder with high precision and control.
Browse our full collection of soldering supplies and metals , including lead-free solder, flux, and patina.
How Does Wattage Affect Solder Quality?
Wattage is the most critical factor when selecting a tool for glass craft. Many hobby guides suggest that an eighty-watt iron is enough for standard projects. However, experienced glass artists know that a one-hundred-watt iron is the true industry standard. This power level ensures you can complete clean, smooth lines without frustrating structural or visual defects.
The Physics of Heat Transfer and Thermal Mass
Soldering is not just about reaching a specific temperature. It is about how well your tool maintains that temperature when it touches cold metal. When your copper foil or lead came comes into contact with the hot tip, it draws heat away rapidly. This process is known as heat sink.
A one-hundred-watt tool has more thermal mass and energy storage. It transfers heat to the metal joint much faster than a sixty-watt or eighty-watt hobby tool. This rapid energy transfer is vital because lead and tin alloy solidifies quickly when the temperature drops even slightly.
Why Heat Recovery Speed Matters for Clean Seams
When you run a solder line along copper foil, you need a smooth, continuous bead. If your iron loses heat, the liquid metal will freeze before it can flow. This causes lumpy, bumpy seams and weak spots in your art piece.
A high-quality tool like the Hakko FX-601 offers rapid heat recovery. When the tip cools down from touching the foil, the internal heating element reacts instantly to bring the temperature back up. This constant heat level allows you to work in long, steady strokes rather than stopping to let the tool reheat.
The Danger of Underpowered Hobby Irons
Using a sixty-watt or eighty-watt hobby iron often leads to cold joints. A cold joint occurs when the solder does not melt fully, resulting in a dull, grainy, and weak connection. These joints can crack over time, which can ruin your entire window or panel.
Underpowered tools also force you to leave the hot tip on the glass for too long. Keeping the iron in one spot builds up localized stress. This thermal shock is a primary cause of heat cracks in stained glass, which are very hard to repair. Upgrading to a one-hundred-watt standard iron is the best way to avoid these issues.
Comparing Soldering Iron Power Levels
Choosing the right wattage depends on your project goals and skill level. Below is a comparison of how different power levels perform in a standard studio environment.
| Iron Wattage | Heat Recovery | Best Use Case | Risk of Cold Joints |
|---|---|---|---|
| 60 Watts | Very Slow | Small suncatchers only | High risk on long seams |
| 80 Watts | Moderate | Light copper foil work | Moderate on thick lead came |
| 100 Watts | Instant | All foil and lead panels | Extremely low risk |
For more detailed recommendations on choosing the right tools for your workshop, you can read our beginner-friendly stained glass tools and supplies guide. You should also consult the safety standards from the Occupational Safety and Health Administration to set up a safe, well-ventilated work space.
Rheostat vs. Built-In Thermostat: Which Temperature Control Is Best?
When choosing a tool for your workshop, how it manages heat is critical. Stained glass soldering requires stable temperatures to produce clean, smooth seams. Traditional irons and modern models handle this task in very different ways. Understanding these systems is the first step in choosing the best setup for your work.
The Traditional Rheostat Approach
Older or traditional soldering irons often rely on an external rheostat, which works like a rotary dimmer switch. You plug your iron into the rheostat control box, then turn a dial to change the power level. This system does not monitor the actual temperature of the copper tip. It only limits the electrical current flowing to the heating element. As a result, when you press the tip against cold glass and lead, the iron loses heat. You must wait for it to recover or manually adjust the dial to boost power.
Modern Thermostatic Temperature Control
Modern irons, like the Hakko FX-601, feature built-in thermostatic controls. These devices monitor the tip temperature in real time. When the tip touches cold materials and starts to cool, the internal thermostat quickly feeds more power to the heating element. This rapid feedback loop keeps the heat stable without manual changes. Stable heat helps prevent common soldering problems like heat fractures in the glass, dull seams, or melted lead lines.
A Crucial Compatibility Warning
Mixing these two control types can cause severe damage to your equipment. For example, the Weller 100 is a highly popular iron that features a built-in magnetic thermostat. According to the technical support guidelines at Delphi Glass, using an external rheostat with a Weller 100 can permanently ruin the tool. The external power dimmer interferes with the internal magnetic switch, causing the heating element to burn out. Always check your tool specifications before plugging it into an external control box.
Which Temperature Control is Best?
Built-in thermostatic control is the superior choice for consistent results. It automates heating so you can focus on your soldering technique. While external rheostats offer a simple way to upgrade older, unregulated irons, they require constant manual tuning and do not prevent temperature drops during active work. Investing in a self-regulating, thermostatically controlled iron ensures a smoother workflow and professional glass art results.
| Feature | External Rheostat Control | Built-In Thermostatic Control |
|---|---|---|
| Control Mechanism | Limits electrical current (dimmer dial) | Monitors and adjusts tip heat in real time |
| Temperature Stability | Fluctuates during contact with cold glass | Remains consistent under active load |
| User Effort | Requires constant manual adjustment | Fully automatic adjustment |
| Best Suited For | Older, non-regulated soldering irons | Modern high-performance stained glass work |
| Equipment Safety | Can damage irons with built-in thermostats | Safe, integrated internal system design |
Choosing the Right Tip Shape for Your Project
Your choice of soldering iron tip shapes directly affects how heat flows to your glass pieces. A proper tip shape allows you to control the flow of solder and run smooth, strong lines. To get the best results, you must match your tool tip to your specific project needs. Our etching and replacement tip selection includes options for every stained glass technique.
Chisel Tips for Smooth Seams
Chisel tips are the standard choice for stained glass work. These tips have a wide, flat face that can hold and transfer heat efficiently over a larger surface area. Using a 1/4 inch or 3/8 inch chisel tip is the best way to run long, consistent solder seams. For broader glass assemblies, a wider chisel tip ensures that both foil edges reach the correct heat level at the same time.
When you use a chisel tip, you can lay the flat side down to slide smoothly along a joint. Keeping the iron at a steady angle ensures a professional bead. If you want to learn more about running neat, clean solder lines, check out our guide on mastering stained glass soldering techniques.
Cone and Pointed Tips for Fine Detail
Cone and pointed tips taper to a narrow point, which concentrates heat in a very small spot. While these tips do not transfer enough heat to run long seams, they are highly useful for detail work. You should use a pointed tip when you need to tack solder small glass pieces in place before you run your final seams.
These narrow tips also help you solder tight corners or add decorative details like copper wire loops. They prevent heat from spreading to nearby glass, which reduces the risk of heat cracks. Be sure to clean your pointed tip often to prevent solder from pooling at the very end of the point.
Bent Tips for Better Ergonomics
Bent chisel tips feature a slight curve near the end of the shaft. This curve changes the angle of the tool in your hand, which allows you to keep your wrist in a more natural position. Using a bent tip reduces physical strain during long work sessions at your bench. This shape is especially helpful when you solder three-dimensional glass pieces like lampshades or boxes.
Selecting the Right Tip Materials
Standard copper tips are common, but pure copper wears down quickly under high heat and acidic flux. To avoid frequent wear, you should use solid alloy or iron-plated tips. Iron-plated tips have a thick iron layer over a copper core. The copper core transfers heat quickly, while the iron plating prevents the acidic flux from eating away the tip shape. These plated tips last much longer and need less maintenance. Browse our Hakko tip cleaning paste and maintenance supplies to keep your tips in top condition.
Organizations like the National Institute of Standards and Technology (NIST) provide detailed data on metal wear and thermal conductivity under extreme conditions. Their research shows that iron-clad tips offer the best balance of heat transfer and durability for hand soldering tools.
Step-by-Step Soldering Techniques for Smooth Seams
Creating a beautiful glass piece relies on smooth, secure solder lines. This stained glass soldering iron guide walks you through the steps to get clean, professional seams on your project. The key is to work in a steady, slow flow so the heat can build a rounded bead.
Prep and Tools
Clean copper foil is essential for a clean seam. Any grease, dust, or oil from your hands will stop the metal from bonding. Apply liquid or gel flux to all foiled joints before you start. You can learn more about safe glass prep methods from the CDC NIOSH industrial safety guides on workshop dust and fumes. For this project, you will want a reliable 100-watt soldering iron that can maintain a steady heat of 700 degrees Fahrenheit, which is the best level for 60/40 alloy. Use glass-specific solder flux for the cleanest results.
The Six-Step Seam Process
- Prepare your workspace: Clean the copper foil with steel wool to remove any dark spots. Brush a thin layer of flux along all foiled lines to help the metal flow.
- Tin the iron tip: Heat your iron to 700 degrees Fahrenheit. Melt a small blob of solder onto the hot tip and wipe it clean on a wet sponge to leave a bright, thin silver coat.
- Tack solder the panel: Put tiny drops of metal on key junction points to hold your glass shapes in place. Use small jigs or wooden blocks to keep the outer edges straight.
- Run the first bead: Hold the tip of your iron flat against the foil at a slight angle. Feed the wire alloy into the tip as you glide along the seam at a steady, slow speed.
- Build the final rounded seam: Make a second pass over the seam to build a high, rounded dome. Move fast enough so the glass does not overheat, but slow enough to melt away any bumps.
- Cool and inspect: Let the metal cool on its own. Look for any flat spots or pinholes, then add a drop of flux and touch them up with your iron tip.
Heat Control Tips
If you stay in one spot too long, the heat can crack the glass or cause the foil glue to fail. Keep the iron tip clean by wiping it often on a damp sponge or brass wire pad. A clean, hot tip will transfer heat into the metal without sticking. For more solder-related projects, explore our 60/40 solder spools and premium Canfield solder options.
Soldering Iron Maintenance and Tip Care
To keep your stained glass soldering iron guide helpful and your seams smooth, you must care for your tools. The most important task is keeping the tip clean and tinned. Proper care stops oxidation, which ruins the metal and blocks heat. If you neglect your tip, the iron will not melt solder evenly and your glass art lines will look rough.
Wet Sponges vs. Brass Wool
Crafters use different tools to clean their irons. The traditional wet sponge is easy to find, but it can harm your tool. When the cold water touches the hot metal, it causes rapid cooling. This thermal shock can crack the plating and shorten the life of your tip, as noted in reports by the National Institute of Standards and Technology. A dry brass wool pad is a much safer choice because it cleans without lowering the tip temperature. For heavy buildup, you can press the hot tip into a solid sal ammoniac block to strip away tough oxide layers.
The Vital Tinning Process
Tinning is the process of coating the hot iron tip with a fresh layer of solder. This silver coat acts as a shield against air and prevents rust. You should tin the tip before you start work, between joint seams, and right before you store the iron. When the silver coat turns dark grey or black, your solder will pool and roll off instead of melting smoothly onto the seam. That dark color means it is time to clean and re-tin the metal so you can maintain steady heat flow.
Tip Storage and Replacement
Knowing when to replace a tip keeps your project safe. Check the metal shape often. If you see pits, holes, or worn spots in the plating, throw the tip away and buy a new one. A damaged tip can drop flakes of oxide onto your flux or foil. When you finish work, clean the tip, apply a thick layer of fresh solder, and turn off the power. Storing the iron with this heavy solder cap keeps the tip safe from moisture until your next stained glass project. Our replacement tip collection covers all standard stained glass iron models.
Safety First: Ventilation and Best Practices
Working with your stained glass soldering iron guide requires more than just mastering heat control and clean joints. Because most glass artists use solder containing lead, understanding workspace safety is a critical duty. Lead solder produces dangerous metal fumes and chemical vapors when heated, especially from rosin or acid core fluxes. Setting up a dedicated safety plan protects you from burns, sharp glass cuts, and toxic dust.
Proper Ventilation and Lead Safety
To stay safe from airborne toxins, set up proper local exhaust ventilation. Heated stained glass solder releases lead-containing fumes that can harm your health over time. Standard household fans are not enough because they only recirculate these toxins around your studio. You need a dedicated bench top filter extraction system or local exhaust hood that vents directly to the outside.
According to the safety guidelines set by the Yale Environmental Health and Safety department, recirculating filtration systems are not acceptable for lead-containing solder. You must also consider using rosin-free or lead-free solders whenever possible to reduce exposure. The CDC NIOSH lead prevention guides offer workshop-specific safety checklists. Browse our lead-free solder alternatives for a safer studio environment.
Safe Workspace Setup and Clean Habits
Your bench should have a fire-resistant surface and be clear of flammable items like paper patterns and rags. Use a sturdy iron holder and always rest the tool horizontally so the hot tip does not touch the bench or your glass. Keep a small fire extinguisher nearby and wash your hands thoroughly after every session, especially before eating or drinking. Lead dust can settle on work surfaces and be ingested later.
Essential PPE and Tool Handling
You should wear safety glasses to protect your eyes from hot solder spatter. A good pair of silicone or leather gloves prevents burns when handling heated glass and metal. If you work with lead-based solder, periodic blood lead level testing is recommended by OSHA guidelines for lead exposure in craft settings.
View our deluxe stained glass tool kit , includes essential soldering supplies for your studio.
Recommended Soldering Irons and Supplies
This stained glass soldering iron guide would not be complete without specific product recommendations that match the technical criteria discussed above. Each of these tools is carried by Art Glass Supplies and ships with fast turnaround.
Top Solder Tool Comparison
The table below compares the three most popular irons used by professional stained glass artists. All are available through ArtGlassSupplies.com.
| Model | Wattage | Temperature Control | Tip Type | Best For |
|---|---|---|---|---|
| Hakko FX-601 | 100W | Built-in ceramic thermostat | Iron-plated chisel | All stained glass soldering |
| Weller 100 | 100W | Built-in magnetic thermostat | Iron-plated chisel | Medium to large panels |
| Leponitt 100W | 100W | Built-in adjustable thermostat | Copper alloy chisel | Budget-friendly pro work |
Three Popular Tool Models
- Hakko FX-601: The industry standard for stained glass soldering. It features a ceramic heating element that delivers precise temperature control and rapid heat recovery. The iron is lightweight and well balanced for long sessions. See the Hakko-compatible and alternative soldering irons on our site.
- Weller 100: A trusted workhorse with a reliable internal magnetic thermostat. This iron is slightly heavier than the Hakko but highly durable. Note that it must not be used with an external rheostat.
- Leponitt 100W: An excellent budget-friendly option with adjustable temperature control. It offers good heat recovery for the price and works well for hobbyists and students. Available directly from our Leponitt soldering iron page.
Tips and Replacement Parts
Stocking extra tips ensures you never have to stop a project due to wear. We carry a wide range of tip shapes and sizes, including chisel, cone, and bent tips for every major iron brand. Pair your tips with Hakko tip cleaning paste to extend their lifespan.
Lead-Free Solder Choices
For artists who prefer lead-free materials, we stock Canfield 50/50 lead-free solder and Canfield Quik-Set solder for faster cooling lines. Pair your solder with Tigers Eye gel flux for smooth application and Novacan black patina for professional finished seams.
Shop the full soldering supplies collection at Art Glass Supplies , including flux, patina, solder, and replacement tips.
Frequently Asked Questions
What temperature should you set for stained glass soldering?
The ideal soldering temperature for stained glass is 700 degrees Fahrenheit (371 degrees Celsius) when using standard 60/40 tin-lead solder. At this temperature, the solder flows smoothly and bonds well to copper foil without burning the flux. If you are using lead-free solder, you may need to increase the temperature to 750 to 800 degrees Fahrenheit. Always test on a scrap piece of glass first.
How do you know if your soldering iron is too hot?
Signs of an overheated soldering iron include flux that burns and turns black immediately. Solder that appears dull or rough instead of shiny, and smoke that rises from the tip continuously. If the solder beads up and rolls off the seam rather than flowing onto it, your iron is too hot. Lower the temperature in 25-degree increments until the solder flows smoothly and produces a shiny finish.
Do you need a temperature controller for stained glass soldering?
If your soldering iron does not have a built-in thermostat, you need a separate temperature controller or rheostat to prevent the tool from overheating. Unregulated irons can exceed 900 degrees Fahrenheit if left plugged in, which will burn your flux, damage your tip, and increase the risk of cracking your glass. For consistent results, a temperature-controlled iron or an external rheostat is essential.
Why does the size of your soldering iron tip matter?
Tip size determines how much heat transfers to your seam and how fast you can work. A wider tip, such as 1/4-inch or 3/8-inch chisel, holds more heat and covers more surface area, making it ideal for long copper foil seams. A smaller tip concentrates heat for precision work but cools quickly when dragged along a long joint. Using the wrong tip size is a common cause of uneven solder lines.
How often should you tin your soldering iron tip?
You should tin your soldering iron tip before every soldering session, after every few seams during active work, and before storing the iron. Tinning means coating the hot tip with a thin layer of fresh solder, which protects the metal from oxidation. When the tip coating turns dark grey or black, your solder will not flow properly, and it is time to clean and re-tin.
Can you use a regular electronics soldering iron for stained glass?
Standard electronics soldering irons typically operate at 15 to 40 watts, which is far too low for stained glass work. These irons lack the thermal mass and heat recovery needed to transfer heat to copper foil or lead came. Using an underpowered iron leads to cold joints, weak seams, and heat stress cracks in your glass. You need a dedicated 100-watt stained glass soldering iron.
Get your professional stained glass soldering iron today , order now for next-day shipping to your studio.