
A simple, flat sheet of glass holds so much potential. It can become a graceful vase, a flowing bowl for your coffee table, or even a custom light fixture. The artistic process that unlocks these possibilities is called draping, or drape forming, and it’s more accessible than you might think. The magic behind this transformation lies in using a quality drape mold. These specially designed forms guide the glass as it softens in the kiln, allowing you to create elegant, organic shapes. This guide covers everything you need to know, from selecting the perfect mold to mastering your firing schedule.
Key Takeaways
- Select the right mold material for your project: Your choice between durable stainless steel for smooth curves or versatile ceramic for detailed shapes directly impacts your final piece, so pick the one that best suits your artistic goal.
- Proper prep work is essential: Always coat your mold with a separator like kiln wash for a clean release and carefully center your glass to guarantee an even, symmetrical drape.
- Master the technical details: Stick to a single glass COE to avoid stress cracks and learn your kiln’s ideal firing schedule to achieve a controlled, graceful shape every time.
So, What Exactly Is a Glass Drape Mold?
If you’ve ever admired a gracefully curved glass vase or a beautifully shaped bowl and wondered, “How did they do that?” the answer is likely a draping mold. Think of a
This technique is a fantastic way to transform a simple sheet of glass into a functional or sculptural piece of art. Unlike slumping, where glass sinks into a concave mold, draping allows you to create taller, more complex forms with elegant, flowing lines. Whether you’re aiming for a sleek, modern vase or a delicate, ruffled-edge dish, a draping mold is the key to bringing that vision to life. It’s a fundamental skill in warm glass art that opens up a whole new world of creative possibilities beyond flat panels.
A Quick Note: This Isn’t About the Fuzzy Stuff!
Before we go any further, let’s clear up a common point of confusion. When we talk about “molds” in the context of glass art, we are absolutely not referring to the fuzzy, unwelcome guest that might appear on forgotten leftovers in the back of your fridge. The molds we use to shape glass are tools—beautifully crafted from ceramic or stainless steel—designed to help us create specific forms. It’s an important distinction, because while our artistic molds are partners in creativity, the other kind of mold is something you want to keep out of your studio and home to ensure a safe and healthy workspace.
Understanding Biological Mold
So, what is the other kind? Biological mold is a type of fungus that thrives in damp, humid environments. According to the Centers for Disease Control and Prevention, molds are a natural part of the environment and can grow on many different surfaces. While the ceramic and stainless steel draping molds we use in the kiln are not susceptible, it’s wise to be aware of biological mold for the overall health of your studio. A poorly ventilated or damp workspace can encourage its growth on other materials like wood, drywall, or even cardboard boxes where you might store supplies. Maintaining a clean, dry studio is key for protecting your health and your art materials.
Common Types and Health Concerns
You’ve probably heard of “black mold,” but several types of biological mold can appear in indoor spaces, and they can be a concern for your well-being. The World Health Organization notes that exposure to damp and moldy environments can cause a range of health effects, especially for those with allergies or asthma. This is why good ventilation is so important in an artist’s studio—not just for kiln fumes, but for managing humidity and air quality. Keeping your creative space clean and dry isn’t just about being tidy; it’s a fundamental part of ensuring you can practice your art safely and comfortably for years to come.
How Does Glass Draping Actually Work?
The magic of draping happens when heat and gravity work together. You start with a flat piece of glass, which could be a single sheet or a fused design you’ve already created. You’ll then place this glass directly on top of your draping mold inside the kiln. Often, the mold is elevated on kiln posts to give the glass room to stretch and form. As the kiln reaches the right temperature, the glass becomes soft and pliable, almost like honey. Gravity then takes over, pulling the softened glass down and around the mold’s contours. The final shape is a perfect impression of the form it was draped over, creating a beautiful, three-dimensional object.
Why Try Glass Draping for Your Next Project?
Draping is your go-to technique for creating pieces with height and dramatic curves. While slumping is perfect for making plates and shallow bowls, draping allows you to craft taller items like vases, candle holders, and freestanding sculptures. This method gives your work an organic, fluid quality that can be hard to achieve otherwise. The exterior of your piece will be smooth, while the interior will pick up the texture of your mold, giving you another layer of creative control. Using different molds lets you explore a wide range of forms, from simple cylinders to complex, abstract shapes, making it an incredibly versatile technique for any glass artist.
Get Inspired: What Can You Make with Draped Glass?
Once you get the hang of draping, you’ll find inspiration everywhere. A simple stainless steel cylinder mold can help you create a stunning vase perfect for a fresh bouquet. You can drape a circular piece of COE90 glass over a small, elevated form to make a footed bowl, ideal for holding candy or jewelry. Try draping glass over wavy or S-shaped molds to create unique serving dishes for appetizers or desserts. You can even make custom light fixtures by draping glass over a dome-shaped mold. The possibilities are truly endless, and experimenting with different shapes and sizes is part of the fun.
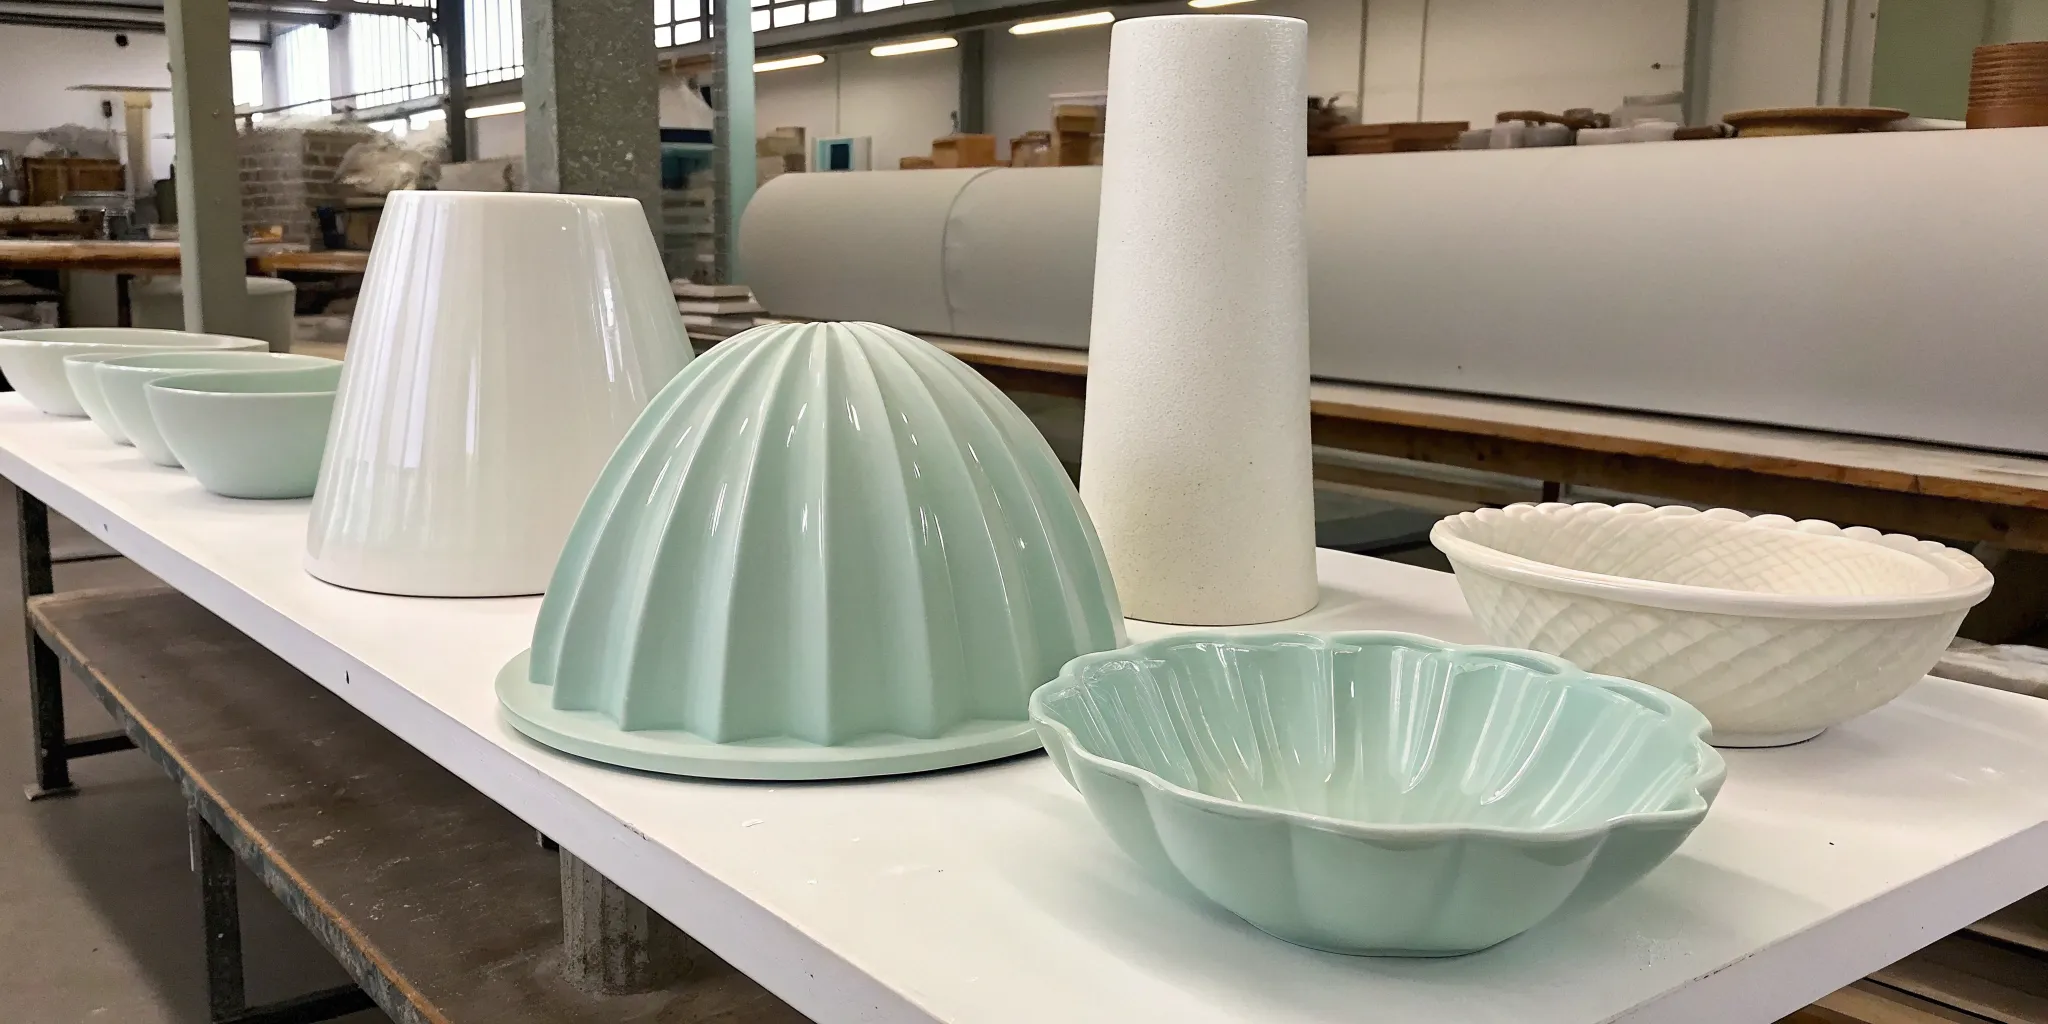
What Are the Different Types of Drape Molds?
Once you get the hang of glass draping, you’ll realize the mold you choose is just as important as the glass itself. Draping molds are made from different materials, and each one offers a unique set of benefits for your projects. From the sleek curves you can get with stainless steel to the custom forms you can carve from fiber, understanding your options is the first step to bringing your vision to life. Let’s look at the most common types of molds you’ll find.
When to Use a Stainless Steel Drape Mold
If you’re looking for a workhorse in your studio, stainless steel molds are a fantastic choice. They are incredibly durable and can handle high temperatures in the kiln again and again without degrading. These molds are perfect for creating simple, elegant curves and smooth surfaces. Think beautiful, flowing bowls or gently curved platters. Because they are so sturdy, you drape your glass over them to create convex shapes. They heat and cool consistently, which helps prevent thermal shock in your glass. For reliable and repeatable results on classic forms, stainless steel is a go-to material for many glass artists.
The Versatility of Ceramic & Plaster Molds
Ceramic molds are probably the most common type you’ll encounter, and for good reason. They open up a world of possibilities for creating pieces with intricate details and textures. Most of these are made from bisque-fired ceramic, which is porous and needs to be prepared with a good kiln wash or primer before firing. This prevents the glass from sticking. Unlike stainless steel, you can use ceramic molds for both slumping (shaping glass into a concave form) and draping (shaping it over a convex form). This versatility makes them a staple for artists who want to experiment with a wide range of designs, from textured plates to sculptural vessels.
Creating Custom Shapes with Fiber Molds
For the artist who wants to break the mold, literally, there are carvable fiber molds. These are made from a rigid, fibrous material that you can easily shape with carving tools to create completely custom forms. If you have a unique design in mind that you can’t find in a pre-made mold, this is your solution. Fiber molds are lightweight and easy to handle, but they don’t have the same longevity as ceramic or steel. They are perfect for one-of-a-kind projects or for creating a prototype before investing in a more permanent mold. They give you total creative control to produce truly original glass art.
Drape Molds for Pottery: A Comparison
If you’re a multi-talented artist who also works with clay, you might have a collection of pottery molds in your studio. It’s a fair question to ask if you can use them for your glass projects, too. The short answer is, unfortunately, no. While they are both called “drape molds,” the materials and construction are worlds apart. Pottery molds are designed for the low-temperature, air-drying, or low-firing process of working with clay. Glass fusing, on the other hand, requires reaching temperatures upwards of 1400°F, which would destroy most pottery molds and could ruin your kiln shelf or even the kiln itself. Understanding the difference is key to keeping your equipment safe and your projects successful.
Materials and Techniques for Clay
Many popular drape molds for pottery are made from wood fiber. These forms are fantastic for clay work because they are lightweight, affordable, and come in a huge variety of shapes and sizes. Potters use them to press slabs of clay over the form, creating consistent sets of plates, platters, or bowls. Because the wood fiber material is slightly absorbent, it helps draw moisture out of the clay, allowing it to firm up and release from the mold more easily. This process works beautifully for ceramics, but that same wood fiber material simply cannot withstand the intense heat required for shaping glass.
Care and Accessories for Pottery Molds
The care instructions for pottery molds really highlight why they aren’t suited for glass kilns. Typically, you clean them by wiping them with a damp sponge, and it’s critical that you don’t get them too wet or soak them in water. They are moisture-resistant, but not waterproof. In a glass kiln, any residual moisture trapped in a mold can turn to steam and cause the mold—and your glass—to crack or explode. Furthermore, glass molds require a thorough coating of kiln wash or primer to prevent sticking, a wet application that would damage a wood fiber mold. For glass, you need materials like ceramic or stainless steel that are built for extreme heat.
Thinking Outside the Box: Unconventional Molds
While standard stainless steel and ceramic molds offer a fantastic range of options, sometimes a project calls for a shape that’s truly one-of-a-kind. This is where you can get creative and look beyond traditional supplies. As we touched on, carvable fiber boards are an excellent choice for crafting a completely custom form from scratch. But you can also find potential molds in unexpected places. For example, some artists have success using thick, high-quality stainless steel kitchenware, like mixing bowls or even colanders, as makeshift molds. The key is to ensure they are truly stainless steel and have no coatings, plastic, or wooden parts.
Before you try this, remember that safety comes first. Any unconventional item must be thoroughly coated in several layers of kiln wash to prevent the glass from sticking. You should also run a test fire with just the object in the kiln to see how it behaves at high temperatures before risking your glass. You can also create abstract drapes by simply arranging kiln posts and furniture on your shelf and draping a sheet of glass over them. Experimenting with these unconventional molds can lead to some of your most unique and exciting pieces, so don’t be afraid to think creatively while always prioritizing a safe studio practice.
From Bowls to Vases: Popular Mold Shapes
The variety of pre-made mold shapes available is astounding, so you’ll never run out of ideas. You can find molds for simple geometric forms like cones, cylinders, and hexagons, which are perfect for making vases, candle holders, or abstract sculptures. There are also molds with organic shapes, like ripples or leaves, that can become stunning decorative platters or wall art. You can even find molds for specific functional items, like a butter dish or a lamp drape. By pairing the right shape with a beautiful sheet of COE90 glass, you can create pieces that are both artistic and useful. The possibilities are truly endless.
How to Choose the Right Drape Mold for Your Project
Picking the right draping mold is a critical step for your project. The mold you choose influences the final shape and the firing schedule you’ll need. It’s about more than just finding a cool shape; you have to consider the material, its size relative to your glass, and how it will behave inside the kiln. Let’s walk through the key factors to help you select the perfect mold with confidence, ensuring your creative vision comes to life just as you imagined.
Does the Mold Material Matter? (Yes!)
The material of your mold plays a huge role in the creative process and the final result. Durable stainless steel is fantastic for draping glass over simple, elegant curves and can be used again and again. If you’re aiming for more intricate shapes, porous ceramic molds are an excellent choice because they can capture finer details. For those moments when you have a truly unique vision, carvable fiber molds give you the freedom to create a completely custom form for a one-of-a-kind piece. Think about your project’s complexity and how often you plan to use the mold to guide your decision.
How to Measure Your Glass for a Perfect Fit
Getting the size of your glass right is the secret to a successful drape. If your glass is too large, it can overstretch and run onto your kiln shelf, while glass that’s too small won’t form properly. To find the perfect fit, you need to measure the path the glass will travel. Use a flexible measuring tape to measure your mold from one rim, down the side, across the bottom, and up to the opposite rim. Your glass must be smaller than this total measurement. For instance, if you’re draping a square piece of glass, its diagonal measurement must be less than the mold’s total draping surface. This simple check prevents the glass from touching the kiln shelf as it stretches, ensuring a clean, beautifully formed piece every time.
Why Mold Size and Glass COE Are Crucial
Here’s a little science that makes a big difference. Glass expands when heated and shrinks when cooled, and so does your mold, but at different rates. This is where COE, or Coefficient of Expansion, comes in. You need to use glass with a consistent COE, like COE96 glass, to prevent stress cracks. When draping, it’s helpful to use a mold that shrinks slightly more than the glass, like stainless steel. This prevents the mold from becoming trapped inside your piece as it cools. Always check that your mold is appropriately sized for your glass blank to allow for a graceful drape.
What’s the Right Firing Schedule for Draping?
There isn’t a universal firing schedule for draping, as each project is unique. The right temperature and timing depend on the mold’s shape, its diameter, how deep you want the drape, and the thickness of your glass. As a general rule, the temperature for draping is lower than for a full slump. The more your glass overhangs the mold, the faster it will drop once it gets hot. Start with the mold manufacturer’s recommendations. Keeping a detailed log of your kiln firings is the best way to learn what works for your specific setup and artistic style.
My Top Tips for Perfect Glass Draping
Once you have your mold and glass ready, the real fun begins. But before you fire up the kiln, a little prep work goes a long way. Getting a beautiful, even drape isn’t about luck; it’s about following a few key steps that set your project up for success. Think of it like baking: you wouldn’t skip greasing the pan or preheating the oven. These techniques are just as essential for glass art.
From preparing your mold surface to placing your glass just right, each step plays a critical role in the final outcome. Mastering these fundamentals will help you avoid common frustrations like your glass sticking or slumping unevenly. Let’s walk through the three most important techniques to ensure your draped pieces come out of the kiln looking flawless every time.
How to Properly Prep Your Drape Mold
First things first, you need to make sure your glass and mold don’t become permanently attached during firing. This is where a good separator, or kiln wash, comes in. Applying a separator to your molds creates a protective barrier that allows the glass to release cleanly after it cools. For ceramic molds, a reliable mixture is one part dry shelf primer to five parts water. Whisk it well and apply a few thin, even coats, letting each one dry completely. This simple step is non-negotiable for a clean release and a smooth finish on your artwork.
A Special Note on Prepping Fiber Molds
Fiber molds are fantastic because they let you get creative and make unique shapes, but they do require a slightly different approach. Because the material is fibrous and porous, applying a good separator is even more critical. You’ll want to use a quality kiln wash to seal the surface thoroughly, which prevents the glass from fusing with the fibers and ensures a clean release. Since these molds are often used for one-of-a-kind projects or prototypes, this prep step is key to making your custom design a success. Just remember that fiber molds are lightweight and easy to handle, but they don’t have the same durability as ceramic or steel, so handle them with care to get the most out of your custom creation.
Why Centering Your Glass is Non-Negotiable
Precision is your best friend when it comes to draping. Taking a moment to carefully center your glass on the mold ensures that gravity pulls it down evenly on all sides during the firing process. If your glass is off-center, you’ll likely end up with a lopsided piece. For a square piece of glass, a good rule of thumb is to measure from corner to opposite corner to check its placement. An even drape starts with an even setup, so don’t rush this part. Whether you’re working with COE90 glass or another type, proper alignment is key.
Nailing the Firing and Cooling Cycles
Every draping project has its own unique firing recipe. The perfect temperature and timing depend on several factors, including the shape and size of your mold, the thickness of your glass, and how deep you want the drape to be. There isn’t a single firing schedule that works for everything. You’ll need to adjust your kiln’s settings based on your specific project. Learning to control these heating and cooling cycles is what gives you command over the final shape. Start by following a recommended schedule for your glass type, and don’t be afraid to take notes and make small adjustments for future projects.
Understanding How Glass Behaves During Draping
Think of what happens inside the kiln as a slow, controlled dance between heat and gravity. As the temperature rises, your solid sheet of glass begins to soften, eventually becoming pliable like thick honey. This is the moment gravity takes over, gently pulling the glass downward to hug the contours of your mold. But there’s more happening at a microscopic level. Glass expands when it gets hot and shrinks as it cools. This is why it’s so important to stick with a single COE (Coefficient of Expansion) throughout your project, whether you’re using COE90 glass or another type. Mixing COEs will cause different parts of your piece to shrink at different rates, creating stress that leads to cracks. Understanding this behavior is the key to predicting how your glass will move and helps you make smart choices before you even press “start” on your kiln.
Are You Making These Draping Mistakes?
Every artist makes mistakes; it’s just part of the creative process. But when it comes to glass draping, a few common slip-ups can be easily avoided, saving you time, materials, and a lot of frustration. By paying attention to a few key details, you can sidestep the most frequent issues that trip up beginners and ensure your projects turn out beautifully. Let’s walk through the three biggest mistakes to watch out for: mismatching your glass, forgetting to prep your mold, and losing control of your kiln temperatures. Getting these right will set you up for a smooth and successful draping experience from the start.
The Classic Mistake: Mismatched Glass COE
One of the most important rules in glass fusing and draping is ensuring all your glass is compatible. This comes down to its Coefficient of Expansion, or COE. Think of COE as the rate at which glass expands when heated and shrinks when cooled. If you mix glass with different COEs, like COE90 glass and COE96, they will shrink at different rates. This creates stress within the piece and almost always leads to cracks or even a complete shatter during cooling. Always double-check that every piece of glass in your project, from the base to the smallest accent, has the same COE.
A Costly Shortcut: Skipping Mold Prep
Imagine spending hours on a beautiful glass design, only to have it permanently stick to your mold in the kiln. This is what happens when you forget to apply a separator. Before draping, your molds need to be coated with a few thin, even layers of kiln wash. This fine powder creates a protective barrier that prevents the molten glass from fusing to the mold’s surface, allowing you to lift your finished piece out easily once it has cooled. It’s a simple, non-negotiable step that protects both your artwork and your equipment. Taking a few extra minutes to prepare your mold correctly makes all the difference.
When Kiln Temperatures Go Wrong
Your kiln is your most powerful tool, but it requires careful management. Firing your glass too quickly or at the wrong temperature can lead to uneven results, thermal shock, or a piece that drapes much further than you intended. It’s essential to follow a recommended firing schedule for draping, which typically uses lower temperatures than a full fuse or slump. Getting to know the specific settings of your kilns and having patience during the heating and cooling cycles are key to achieving a controlled, graceful drape every time. Rushing the process is a recipe for disappointment, so let the kiln do its work.
Troubleshooting an Incomplete Drape
It’s a frustrating moment: you open your kiln expecting a graceful bowl and find your glass has only bent slightly, creating a “taco” shape instead of a full drape. This almost always comes down to your firing schedule. An incomplete drape usually means your kiln didn’t get hot enough or didn’t hold the target temperature long enough for gravity to do its work. While draping uses lower temperatures than a full fuse, a setting around 1150°F might be too cool, especially for thicker glass. The fix is to adjust your firing schedule by slightly increasing the process temperature or extending the hold time. Try bumping it up by 15 degrees or adding 10 minutes to your hold, and keep a detailed log to track what works best for your specific kiln and projects.
Ready to Buy? Where to Find the Best Drape Molds
Finding the right mold is just as important as selecting your glass. The quality of your mold affects the final shape, texture, and success of your project. When you’re ready to start shopping, it helps to know where to look, what to compare, and how to budget. A good mold is an investment that you can use for many firings, so choosing wisely from the start will save you time and frustration. Let’s walk through how to find the perfect draping mold for your studio.
My Go-To Source: ArtGlassSupplies.com
When you’re searching for the perfect shape for your next project, having a wide selection is key. We offer a huge variety of high-quality molds designed specifically for glass artists. Using the right tool is essential; ceramic molds are fantastic for slumping glass into a specific form like a bowl or platter, as they hold the shape precisely. On the other hand, stainless steel molds are excellent for draping glass over them to create more fluid, organic forms. Having a reliable source with plenty of options means you can spend less time searching and more time creating beautiful art in your kiln.
Comparing Brands: What to Look For in a Drape Mold
As you browse, you’ll notice that molds are made from a few different materials. The most common choices you’ll encounter are ceramic and stainless steel. Ceramic molds, particularly those made from bisque-fired ceramic, are a popular pick because they are durable and can handle high temperatures without issue. They provide a smooth surface for the glass to form against. Stainless steel molds are another great option, known for their longevity and ability to create unique draped shapes. When comparing brands, consider the complexity of the shapes they offer and the material’s reputation for durability over many firings.
Drape Molds for Every Budget
Draping molds come in a wide range of prices, so you can definitely find something that fits your budget. You don’t have to spend a fortune to get started. Simple, small drape molds can cost as little as $12, making them a great entry point for trying new shapes. More intricate or larger molds, like those for creating lamp shades or complex sculptural pieces, can cost closer to $80. Think about the types of projects you want to create most often. Investing in a few versatile, high-quality molds will serve you better in the long run than buying many cheap ones that might not last.
Related Articles
- Small Ruffle Draping Mold | Art Glass Supplies – Slumping & Draping Molds
- Mastering the Art of Casting Molds Guide | Artglasssupplies
- Glass Casting 101: A Complete Beginner’s Guide – ArtGlassSupplies
- Large Round Box Casting Mold | Art Glass Supplies – Colour De Verre
- Swirl Textured Coaster Draping Mold | Art Glass Supplies – Slumping & Drap
Frequently Asked Questions
What is the main difference between draping and slumping? Think of it this way: draping is shaping glass over a convex form, while slumping is shaping glass into a concave one. When you drape, you place your glass on top of a mold, and gravity pulls it down and around the shape, creating taller forms like vases or sculptures. With slumping, the glass sinks into a mold, which is perfect for making things like bowls and plates.
Do I need to apply kiln wash to every type of mold? Applying a separator like kiln wash is essential for most molds, especially porous ceramic ones. It creates a necessary barrier that prevents the hot glass from sticking permanently. However, some stainless steel molds are designed to be used without a separator, as the material’s properties can help the glass release on its own as it cools. Always check the manufacturer’s instructions for your specific mold to be sure.
Why did my draped glass piece crack after firing? Cracking is almost always caused by stress in the glass. The most common reason is mixing glass with different COEs (Coefficient of Expansion). Even a tiny piece of incompatible glass will cause the project to crack as it cools. Another cause could be cooling the kiln too quickly, which creates thermal shock. Always double-check that all your glass is the same COE and follow a slow, controlled cooling cycle.
How do I figure out the right firing schedule for my draping project? There isn’t one single schedule because every project is different. Your ideal temperature and timing will depend on the size of your glass, the shape of the mold, and how deep you want the drape to be. A great starting point is to use the firing schedule recommended by the glass manufacturer. Keep a detailed log of your firings, noting what worked and what didn’t, so you can refine your own schedules over time.
Can I reuse my draping molds? Absolutely. High-quality ceramic and stainless steel molds are designed to be used many times, making them a great investment for your studio. You will need to reapply a fresh coat of kiln wash to ceramic molds before each firing to ensure a clean release. With proper care, your molds can help you create beautiful art for years to come.