
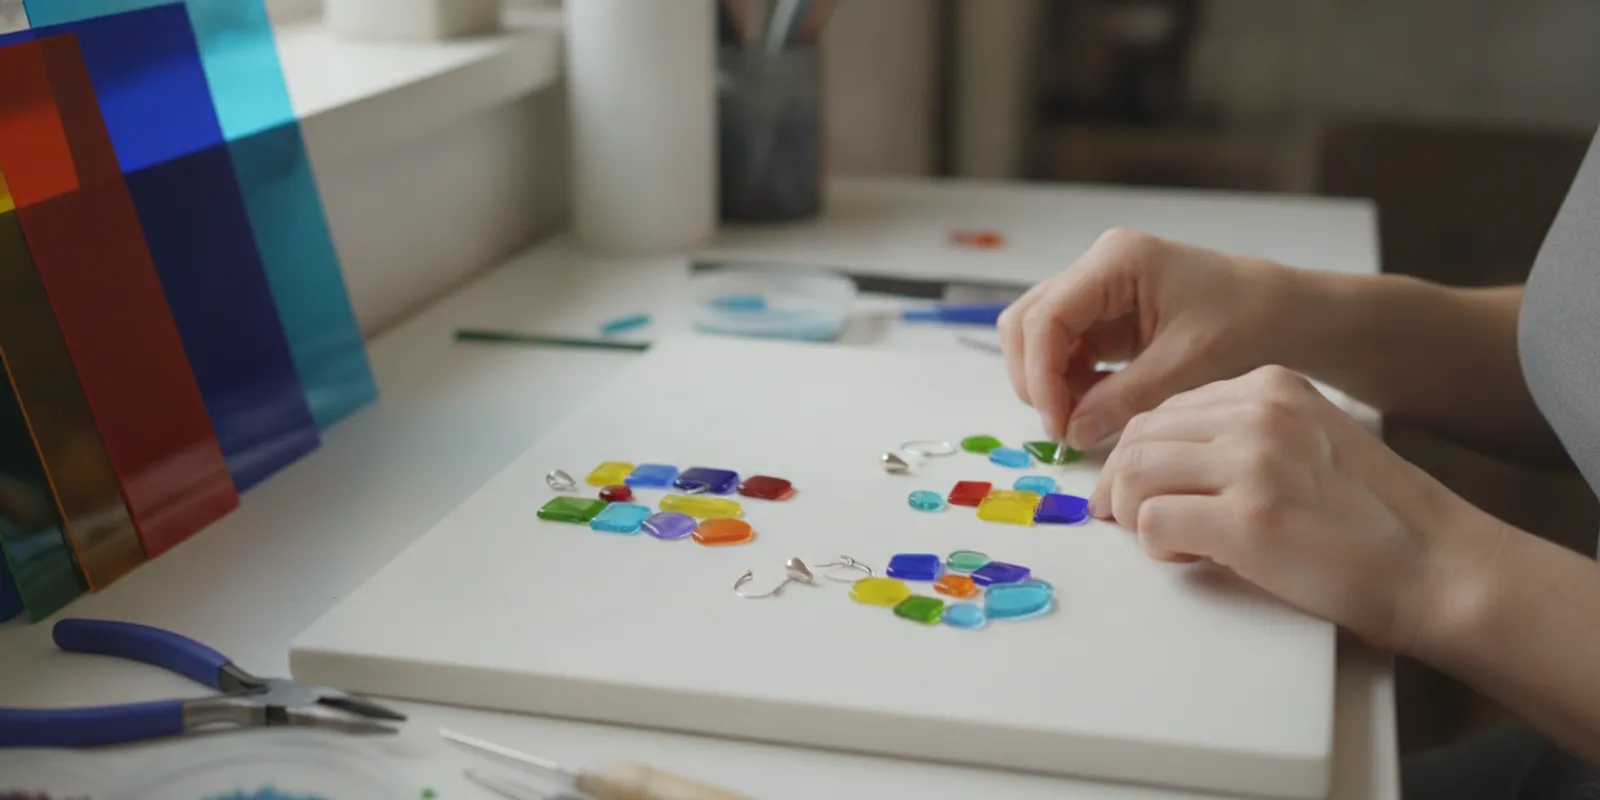
Glass jewelry can be small, but a successful fused piece still depends on choosing materials that behave well together. When you plan glass jewelry with compatible pieces, you reduce the risk of cracks, stress, and uneven results after firing. Start by confirming the glass system, then plan the shape, layer arrangement, and firing process for the actual piece rather than relying on appearance alone.
What does compatibility mean in glass jewelry?
Compatibility means that glass pieces can be fused together and cooled without developing damaging internal stress. Similar colors or matching thicknesses do not establish compatibility. Different glasses may expand and contract at different rates during temperature changes. When joined, that mismatch can leave stress in the finished piece, which may show up as a crack or later failure.
The Coefficient of Expansion (COE) describes how much a material expands or contracts as its temperature changes. Matching COE is an important way to identify a compatible glass system, but a number by itself is not a universal guarantee. Use components identified by the manufacturer as compatible with one another. Do not combine products from different systems simply because their COE values look close.
Viscosity and softening points matter too. Viscosity describes how readily glass flows as it heats; the softening point indicates when it begins to deform under heat. Glasses with different flow behavior may move at different rates in the kiln. A decorative piece could spread, lose its outline, or pull away from a base even if the glasses appear similar before firing. For a wearable item, an unexpected edge or thin neck can become a weak point.
For a first project, choose one known compatible family for the base and accents. Check product guidance for specialty materials, coatings, and decals rather than assuming that every decorative item can share the same schedule. Keep labels or a written record so that you can identify the system later.
How should you choose glass jewelry materials?
Make a material list before cutting. Include the base glass, every accent, and anything that will touch or cover the glass during firing. If you are choosing among stained glass sheets, do not assume a sheet intended for another technique is suitable for kiln fusing. Select material intended for the process, and verify its compatibility with the other components.
- Base: Choose a piece with enough area to support the design and its planned attachment method. A simple outline is easier to inspect than a narrow, branching shape.
- Accents: Confirm that frit, dots, stringers, or small cut pieces belong to the same compatible system as the base. Consider where they sit and whether their shape will remain supported.
- Surface effects: Check whether dichroic glass, decals, or coatings are intended for the firing process. Read instructions for firing face, temperature limits, and placement.
- Findings: Decide whether the piece will use a hole, bail, or another attachment after firing. Plan the glass dimensions around that point rather than improvising after the blank is complete.
Use product labels and descriptions, not memory. Studios with more than one system should keep materials separated or clearly marked. The Bullseye glass selection and COE96 Wissmach sheets represent distinct product paths; select one system for an individual fused piece and verify each component against its own product information.
Which design shapes are easier to plan?
Compact, rounded shapes are often easier to support and inspect than long, thin forms with sharp inside corners. A small pendant, rounded tile, or matching pair of circles gives you a clear outline and fewer narrow projections. Round corners before firing where the design allows, and leave a sensible amount of glass around any attachment point. A narrow bridge between a hole and an edge can be vulnerable to impact.
Sketch the finished dimensions first. Include the room needed for a bail or jump ring, and remember that edges can round as glass softens. A design that looks generously sized before firing may become smaller or change outline during the fuse. Keep small accents away from the perimeter so a shifted piece does not end up partly unsupported.
For matching earrings, cut both bases from the same compatible sheet and use a paper template to keep their outlines alike. Mark or sketch accent placement on the template, then compare the two layouts before loading. A quick photograph provides a useful reference if you are making another pair. It also helps distinguish a material or firing issue from a layout difference when the results vary.
Think about the finished piece from several angles. A pendant may look balanced from the front but be lopsided if its thicker accents are all placed on one side. That uneven profile is not automatically a reason to discard the idea, but it is a good reason to make a representative test. For a pair of earrings, consider both visual balance and how each piece will hang from its finding.
How do thickness and firing behavior affect the result?
Heat takes time to move through glass. Thick areas heat and cool differently from thin areas, so a layered jewelry blank may respond differently from a single sheet. Large thickness differences can make the piece harder to fire evenly and can encourage distortion. Compatibility does not remove the need to consider the dimensions and arrangement of the load.
Keep the design balanced where practical. If several accents are stacked on one side, that side may have a raised profile and behave differently during firing. Before making a final piece, try a small sample with the same base, accents, and approximate layer arrangement. A test should represent the actual design; a flat sample will not tell you everything about a thicker, asymmetric pendant.
A firing schedule includes more than a peak temperature. Heating, the working range, and cooling through stress-sensitive temperatures all affect the result. The glass must soften enough to bond, while excessive heat can blur details or spread the outline. Cooling too quickly can leave thermal stress. Follow recommendations for the specific glass system, kiln, and load thickness instead of treating one peak temperature as a universal recipe.
Kiln size, controller, shelf arrangement, and the number and spacing of pieces can influence how a load behaves. Leave room around pieces as appropriate for your kiln and firing surface. Avoid copying a schedule from a different setup without checking whether it applies. If you are comparing equipment, review glass fusing kiln options with your project size and electrical requirements in mind.
What should you prepare before firing?
- Confirm every component. Check the system and compatibility information for the base, accents, and specialty materials. Set aside anything with unknown firing behavior.
- Clean and dry the glass. Handle pieces by their edges and remove dust or residue with a method appropriate for the material. Let all pieces dry fully before arranging them.
- Prepare the shelf. Use kiln wash or another suitable firing surface according to its instructions. Ensure the glass will not contact an unprotected shelf.
- Arrange and inspect. Place the base flat, add accents with deliberate spacing, and check that delicate points are supported. Compare the layout with your sketch or reference photo.
- Record the load. Note the glass system, layer arrangement, approximate dimensions, kiln, and schedule. A brief record makes the result easier to reproduce or troubleshoot.
Use adhesive only if its instructions say it is suitable for your intended purpose. Some products help hold pieces temporarily during setup; that does not mean they are meant to remain in the kiln or withstand the firing. Check the directions for the glass fusing adhesive you are considering, and do not assume all adhesives behave alike.
A small test tile is especially useful when you change one variable: a new accent material, a thicker stack, a surface treatment, or a different shape. Keep the other conditions as consistent as possible. If the test fails, you can narrow down what to investigate rather than changing several materials and firing choices at once. A test does not replace manufacturer compatibility information, but it can reveal issues in your process before you invest time in a finished piece.
How do common jewelry approaches compare?
| Approach | Useful for | Compatibility and firing concerns | Planning check |
|---|---|---|---|
| Single-layer cut glass | Thin earrings or small pendants | Use glass intended for the chosen process; consider edge finish and how the piece will be attached. | Plan the outline and attachment before cutting. |
| Two-layer fused blank | Depth, color blocks, or a defined base with accents | Both layers need to be compatible; the combined thickness affects heating and cooling. | Keep the footprint balanced and test a representative stack. |
| Frit or small accents on a base | Patterns and localized color details | Verify each accent’s compatible system and its behavior at firing temperature. | Keep details supported and away from vulnerable edges. |
| Specialty surface or decal | Distinctive surface effects | Check product-specific firing limits, orientation, and compatibility instructions. | Test the effect on a sample before using it in a finished piece. |
How can you troubleshoot a test piece?
Evaluate a test against the question you set out to answer. If the concern was whether two materials belong together, first confirm the product information and system; appearance after firing is not enough to establish compatibility. If the concern was shape or movement, compare the fired outline with the pre-firing sketch. If an accent moved, check its placement, support, and the way the glass softened.
Change one factor at a time when repeating a test. For example, if the outline spread more than expected, keep the materials and arrangement the same while reviewing the schedule with the glass and kiln guidance. If the result has an uneven profile, revise the layer balance without also changing the glass system. This simple method makes each test more informative.
Keep unsuccessful samples if they are safe to handle. Label them with the date, materials, thickness, and schedule so you do not repeat the same experiment unknowingly. Do not wear or sell a test that has cracks, sharp edges, or uncertain structural integrity. A useful test is one that teaches you something, not necessarily one that becomes a finished ornament.
How should you inspect and finish the jewelry?
Allow the kiln to complete its cooling cycle and follow the kiln maker’s guidance before opening it. Rapid cooling can cause thermal stress. Once the glass is cool, inspect both faces and all edges under good light. Look for cracks, sharp edges, weak narrow sections, or accents that did not bond as expected. Do not assemble or wear a piece that appears cracked or structurally weak.
Compare the result with the planned dimensions and shape. If an edge needs attention, use an appropriate coldworking method with suitable eye and respiratory protection, and follow the tool instructions. Do not drill a finished piece unless you have appropriate equipment and technique; drilling adds a risk of chipping or breakage. A nylon burnisher can be useful for certain glass-art tasks, but it does not replace proper kiln setup or finishing tools.
Attach findings in a way that suits the design and does not put pressure on a fragile area. If you use a bail, make sure the contact surface is clean and the adhesive is intended for that application. Let it cure as directed before wearing or gifting the piece. For a pierced attachment, check the glass around the hole carefully and avoid forcing a finding into a tight opening.
Before making a second piece from a successful first trial, compare the materials and record. A small change in accent thickness or placement can change the way a piece behaves. Reuse the same verified system and keep the original notes beside the next layout; consistency makes a repeatable pair more likely.
What mistakes should you avoid?
- Choosing by appearance. Similar color or thickness does not prove that two glasses are compatible. Check manufacturer information and system labels.
- Relying only on COE. COE matters, while viscosity and softening points influence movement and bonding during a firing.
- Using a schedule from an unlike load. Thickness, kiln, and arrangement matter. Follow relevant guidance and test carefully.
- Leaving a weak edge. A hole or narrow neck too close to an edge can create a vulnerable area. Design around attachments from the start.
- Changing multiple things at once. When a test behaves unexpectedly, isolate variables so the next trial teaches you more.
- Opening the kiln too soon. Let the load cool as directed to reduce the chance of thermal stress.
For material planning, it can help to compare a few representative components before settling on a design. A small, simple pendant made from a verified system is a more manageable first trial than a complex stack with several unknown effects. Once the base approach works, add one new design feature at a time.
Frequently asked questions
Can I fuse glass from different COE systems together?
Do not assume two different systems are compatible. Use materials identified as compatible by the manufacturer, and follow specific instructions for any approved combination. Similar COE numbers alone do not prove that two glasses will fuse safely.
Does matching COE guarantee a successful fuse?
No. COE is an important compatibility measure, but viscosity, softening behavior, thickness, firing conditions, and cooling also affect the outcome. Follow product guidance and test unfamiliar combinations.
Can I use any glass sheet for jewelry?
No. Choose glass intended for the process and compatible with the other components. A sheet intended for another glass-art technique may not be appropriate for kiln fusing.
How do I know when a piece is ready to wear?
Wait until the kiln has cooled according to its instructions, then inspect the piece for cracks, sharp edges, weak areas, or poorly bonded accents. Finish and attach hardware only when the glass is sound.
Should I make a test before a full jewelry design?
A small, representative test is useful when you change materials, thickness, layout, or a surface effect. It helps you evaluate your process, but it does not replace compatibility information from the glass maker.
Find supplies for your next fused-glass project
With verified compatible materials, a balanced design, and a controlled firing and cooling process, you can make glass jewelry with greater confidence. Keep notes on each test, inspect finished pieces carefully, and build more complex designs only when the materials and process are understood.
Make Santa Fe Wiki’s Getting Started in Glass Fusing guide warns that incompatible glass can crack or fail after firing, reinforcing the importance of checking compatibility before combining materials.