
Long before modern kilns, ancient artisans were melting sand and minerals to create stunning glass beads used as currency and symbols of status. When you begin your journey with glass jewelry, you’re connecting with a craft that is thousands of years old. While our tools have become more precise, the fundamental process of transforming raw material into beautiful adornment remains. This guide bridges that rich history with modern practice. We’ll cover the essential information you need to get started today, including how to select the right glass for jewelry making, what tools are necessary for a home studio, and the techniques for creating durable, beautiful pieces.
A Brief History of Glass in Jewelry
It’s easy to think of glass jewelry as a modern trend, but its roots stretch back thousands of years. Long before we had electric kilns and precision tools, ancient artisans were melting sand to create beautiful, colorful adornments. The journey of glass in jewelry is a fascinating story of innovation, artistry, and trade that has shaped cultures across the globe. From the earliest simple beads used for decoration and currency to the complex fused glass pendants and dichroic earrings we create today, glass has always been a medium for human expression. Understanding this rich history can give you a deeper appreciation for the materials you work with every day and connect you to a long line of creators who came before.
From Ancient Beads to Modern Art
The Origins in Egypt and Venice
The story of glass in jewelry begins in ancient civilizations like Egypt and East Asia, where the first glass beads were crafted. These early pieces were more than just decoration; they were symbols of status and wealth. By the late 1400s, glass beads had become so valuable they were used as a form of currency to trade for goods and resources across Africa, Asia, and the Americas. The epicenter of this craft was Venice, Italy, where, beginning in the 1300s, artisans developed secret techniques for creating intricate and vibrant glass. Their work set a global standard for quality and design, making Venetian glass a prized possession around the world and cementing its place in the history of adornment.
Glass Beads as Currency and Craft
The craftsmanship of glass beads truly flourished in Venice, where artisans perfected methods like glass blowing and winding to create stunningly detailed designs. This tradition of excellence continued to evolve, and by the 1900s, Czech glass beads gained fame for their exceptional quality and intricate patterns, which remain popular with designers today. The evolution from simple, wound beads to precisely faceted gems illustrates a constant drive for innovation. These historical techniques laid the groundwork for the amazing things modern artists can do, whether it’s creating complex patterns with COE90 glass or experimenting with colorful frit. The legacy of these early masters lives on in every piece of glass jewelry made today.
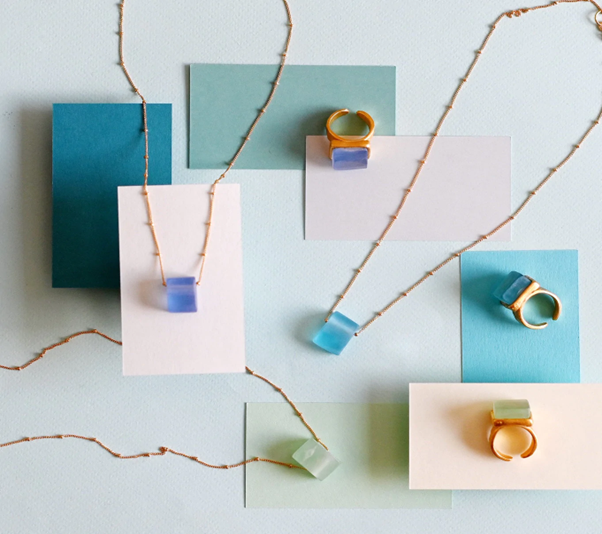
What Jewelry Can You Make with Art Glass?
- Glass and lac bangles
- Glass beaded necklace, bangles, and earrings
- Toughened glass pendants
- Painted glass earrings and necklaces
- Jewelry boxes made of stained or etched glass
And the list goes on! There can never be enough ideas for jewelry making. All you need is a reliable resource for art glass jewelry supplies.
Common Types of Glass Used in Jewelry Making
When you start exploring glass jewelry, you’ll quickly see just how many different types of glass are available. Each one offers a unique look and requires a specific set of techniques to master. From vibrant, layered pieces fired in a kiln to delicate beads shaped by a torch, the glass you choose will define your creative process and the final look of your jewelry. Understanding these common types is the first step in finding the style that best suits your artistic vision. It’s a fun process of discovery that lets you experiment with color, texture, and light to create truly one-of-a-kind wearable art. Think of it as choosing your palette; some artists are drawn to the dazzling, color-shifting effects of dichroic glass, while others prefer the organic, earthy feel of sea glass. There’s no right or wrong answer—only the medium that speaks to you and allows you to bring your ideas to life.
Kiln-Formed Glass
Kiln-formed glass jewelry is created by heating glass in a kiln to shape, fuse, or slump it into a desired form. This method is perfect for making custom pendants, earrings, and cabochons with incredible depth and color. Making custom glass jewelry from scratch involves several steps, from cutting and arranging the glass to firing it at precise temperatures. To get started, you’ll need a reliable kiln and compatible glass sheets, like COE90 or COE96 glass, which are designed to expand and contract at the same rate to prevent cracking. This technique opens up a world of possibilities for layering colors and creating intricate patterns that are impossible to achieve with other methods.
Dichroic Glass
If you’ve ever seen a piece of glass jewelry that shimmers with different colors as it moves, you were likely looking at dichroic glass. This captivating material is coated with micro-layers of metals and oxides, which gives it the ability to display two or more different colors depending on the viewing angle. Dichroic glass is a fantastic choice for creating statement pieces that catch the eye and spark conversation. It’s available in a huge variety of patterns and colors, making it a go-to for artists who want to add a touch of magic and brilliance to their work. You can use it as a top layer to add sparkle or cap it with clear glass to create a sense of depth.
Fused Glass
Fused glass is made by joining two or more pieces of glass by heating them in a kiln until they melt and fuse together. This technique allows you to layer different colors and shapes to build complex designs. Fused glass can be heated and shaped into many forms, comes in lots of colors, and is a versatile medium for jewelry. You can work with large sheets of glass, tiny pieces called frit, or thin rods called stringers to add detail and texture. Once fused, the piece can be shaped further by slumping it over molds to create curved forms. The result is a solid, beautifully blended piece that’s perfect for pendants, earrings, and bracelet components.
Torch-Worked and Specialty Glass
Beyond the kiln, many artists use a torch to create stunning glass jewelry. This technique, often called lampworking, offers precise control for crafting detailed items like beads and small sculptures. It involves melting glass rods in the flame of a torch and shaping the molten glass with tools and gravity. In addition to torch-working, there are other specialty glasses that artists incorporate into their jewelry, some of which don’t require any heat at all. These different methods allow for a wide range of artistic expression, from intricate, flame-sculpted beads to organic, found-object designs that tell a unique story.
Lampwork and Murano Glass
Lampwork glass is made by melting glass rods in a flame and shaping them into beads or other forms. This age-old technique allows for incredible detail, letting artists create miniature worlds inside a single bead. Murano glass, from the Venetian island of Murano, is perhaps the most famous example of lampworking. Known for its exceptional quality and artistic designs, Murano glass is often used in high-end, unique jewelry pieces. Mastering lampworking takes patience and practice, but it gives you the ability to create truly custom components for your jewelry designs that are impossible to replicate with a kiln.
Sea Glass and Enamel
Not all glass jewelry starts in a studio. Sea glass is often used in jewelry making for its unique, frosted appearance and is typically collected from beaches after being tumbled by the waves for years. Each piece is one-of-a-kind, with a soft texture and muted color that’s perfect for creating earthy, organic jewelry. Another technique is enameling, which involves fusing powdered glass onto a metal surface with heat. This process adds vibrant, durable color to metal jewelry pieces like pendants and earrings, combining the beauty of both materials into a seamless, artistic whole.
The Pros and Cons of Working with Glass
Glass is a stunning and versatile medium for jewelry making, but like any material, it comes with its own set of benefits and challenges. Its ability to capture light and color is unmatched, allowing for brilliant, eye-catching designs that can’t be replicated with other materials. However, it also requires specific tools, knowledge, and a bit of patience to work with successfully. Understanding both the advantages and the potential hurdles will help you decide if glass is the right fit for your creative projects and prepare you for the journey of turning this beautiful material into wearable art. It’s helpful to think of it less as a list of pros and cons and more as a realistic look at the craft. Every artist finds their preferred medium by learning its quirks and possibilities. Glass is no different; its challenges are simply part of the process of mastering a material that offers incredible creative rewards for those who stick with it.
Advantages of Glass as a Medium
One of the biggest draws of working with glass is its incredible versatility. Glass beads have been popular for a long time because they can be heated and shaped into many forms, come in lots of colors, and are often more affordable than crystal. The creative possibilities are nearly endless. You can fuse layers to create depth, use dichroic glass for a dazzling shimmer, or shape it with a torch for intricate detail. This flexibility allows you to produce everything from simple, elegant pendants to complex, multi-colored statement pieces, ensuring your jewelry will always stand out in a crowd.
Challenges to Keep in Mind
While the creative potential of glass is huge, it’s important to be aware of the challenges you might face. Glass requires a thoughtful approach and a willingness to learn specific techniques to handle it safely and effectively. The material can be unforgiving if not treated correctly, and there’s a learning curve when it comes to understanding firing schedules, compatibility, and finishing methods. However, with the right preparation and a bit of practice, these challenges are easily managed, and the beautiful results are well worth the effort you put in.
Fragility and Weight
The most obvious challenge of working with glass is its delicate nature. Glass is very fragile, chips and breaks easily, and can be heavy, making it best for small pieces like earrings and pendants rather than large, chunky bracelets. To create more durable jewelry, it’s essential to properly anneal your pieces, which is a process of slowly cooling the glass in a kiln to relieve internal stress. This crucial step significantly strengthens the glass by removing weak points, making it much more resilient and suitable for everyday wear. Think of it as the final, strengthening breath for your creation.
Tool Requirements
Getting started with glass jewelry requires an investment in specialized equipment. Working with glass requires expensive diamond tools to cut or shape it when it’s cold. If you plan on fusing, slumping, or annealing, a kiln is an essential piece of equipment. You’ll also need safety gear, like protective eyewear, and various hand tools for cutting and shaping. While the initial setup can seem like a lot, having the right tools not only makes the process safer and more enjoyable but also gives you the ability to execute your creative vision with precision and confidence.
Your Essential Glass Jewelry Supplies Checklist
- Glass – No hard guesses to tell the most important thing you will need for making jewelry. It is art glass, indeed! There are limitless types of art glass you can use for making earrings, necklaces, bracelets, rings, anklets, and other jewelry pieces.
- Dichroic glass – This is a unique glass, especially because of its glowing properties. Dichroic art glass alone however does not work. Club other elements and see the magic unfolding.
- Fused glass – This kind of glass jewelry looks very beautiful. In fused glass jewelry, tiny pieces of different glasses are melted together using the kiln. The resulting piece looks aesthetically pleasing.
- Frosted glass – Frosted glass or sandblasted glass, or acid-etched glass is an opaque glass. Beautiful pendants and bracelets can be made using it.
- Luminescent glass – It is a unique art glass used for making rings and bracelets usually.
-
- Bails – Another prerequisite for making jewelry is bails. These are used to connect pieces of beads or glasses into beautiful necklaces, bracelets, and anklets. There are different metals of jewelry bails such as silver and nickel.
- Mold – Casting molds come in different shapes and designs. Melted glass can be transformed into beautiful pieces of jewelry using molds. Pendant designs, rings, and earrings are all made using this.
- Kiln – There are various jewelry-making processes like shaping, soldering, polishing, and reinforcing where an olympic glass kiln is required. The kiln provides the required amount of heat to the metal, gemstones, or even glass. This makes the jewelry durable and sturdy.
- Paints – Glass paints, mostly acrylic glass enamel is used in jewelry making. Some really cool pendants, bracelets, rings, and earrings can be created using glass paint. Quirky and colorful jewelry is a hot favorite for tourists.
- Other Art Tools – Among these important items, there are some other tools necessary for jewelry making business. Glass adhesive, sifter, shelf paper for kiln cleaning, Glastac gel, copper wire, and many others. These tools may not be the main element but play a crucial role in the jewelry making process.
Sourcing Your Supplies
Once you have your ideas and essential tools lined up, the next big step is finding the right glass. The quality of your materials directly impacts the final look and durability of your jewelry, so this isn’t a step to rush. Finding a supplier you trust is key, especially when you’re working with techniques like glass fusing where compatibility is everything. A dedicated art glass retailer will offer a wider selection of specialized glass than a general craft store and provide the consistency you need to create professional-quality pieces. This ensures that when you reorder your favorite shade of blue, you get the exact same product every time.
Tips for Buying Glass Online
Shopping for glass online opens up a world of color and texture, but it can also feel a bit overwhelming. First, always pay attention to the COE, or Coefficient of Expansion. This number tells you how much the glass will expand and contract when heated. For fusing projects, all your glass must have the same COE to prevent cracking. Most artists work with either COE90 or COE96 glass, so make sure you stick to one type within a single piece. Think of it as the golden rule of glass fusing!
Next, explore the variety available. Don’t just limit yourself to sheet glass. You can create incredible depth and detail using frit (crushed glass), stringers (thin rods), and dichroic glass, which has a stunning metallic shimmer. A good online store will have clear photos and detailed descriptions of each product, including its size, thickness, and COE. Reading these details carefully helps you visualize how the glass will work for your project. When you find a supplier with a great selection and clear information, you can confidently experiment with different materials to find your unique artistic style.
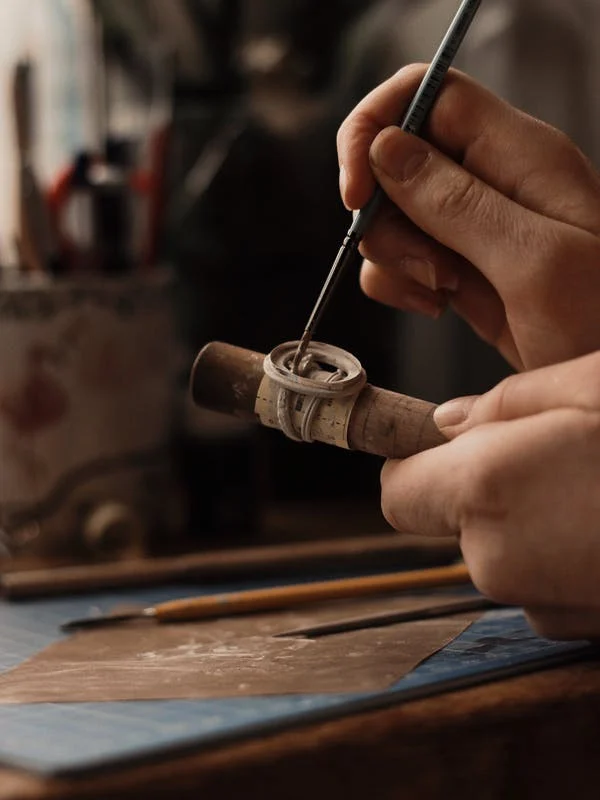
The Process: Creating Glass Pieces from Scratch
Turning raw glass into a beautiful piece of jewelry is a multi-step journey, but it’s one of the most rewarding things you can do as an artist. The basic idea is to take different pieces of glass, melt them together into a new, solid form, and then refine that form into something wearable. It involves heat, shaping, and a bit of patience, but the result is a completely unique creation. Whether you’re making a simple pendant or a complex pair of earrings, the fundamental process remains the same. Let’s walk through the main stages of bringing a glass jewelry piece to life, from the initial design to the final polish.
Preparing and Firing in a Kiln
The magic really starts at the kiln. Before you even turn it on, you need to prepare your kiln shelf. This usually involves applying a special separator or kiln wash to the surface, which prevents the molten glass from sticking permanently. Once your shelf is ready, you can arrange your glass. You might use large pieces of compatible glass, like COE90, or sprinkle on finely ground colored glass called frit to create patterns. The kiln then heats up, melting the glass until it flows together and fuses into a single, solid piece. This firing process is what transforms your separate components into a cohesive design.
Shaping and Finishing Raw Glass
After your piece has been fired and has cooled completely—a process called annealing—it’s time for shaping and finishing. The edges will likely be sharp or uneven, so the next step is to grind them down for a smooth, professional look. A glass grinder is the perfect tool for this job. This stage is where you refine the final shape of your pendant or earring, ensuring it’s comfortable to wear and visually balanced. Taking the time to carefully finish your piece is what separates handmade work from truly high-quality, artisanal jewelry. This process requires several steps, but each one contributes to the final beauty of your creation.
Safety First: Essential Precautions for Glass Artists
Working with glass is incredibly fun, but it’s important to make safety a top priority in your studio. Just like a chef respects their knives, a glass artist needs to respect their materials and tools. Creating a safe workspace isn’t complicated; it’s about building good habits that protect you from the two main hazards: fine glass dust and sharp edges. When you’re cutting, grinding, or even just handling raw glass, taking a few simple precautions will ensure you can focus on your creativity without any worries. Think of your safety gear as just another one of your essential artist tools—it’s there to help you do your best work for years to come.
Protecting Yourself from Dust and Debris
When you grind or cut glass, you create tiny, airborne particles of glass dust. It’s crucial to keep this dust out of your lungs and eyes. Always wear the proper personal protective equipment (PPE). A quality respirator or dust mask is non-negotiable to protect your respiratory system. Similarly, safety goggles or a full face shield will protect your eyes from any flying debris or sharp fragments. It might feel like an extra step, but it’s a habit that will protect your long-term health and allow you to continue creating safely. Make it a rule in your studio: no grinding without your gear on.
Working Safely with Water and Grinders
Most glass grinders are designed to be used with water, and for a very good reason. The water acts as a coolant for the grinder bit, but more importantly, it captures the fine glass dust and turns it into a manageable slurry, preventing it from becoming airborne. This dramatically reduces the risk of inhalation. Always make sure your grinder’s reservoir is full and that water is flowing over the bit before you start working. It’s also a good idea to work in a well-ventilated area to further disperse any potential dust. Since you’re mixing water and electricity, be sure your grinder is plugged into a GFCI outlet for added protection.
Finishing Touches: Turning Glass into Wearable Art
You’ve successfully fired and shaped your glass piece—now it’s time for the final transformation. This is where your glass cabochon becomes a functional, wearable piece of jewelry. The goal is to add a finding, which is the component that allows you to hang your piece from a chain, attach it to an earring hook, or connect it to a bracelet. There are a few different ways to do this, and the method you choose will influence the final style of your jewelry. The most common approaches are using bezels or bails to frame the piece or drilling small holes to allow for wire wrapping.
Using Bezels to Protect Edges
A bezel is a thin metal band that you can wrap around the edge of your glass piece. It creates a clean, finished frame that not only looks professional but also protects the glass edges from chipping. Once the bezel is secured, you can solder a loop or “bail” onto it, which is what you’ll thread the necklace chain through. This method gives your jewelry a very polished and secure setting, making it a great option for pendants and rings. It’s a classic technique that provides both durability and a touch of metallic elegance to your glass art.
Drilling Holes for Wire Wrapping
If you prefer a more organic or minimalist look, you can skip the bezel and instead drill a small hole directly into the glass. Using a tiny, diamond-tipped drill bit, you can create a clean hole for threading wire or attaching a jump ring. This technique is perfect for creating a simple bail with wire or for incorporating the glass piece into a more intricate wire-wrapped design. Drilling requires a steady hand and a bit of practice, but it opens up a whole new world of design possibilities, allowing the glass itself to be the star of the show without a metal frame.
Displaying Your Finished Work Safely
Once you’ve created a collection of beautiful glass jewelry, you’ll want to show it off, especially if you plan on selling your work at art fairs, in galleries, or online. A professional display not only makes your work look more appealing but also keeps it safe. Potential customers will want to see your pieces up close, so having them in a secure yet accessible case is key. Investing in a quality display is an investment in your business. It signals to buyers that you value your own work, which in turn encourages them to value it too. A well-built, secure case protects your hard work from theft and accidental damage.
Choosing the Right Glass for Showcases
When it comes to the display case itself, the type of glass or acrylic you use matters. For maximum security, especially in a retail or market setting, many professional jewelers recommend using laminated glass. This type of glass is made with a layer of vinyl sandwiched between two pieces of glass. If it breaks, the vinyl layer holds the shards together, making it much more difficult for someone to quickly smash and grab your items. While it’s a bigger investment upfront, a secure showcase built with strong materials gives you peace of mind, allowing you to focus on talking with customers and sharing the story behind your art.
Ready to Start Your Glass Jewelry Business?
Frequently Asked Questions
What’s the difference between COE90 and COE96 glass, and why does it matter so much? Think of the COE, or Coefficient of Expansion, as the glass’s team number. It tells you how much the glass will expand when heated and shrink when cooled. For a fused piece to be successful, all the glass you use must be on the same team—either all COE90 or all COE96. If you mix them, they’ll shrink at different rates as they cool, creating stress that will almost certainly cause your beautiful piece to crack.
Do I absolutely need a kiln to start making glass jewelry? While a kiln is essential for fusing and slumping, it’s not the only way to begin your journey with glass. You can start by creating beautiful pieces using sea glass and wire wrapping, or by designing with pre-made lampwork beads. These methods don’t require a large initial investment in equipment and are a great way to develop your design skills and get a feel for working with glass as a material.
How can I make my glass jewelry more durable and less fragile? The key to strong glass jewelry is a process called annealing. This is the controlled, slow cooling of your piece inside the kiln after it has been fired. Rushing this step or cooling the glass too quickly leaves stress inside the piece, making it fragile and prone to breaking. A proper annealing schedule relieves that internal stress, resulting in a much stronger and more resilient piece of wearable art.
What’s the best way to get a smooth, professional-looking edge on my glass pieces? After your glass comes out of the kiln, the edges can be sharp and a bit uneven. The best tool for refining them is a glass grinder. Using the grinder with a steady flow of water will allow you to gently grind down the sharp edges, creating a smooth, clean, and comfortable finish. This step is what truly elevates a piece from a rough creation to polished, professional-quality jewelry.
I feel overwhelmed by the long list of supplies. What are the absolute must-haves to start with fused glass? It’s easy to get carried away, but you only need a few key things to get started. Your non-negotiables are a reliable kiln, a basic glass cutter and running pliers, and your safety gear, especially protective eyewear. Beyond that, just choose your glass. Pick one COE to work with—either 90 or 96—and grab a few colors of sheet glass and maybe some frit to experiment with. You can always add more specialized tools and materials as you grow.
Key Takeaways
- Master Glass Compatibility: For kiln-fused jewelry, always use glass with the same COE (like all COE90 or all COE96) in a single project. This is the most important rule for preventing cracks and creating strong, beautiful pieces.
- Prioritize a Safe Workspace: A safe studio is a creative one. Always wear a respirator and safety glasses when cutting or grinding glass, and ensure your grinder is used with water to control dust.
- Perfect Your Finishing Technique: The final steps elevate your work from a hobby to a craft. Properly annealing glass in the kiln adds durability, while grinding edges and adding findings like bails or bezels creates a polished, professional look.
Related Articles
- Nano Beads Casting Mold | Art Glass Supplies – Colour De Verre
- Aanraku Snap Necklace w Chain and One Flat Disk | Art Glass Supplies – Jewelry Supplies
- Aanraku Snap Pendant with One Snap Disc | Art Glass Supplies – Jewelry Supplies
- 8″ Mini Square Casting Mold | Art Glass Supplies – Pot & Screen Melts
- Holey Journey Circle Kiln Casting Mold | Art Glass Supplies – Casting Mold