
That clear vase in your cabinet or the plain window in your kitchen holds so much potential. With a bit of color, it can become a statement piece. But getting a professional-looking result depends entirely on the products you use. A paint that works for a suncatcher might not be right for a dinner plate. To get the look you want, you need to understand your options. This guide demystifies the process. We’ll cover everything from opaque enamels to transparent stains, helping you select the best paint for glass and master the simple steps to make your artistic vision a reality.
Trying your hand at glass painting for the first time? It may sound complicated but it is not. Painting becomes even more fun if you have some outstanding glass paints and enamels.
In this blog, we will unravel some of the most useful tips and tricks for you to ace glass painting. 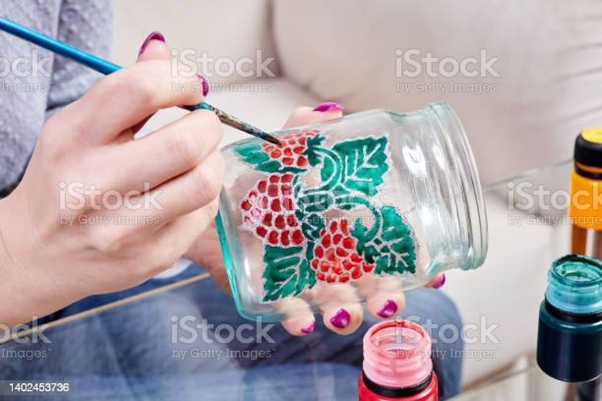
Paint the Glass Like a Pro!
Read these tips to create a beautiful glass art;
- Clean Glass – Always use a clean glass surface for painting. The glass should not have any cracks or chips. Avoid using recycled glass for painting. The paint will only stick to the surface if it is free from dust and oil. Wash the glass with warm soapy water or rubbing alcohol. Wipe it off with a lint-free cloth. Avoid touching it on the areas that are to be painted.
- Tracing Method – You can use stencils to create a pattern on the glass. Use a stencil for tracing design on glasses, vases, and jugs. Another way is to paste the pattern on the inner side of the glass and then trace it from the outside. You can use this for glass frames, windows, and doors. Keep in mind to tape off the stencil before the paint dries.
- More Coats – Painting more than one coat is always a good idea. Especially, for lighter colours, apply more coats to get an opaque design. Apply the second coat only when the first coat is fully dried.
- Be Careful – While painting glass crockery, do not paint the areas that will come in contact with food, your mouth, or your hands. Paint a little lower than the glass edges or areas where it is not in direct contact with your mouth or hands. For glass plates, paint on the backside.
- Light Pressure – Use very light pressure on the brush while painting. Putting too much pressure on the brush tip will wipe off the paint. Use gentle strokes to deliver the paint properly on the surface.
- Direction – Use uni-directional strokes while painting on the glass. This gives your design a clean and smooth finish without the appearance of paint strokes.
- Curing Tips – Do not wash your glassware before curing it. Either air dry it or bake it to make the paint permanent. Avoid preheating the oven as it will cause cracks in the glass. Every glass paint has specific curing instructions. Follow those instructions for curing. Use nitrile gloves to handle the glass before placing it in the oven to avoid fingerprints. Once the curing is complete, leave the glass in the oven to cool down.
- Supplies and Tools – Using the right brushes that do not leave bristle marks is important for clean art. Brushes with natural bristles are recommended over those with synthetic bristles.
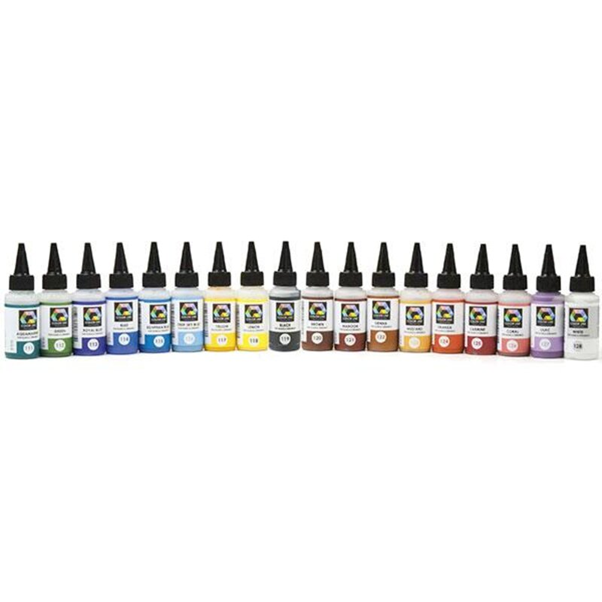
Which Glass Paint to Buy
Basic water paints do not stay on the glass surface. So, there are different glass paints that work on them.
For a Durable, All-Purpose Finish: Acrylic Enamel
This paint sticks to non-porous surfaces like ceramic tiles, granite, and glass. It is a blend of acrylic and oil-based paint. This particular element makes it the best choice for glass painting projects.
The Go-To Option: Specially Formulated Acrylics
This paint is specially curated with chemical ingredients to stick onto glass surfaces. While purchasing, check for a wine glass icon on the bottle cap or label.
For a Transparent, Stained-Glass Look: Glass Stains
If you love the luminous quality of traditional stained glass, then glass stains are the perfect medium for your project. Unlike opaque paints, these are specifically designed to be transparent, allowing light to shine through your artwork. This makes them the ideal choice for painting on windows, suncatchers, or glass bottles that you want to place in a sunny spot. When the light hits your piece, the colors will glow beautifully, mimicking the effect of authentic stained glass. They are easy to work with and can be blended to create new shades, giving you plenty of creative freedom for your designs.
For a Matte Finish: Chalk Paint
For a completely different aesthetic, chalk paint offers a beautiful, soft matte finish. If you’re aiming for a rustic, shabby-chic, or vintage look, this is an excellent option. Chalk paint adheres surprisingly well to glass surfaces, giving you an opaque, chalky texture that can transform a simple jar or vase into a decorative statement piece. It’s worth noting that while it sticks well, it can be more prone to chipping than enamel-based paints. To protect your finished work, especially if it will be handled often, consider applying a clear sealant over the top once the paint has fully dried.
For When You Can’t Use an Oven: Oil-Based Paints
Sometimes, heat-curing your glass project just isn’t practical. Your piece might be too large for a conventional oven, or you may not have access to a dedicated kiln. In these situations, oil-based paints are a fantastic alternative. These paints are known for their excellent adhesion and durability on non-porous surfaces like glass. They don’t require any heat to become permanent; instead, they air-cure over time to create a strong, lasting finish. This makes them a reliable choice for creating permanent designs on items that can’t be baked, ensuring your artwork stays put without a trip to the oven.
For Outdoor Projects: Solvent-Based Paint
These paints are used for outdoor projects such as glass windows or doors. Solvent-based paints emit toxic gases. So, ensure you wear your protective gear while working with these.
Don’t Like Brushes? Try Glass Paint Markers
Glass painting markers come in two forms; water-based and oil-based. Use oil-based markers for outdoor projects as they are more durable. These pens work great for artists who are not very adept with paintbrushes.
Permanent and Fade-Resistant: Oil-Based Markers
If you’re creating a piece that needs to last, oil-based markers are a fantastic choice. They are perfect for drawing crisp outlines, adding fine details, or writing text on your glass projects. Because the marker format gives you excellent control, you can achieve a level of precision that can be tricky with a brush. Once the paint has fully cured, many oil-based marker designs become incredibly durable and fade-resistant. Some can even be placed in the dishwasher, making them ideal for personalizing mugs, glasses, or plates that you intend to use regularly. Just be sure to work in a well-ventilated space, as they can have a strong odor.
Durable with a Gloss Finish: Acrylic Paint Pens
For a vibrant, glossy look, consider acrylic paint pens made specifically for glass. It’s important to note that these are not the same as your standard craft acrylics; they are formulated to bond permanently to non-porous surfaces. These pens are a favorite among many artists because they dry relatively quickly, which is a huge advantage when you’re working on a project with multiple colors or layers. They offer the best of both worlds: the brilliant color of acrylic paint with the control of a marker. Cleanup is also simple with soap and water before the paint cures, making them a very user-friendly option for achieving a professional, durable finish.
For Practice or Temporary Designs: Water-Based Pens
Not every project needs to be permanent. Water-based markers are the perfect tool for beginners who are still getting comfortable with glass painting or for creating temporary designs. Think seasonal decorations on a window or labeling jars in your pantry. The biggest benefit is that they can be washed off easily with a damp cloth, which means you can practice your technique without any pressure. If you make a mistake or simply want to change the design, you can wipe the surface clean and start fresh. This makes them an excellent, low-commitment way to plan your artwork before using permanent paints.
For a 3D, Stained-Glass Effect: Outliners
This paint comes in different tubes and bottles. It has thicker consistency and helps in creating a 3D effect. These come in highlighting colours to give a stained glass look, such as silver, black, gold, copper, and bronze.
Expert Recommendations for Glass Paints
Choosing the right paint is the first step to getting the look you want. Not all paints are created equal, and the one you pick will depend entirely on your project’s goals. Are you looking for a solid, vibrant color, or something more delicate and translucent? Do you need a finish that can withstand the elements, or is your piece purely for indoor decoration? Understanding the different types of glass paint will help you make the best choice for your artwork and ensure your finished piece looks exactly as you imagined. Let’s look at a couple of popular options that deliver fantastic results for different styles.
Best for Beginners: Opaque Enamel Paints
If you’re just starting out, acrylic enamel paints are your best friend. These paints are specially formulated to adhere well to non-porous surfaces like glass, creating a durable and opaque finish. Think of them as a hybrid between acrylic and oil-based paint, giving you the best of both worlds: easy cleanup and a strong bond. They are perfect for creating bold, solid designs on mugs, vases, or decorative plates. Because they provide excellent coverage, you don’t have to worry as much about visible brushstrokes, which makes them incredibly forgiving for newcomers. They give you a straightforward way to add vibrant, lasting color to your glass projects without a steep learning curve.
Best for a Frosted Look: Transparent Gel Paints
For a more ethereal or delicate effect, frosted and etching paints are the way to go. These paints create a soft, semi-transparent, textured look that mimics the appearance of etched glass. This style is perfect for adding a touch of elegance to candle holders, wine glasses, or window panes where you want light to pass through. Instead of completely covering the glass, these paints add a subtle layer of texture and translucency. This allows you to play with light and shadow, creating sophisticated designs that feel integrated with the glass itself rather than just sitting on the surface. It’s an excellent choice for decorative pieces that require a more refined touch.
How to Paint on Glass: A Step-by-Step Guide
Painting on glass is a rewarding process that allows you to transform an ordinary object into a piece of art. The key to a professional-looking finish isn’t some hidden secret; it’s all about proper preparation and patience. By following a few simple steps, you can ensure your paint applies smoothly, adheres permanently, and looks stunning for years to come. We’ll walk through the entire process, from cleaning your glass to curing your final design. Whether you’re decorating a simple jar or creating a complex piece on a sheet of stained glass, these fundamental steps will set you up for success.
Step 1: Prepare Your Glass Surface
You can’t build a great house on a weak foundation, and you can’t create lasting glass art on a dirty surface. This is the most critical step, so don’t skip it! Any dust, grease, or fingerprints will prevent the paint from sticking properly. Start by washing your glass piece thoroughly with warm, soapy water. For an even deeper clean, you can wipe it down with rubbing alcohol. Once it’s clean, dry it completely with a lint-free cloth to avoid leaving behind any fuzzy bits. From this point on, try to handle the glass by the edges or wear gloves to avoid transferring oils from your skin back onto the painting surface.
Step 2: Apply Your Design
Now for the fun part! If you’re not comfortable painting freehand, stencils are a great way to create clean, precise designs. You can also print out a pattern, tape it to the inside of the glass, and simply trace the lines from the outside. This trick works perfectly for jars, glasses, and frames. As you begin to paint, remember that several thin coats are always better than one thick, goopy one. A thick layer of paint is more likely to peel or show brush marks. Apply a thin, even coat and let it dry completely before adding the next. This technique creates a much smoother and more durable finish.
Step 3: Cure the Paint for Permanence
Curing is the process of hardening the paint to make it permanent and durable. Most glass paints require curing, and you can typically do this in one of two ways: air drying or oven baking. Air drying takes much longer—sometimes up to 21 days—but is the only option for items that can’t go in an oven. For a faster, more durable finish, oven curing is the way to go. Always follow the specific time and temperature instructions on your paint bottle, as they can vary. Artists who work with more advanced techniques like glass fusing use specialized kilns, but a conventional oven works perfectly for curing paint.
The Oven-Curing Method
The most important rule of oven curing is to never put cold glass into a hot oven. The sudden temperature change can cause the glass to crack or even shatter. Instead, place your painted piece in a cool, room-temperature oven. Set the oven to the recommended temperature and let the glass heat up along with it. Once the baking time is complete, turn the oven off but leave the glass inside to cool down slowly. Rushing this process can ruin all your hard work, so patience is key.
Step 4: Add a Protective Sealant (Optional)
For decorative items that will be handled frequently or exposed to the elements, a sealant can provide an extra layer of protection. A clear acrylic sealant, which you can find in brush-on or spray-on formulas, will guard your design against scratches and fading. It can also add a nice glossy finish to your work. However, it’s important to know that most sealants are not food-safe. If you’ve painted a plate or a mug, applying a sealant will make it unsafe for eating or drinking from, so only use it on purely decorative pieces.
Important Safety Information
When you’re creating items that might be used for food or drink, safety becomes a top priority. It’s easy to get caught up in the creative process, but taking a moment to understand the materials you’re working with is essential. Not all paints are suitable for all projects, and terms like “non-toxic” can sometimes be misleading. Knowing the difference and following a few simple safety rules will ensure that your beautiful creations can be enjoyed without any worries. Let’s clear up some common questions about the safety of painted glassware.
Food-Safe vs. Non-Toxic
It’s crucial to understand the difference between “non-toxic” and “food-safe.” Most craft paints are labeled non-toxic, which means they won’t cause harm if you accidentally get some on your skin. However, this does not mean they are safe to eat off of. A paint is only considered food-safe if it has been specifically tested and certified for contact with food. To be safe, never paint any surface that will directly touch food or your mouth. For a mug, leave a clear space around the rim. For a plate, paint on the underside so the design shows through the glass without ever touching the food.
Microwave and Oven Safety
Here’s a simple rule to remember: painted glassware should never go in the microwave. The curing process makes the paint durable for washing, but the intense heat of a microwave can cause the paint to bubble, peel, or release chemicals. Even if the glass item itself was originally microwave-safe, the addition of paint changes that. As for the oven, it should only be used for the initial curing process. Once your piece is cured and cooled, it shouldn’t be put back in the oven for cooking or reheating food. Treat your painted pieces with a little extra care to keep them safe and beautiful.
Caring for Your Painted Glassware
You’ve spent time and effort creating a beautiful piece of painted glass, so you’ll want to make sure it lasts. Proper care is simple, but it makes a huge difference in preserving the vibrancy and integrity of your design. A few adjustments to how you wash, handle, and display your art will keep it looking as good as the day you made it. Whether it’s a set of custom wine glasses or a decorative suncatcher, these tips will help you protect your work for the long haul.
Washing and Cleaning
Unless the paint label specifically states that it is top-rack dishwasher-safe after curing, you should always hand-wash your painted glassware. The high heat and harsh detergents in a dishwasher can slowly chip away at your design. When washing by hand, use a soft sponge or cloth with mild soap and cool or warm water. Avoid using abrasive scrubbers or soaking the piece for long periods. A gentle wash and a soft towel for drying are all you need to keep your painted glass clean and intact.
Display and Upkeep
How you display your art can also affect its longevity. If your piece is displayed indoors, simply keep it dusted and out of reach of curious pets or small children. For pieces that live outside, like a painted garden stake or window decoration, they’ll need a bit more protection. Constant exposure to sun and rain can cause the colors to fade and the paint to break down over time. To combat this, you may need to reapply a coat of UV-resistant outdoor sealant every year or so to keep the design protected and vibrant.
Create Beautiful Paintings!
These tips will help you master your glass painting project, even if it is your first time. Create a beautiful DIY decor for your home or an impressive project for school. There are a lot of creative glass painting ideas for you out there. Any great artwork depends on the great material and efforts put into that. Our tips and tricks will improve your efforts, and our glass paints will ensure great material. Create a masterpiece!
Frequently Asked Questions
What’s the best way to fix a mistake after the paint has started to dry? If the paint is still a bit tacky, you can often use a cotton swab dipped in rubbing alcohol to carefully wipe away the mistake without disturbing the rest of your design. For fully dried acrylic enamel, you might need to gently scrape it off with a craft knife. The key is to work slowly and carefully. To avoid this stress altogether, I always keep a wet cloth handy to wipe away fresh smudges immediately.
Why does my paint look streaky, and how can I get a smoother finish? Streakiness is a super common issue, and it usually comes down to two things: paint thickness and brush pressure. Applying one thick, heavy coat is a recipe for visible brush marks. Instead, work in multiple thin, even layers, letting each one dry completely before adding the next. Also, use a light touch. Let the brush glide across the surface rather than pressing down hard, which can push the paint around and lift it off the glass.
Can I paint on a glass item that can’t be baked in an oven? Absolutely. While oven-curing creates a very durable finish, it’s not your only option. For pieces that are too large or have components that can’t handle heat, look for air-cure paints. Oil-based paints and some specially formulated acrylics will cure to a hard, permanent finish over time just by being left to dry. Just be sure to check the paint label for its specific air-dry curing time, which can be up to three weeks.
Is it ever okay to paint the rim of a drinking glass if the paint is non-toxic? This is a great question, and the safest answer is no. The term “non-toxic” means the paint isn’t harmful if it gets on your skin, but it doesn’t mean it’s “food-safe” or approved for ingestion. To keep your beautiful glassware safe for use, always leave a clear margin of at least an inch from the rim where your mouth will touch. You can still create a gorgeous design on the rest of the glass.
Can I use different types of glass paint, like an acrylic enamel and a transparent stain, on the same project? Yes, you can definitely mix different types of paint to create unique effects, but you need to be strategic about it. A great technique is to use an opaque paint or an outliner to create a design, let it cure completely, and then fill in the sections with a transparent stain. This mimics a classic stained-glass look. The main rule is to ensure the paints are compatible and to follow the curing instructions for each type you use.
Key Takeaways
- Proper prep is the key to a lasting finish: Always start by thoroughly cleaning your glass with soapy water or rubbing alcohol. This step removes any residue or oils, ensuring the paint adheres correctly for a smooth, permanent design.
- Choose the right paint for your desired effect: Your paint selection dictates the final style. Use acrylic enamels for solid, opaque coverage, transparent stains for a luminous stained-glass look, or paint markers for adding crisp details and text.
- Cure your artwork correctly to make it durable: To ensure your design is permanent and washable, follow the paint’s curing instructions. If oven-baking, always place your piece in a cool oven and allow it to heat up and cool down with the oven to prevent the glass from cracking.
Related Articles
- Color Line Paint Pen Lacquer Red 2.2 oz – Glass Paints
- Color Line Paint Pen Silver Pearl 2.2 oz – Glass Paints
- Color Line Airbrush Medium 7 oz – Glass Paints
- Color Line Paint Pen Lilac 2.2 oz – Glass Paints
- Color Line Paint Thinner 1.76 oz – Glass Paints