
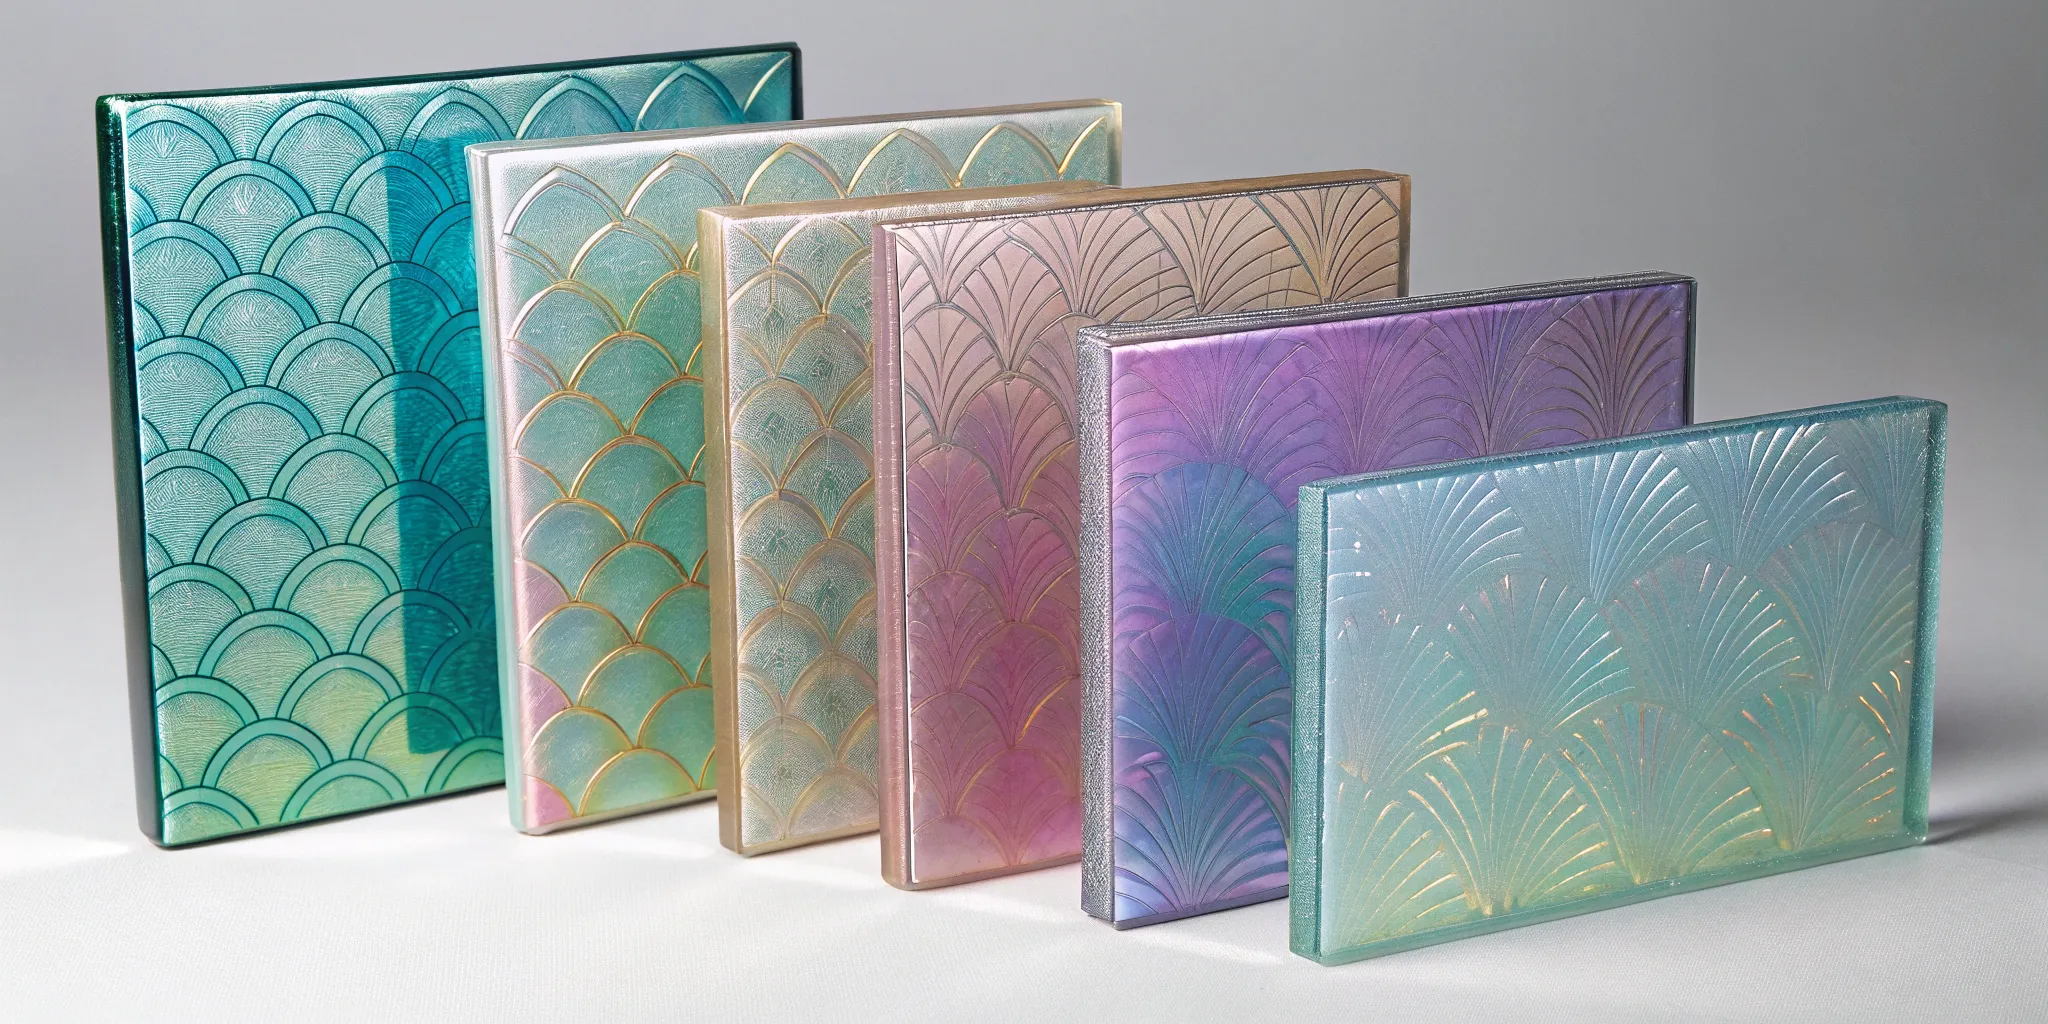
You’ve seen the brilliant, color-shifting surface of dichroic glass. It’s a marvel of science that we artists get to play with. But what if you could add your own signature to that shimmer? Etching is the art of strategically taking that science apart. By using a special cream or a physical tool, you can remove parts of that metallic coating to create custom designs. This is the key to understanding what is etched glass: it’s a subtractive process that adds incredible artistic value. You can reveal the base glass underneath for a bold contrast or even create entirely new colors, giving your COE96 glass projects a truly unique and dynamic finish.
Key Takeaways
- Understand the science behind the shimmer: Dichroic glass isn’t colored with dyes; its magical, color-shifting appearance comes from micro-thin layers of metal oxides that manipulate light. This special coating is what makes every angle offer a new, vibrant hue.
- Add custom designs by etching: You can completely personalize dichroic glass by selectively removing its metallic coating. Use etching cream with stencils to create clean patterns or a rotary tool to engrave fine details, giving you full control over the final look.
- Test first to master your timing: Etching cream works differently on every piece of dichroic glass, so there is no one-size-fits-all timing. Always test on a small scrap from the same sheet to prevent surprises and figure out exactly how long it takes to achieve your desired effect.
What Exactly Is Dichroic Glass?
If you’ve ever seen a piece of glass that seems to magically shift colors as you turn it in your hand, you’ve likely encountered dichroic glass. It’s a captivating material that appears to hold multiple colors at once, changing depending on the light and your viewing angle. This stunning effect isn’t from pigments or dyes, but from a high-tech process that feels a bit like science fiction. At its core,
This technology was originally developed by NASA for use in satellite mirrors and space suit visors, which is why it’s often called “space age” glass. Artists soon discovered its creative potential, and it has since become a favorite in the world of glass art, especially for making jewelry, pendants, and decorative tiles. The coating is what gives the glass its signature shimmer and color-shifting properties, making every piece truly one-of-a-kind. When you work with dichroic glass, you’re not just using a color; you’re using light itself to create your art. It adds a layer of depth and movement that’s hard to achieve with other materials, making it perfect for statement pieces that really catch the eye.
Why Does It Seem to Change Color?
The mesmerizing color-shifting effect of dichroic glass all comes down to physics. Those ultra-thin metallic layers on the glass surface are engineered to interfere with light waves. Think of it like a soap bubble or a drop of oil on water. As light hits the glass, the layers cause some colors to bounce off, or reflect, while allowing other colors to pass straight through. This is why the glass appears to be one color from a certain angle but a completely different color when light shines through it. The color you see is literally determined by the angle of your gaze.
Dichroic vs. Standard Glass: What’s the Difference?
So, what makes dichroic glass different from the standard colored glass you might use for a stained glass project? The main distinction is how the color is created. Standard stained glass gets its color from minerals and metallic salts mixed in when the glass is molten. The color is part of the glass itself. Dichroic glass, on the other hand, gets its brilliant colors from the thin metallic coating applied to the surface in a vacuum chamber. This advanced process is what creates the iridescent, shimmering effect that standard glass just can’t replicate. It’s a surface treatment, not an internal property, which gives it that unique, almost ethereal quality.
How Is Dichroic Glass Actually Made?
The creation of dichroic glass is a fascinating process that feels like it’s straight out of a science fiction movie. It’s not made in a typical glass furnace. Instead, it’s born in a high-tech vacuum chamber where science and artistry meet. This advanced manufacturing method is what gives dichroic glass its signature shimmer and color-shifting properties, making each piece a unique work of art before you even start your project. Understanding how it’s made can give you a deeper appreciation for the material and inspire new ways to use it in your work.
Inside the High-Tech Layering Process
Ever wonder how dichroic glass gets its vibrant, shifting colors without any dyes? The secret lies in a process that mimics nature. Think of the iridescent sheen on a butterfly’s wing or a slick of oil on water. Dichroic glass achieves a similar effect through incredibly thin layers of metal oxides. Inside a vacuum chamber, metals like titanium and magnesium are vaporized and bonded to the surface of COE90 glass in layers thinner than a human hair. The specific combination and thickness of these layers control how light is reflected and transmitted, creating the dazzling colors you see.
What Materials Make Dichroic Glass Shine?
Dichroic glass often comes with a higher price tag, and for good reason. The manufacturing process is incredibly complex and requires a significant investment. First, the specialized equipment, like the vacuum deposition chamber, is extremely expensive to build and operate. Second, the materials themselves, including precious metal oxides and quartz crystals, add to the cost. Finally, it takes highly skilled technicians who have a deep understanding of both physics and glass art to run the equipment and produce consistent, beautiful sheets of stained glass. Every piece is a testament to this intricate and costly process.
A Brief History of Glass Etching
Glass etching is a technique with deep roots, first gaining popularity in the mid-1800s where it was sometimes called “French embossing.” At its heart, it’s a subtractive art form. Instead of adding something to the glass, you’re strategically taking a tiny bit of the surface away. This process roughens the glass on a microscopic level, which changes how it interacts with light. The result is that beautiful, cloudy, and frosted appearance that provides privacy while still letting light filter through. It’s a way to draw with texture, turning a smooth, transparent surface into a canvas for intricate designs, patterns, and imagery that play with light and shadow.
Historically, achieving this effect involved some pretty intense methods. The two main approaches were acid etching and abrasive blasting, also known as sandblasting. Acid etching uses powerful chemicals to dissolve the surface of the glass, creating a very fine, satin-like finish. Sandblasting, on the other hand, uses a high-pressure stream of abrasive particles to physically chip away at the glass, which can create deeper, more sculptural effects. While these industrial methods are still used for large-scale architectural projects, the core principles have inspired the more accessible techniques that artists use in their studios today. The history of glass etching shows a fascinating evolution from industrial application to personal artistic expression.
From the 1800s to Today
In its early days, etched glass was a hallmark of sophisticated design, often seen on the doors and windows of Victorian homes and pubs. It offered a practical solution for privacy without sacrificing natural light, all while adding an element of decorative flair. You can still see beautiful historical examples in older buildings, where ornate floral patterns and lettering grace entryways and partitions. This traditional use laid the groundwork for how we think about etched glass today: as a way to add both function and beauty to a piece.
Fast forward to the present, and artists have taken this historical craft in countless new directions. The same technique once used for a pub window can now be applied to a delicate dichroic pendant or a complex, multi-layered stained glass panel. Thanks to modern products like etching creams, artists no longer need access to industrial equipment to create custom designs. This accessibility has allowed for an explosion of creativity, enabling hobbyists and professional artists alike to add personal, detailed patterns to their glasswork, transforming a simple sheet of glass into a unique piece of art.
What Is Etched Glass and How Does It Work on Dichroic?
Etched dichroic glass is simply dichroic glass that has had parts of its metallic coating removed to create patterns, textures, and new colors. Think of it as a way to add another layer of artistry to an already stunning material. By selectively taking away the dichroic coating, you can reveal the base glass underneath or even create entirely new shades where the coating is only partially removed.
This process allows you to move beyond the standard shimmer and design intricate details, from delicate lines to bold geometric shapes. Whether you use chemicals or tools to achieve this effect, etching gives you precise control over the final look of your piece. The result is a dynamic work of art with incredible depth, contrast, and personality. It’s a fantastic technique for making your glass jewelry, decorative plates, or fused art pieces truly one-of-a-kind.
Defining Glass Etching
At its heart, glass etching is a subtractive art form. When you etch dichroic glass, you’re selectively removing the thin metallic coating to create a design. This process reveals the base glass underneath for a striking contrast, or you can even create new colors by only partially removing the coating. It’s a way to add your personal touch and intricate patterns to an already beautiful material, giving you complete artistic control over the final piece. You can use stencils with an etching cream for crisp, clean lines or freehand with a rotary tool for more organic designs. This technique gives you the power to transform a sheet of COE90 glass into something completely unique.
The Difference Between Etched and Frosted
You’ve probably heard the terms “etched” and “frosted” used interchangeably, but for a glass artist, the distinction is important. Think of it this way: etching is the technique, while frosted is the look. Etching permanently alters the glass surface, usually through a chemical reaction with an acid cream or by sandblasting. This process carves your design right into the glass. The term “frosted” often just describes a translucent, hazy appearance. Sometimes, this look is achieved with a temporary vinyl film that can be peeled off, which isn’t what we do in glass art. When you etch glass, you’re creating a permanent, high-quality design with sharp details and artistic depth that a simple frosted finish can’t match.
How Does Chemical Glass Etching Work?
Chemical etching is a process that uses a corrosive substance to dissolve the metallic layers on dichroic glass. While powerful acids can do the job, they are extremely hazardous. A much safer and more accessible option for your studio is a glass etching cream. These creams work in a similar way but are gentler and easier to handle. You simply apply the cream to the areas you want to etch.
The time it takes can vary quite a bit depending on the specific piece of COE90 glass you’re working with; some might etch in seconds, while others could take up to 30 minutes. Partially etching the surface can produce surprising new colors, while completely removing the coating leaves a black, matte finish. To create specific designs, you can use stencils or other “resists” to protect parts of the glass from the cream.
Beyond Chemicals: Physical Engraving Methods
If you prefer a more hands-on approach, you can physically engrave your dichroic glass. This technique involves using a tool to scratch or grind away the metallic coating, giving you incredible control over the details. Most artists use a handheld rotary tool, like a Dremel, fitted with special diamond-coated burrs to carve into the surface. The key is to use a light touch and let the tool do the work. Pressing too hard won’t speed up the process and will only wear out your burrs faster.
Engraving is perfect for adding fine lines, unique textures, and custom patterns to your COE96 glass projects. After you’ve finished, the engraved areas will appear dull and black. You can leave them that way for a high-contrast look or fire polish the piece in one of your kilns to restore a beautiful, glossy finish.
Exploring Different Glass Etching Techniques
Beyond the etching cream and rotary tools in your studio, several other methods exist for etching glass, each offering a unique finish. Some are large-scale industrial processes, while others are clever workarounds that give you the etched look without the permanence. Understanding these different approaches can give you a broader perspective on the art of glass etching and might even inspire you to experiment with new styles. From deep, sculptural carvings to temporary frosted designs, the possibilities are vast. Let’s look at a few of the most common techniques you might encounter and see how they compare to the methods we’ve already covered.
Sandblasting and Carved Glass
If you’ve ever seen a large, frosted glass panel on a door or a shower, it was likely sandblasted. This technique uses a high-pressure stream of air mixed with an abrasive material—like sand or aluminum oxide—to erode the glass surface, creating a frosted effect. Unlike the fine detail work you can do with a rotary tool, sandblasting is fantastic for achieving a uniform, matte finish over large areas or creating bold, graphic designs with stencils. Because it requires an air compressor and a blasting cabinet to contain the abrasive material, it’s more of a professional workshop technique than a weekend DIY. The result is a permanent, durable etch that won’t chip or peel.
Creating 3D and Textured Effects
Sandblasting can also be used to create stunning three-dimensional designs through a technique called glass carving. By varying the pressure and the amount of time the abrasive hits the glass, an artist can carve away layers to different depths. This process, also known as sculpture carving, can make a design appear to float within the glass, adding incredible depth and texture. It’s a highly skilled art form that transforms a flat sheet of glass into a sculptural masterpiece with highlights and shadows that change with the light.
Historical Methods: Mold Etching and Leptat Glass
Glass etching isn’t a new invention; artists and manufacturers have been experimenting with it for centuries. One fascinating historical method is mold etching. Developed in the 1920s, this technique involves etching a design directly into a mold. When molten glass is then pressed into the mold, the pattern is transferred directly onto the glass surface as it’s being formed. This industrial process allowed for the mass production of intricately patterned glassware. It’s a great example of how artists and innovators have long sought ways to embed design directly into the material itself, making the pattern an integral part of the glass piece from the very beginning of its creation.
Non-Permanent Options: Frosted Vinyl Film
What if you love the look of etched glass but aren’t ready to make a permanent change? Frosted vinyl film is your answer. This adhesive material is designed to mimic the appearance of frosted or etched glass, and you can apply it to almost any smooth glass surface. It’s a fantastic, low-commitment option for adding privacy to a window, testing out a design idea, or creating temporary decorations for a special event. You can cut the film into any shape you like, apply it with a bit of soapy water, and then simply peel it off when you’re ready for a change. It gives you the aesthetic of etched glass without any of the permanence.
Is Etched Glass Expensive?
The cost of etched glass really depends on the method and scale of the project. If you’re talking about custom architectural installations, like a fully carved glass wall, then yes, it can be quite expensive. This is because it often involves specialty fabrication and the replacement of large sheets of glass, which drives up material and labor costs. However, for the studio artist or hobbyist, etching is one of the most affordable ways to add custom details to your work. A bottle of etching cream or a set of diamond burrs for your rotary tool is a small investment that can transform a simple piece of stained glass or a fused pendant into a high-value, personalized work of art.
The Magic of Etching on Dichroic Glass
Etching is where the real magic happens. It’s a process that takes the natural beauty of dichroic glass and adds your unique artistic touch. By selectively removing the metallic coating, you can create intricate patterns, add stunning contrast, and even reveal surprising new colors hidden just beneath the surface. This technique gives you an incredible amount of creative control, allowing you to transform a standard piece of glass into a one-of-a-kind masterpiece that is entirely your own.
Create Patterns That Shift and Shimmer
So, how does it work? An etching cream uses a chemical reaction to gently dissolve the thin metallic layers that give dichroic glass its signature shimmer. The real fun starts when you control where the coating is removed. By using “resists,” like adhesive vinyl stencils, you can protect parts of the glass from the cream. This allows you to create crisp, clean patterns, from simple geometric shapes to complex designs. What’s truly fascinating is that partially etching a surface can create entirely new colors, turning a simple piece of glass into a canvas of shifting hues.
How to Play with Contrast and Light
Dichroic glass is all about its dynamic relationship with light. Etching lets you play with this by creating a powerful contrast between the shimmering, coated areas and the plain glass underneath. When you etch dichroic glass on a black base, the exposed sections become a deep, solid black, making the remaining colors pop with vibrancy. This interplay between light and dark adds incredible depth to your finished piece. Firing the glass in a kiln after etching can also alter the colors, giving you another layer of creative control.
Uncover Hidden Layers of Color
One of the most exciting parts of etching is the element of discovery. You can take a sheet of glass that appears to be a single color and reveal a whole spectrum of hues hidden within its layers. By carefully controlling how long the etching cream sits on the surface, you can coax out different colors. If you remove the coating completely, you’ll expose the base glass for a bold, dramatic effect. This process is surprisingly quick, often producing gorgeous results in under a minute, making it a perfect way to experiment with your favorite sheets of COE 96 glass.
Ready to Start? Your Glass Etching Supply List
Alright, let’s get everything you need to start your first etching project. The good news is that you don’t need a ton of complicated or expensive equipment. Most of what you’ll use can be found at a local craft store or right here on our site. Getting all your tools and materials ready before you begin is one of the best things you can do to make the creative process feel smooth and enjoyable. When you aren’t scrambling to find a cotton swab or a roll of tape, you can stay focused on your design and have a lot more fun.
We can break down your supply list into three simple categories. First, you’ll need the etching agent itself, which is a special cream that does the work of creating the matte finish on the glass. Second, you’ll need some basic safety gear to protect your hands and workspace. This is a non-negotiable step that ensures you can create with confidence. Finally, you’ll gather your applicators and resists, which are the fun tools you’ll use to apply the cream and create your unique patterns. Think of these as your stencils and paintbrushes for this project. Having everything laid out on your workbench before you even open the etching cream will make a world of difference. It helps you move from one step to the next without interruption, letting your creative ideas flow freely. It also helps prevent simple mistakes, like realizing you don’t have the right kind of tape halfway through your design. Let’s walk through exactly what you’ll need for each part of the process.
Your Essential Etching Checklist
To get started with chemical etching, your shopping list is pretty straightforward. The key ingredient is an acid etching cream. A popular and widely available option is Armour Etch, which you can find at most major craft stores. Of course, you’ll also need your canvas: a beautiful piece of COE90 or COE96 dichroic glass. To apply the cream, you can use a variety of simple tools depending on the effect you want. A small paintbrush is great for detailed work, while a cotton swab or a small piece of a plastic sponge works well for covering larger areas. That’s really all you need for the basic process.
Safety First: Don’t Skip This Gear
Before you start any project involving chemicals, it’s important to put safety first. While etching creams like Armour Etch are formulated for hobbyist use and are much safer than industrial acids, they still require careful handling. The most important piece of safety gear you’ll need is a pair of plastic or nitrile gloves. This will protect your skin from any potential irritation. It’s also a great idea to work in a well-ventilated space to ensure you have fresh air circulating. Keeping a roll of paper towels handy for any drips or spills is also a smart move. Taking these simple precautions will give you peace of mind so you can focus on your art.
Proper Disposal of Etching Materials
Once your design is perfect, it’s time to clean up. Because etching cream is a chemical, you can’t just rinse it down the drain or toss it in the trash. Proper disposal is key to keeping your studio safe and protecting the environment. The first step is to know what you’re working with by checking the product’s label. Any leftover cream, along with used applicators and contaminated paper towels, should be collected in a sealed plastic bag or container. This material is often considered household hazardous waste. You’ll want to check your community’s local hazardous waste disposal guidelines to find out where you can drop it off safely. It’s a simple extra step that makes a big difference.
Working Safely with Sinks
When it’s time to rinse the etching cream off your glass, your first instinct might be to head to the nearest sink. Please don’t! Rinsing directly into your drain can damage your plumbing and send harmful chemicals into the water system. Instead, set up a separate rinsing station. Use a dedicated plastic tub or bucket filled with water to wash the cream off your glass piece. This keeps the chemicals contained. Once you’re done, this rinse water is now contaminated and needs to be disposed of in the same way as the leftover cream. This simple practice protects your pipes and makes cleanup much safer and more manageable.
Choosing the Right Applicators and Resists
This is where your creativity really comes into play. To create a pattern, you need to use a “resist,” which is simply a material that blocks the etching cream from touching the glass surface. Anything the resist covers will keep its original shiny finish, while the exposed glass will become etched. You have so many options here. You can use electrical tape or painter’s tape to create sharp, geometric lines. Adhesive vinyl or contact paper is perfect for cutting out more intricate shapes or letters. You can even use pre-made vinyl decals or stickers as a quick and easy resist. For a more free-form approach, you can draw a design directly onto the glass with a Sharpie pen.
Understanding Stencil Types
The key to creating a clean, intentional design with etching cream is using a “resist”—which is just a fancy word for a stencil. This material acts as a barrier, protecting the shiny dichroic surface you want to keep while exposing the areas you want to etch. You can get really creative with materials you might already have. For crisp, geometric lines, something as simple as electrical or painter’s tape works wonders. If you want to cut out more detailed shapes, letters, or flowing curves, adhesive vinyl or contact paper is your best friend. You can cut your designs by hand or use a craft cutting machine for perfect precision. For a quick and easy solution, pre-made vinyl decals or stickers also make excellent resists. Whatever you choose, the goal is the same: to create a barrier that allows you to create crisp, clean patterns with confidence.
My Favorite Techniques for Etching Glass
Once you’re ready to start transforming your dichroic glass, there are a few popular methods you can try. Each technique offers a different level of control and creates a unique effect, so you can choose the one that best fits your vision. Whether you prefer the simplicity of chemical etching or the precision of engraving, these approaches will help you add incredible depth and personality to your work. Let’s walk through three of the most common techniques for etching dichroic glass.
How to Get Started with Etching Cream
If you’re new to etching, using an acid cream is one of the most approachable ways to start. This method involves applying a glass etching cream, like Armour Etch, directly onto the dichroic surface. The cream contains chemicals that gently eat away at the top layer of the glass, creating a frosted, matte finish that contrasts beautifully with the shiny, unetched areas. It’s a relatively quick process that gives you impressive results without needing a lot of specialized equipment. You can find some great step-by-step guides that walk you through the process, from application to cleanup.
Using Resists for Intricate Designs
To take your acid etching a step further, you can use resists to create specific patterns and designs. A resist is simply any material that blocks the etching cream from touching the glass. You can use vinyl decals, contact paper, or even simple masking tape to mask off areas you want to protect. After applying your resist, you cover the entire piece with etching cream. Once you wash it off, the protected areas will remain shiny and vibrant, while the exposed glass will be etched. This technique is perfect for making crisp lines, geometric shapes, or intricate, custom designs. You can find plenty of etching and engraving inspiration to get your creative ideas flowing.
Creating a Solid Etch Design
For a really bold, high-contrast look, you can create what’s called a solid etch design. This technique is all about completely removing the dichroic coating from a specific area, which leaves behind a uniform, matte surface. Instead of creating subtle textures or new colors, your goal here is a clean block of etched glass that makes the unetched, shimmering parts of your design pop dramatically. To get this effect, just apply a thick, even layer of etching cream over the exposed glass, making sure there are no thin spots. This method is perfect for strong silhouettes or crisp geometric patterns. After etching, these pieces look fantastic when slumped into one of our glass molds to create a finished dish or pendant with a striking, professional look.
Adding Fine Details with Engraving
For artists who want to add delicate, precise details, engraving is an excellent choice. Unlike chemical etching, engraving is a physical process where you use a tool to scratch or grind away the dichroic coating. Many artists use a rotary tool, like a Dremel, with fine diamond-coated burrs to draw directly onto the glass. This gives you complete control to create fine lines, stippling effects, or even detailed illustrations. Engraving reveals the color of the glass underneath the dichroic layer, adding another dimension to your work. It’s a fantastic way to personalize your pieces with textures and patterns that are truly one-of-a-kind.
Common Etching Problems (and How to Fix Them)
Working with etched dichroic glass is an exciting process, but like any new skill, it comes with a few learning curves. Don’t worry, these are hurdles every glass artist faces. Getting ahead of them means you can spend less time troubleshooting and more time creating beautiful pieces. Let’s walk through some of the most common challenges and talk about simple, practical ways to solve them so you can etch with confidence.
Prepping Your Glass for Perfect Results
Why to Avoid Certain Glass Cleaners
The absolute key to a crisp, even etch is starting with a perfectly clean surface. Before you apply any stencils or cream, you need to make sure your glass is completely free of any oils from your fingers, dust, or lint. It might be tempting to grab your everyday window cleaner, but this is a common mistake that can ruin your project. Many household glass cleaners, especially those advertised as “fingerprint-resistant,” are designed to leave behind a thin, invisible film. While that’s great for windows, it’s a disaster for etching. This residue acts as an unintentional resist, preventing the etching cream from working properly and leading to a splotchy, uneven finish. Instead, simply clean your glass with isopropyl alcohol or soap and water, rinse it well, and dry it with a lint-free cloth for a flawless start.
How to Perfect Your Etching Time
You’ll quickly notice there’s no magic number for how long to leave etching cream on your glass. Some types of dichroic glass etch in seconds, while others might need 20 minutes or more. This happens because different glass has different protective coatings or metal layer thicknesses, which changes how quickly the cream works. The best way to handle this is to embrace testing. Always use a small scrap piece from the same sheet to see how long it takes to get the effect you want.
Tips for Consistent Color Results
The color of dichroic glass is all about how it plays with light, and etching adds another layer. A piece of etched glass will look completely different depending on its background; colors often appear much brighter against solid black. To truly understand how your finished piece will look, it’s smart to experiment. Before starting your main project, test small pieces of your COE90 glass to see how the colors etch and shift after firing in a kiln. Keeping these test tiles helps you build a personal reference library for future projects.
Working with Etching Cream Consistency
One of the first things you’ll notice about etching cream is its texture. Sometimes, the active ingredients can settle, so it’s crucial to stir the cream thoroughly before you start. Think of it like natural peanut butter; you need to mix it up to get the good stuff evenly distributed. When you apply it, aim for a thick, consistent layer. A thin or uneven coat can lead to a splotchy etch. A generous application ensures the chemicals work uniformly across the exposed surface of your glass. This consistency is key whether you’re aiming to partially etch the surface to reveal new colors or completely remove the coating for a striking matte black finish.
Limitations of Etching Cream for Large Areas
It’s also important to know the limits of etching cream. It’s fantastic for detailed patterns and designs, but it’s not the right tool for etching large, solid areas of glass. As a general rule, you’ll run into trouble on surfaces bigger than about one square inch. Trying to cover a large area will likely result in a blotchy, uneven finish where you can see every brush stroke. For those projects where you need a large, uniformly frosted surface, sandblasting is the technique you’ll want to explore. Think of etching cream as a fine-point pen, not a paint roller—it excels at details.
Beginner Mistakes to Avoid
A few simple habits can save you a lot of frustration. First, always protect your hands by wearing gloves. Second, remember the etching process doesn’t stop on its own. As soon as your timer goes off, wipe off any excess cream and wash the glass thoroughly with water. If you skip this, the cream will keep eating away at the glass and can ruin your design. And the most important rule? Always test on a scrap piece first. This single step will tell you everything you need to know about timing and color.
How to Care for Your Etched Glass Art
Once you’ve created a beautiful etched design, you’ll want to make sure it stays that way. Caring for your etched dichroic glass is all about gentle cleaning and mindful handling. The metallic coating that gives the glass its signature shimmer is delicate, but with a few simple steps, you can protect your artwork and keep it looking vibrant for years to come. These practices will help you preserve the crisp lines of your etching and the brilliant colors of the glass itself, ensuring your finished piece is something you can be proud of.
Whether you’re working with textured glass or smooth sheets, a little post-etching care goes a long way. Think of it as the final, finishing touch that honors all the creative work you just put in.
Cleaning and Maintenance Made Simple
After you’ve finished etching, the first step is to stop the chemical reaction. You’ll need to wipe off any remaining etching cream and wash the glass completely with water. If you don’t clean it well, the cream can continue to eat away at the glass, which might soften the edges of your design. You may also notice the etched areas look a bit dull. To bring back that beautiful gloss, you can fire polish the piece by carefully heating it in one of your kilns. This process smooths the surface and restores its shine. Finally, remember to clean your brushes and tools thoroughly to keep them in good shape for your next project.
Is Etched Glass Dishwasher Safe?
This is a great question, especially if you’re creating functional art like plates or glasses. For pieces etched with a cream, the answer is generally yes. The design created by the cream is permanent and becomes part of the glass itself, so it won’t wash off in the dishwasher. However, the real consideration isn’t the design, but the integrity of the glass.
If you’ve used a physical method like engraving or sandblasting, it’s a different story. These techniques can create micro-stresses that weaken the glass, making it more vulnerable to the high heat and intense water pressure of a dishwasher. To be safe and ensure your beautiful work lasts, it’s always best to hand-wash any pieces that have been deeply engraved or carved. For chemically etched items, the top rack of the dishwasher is usually fine.
How to Store and Handle Your Pieces Safely
The stunning, color-shifting surface of dichroic glass comes from a very thin metallic coating, which means it can be scratched. Always handle your etched pieces with care to avoid damaging the delicate surface. When storing your finished art or unused sheets of COE90 glass, it’s a good idea to place a soft cloth or paper between them to prevent rubbing. Before you even start a big project, it’s smart to test your etching cream on a small scrap piece. This helps you see how quickly the glass etches and what the final effect will look like, preventing any surprises and protecting your best materials.
Food Safety for Etched Glassware
If you’re planning to create etched glassware for food or drinks, like custom wine glasses or a serving dish, there’s a key safety guideline to keep in mind. It’s best to only etch the outside surfaces that won’t directly touch food or your lips. The reason is that the etching process creates a porous, frosted texture on the glass. While beautiful, this surface can trap food particles and is susceptible to staining from colorful foods and drinks. Additionally, it’s essential to properly clean the glass once your design is complete. You’ll need to wipe off all excess cream and wash the glassware thoroughly with soap and water. This stops the chemical reaction and ensures no residue remains, leaving you with a beautiful and safe piece to enjoy.
Get Inspired: Project Ideas for Etched Glass
Once you’ve mastered the basics of etching, you can start bringing your creative visions to life. Etched dichroic glass has a place in everything from tiny, wearable art to large-scale architectural installations. Its unique ability to play with light and color makes it a favorite among artists and designers looking to create something truly special. Whether you’re making pieces for yourself, for sale, or for your home, here are a few ideas to get you started.
Design Your Own Jewelry and Wearable Art
Dichroic glass is a natural choice for jewelry, and etching adds a layer of personal expression that makes each piece a one-of-a-kind treasure. You can create delicate, intricate patterns on small cabochons for rings and earrings or design a bold, graphic statement piece for a pendant. The etching process carves into the glass, creating texture and contrast that beautifully catches the light as the jewelry moves. Imagine a pair of earrings with an etched floral pattern that reveals a new color with every turn of the head. You can use COE90 glass to craft stunning, professional-quality pieces that are perfect for gifts or for selling in your own shop.
Create Unique Home Decor Pieces
Bring the magic of etched dichroic glass into your living space with custom home decor. The creative applications are nearly endless, with artists using it for everything from decorative bowls and plates to custom tiles and sculptures. An etched dichroic bowl can serve as a stunning centerpiece on a dining table, its colors shifting throughout the day with the changing light. You could also design a set of coasters with a matching geometric pattern or create custom tiles for a kitchen backsplash or bathroom accent wall. Using slumping and draping molds, you can shape your etched glass into beautiful, functional art that adds a personal touch to any room.
Think Big with Architectural and Lighting Projects
While it might seem ambitious, etched dichroic glass is also used in larger architectural and lighting projects. Designers love it because its bright, changing colors add a unique and exciting look to buildings and interior spaces. You can see it used in wall cladding, decorative panels, and even elevator lobbies. For your own projects, think about creating a custom lampshade that casts colorful, patterned light across a room. You could also design a small, decorative window panel that transforms sunlight into a dazzling display. These larger pieces draw on techniques used in stained glass and can become incredible focal points in your home.
Related Articles
- Innovative Techniques: Dichroic Glass & Metallic Paints
- Glass Etching: A Simple Step-by-Step Guide
- How to Do Glass Etching: A Step-by-Step Guide
- Dichroic Glass in Contemporary Architecture
Frequently Asked Questions
Is it safe to use etching cream in my home studio? Yes, it’s generally safe when you take the right precautions. Hobbyist etching creams are designed for home use and are much gentler than industrial acids. The most important things are to wear gloves to protect your skin and to work in a space with good airflow. Just be mindful, follow the product instructions, and you can confidently and safely add etching to your creative process.
Why is dichroic glass so much more expensive than other types of art glass? The price comes down to its highly technical manufacturing process. Dichroic glass is created in a vacuum chamber where microscopic layers of metal oxides are fused to the glass surface. This equipment is incredibly expensive to own and operate, and it requires highly skilled technicians to get those brilliant, color-shifting results. You’re paying for a piece of high-tech artistry that simply can’t be replicated in a standard glass furnace.
What happens if I mess up my etching design? Can I fix it? This is a great question because it happens to everyone. Unfortunately, once the glass is etched, the process can’t be reversed; you can’t add the metallic coating back on. However, you can often incorporate the mistake into a new design by etching more of the surface or altering your pattern. The best way to avoid this is to always test your design and timing on a small scrap piece of the same glass first.
Do I absolutely need a kiln to finish my etched dichroic glass project? Not necessarily, but it depends on the look you want. After etching, the treated areas will have a matte, frosted finish. Many artists love this high-contrast look and leave it as is, especially for jewelry. However, if you want to restore a glossy shine to the etched parts, you will need to fire polish the piece in a kiln. A kiln is also essential if you plan to fuse your etched piece with other layers of glass.
Can I etch any piece of dichroic glass, or are some better than others? You can etch any type of dichroic glass, but you’ll find that they all behave a little differently. Some coatings etch very quickly, while others take much longer to react to the cream. Textured dichroic glass can also be a bit trickier to work with than smooth glass. This is why testing on a scrap piece is so important. It helps you understand the specific timing and color results for the exact sheet of glass you’re using in your project.