
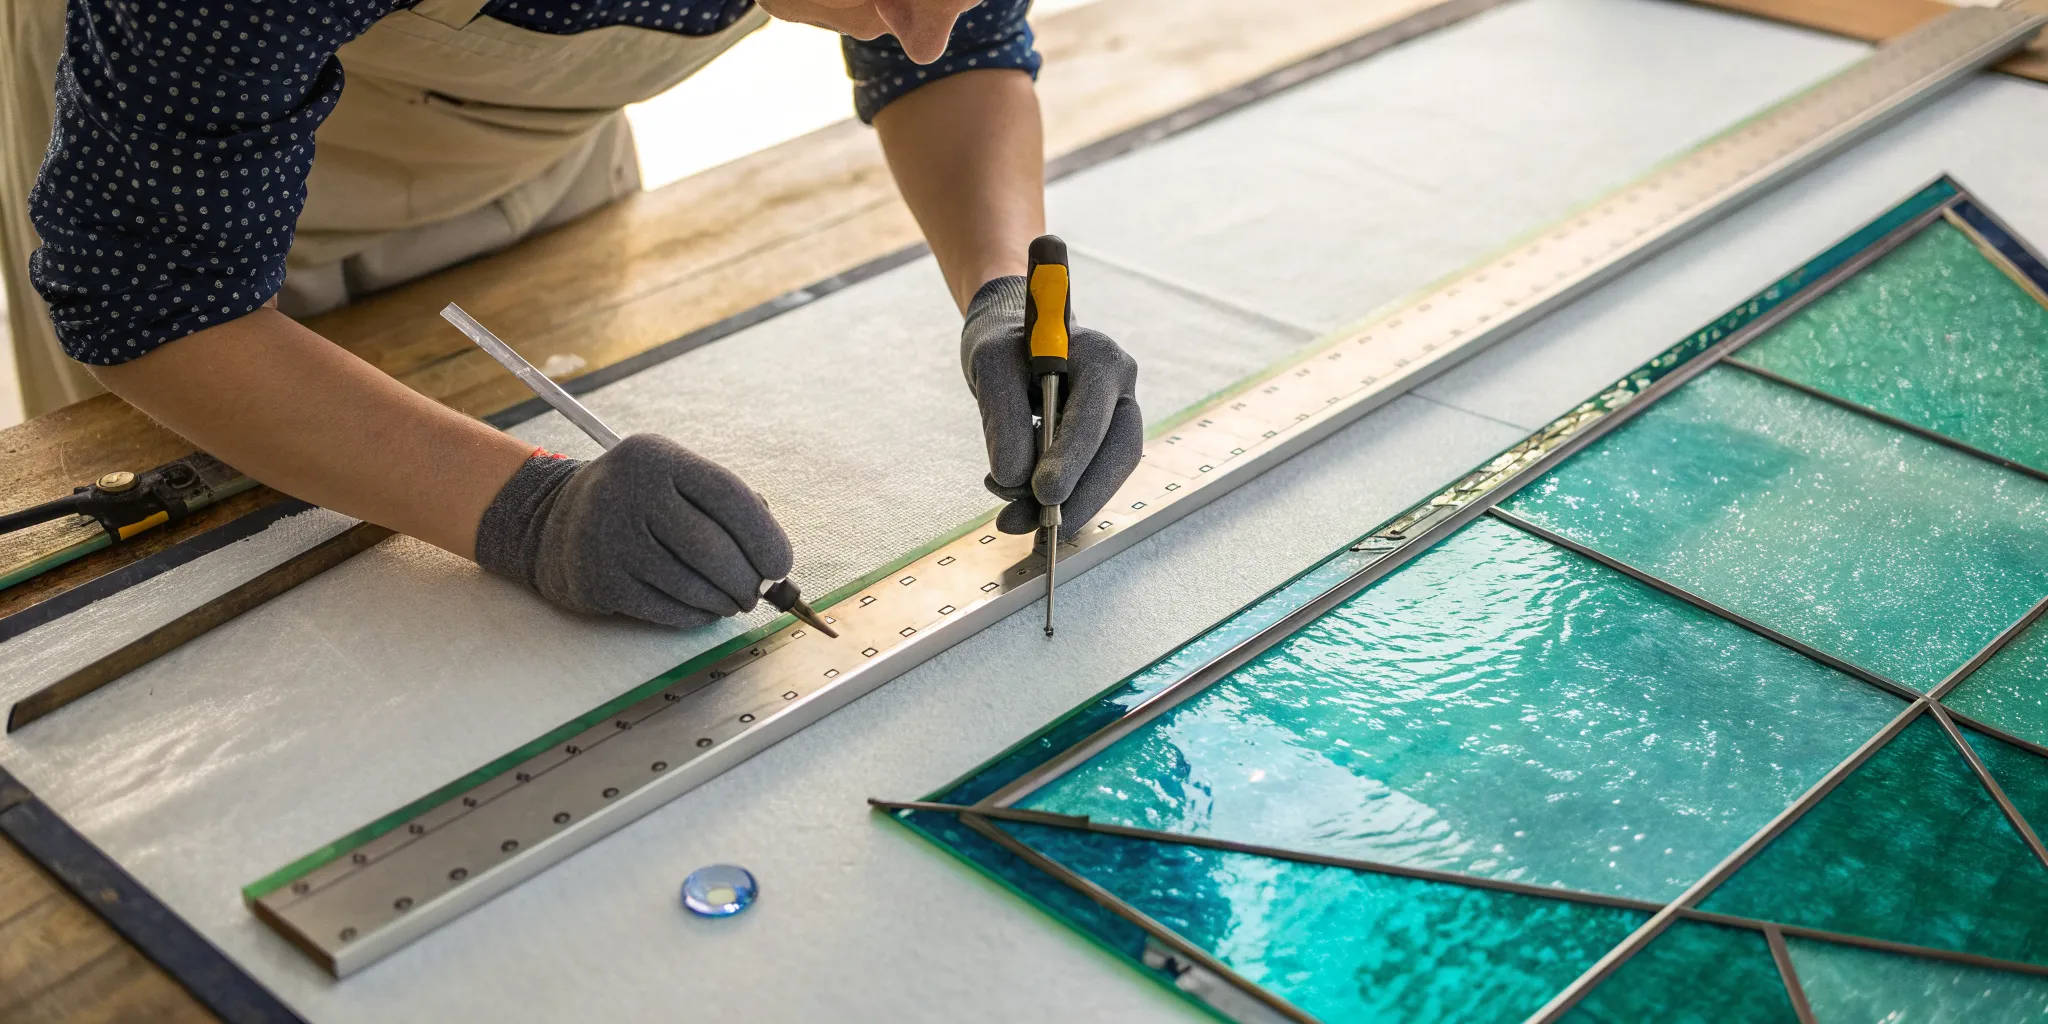
Getting a clean cut is everything. A jagged break can waste expensive glass and ruin your design before you even start. But cutting glass isn’t a mysterious talent—it’s a learnable skill. It all comes down to creating a controlled score line. This guide will outline the essential steps and tools for cutting stained glass, showing you exactly how to cut stained glass cleanly. Consider this your roadmap to working safely and building the confidence you need to improve your stained glass skills from the very first cut.
Key Takeaways
- Proper preparation prevents poor cuts: Before you begin, gather your essential tools, thoroughly clean the glass surface, and set up a safe, well-lit workspace to ensure the best possible outcome.
- A single, confident score is everything: Use firm, consistent pressure and cutting oil to make one continuous score from edge to edge. For a clean break, apply gentle pressure starting at the end of the score line, never in the middle.
- Practice on scraps and finish your edges: Build your confidence by practicing on scrap glass before cutting your final pieces. After the break, always use a grinder or grozing pliers to smooth the edges for a perfect fit and a professional finish.
Getting Started: Advice for New Artists
Diving into a new creative hobby is exciting, but it can also feel a little overwhelming. Where do you even begin? Stained glass is an incredibly rewarding art form, and with a little guidance, you can get started on the right foot. This section is all about practical advice for beginners, from understanding the costs to choosing a first project that sets you up for success. Think of this as your friendly roadmap to building a solid foundation in your new craft, helping you avoid common frustrations and find joy in the process from day one.
Understanding the Initial Investment
Let’s talk about the elephant in the room: the startup cost. Getting into stained glass does require an initial investment, and it’s smart to know what to expect before you jump in. You’re not just buying a few craft supplies; you’re building a toolkit for a new skill. While it’s an investment, think of it as setting up your own little studio, a space where you can create beautiful things for years to come. The tools are durable, and once you have them, your main ongoing cost will be the glass and consumables like solder and foil. It’s a hobby that pays you back in satisfaction every time you finish a piece.
What to Expect for Startup Costs
So, what’s the damage? Most artists find that a complete beginner setup costs between $500 and $1,000. This range covers the non-negotiable essentials: a quality glass cutter, breaking and grozing pliers, a soldering iron, and most importantly, a glass grinder. A grinder is the one tool that truly separates a frustrating experience from a successful one, as it allows you to perfect the shape of each piece for a tight fit. This initial budget also accounts for your first few supplies, like copper foil, solder, flux, and, of course, some beautiful sheets of glass to practice on.
The Value of Taking a Class First
Before you start adding all those tools to your shopping cart, here’s my most practical piece of advice: take a beginner’s class. Seriously. Many local studios and community centers offer introductory workshops. This gives you a chance to use all the professional-grade tools and get a real feel for the process without the upfront financial commitment. A class is the perfect way to decide if you truly enjoy the craft. Plus, you get hands-on instruction from an experienced artist who can correct your technique in real-time—something a YouTube video just can’t replicate. You’ll learn safety basics and pro tips that will save you a ton of frustration down the road.
Tips for Choosing Your First Project
When you’re ready to tackle your first solo piece, the project you choose can make or break your experience. It’s tempting to want to recreate a complex, multi-colored masterpiece you saw online, but I strongly encourage you to start simple. Your first project is all about learning the fundamental rhythm of the craft: score, break, grind, foil, solder, and finish. Choosing a pattern with fewer pieces and gentle curves or straight lines will allow you to focus on mastering each step. Celebrate the small wins and focus on building a solid foundation of skills. Your confidence will grow with every successful solder seam.
Starting with Straight Lines and Smooth Glass
Let’s get more specific. For your first few projects, seek out patterns that feature mostly straight lines. Why? Because a straight-line cut is the easiest to score and break cleanly, helping you build muscle memory and confidence. Along with simple shapes, pay attention to the glass texture. While heavily textured glass is beautiful, it can be tricky to cut evenly. To set yourself up for success, begin with smooth glass. When you’re ready to pick out your first sheets, look for easy-to-cut stained glass that will help you practice the fundamentals without a fight. This approach lets you hone your cutting and soldering skills before moving on to more challenging designs and materials.
Your Essential Stained Glass Cutting Toolkit
Before you make your first cut, it’s important to get your tools in order. Having the right equipment not only makes the process easier and more enjoyable but also sets you up for creating clean, precise cuts from the very beginning. Think of it as preparing your ingredients before you start cooking; a little prep work goes a long way. Here are the must-have tools you’ll want on your workbench.
Choosing the Right Glass Cutter for You
Your glass cutter is the most important tool in your kit, so it’s worth getting a good one. Look for a cutter with a carbide wheel, which is strong and stays sharp for a long time. Many artists prefer oil-filled cutters because they automatically lubricate the wheel as you score, making for a smoother glide across the stained glass. If you find it difficult to apply firm pressure or hold small tools, a pistol grip cutter can be a game-changer. It offers a more ergonomic hold, giving you better control and reducing hand fatigue.
Why You Need Both Running and Grozing Pliers
Once you’ve scored your glass, you’ll need a little help to break it cleanly. That’s where pliers come in. You’ll want two main types in your toolkit: running pliers and grozing pliers. Running pliers are your go-to for snapping long, straight, or gently curved cuts. They apply even pressure on both sides of the score line to “run” the break along the glass. Grozing pliers, on the other hand, have serrated jaws perfect for nipping away small, stubborn pieces and refining the edges of your cut. Having both types of glass pliers on hand will prepare you for any cut you need to make.
The Secret to a Smooth Cut: Cutting Oil
Cutting oil might seem like a small detail, but it makes a huge difference in the quality of your cuts. This isn’t just any oil; it’s specifically designed to lubricate your cutter’s wheel, which reduces friction and helps you create a deep, consistent score. A well-lubricated score is much more likely to break exactly where you want it to. Before you make a cut, just add a small amount of cutting oil to the wheel or directly onto the glass along your intended line. This simple step helps prevent the glass from flaking and ensures a cleaner, more predictable break every time.
Setting Up a Safe and Efficient Workspace
Working with glass is incredibly rewarding, but safety should always come first. Tiny shards of glass can fly when you’re cutting, so a good pair of safety glasses is non-negotiable to protect your eyes. It’s also a smart idea to wear gloves to protect your hands from sharp edges as you handle the pieces. Beyond personal safety supplies, your workspace setup matters. Try to work at a comfortable, waist-high table with a flat surface. Many artists use a cutting mat or a piece of homasote board to create a semi-soft surface that’s gentle on the glass and helps contain small scraps.
Helpful Workspace Additions
Beyond the essentials, a few extra items can make your workspace much more functional. A good task lamp, for instance, helps you see your score lines clearly, which is crucial for accuracy. For perfectly straight cuts, a metal ruler with a cork backing is a great investment; it stays put on the glass without slipping. And while it’s not a cutting tool, a small glass grinder will quickly become your best friend. It lets you smooth and refine the edges of your pieces, ensuring they fit together perfectly for foiling or leading. Finally, a simple bench brush and dustpan make cleaning up tiny glass shards quick and safe, keeping your area tidy and ready for your next project.
Safety First: How to Cut Glass Without Injury
Before you start cutting your beautiful sheets of stained glass, let’s cover the most important part of the process: safety. Creating a safe workspace isn’t complicated, but it’s the key to keeping this hobby fun and injury-free. Think of these steps as your creative ritual, setting the stage for a successful project. By taking a few simple precautions, you can focus all your energy on your art. Let’s get your space set up so you can work with confidence.
Don’t Skip the Gloves and Goggles
This is non-negotiable. Always wear gloves and safety glasses to protect your eyes and hands from sharp glass. When you score and break glass, tiny slivers can fly off in unpredictable directions. Standard eyeglasses don’t offer enough coverage, so choose a pair that wraps around to protect you from the sides. For your hands, a good pair of cut-resistant gloves is a smart investment. You want a pair that offers protection without being so bulky that you can’t handle the glass properly. These two simple steps will save you from the most common injuries.
Why Good Lighting and a Clean Space Matter
Your environment plays a huge role in working safely and effectively. Always work in a bright, tidy area to prevent accidents. Good lighting is essential for seeing your score lines clearly, which leads to cleaner breaks. A cluttered bench is a recipe for disaster, so keep your tools organized and your surface clear. Your cutting surface should be a waist-high table that is flat and semi-soft, like a cutting mat. This cushions the glass slightly and prevents it from skittering around. A stable, clean, and well-lit space makes the entire process smoother and much safer.
How to Safely Dispose of Sharp Glass Scraps
What you do with your scraps is just as important as how you cut your main pieces. You’ll need a dedicated place to throw away glass scraps, so use a strong container just for this purpose. A heavy-duty cardboard box or a small plastic bucket works well. Make sure to label it clearly so no one mistakes it for regular trash. Never sweep shards off your table with your bare hands. Instead, use a small bench brush and dustpan to clean your workspace as you go. This keeps tiny, sharp pieces contained and prevents accidental cuts.
Protecting Yourself While Grinding
After you cut your glass, the edges will be sharp and slightly uneven. A glass grinder, which is essentially a wet sander, smooths those edges for a perfect fit. But as it grinds, it creates a spray of water and tiny glass particles. To keep yourself safe, eye protection and a face mask are absolute must-haves. Even though the grinder uses water to control dust, you don’t want to breathe in any glass particles or get them in your eyes. For extra protection, a grinder shield that attaches to your machine is great for stopping splashes. And since grinders can be loud, a pair of earplugs can make the process much more comfortable.
Essential Safety for Soldering and Lead
Soldering is where your project truly comes to life, binding the copper-foiled pieces together with molten metal. For this, you’ll need a quality soldering iron that maintains a steady temperature, a stand to hold it safely when not in use, and 60/40 lead solder. Because you’ll be working with heat, chemicals, and lead, safety is critical. Always wear your safety glasses. You’ll also need rubber gloves to protect your skin from the acidic flux, which is the chemical that helps the solder adhere to the copper foil. Setting up these safety habits from the start makes the process stress-free and allows you to focus on creating beautiful, strong solder lines for your stained glass art.
Working with Soldering Fumes
When you heat solder and flux, they release fumes that you should never breathe in. It’s a common mistake to think a regular fan is enough, but a fan just blows the harmful fumes around your workspace. What you really need is a dedicated fume extractor. These devices are designed to sit right next to your project and use a carbon filter to pull the smoke and fumes directly away from your face, capturing the harmful particles. Investing in a fume extractor is one of the most important things you can do for your long-term health as a soldering artist, ensuring your studio remains a safe and healthy place to create.
Handling Lead Safely
Let’s clear the air about working with lead: it is safe when you follow a few simple, common-sense rules. Lead is only harmful if it’s ingested or inhaled, not through skin contact. The most important habit to build is to never eat, drink, or smoke in your work area. After a session of handling lead came or solder, wash your hands thoroughly with soap and water. While lead isn’t absorbed through the skin, it’s still a good practice to wear gloves, especially when applying flux or patina, to keep chemicals off your hands and make cleanup easier. By following these straightforward precautions, you can confidently work with traditional stained glass materials.
Prepare Your Stained Glass for Cutting
Before you even think about scoring, a little prep work goes a long way. Taking a few minutes to get your glass ready is the secret to achieving those crisp, clean breaks you’re aiming for. Rushing this stage often leads to frustration and wasted material, and nobody wants that. Think of it as setting the stage for a great performance. By cleaning your glass, planning your design, and marking your lines with care, you’re giving yourself the best possible chance for a successful cut. These simple habits are what separate beginners from seasoned artists, and they’re incredibly easy to adopt.
Start with a Squeaky-Clean Glass Surface
First, you need a spotless surface. Any dust or grime on your glass can cause your cutter’s wheel to skip, creating an uneven score line that leads to a messy break. To prevent this, wipe down your sheet of stained glass with a lint-free cloth and some glass cleaner or isopropyl alcohol. Make sure the glass is completely dry before you move on. This simple step takes less than a minute but makes a huge difference in the quality of your cut.
Mapping Out Your Pattern Before You Cut
Once your glass is clean, it’s time to plan your design. Having a clear idea of your cuts is crucial, especially with expensive glass. If you’re using a pattern, trace it onto the glass with a fine-tipped marker. For beginners, I highly recommend practicing on scrap glass first. Learning to cut basic squares and curves helps you understand how glass breaks. This practice will save you frustration and money later when you’re working on more complex pieces. It’s a small investment of time that pays off big.
Using Pattern Shears and Project Boards
Once your pattern is traced, a couple of extra tools can make a world of difference in your accuracy. Pattern shears are a game-changer, especially for beginners. These special scissors cut out your paper pattern pieces while removing a thin sliver of paper at the same time. This tiny gap perfectly accounts for the thickness of your copper foil or lead came, which means your glass pieces will fit together snugly without hours of extra grinding. For keeping everything organized and perfectly square, a project board is your best friend. It gives you a dedicated surface to lay out your cut pieces, ensuring your design stays aligned as you work. Using these specialized tools together helps you build your project with precision from the very start.
How to Mark Your Lines for Precision Cutting
With your plan ready, carefully mark your cutting lines on the glass. A fine-tipped permanent marker is great for this; the ink won’t smudge but can be removed later with alcohol. For straight cuts, always use a ruler or cutting square to guide your marker. Ensure your lines extend from one edge of the glass to the other, as a score needs to run the full length for a clean break. Double-check your measurements before you pick up your cutter, as this is your last chance to make adjustments.
How to Score Stained Glass Correctly
Scoring is the most important step in cutting glass. It’s not about cutting through the glass, but creating a precise line of weakness that tells the glass exactly where to break. Think of it as a controlled fracture. A good score is your best friend for achieving clean, crisp edges that fit together perfectly in your final piece. When you get this part right, the rest of the process becomes so much easier. Don’t worry if it feels a little awkward at first. With a bit of practice, scoring will become second nature, and you’ll be creating beautiful cuts with confidence.
Finding Your Perfect Grip and Stance
Your relationship with your glass cutter starts with how you hold it. The goal is to find a grip that feels both comfortable and stable. Most beginners use a pencil-grip cutter, which you should hold just like a pen. Let it rest naturally in your hand and use your index finger to apply pressure from above. If you’re using a pistol-grip cutter, hold it with your whole hand. Whichever glass cutter you choose, the key is to keep your wrist straight and lock your elbow. This allows you to use your shoulder and body weight to guide the cutter in one smooth, continuous motion across the glass, giving you far more control than just using your wrist.
The “One Swift Motion” Scoring Technique
Once you have your grip, it’s time to apply pressure. You want to hold the cutter upright and press down with firm, consistent pressure as you roll it across the glass. You’re looking for that satisfying “shoooshing” or zipping sound. That’s the sound of a perfect score! If you hear a gritty, grinding noise, you’re likely pressing too hard, which can create tiny fractures and lead to a messy break. If you don’t hear much at all, you’re probably being too gentle. Practice on some scrap pieces of COE90 glass to find that sweet spot. The right amount of pressure creates a score line that looks like a tiny scratch on the surface.
What a Good Score Line Looks and Sounds Like
This is a golden rule of glass cutting: score from one edge all the way to the other, and never go over the same line twice. A single, confident pass is all you need. Going back over a score line will dull your cutting wheel and can cause the glass to chip or break unpredictably. It’s better to have a slightly imperfect single score than a double-scored mess. Commit to your line and follow through from start to finish without stopping. This single, clean score creates the perfect fissure for the glass to split along when you’re ready to break it. Mastering this one habit will dramatically improve the quality of your stained glass pieces.
Applying Cutting Oil for a Flawless Score
Cutting oil is a non-negotiable part of the process. It might seem like a small detail, but it makes a huge difference. Before each score, put a little cutting oil on the cutter’s wheel to help it glide smoothly across the glass surface. This lubrication reduces friction, which protects your cutting wheel and keeps it sharp for longer. More importantly, the oil seeps into the score line, keeping the fissure open and making the glass much easier to break cleanly. Some cutters have a built-in reservoir that automatically dispenses oil, while with others, you can simply dip the wheel into a small, oil-soaked sponge before you cut. Either way, don’t skip this step.
Always Score the Smoothest Side of the Glass
Here’s a simple rule that will save you a lot of headaches: always score the smoothest side of the glass. Most sheets of stained glass have one side that is smoother than the other, even if the texture is subtle. Your cutter needs a flat, uninterrupted path to create a deep and even score line. If you try to score over bumps and ripples, the wheel will skip and bounce, creating a weak score that will almost certainly lead to a jagged, unpredictable break. Before you even mark your line, get in the habit of running your fingers over both sides of the glass to identify the smoothest surface. This small step ensures your cutter can do its job properly, giving you a clean fissure that will break exactly where you want it to.
How to Safely Break Glass After Scoring
You’ve made your score line, and it looks perfect. Now comes the moment of truth: the break. This is where your piece truly takes shape, and doing it correctly is just as important as making a good score. A clean break follows your score line precisely, giving you the exact shape you planned. A bad break can ruin the piece, waste glass, and create a safety hazard. Don’t worry, it’s less about brute force and more about technique.
The goal is to apply gentle, even pressure that encourages the glass to separate right where you scored it. There are a few trusted methods to get this done, and the one you choose will often depend on the size and shape of your cut. We’ll walk through the most common techniques, from using special pliers to simply using your hands. With a little practice, you’ll be snapping glass cleanly and confidently every time.
Positioning the Score Line for a Clean Break
For larger, straight cuts, your worktable is your best friend. This method uses leverage to create a clean, straight snap with minimal effort. Start by lining up your score line directly with the edge of your table. Hold the main piece of glass firmly against the tabletop with one hand. With your other hand, apply quick, even downward pressure to the piece of glass hanging over the edge. It should snap cleanly along your score. This technique is fantastic for separating a large sheet of stained glass into more manageable pieces before you start cutting intricate shapes.
Using Running Pliers Like a Pro
Running pliers are a game-changer, especially for beginners. These specialized pliers are designed to apply pressure perfectly on either side of your score line, encouraging the glass to “run” or break exactly where you want it to. Most running pliers have a centerline mark on the top jaw. Simply align that mark with your score, placing the jaws about a quarter-inch from the edge of the glass. Squeeze the handle gently and firmly. You’ll feel a slight give and hear a soft pop as the glass separates. These pliers are excellent for straight lines and gentle curves, giving you a level of control that’s hard to achieve by hand.
When and How to Break Glass by Hand
Sometimes, the best tools are the ones you were born with. For smaller pieces of glass, breaking by hand offers great control. Hold the glass with both hands, placing your thumbs on the top surface on either side of the score line. Your index fingers should be directly underneath your thumbs, supporting the glass from below. To make the break, apply gentle pressure upwards with your index fingers while pressing down and outwards with your thumbs. Think of it as a quick, crisp snapping motion with your wrists, almost like breaking a chocolate bar. Start with scrap glass to get a feel for the pressure needed.
How to Guide the Break Exactly Where You Want It
No matter which method you use, always start the break from the edge of the glass. Applying pressure in the middle of a score line can cause the break to veer off in an unexpected direction. By starting the break at one end of your score, you guide the fracture along the weakened line you created. This gives you a much cleaner and more predictable result. Whether you’re using running pliers or your hands, initiate the pressure at the very beginning of your score line to ensure the crack follows the path you intended from start to finish.
Cut Curves and Complex Shapes
Once you’ve mastered straight lines, you’ll be ready to tackle curves and more intricate shapes. This is where your stained glass projects really start to come to life. Cutting curves might seem tricky at first, but it’s all about breaking the process down into smaller, more manageable steps. Instead of trying to cut a perfect circle in one go, you’ll learn to approach it with a series of strategic scores and breaks. With a little patience and the right techniques for scoring, making relief cuts, and shaping with pliers, you’ll be cutting complex patterns with confidence.
Scoring Gentle and Deep Curves
Scoring a curve isn’t like scoring a straight line. For an outside curve, like the edge of a circle, avoid trying to cut it in one continuous motion. This often leads to the glass breaking where you don’t want it to. Instead, gently chip away at the glass with several smaller, deliberate cuts that follow your pattern line.
Inside curves, like the inner arc of a crescent moon, require a slightly different approach. It’s often easier to first break off the larger outside curve, then carefully chip away at the inside curve. A great technique is to score a straight line from one tip of the crescent to the other, break that piece out, and then make small, curved relief cuts to remove the remaining glass. This gives you more control over the final shape of your stained glass.
Using Relief Cuts for Tight Corners
For particularly tight or complex curves, relief cuts are your best friend. These are additional score lines that run from your main score line out to the edge of the glass. They help relieve tension in the glass, making it much easier to break out the curve without cracking the entire piece. If a score doesn’t break cleanly all the way through, don’t force it. You can carefully turn the glass over and try breaking it from the other side. You’ll also find that pushing the cutter away from you, rather than pulling it, can give you more control when following a detailed pattern.
Shaping and Nibbling with Grozing Pliers
After making your cuts, you’ll likely have some jagged bits or nubs along the edges. This is where grozing pliers come in. These pliers have serrated (toothed) jaws that are perfect for nibbling off small, unwanted pieces of glass. This process, called grozing, allows you to smooth out your curves and refine the shape to perfectly match your pattern. Think of it as fine-tuning your cut. Using grozing pliers is an essential step for achieving clean, precise edges that will fit together perfectly in your final design. They are especially helpful for cleaning up small or tightly curved breaks.
Common Glass Cutting Mistakes (and How to Fix Them)
Every artist makes mistakes, especially when learning a new skill. Cutting glass is all about technique, and a few common errors can lead to frustration and wasted material. The good news is that these slip-ups are easy to correct once you know what to look for. Getting a feel for the right pressure and motion takes a little practice, but avoiding these key mistakes will help you achieve clean, predictable cuts much faster. Think of these tips as your guide to building good habits from your very first score.
The “One Score” Rule: Why You Can’t Go Back
It can be tempting to go over a score line if it looks faint, but this is one of the most common beginner mistakes. Scoring the same line twice weakens the glass and makes it much more likely to break badly. A second pass creates tiny, competing fracture lines that prevent the glass from breaking cleanly along your intended path. You’ll end up with a jagged, chipped edge instead of a smooth one.
Your goal should always be to make one single, confident score. If your first attempt is shaky or doesn’t seem deep enough, it’s usually better to adjust your pattern and start a new cut rather than trying to fix the original. Trust your first score and focus on a clean break.
Finding the Pressure Sweet Spot
Finding the right amount of pressure is crucial for a successful cut. If you press too hard, you can create a deep score that’s difficult to break or even cause uncontrolled cracks to spread across your glass. If you use too little pressure, the score will be too shallow to guide the break properly. Uneven pressure is also a problem, as it can lead to jagged breaks.
The perfect score makes a continuous, crisp “zipping” sound. To find that sweet spot, practice on scrap glass until you can consistently create a clean line. This helps you develop the muscle memory needed for working on your final project pieces.
Are You Breaking Your Glass the Wrong Way?
Once you have a good score, the way you break the glass is just as important. A common error is trying to snap the glass from the middle of the score line. For the most predictable result, you should always begin breaking the glass from the end of the score line where you finished cutting. This allows the fracture to follow the path of least resistance you created.
When using running pliers, position the tool’s center mark directly over the score line at the very edge of the glass. Apply gentle, steady pressure until you hear a pop and see the fracture run along the line. This controlled approach gives you a much cleaner break than simply trying to snap it with your hands.
Why You Should Never Cut on Dry Glass
A dry cutter is an unhappy cutter. Using cutting oil is essential for getting a smooth score and extending the life of your cutting wheel. As Wissmach Glass Company notes, not using cutting oil causes friction and makes the cutter skip. This friction can create a rough, inconsistent score that is nearly impossible to break cleanly.
Lubrication cools the wheel and clears away microscopic glass particles, allowing for a seamless glide. If you have a self-oiling cutter, check that it’s full before you start. If you use a standard cutter, just dip the wheel in a small amount of cutting oil before each score. A little bit goes a long way in ensuring a perfect cut.
How to Get Perfectly Smooth Edges
A clean break is a fantastic start, but the edges of your glass pieces need a little extra attention before you can move on. Finishing your edges isn’t just about making them look pretty; it’s a crucial step for safety and for ensuring your pieces fit together perfectly. A smooth edge will accept copper foil or lead came much more evenly, which leads to stronger solder lines and a more professional final project. Taking a few extra minutes to grind, nip, and file any rough spots will make a huge difference in the quality of your work. It’s one of those small details that truly sets great stained glass art apart.
When to Use a Glass Grinder
After breaking your glass, you’ll likely have some sharp points or slightly jagged areas. A glass grinder is your best friend for smoothing these imperfections out. Grinding the edges ensures a snug fit when you assemble your project, which is especially important for achieving those clean, tight lines. It also removes any dangerous sharp bits, making the glass much safer to handle as you work. Using a
Essential Grinder Accessories
Your grinder will come with a couple of crucial accessories: a grinder bit and a sponge. The bit is the diamond-coated head that does the actual grinding, and it needs to be kept wet to work effectively and safely. That’s where the sponge comes in. You’ll keep it soaked with water and positioned so it’s always touching the bit as it spins. This constant flow of water cools the bit, preventing it from overheating, and washes away the fine glass dust created during grinding. This not only keeps your workspace cleaner but also helps you see what you’re doing. And speaking of safety, always remember to wear your safety glasses when grinding, as small glass particles can definitely fly.
Grinder bits come in various sizes, and having a couple of options is a smart move. A standard 3/4″ or 1″ bit is perfect for general smoothing of straight lines and gentle curves. However, a smaller 1/4″ bit is a lifesaver for getting into those tight inside curves that are impossible to reach otherwise. Using the right bit ensures your pieces fit together perfectly, which is especially important if you’re shaping glass to fit into specific slumping molds for a fusing project. Just like your cutter, your bits will wear down over time. Periodically check them for smoothness; a dull bit will grind unevenly and can chip your glass, so replacing them when needed is key to a professional finish.
Quick Edge Cleanups with Grozing Pliers
Sometimes, a small, stubborn sliver of glass just won’t break away with the score line. That’s where grozing pliers come in. These specialized pliers have serrated jaws that allow you to gently “nibble” away tiny bits of glass with precision. They are perfect for refining curves and cleaning up edges that are just slightly off. Instead of trying to re-cut a piece, you can use grozing pliers to carefully remove flares and bumps, giving you more control over the final shape. Think of it as sculpting the edge of your glass piece by piece.
Smoothing Edges by Hand with a Glass File
For the most detailed finishing work, glass files are an indispensable tool. While a grinder is great for overall smoothing, files allow you to get into tight inside curves and sharp corners where a grinder bit can’t reach. They are also ideal for when you only need to remove a very small amount of glass or want to soften an edge without the aggressive power of a grinder. Using glass files after grozing can help you achieve an exceptionally smooth and refined edge, ensuring every piece of your project is shaped exactly as you envisioned it.
Beyond the Cut: Assembling Your Stained Glass Piece
You’ve done the hard work of cutting and grinding, and now you have a collection of perfectly shaped glass pieces. This next phase is where the real magic happens. Assembling your project is the process of taking those individual components and transforming them into the single, beautiful piece you envisioned. It’s a multi-step journey that involves wrapping your glass in copper foil, carefully soldering the seams together, and adding the final finishing touches that make your artwork truly shine. This is where your design comes to life, as the colors and shapes finally unite.
Don’t rush this part of the process. Each step, from foiling to polishing, builds on the last and is essential for creating a strong, durable, and professional-looking piece of stained glass art. It requires a bit of patience and a steady hand, but seeing your project come together is one of the most rewarding parts of the craft. We’ll walk through each stage, covering the tools and techniques you need to assemble your piece with confidence. Get ready to see your hard work pay off as you bring your creation to its stunning conclusion.
Foiling Your Glass Pieces with Copper Tape
Before you can solder, you need to give the solder something to stick to. That’s where copper foil comes in. This is a thin, adhesive-backed tape that you’ll wrap around the edge of every single piece of glass. When you apply the foil, try to center it perfectly so you have an equal amount on the front and back of the glass. Once it’s in place, press it down firmly with your fingers, then use a tool called a fid or even the barrel of a pen to burnish it, smoothing the foil tightly against the glass. This ensures there are no air bubbles and creates a strong bond. For most projects, a 7/32″ or 1/4″ foil is a great place to start. You can also choose foil with a black or copper backing, which helps hide the foil inside the finished piece, especially if you plan to use a dark patina.
Soldering Your Project Together
Soldering is the step that permanently joins your foiled glass pieces. To do this, you’ll need a quality soldering iron, 60/40 solder (60% tin, 40% lead), and flux. Flux is a crucial chemical that cleans the copper foil and allows the molten solder to flow smoothly across the seams. After arranging your foiled pieces according to your pattern, brush a thin layer of flux onto all the copper seams. Then, touch your hot soldering iron to the seam and feed the solder onto it. Your goal is to create a smooth, rounded, and consistent bead of solder along all the joints. Remember to work in a well-ventilated area and consider a fume extractor, as this process creates smoke you don’t want to inhale. With a little practice, you’ll get a feel for how the solder flows and be able to create beautiful, strong seams.
Framing for Stability and a Professional Look
Framing is the key to giving your stained glass piece long-lasting stability and a clean, finished appearance. For most projects, you’ll use either flexible lead came or rigid zinc came. Zinc is a great choice for adding strength and a modern, straight-edged look to square or rectangular pieces. To attach the frame, you’ll cut the came to size using lead nippers and fit it around the perimeter of your panel, soldering the corners and joints. This is also the time to think about how you’ll hang your piece. You should solder hanging loops, like jump rings or bent tinned wire, directly onto the frame. Never attach a hanger to a single piece of glass, as it won’t be strong enough to support the weight of the entire project.
Finishing Touches: Patina, Polish, and Hanging
Your piece is assembled, but it’s not quite done yet. The final touches are what will make it truly stand out. First, clean your piece thoroughly with soap and water to remove all flux residue, which can corrode the solder over time. Once it’s dry, you can apply a patina to change the color of the solder lines from their natural silver to black or copper. When using patina and other chemicals, always wear gloves and work in a well-ventilated space. After the patina has been applied and neutralized, the last step is to polish your piece. A good finishing compound or wax will protect the solder and patina from oxidizing and give the glass a brilliant shine. Finally, attach a sturdy chain or wire to your hangers, and your masterpiece is ready to display.
How to Improve Your Stained Glass Cutting Skills
Like any new skill, cutting glass takes time and repetition to master. Don’t get discouraged if your first few cuts aren’t perfect. Every artist starts somewhere, and the key is to keep practicing. By focusing on the fundamentals, you’ll build the muscle memory and confidence needed to tackle any project that inspires you. The goal isn’t perfection on day one; it’s progress. Grab some scrap glass, get comfortable, and let’s work on building your skills one cut at a time.
Practice on Scrap Glass (Not Your Favorite Sheet!)
Before you slice into that beautiful sheet of iridescent glass you’ve been eyeing, get your practice in on some scrap pieces. Practice is essential for learning how glass breaks without the pressure of ruining expensive materials. Start with the basics: straight lines. Once you feel comfortable with those, move on to simple squares, rectangles, and gentle curves. Learning to cut foundational shapes like circles and crescents helps you develop a feel for the cutter and understand the physics of a clean break. This initial practice saves you money and frustration down the road, giving you a solid foundation for more intricate work.
Drills to Perfect Your Scoring Pressure
The secret to a perfect cut lies in the score line. As you guide the cutter across the glass, aim for firm, consistent pressure from one edge all the way to the other. You’re listening for a crisp, continuous “shoooshing” or zipping sound. If you press too hard, you’ll see a flaky white line, which is actually a series of tiny fractures that can cause the break to go astray. If you press too lightly, the score won’t be deep enough for a clean snap. Hold the cutter upright and make your score in one single, fluid motion. This technique is crucial for working with all types of glass, from standard COE90 glass to more delicate sheets.
Ready to Tackle More Complex Shapes?
Once you’ve mastered straight lines and simple curves, you can start experimenting with more complex patterns. This is where your creativity really comes into play. Knowing different ways to break glass gives you more freedom to cut any shape you need for your stained glass projects. Try cutting S-curves, tight inside curves, and other organic shapes. This is also a great time to get more familiar with your tools, like using grozing pliers to carefully nibble away at tight angles. The more comfortable you become with these advanced cuts, the more intricate and detailed your designs can be.
Exploring Advanced Cutting Technology
While mastering hand-cutting is a fundamental skill, it’s exciting to see how technology is shaping the future of glass art. For artists creating highly intricate or repetitive designs, advanced tools like laser cutters and water jets offer incredible precision. Laser cutting uses a focused beam of light for patterns that are nearly impossible to achieve by hand, while water jet cutting uses a high-pressure stream of water to slice through even thick glass with smooth edges. As this technology becomes more accessible, it empowers artists to explore new creative frontiers. While you don’t need these machines in your home studio, it’s inspiring to know what’s possible as you continue to grow your skills.
Find online communities for tips and support
You don’t have to learn in a vacuum. There are tons of vibrant online communities where you can find support, inspiration, and practical advice. Joining a Facebook group for stained glass artists or following experienced creators on Instagram can be incredibly helpful. These forums are perfect for asking questions about tricky cuts, getting feedback on your work, or learning about new techniques. You can also get great recommendations on tools. While a cutter and pliers are all you need to start, you’ll often find discussions about when to invest in a grinder or even your first kiln. Connecting with others makes the learning process more fun and less intimidating.
Related Articles
- How to Use a Glass Cutter Tool: Step-by-Step
- A Guide to the Different Types of Glass Cutters
- A Complete Guide on Stained Glass Tools & Supplies
- What Is Stained Glass Art? A Complete Guide
Frequently Asked Questions
What’s the most common reason my glass isn’t breaking where I scored it? This is a super common frustration, and it usually comes down to the score line itself. The top culprit is often inconsistent pressure, which creates a weak spot that the break can’t follow. Another reason is going over the score line more than once. This actually damages the glass and makes it break unpredictably. Always aim for one single, confident pass with even pressure, and start your break from the very edge of the glass to guide the fracture properly.
Do I really need to use cutting oil for every cut? Yes, absolutely. Think of cutting oil as a non-negotiable part of the process. It does more than just help the cutter glide smoothly; it protects your cutting wheel from dulling quickly. Most importantly, the oil seeps into the score you create, keeping the tiny fissure open and making the glass significantly easier to break cleanly and precisely along that line. It’s a small step that prevents a lot of headaches.
I’m having trouble cutting curves. What’s the secret? The secret to cutting curves is to not think of it as one single cut. Instead of trying to score and break a perfect arc all at once, approach it in smaller sections. For tight curves, making several “relief cuts” is a game-changer. These are small, straight scores that run from your main curved line out to the edge of the glass. This relieves tension and allows you to break out small pieces one at a time, giving you much more control over the final shape.
What’s the difference between running pliers and grozing pliers? It helps to think of them by their jobs. Running pliers are for the initial break. You line them up with your score and squeeze to “run” the break cleanly along the line. They are perfect for straight cuts and gentle curves. Grozing pliers are for cleanup and detail work. Their serrated jaws are designed to nibble away small, stubborn bits of glass, allowing you to smooth out edges and refine the shape after the main piece has been broken off.
How do I know if I’m applying the right amount of pressure when I score? Your ears are your best guide for this. A perfect score makes a distinct and satisfying “zipping” sound as the wheel moves across the glass. If you hear a loud, gritty grinding noise, you’re pressing way too hard, which can cause the glass to flake. If you don’t hear much of anything, you’re likely being too gentle for the score to be effective. Grab some scrap glass and practice until you can consistently produce that clean zipping sound.