

Stained Glass Grinder Guide
A stained glass grinder guide should help you make better decisions at the workbench, not simply repeat a list of popular models. A grinder refines broken edges, improves the fit between pieces, and gives you more control over curves, points, and small corrections. The right setup depends on your projects, available space, bit needs, and how often you work.
This guide covers the complete workflow. You will learn what a grinder does and how to compare its motor and water system. You will also learn which bits suit different edges, how to work safely, and how to maintain the equipment. It also explains the difference between choosing a grinder for an occasional home bench and choosing one for a teaching or production studio.
Explore stained glass tools and supplies
Why You Need a Grinder for Stained Glass Work
A grinder turns rough, freshly broken glass edges into controlled fitting surfaces. It is especially useful for curves, points, small notches, and places where two pattern pieces must meet closely. A grinder does not replace careful scoring or breaking. It gives you a precise finishing step after the cut.
Cutting glass and grinding glass are different actions. A glass cutter scores a planned line so the sheet can break along it. A grinder uses a diamond-coated abrasive surface attached to a motor. As you guide the edge against that surface, it removes small amounts of material through abrasion. For broader instruction, connect this workflow with the stained glass techniques reference.
What a grinder improves
Used with a light touch, the grinder can smooth a jagged section, true a curve, or remove just enough material for a clean fit. Accurate edges make later foiling and assembly easier because the foil is not hiding large irregularities or forced to compensate for mismatched outlines. The tool is most valuable when small changes matter.
Restraint is part of accuracy. The grinder cannot determine how much glass belongs in the finished pattern. Removing too much makes a piece undersized and creates a gap. Keep the pattern or template visible, make short passes, and check the fit often. Treat the grinder as a fitting tool rather than a shortcut for inaccurate cutting.
How it fits your workflow
A practical grinder guide follows the order in which artists actually work. Choose a machine that fits the bench, select the right bit, prepare the water system, shape the edge gradually, and clean the equipment afterward. This approach keeps the focus on repeatable results instead of a single headline specification.
How This Stained Glass Grinder Guide Helps You Choose
Choose a grinder by comparing your workload, workspace, water handling, bit access, and service needs. A compact machine can suit occasional home projects, while a larger platform may be more comfortable for panels, classes, or repeated production. No single motor rating decides the purchase. The best choice supports your actual glass practice.
| Feature. | What to evaluate. | Why it matters. |
|---|---|---|
| Motor. | Consistent torque during normal grinding. | Supports steady removal without forcing the glass. |
| Platform. | Surface area and access around the bit. | Gives you room to guide larger pieces. |
| Water system. | Reservoir access and a saturated sponge. | Helps cool and lubricate the working surface. |
| Bit changes. | Secure replacement and useful size options. | Makes it easier to shift between broad edges and detail work. |
| Footprint. | Bench depth, clearance, and storage. | Keeps setup and cleanup manageable. |
Motor and platform
Look for consistent performance during normal grinding rather than relying on an unsupported power number. Smooth torque helps you maintain light pressure as the diamond surface removes material. Platform size is equally practical. A compact surface can suit small pieces and limited benches, but more room helps when you turn panels or handle several shapes. Low-profile access can also make it easier to reach the work surface.
Water, bits, and footprint
The reservoir should be easy to fill, empty, and clean. Confirm that the sponge can remain saturated before work begins because it transfers water to the grinding area. Check which bit sizes the machine supports, and do not assume every package includes accessories. Measure the complete footprint, including clearance for glass, rinse water, and cleanup. A grinder that fits the bench but disrupts the workflow is not a good fit.
Voltage and product support
Verify voltage compatibility for your location before purchase. Also confirm that compatible replacement bits and operating guidance are available for the model you are considering. For model-focused information, review the stained glass grinder comparison guide. That article serves a comparison purpose, while this guide focuses on matching equipment to your space and technique.
Grinder Bit Types for Curves, Corners, and Detail Work
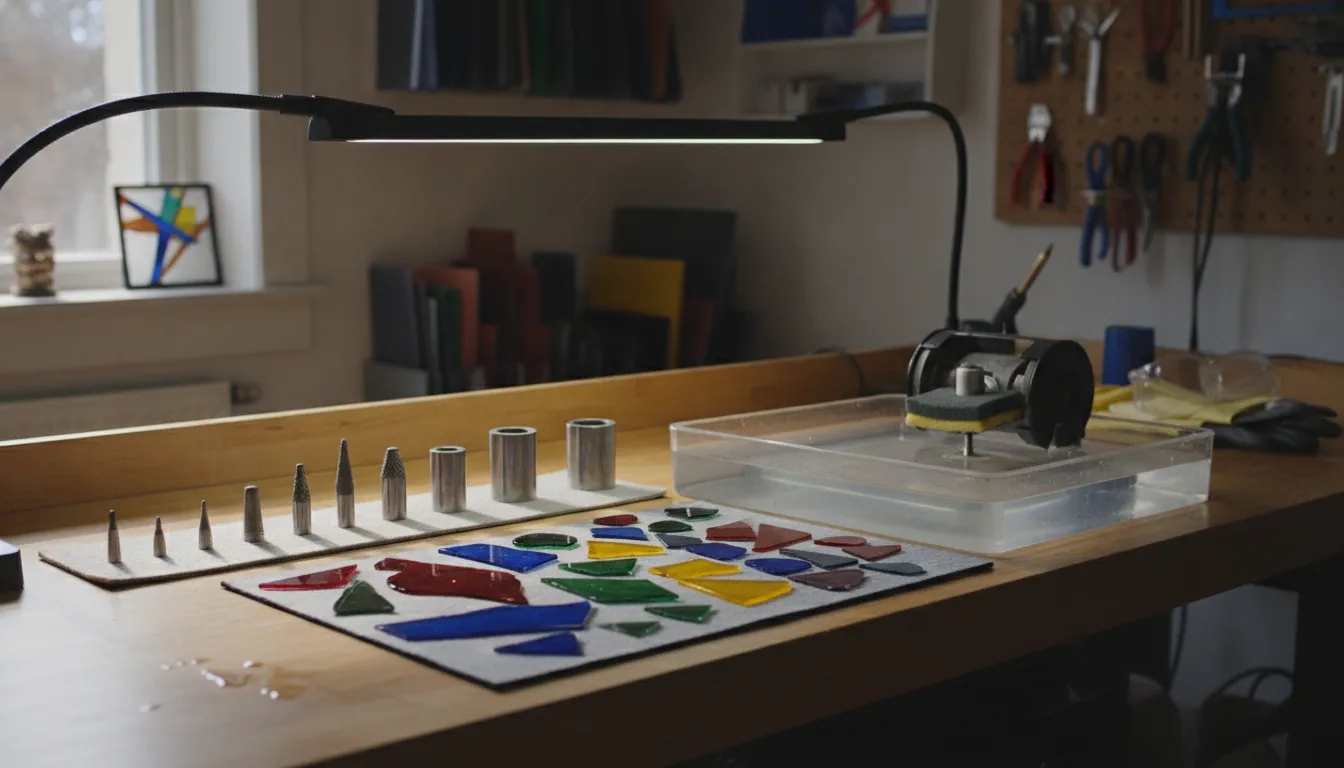
The bit is the working surface that determines how much access and control you have at the glass edge. A grinder removes material through diamond abrasion, not by slicing like a saw. A light, steady touch usually produces better control than forcing the piece into the bit.
Start with a standard 1-inch bit
A standard 1-inch diamond bit is a practical starting point for many stained glass projects. Its diameter balances working area, stability, and access along ordinary curves and outside edges. It suits smoothing broken edges, refining pattern pieces, and preparing several similar shapes for assembly.
Smaller detail bits are better for tight inside curves, narrow notches, and intricate features. Their reduced diameter can reach areas a larger bit cannot, but it also demands more deliberate positioning. Use the smallest bit that solves the access problem instead of choosing it for every task. A correctly matched bit helps prevent excess material removal.
Match the bit to the edge
- Broad curves: Use a standard 1-inch bit and move the glass gradually through the curve. Keep the edge supported on the platform.
- Tight inside corners: Switch to a smaller detail bit when the larger diameter cannot reach the corner. Approach from more than one direction instead of twisting the glass aggressively.
- Sharp points: Grind adjoining edges evenly and stop before the point becomes rounded. Easy access does not prevent over-grinding.
- Straight edges: Consider a straight-edge guide when repeatable linear edges matter. A guide can support consistent positioning across matching pieces.
Keep the bit wet through the grinder’s sponge and water system. Water helps reduce friction and supports smoother grinding. If a bit feels unusually slow, inspect its diamond surface rather than compensating with force. A worn bit can tempt you to press harder, reducing both accuracy and bit life.
How to Use a Stained Glass Grinder Safely
Safe grinding starts with preparation and continues with controlled contact. The diamond abrasive removes glass quickly when pressure or angle changes suddenly, so keep the bit cooled, your hands controlled, and the intended shape visible during each pass. Wear eye protection, stabilize the machine, keep electrical connections away from water, and follow the grinder manufacturer’s instructions.
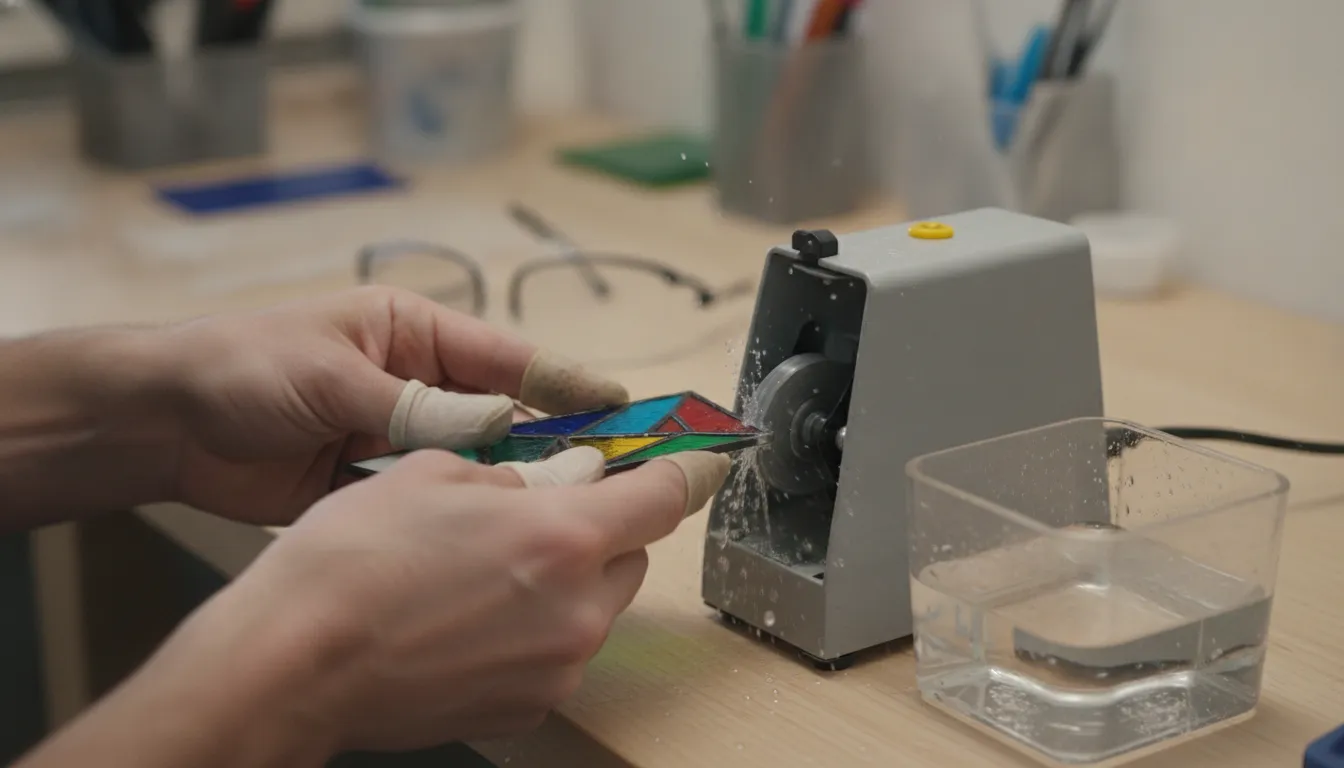
- Inspect the piece first. Check the cut line and identify edges that need smoothing. Note corners or points meant to remain sharp. Keep a paper template attached when it helps you see the shape limit. Plan your grip so your fingers stay clear of the rotating bit.
- Fill the reservoir and saturate the sponge. Add water according to the machine instructions. Press the sponge into the reservoir until it is fully wet. Do not begin with a dry sponge.
- Put on eye protection and prepare the area. Wear safety glasses that shield your eyes from splashes and loose fragments. Place the grinder on a stable surface. Keep electrical connections away from standing water.
- Use light, steady pressure. Let the diamond abrasive do the work. Use short passes instead of forcing a long edge against the wheel. Check the outline after each pass.
- Rotate the glass gradually. Work around curves and corners by changing the angle of the piece. Avoid rocking the glass into the bit or pushing it sideways suddenly.
- Rinse and inspect each piece. Turn off the grinder before setting the glass down. Rinse away slurry and residue, then dry the piece before checking the fit.
- Manage slurry. Slurry is water mixed with ground glass. Do not let it obscure your work or interfere with the sponge’s contact with the bit. Refresh heavily loaded water according to the manufacturer’s directions.
The goal is not to reshape a piece in one pass. Remove only the material needed for a clean fit, then reassess before taking another pass. This pause helps protect the pattern outline and keeps the final fit predictable.
Grinder Maintenance and Bit Replacement
Good maintenance keeps a grinder predictable and protects the abrasive surface that does the work. Routine care preserves cooling, control, and consistent material removal. Empty the tray, rinse away slurry, inspect the sponge, and protect the bit after each session. Follow the model’s manual for any disassembly or lubricant guidance, and keep the next session easy to start.
Clean the water system after each session
Switch off and unplug the machine before handling the reservoir, sponge, or bit. Pour out dirty water rather than leaving glass slurry in the basin. Rinse the reservoir and remove sludge from corners, around the sponge, and near the bit opening. Residual slurry can reduce grinding efficiency.
Rinse finished glass pieces as well. Soap or detergent helps remove residue and template material. Let removable parts dry as directed by the manufacturer. Store the grinder where the platform and electrical components will not receive unnecessary moisture. Keep the bit protected from knocks.
Maintain water and coolant correctly
Before grinding, check the reservoir and fully saturate the sponge. Maintain a consistent water level while working. Insufficient water can increase heat and reduce effective cooling. If a manufacturer permits coolant, follow its stated mixing and cleaning directions. Never assume an unapproved household chemical is suitable.
Inspect the bit before replacing it
Check the diamond surface for visible wear, damage, or areas that no longer remove glass efficiently. A dull bit often appears as slower cutting, increased effort, less predictable edge control, or a need to press harder. Those symptoms matter because excessive pressure can shorten bit life and make over-grinding more likely.
Replace a bit when its abrasive surface is worn or damaged. Use the size and fitting specified for your grinder. Do not force a dull bit through a project. A fresh, correctly fitted bit should let the water do its cooling work and allow light, controlled contact. For additional technique context, review these tips for using glass grinders.
Home or Studio Grinder: Which Setup Fits Your Projects?
There is no universal best grinder. The right setup depends on how often you work, how much glass you process, and how comfortably the machine fits your workspace. A grinder for occasional home use may feel limiting in a classroom. A large setup may waste space when used only a few times each year.
Match the grinder to your workload
For occasional home use, prioritize durable construction, straightforward bit replacement, effective water cooling, and a footprint you can store. A compact platform can be practical when you grind a few pieces at a time, provided you can position the glass securely and manage water nearby.
A serious home studio benefits from more working room. A larger platform supports broader pieces, but measure the bench before buying. Leave room to work without crowding cutting, foiling, or assembly areas. Evaluate motor performance, platform area, and supported bits against your projects rather than treating one feature as decisive.
Think beyond the motor
In a teaching room, several people may need to learn the controls and change bits without slowing the class. Easy platform access and manageable cleanup matter as much as capacity. In professional production, consistent torque supports a predictable workflow across repeated pieces. Bit access matters when work moves between shaping and detail.
Noise and water cleanup also matter. A home user may need to set up and put away the grinder in the same room, while a dedicated studio can keep a wet-work station ready. Plan for water near the work surface, a place to rinse components, and protected storage.
Use this decision checklist
- How many pieces will you grind in a typical session?
- Do you have enough platform and bench space for the largest pieces you make?
- Can you manage water, cleanup, and storage where the grinder will live?
- Will you need frequent bit changes or multiple bit types?
- Are compatible replacement parts and operating guidance easy to find?
The stained glass techniques reference provides broader context for how tools fit into a complete workflow. Use the grinder comparison guide when you want model-specific information, and use this article when you need to decide how a grinder should work in your own studio.
Shop stained glass grinders and tools
FAQs: Stained Glass Grinder Guide
Do I really need a glass grinder for stained glass?
Not for every project, but a grinder is valuable when you need smooth edges, accurate contours, or a reliable fit between pieces. It removes small amounts of glass with a diamond-coated abrasive surface, so it complements cutting rather than replacing careful pattern work. Occasional simple projects may not require one. Detailed designs and regular studio work usually benefit from the added control.
How do I choose a stained glass grinder for beginners?
Prioritize a stable work surface, straightforward bit changes, effective water cooling, and a footprint that suits your bench. Also check reservoir access, electrical requirements, and compatible replacement bits. Choose features that support the projects you expect to make instead of paying for capacity you will not use.
What size stained glass grinder bit do I need?
A 1-inch diamond bit is a practical starting point for many stained glass projects because it balances access and stability. Use a smaller detail bit for tight inside curves, narrow notches, or intricate corners. Match the diameter to the area you need to reach, and use the smallest bit that solves the access problem.
How do I keep a stained glass grinder bit wet?
Fill the reservoir according to the grinder instructions and fully saturate the sponge before starting. The sponge transfers water to the grinding area as the bit turns. Watch the water level during the session, and stop if the working surface becomes dry. Clean slurry from the reservoir so it does not interfere with water delivery.
When should I replace a stained glass grinder bit?
Inspect the bit when grinding becomes slower, requires more pressure, or produces less predictable control. Visible damage or worn diamond material is also a reason to replace it. Use a replacement with the correct size and fitting for your machine. Do not force a dull bit through a project because extra pressure can increase over-grinding.
Find the tools for your stained glass workspace
Make Your Grinder Work for Your Glass Practice
A grinder is most useful when it supports a careful workflow. Choose a machine that fits your bench and workload. Select bits for the edges you actually make, keep the working surface wet, and remove only the material needed for a clean fit. Consistent preparation and maintenance will do more for results than chasing one impressive specification.
Art Glass Supplies offers a broad range of glass art tools and supplies for hobbyists, teachers, and working studios. Compare the equipment and accessories that match your process, then build a setup you can use comfortably and maintain over time. Check product instructions for model-specific requirements before operating or servicing any grinder.