
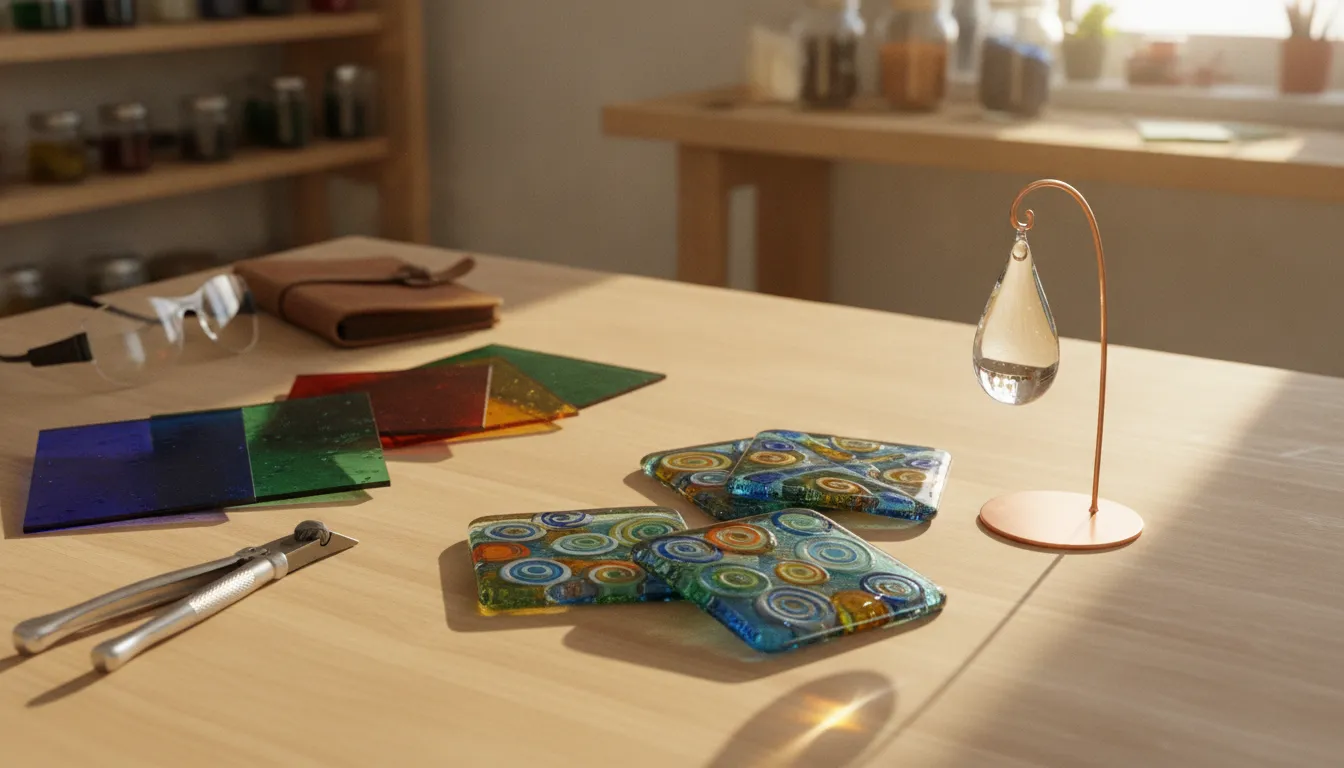
Starting with a small fused-glass piece lets you learn how glass behaves without committing a large sheet or an ambitious firing schedule. Coasters, pendants, accent tiles, and other compact designs give you room to practice cutting, layering, kiln loading, and annealing while keeping each experiment manageable.
The best glass fusing project ideas for beginners use small, compatible pieces and simple shapes, so you can focus on technique. Choose glass with a matching Coefficient of Expansion (COE): as temperature rises, glass viscosity and softening points change, and incompatible pieces can crack as they cool. A compatible glass assortment, basic tools, safety gear, and a properly annealed firing create a reliable foundation.
These projects are creative, but they also teach practical decisions about thickness, surface decoration, and heatwork. For a broader overview of materials and studio setup, see our glass fusing techniques guide. Then begin with the easiest designs and build your confidence one firing at a time.
Shop glass fusing project supplies to start building your first piece today
The Easiest Glass Fusing Project Ideas for Beginners
Starting small is not a limitation. It is one of the best ways to learn how glass behaves while keeping material costs, firing time, and disappointment under control. A coaster, pendant, or small decorative tile gives you a manageable surface for practicing cutting, arranging, fusing, and finishing. You also get a useful object quickly, which makes it easier to evaluate your results and decide what you want to try next.
Simple projects are especially forgiving because they use less glass and usually have fewer layers. If a color combination or shape does not work, you have not committed a large sheet or a complicated mold. As your confidence grows, you can build on these skills with the techniques in our glass fusing techniques guide, rather than trying to solve every firing variable at once.
Learn compatibility before you decorate
The most important beginner rule is to use glass that is compatible. COE, or coefficient of expansion, describes how much glass expands and contracts as its temperature changes. Two pieces can look perfect together but contract at different rates during cooling, creating stress that may cause cracks or breakage. Glass viscosity and its softening point also change as temperature rises, so compatibility is a physical concern, not just a label or color preference. Keep each project within one compatible glass system, and record the products you use.
A small kiln still needs to reach about 1450°F (790°C) for a full fuse. After the glass softens and flows together, it must cool slowly through the annealing range. Controlled annealing relieves internal stress and gives the finished piece a better chance of remaining sound. A kiln schedule is part of the project, not an afterthought. For a broader equipment overview, see our glass fusing for beginners essential tools guide.
A practical starter setup
You do not need every accessory before making your first piece. Begin with the essentials:
- A kiln rated for glass fusing temperatures and a reliable kiln shelf
- COE-matched sheet glass, plus a small selection of frit or stringers
- A glass cutter and appropriate hand tools for safe, controlled cuts
- Safety goggles for cutting and heat-resistant gloves for kiln work
Choose a project that fits your kiln shelf without crowding. That leaves room to observe how the glass moves and to repeat a successful design. The goal is not a flawless first firing. It is a clear first lesson that helps you make the next project with better control.
Five Beginner Projects at a Glance
| Project | Main Skill | Approximate Firing | Key Supplies |
|---|---|---|---|
| Fused Glass Coasters | Cutting and layering | One full fuse plus anneal | 3mm clear base, frit, stringers |
| Glass Pendants | Small-format design | Tack or full fuse | Blank, dichroic accents, bail |
| Dichroic Accent Tiles | Compatibility and assembly | Full fuse | COE-matched base and dichroic |
| Slumped Glass Bowl | Three-dimensional forming | Fuse, then cool slump | Blank, kiln-safe mold |
| Night Light Panels | Light transmission | Full fuse plus anneal | Clear, translucent, opal glass |
Beginner Project 1: Fused Glass Coasters
Coasters are one of the most satisfying glass fusing project ideas for beginners because the format is small, useful, and easy to decorate without managing a complicated shape. You can practice clean cutting, composition, layering, and kiln firing on a four-inch square before moving on to larger work.
- Prepare the base. Put on safety goggles and use a glass cutter to score and break a 4-inch square of 3mm clear base glass. Check the edges carefully and remove sharp burrs according to your studio’s safety practice. Clean the glass thoroughly so dust and fingerprints do not become part of the fired surface.
- Choose compatible decoration. Select frit, short glass stringers, or a few small dichroic chips for the design. Every piece that will be fused together must be compatible with the same COE, or Coefficient of Expansion. As the kiln heats the glass, its viscosity and softening point change. If pieces expand and contract differently, internal stress can remain after cooling and cause cracks. For more background, see this glass fusing techniques guide.
- Build the pattern. Arrange the decoration on the clear square with a little space between strong focal elements. Frit can create gradients or speckles, while stringers add fine lines and movement. If you want to explore more linear patterns, browse these glass stringer ideas. Keep the design low and balanced so pieces do not slide or stack unpredictably during firing.
- Fire to a full fuse. Place the assembled coaster on a properly prepared kiln shelf. Fire to about 1450F (790C), using a short hold at peak temperature so the layers fuse together. Use the firing schedule recommended for your specific compatible glass and kiln, since thickness, glass type, and kiln behavior affect the result.
- Anneal and inspect. Do not rush the cool-down. Annealing is a slow, controlled stage that allows internal stress to relax and helps prevent breakage. The fused glass annealing tutorial explains why the schedule matters. Once the kiln and coaster are fully cool, inspect the surface and edges before using the piece.
Try a restrained first design, then compare the result with your next coaster. Small changes in frit placement, stringer direction, or color balance will teach you how your materials behave while keeping the project approachable.
Beginner Project 2: Small Fused Glass Pendants
Small pendants are one of the most satisfying glass fusing project ideas for beginners because they turn a few carefully chosen pieces into wearable art. Their compact size also makes it easier to test a color combination or firing approach without committing a large sheet of glass.
Gather a few simple materials
- A small compatible glass blank, either a pre-cut square or round piece
- Dichroic glass accents, stringers, and a glass-compatible adhesive if needed for placement
- A kiln, jewelry bail, and safety glasses for cutting or handling glass
Start with a clean square or round blank. If you are cutting the base yourself, score the glass deliberately and use a shape that can be handled comfortably. A pre-cut blank is a useful shortcut while you focus on decoration. Add one or two dichroic accents for a metallic sheen, then finish the design with short stringer pieces, a simple twist, or a small spiral. The glass stringer project ideas article can help you think beyond straight lines without overcrowding the pendant.
Compatibility is the detail that protects the finished piece. Every glass component must be compatible with the base, including decorative dichroic glass and stringers. Matching the Coefficient of Expansion, or COE, helps prevent cracking as the pendant cools. As the kiln heats, glass viscosity and its softening point change. So pieces that move differently during heating and cooling can retain stress even when the surface looks finished. See this glass compatibility guide before combining materials, and use the dichroic fusing instructions for placement and firing guidance.
Fire the pendant to a tack fuse when you want the stringers and accents to remain visibly dimensional. Choose a full fuse when you prefer a smoother, more unified surface. Follow a tested schedule for your kiln and glass, including an appropriate annealing cycle, then let the piece cool fully before opening the kiln. Once it is clean and inspected, attach a jewelry bail with a suitable glass adhesive. A simple bail turns the finished test piece into a gift, a necklace, or a small lesson in how heat changes glass.
Beginner Project 3: Dichroic Accent Tiles
Dichroic glass can turn a simple fused tile into a small piece of moving color. Its thin, light-transmitting coating reflects some wavelengths while allowing others to pass through, so the surface can flash different colors as the viewing angle or light changes. That shifting metallic effect makes dichroic glass especially rewarding for a first decorative project.
Begin with small square tiles rather than a large panel. A compact format is easier to cut, arrange, and place in a kiln, and gives you room to test the coating. Try a single dichroic square on a clear or colored base, or combine two or three coordinated pieces for a restrained mosaic effect. Finished tiles can become pendants, wall-art accents, small mosaic-style insets, or embellishments for a larger fused-glass design.
Choose compatible glass before you decorate
The most important decision is not the color combination. It is compatibility. The dichroic piece and its base must have the same Coefficient of Expansion, or COE, so they expand and contract at compatible rates during heating and cooling. If they do not, the finished tile can develop stress cracks or break after firing. The glass compatibility guide explains why matching COE matters in a fusing project.
Do not assume that every dichroic sheet belongs with every base sheet. For a COE 90 project, select materials from the COE 90 dichroic glass collection and pair them with a compatible COE 90 foundation. As the kiln heats, the glass softens and its viscosity changes. During cooling, mismatched materials respond differently, leaving stress trapped in the tile even when it looks perfect at first.
Build a tile with a simple composition
Cut a small base square, clean it carefully, and place the dichroic accent with its coated side oriented according to the manufacturer’s directions. Keep the design uncluttered so the reflective surface remains the focal point. Fire and anneal the piece according to your tested schedule rather than copying a single temperature blindly. For a detailed handling and firing overview, follow these dichroic glass fusing instructions.
This project teaches precise cutting, clean assembly, surface awareness, and the value of recording firing results. Once you know how a small tile responds, you can repeat the effect in jewelry or larger mosaic-inspired work.
Beginner Project 4: Slumped Glass Bowl
A slumped bowl is a rewarding next step because it introduces your first three-dimensional form. Instead of leaving a fused sheet flat, you shape it over a kiln-safe mold during a separate, cooler slump firing. This project lets you see how a flat piece becomes functional without requiring a complicated design.
Begin with a simple bowl blank made from compatible glass. Choose a mold roughly 6 to 8 inches wide and 1 to 2 inches deep. With a shape you can easily inspect for chips, sharp edges, or unwanted texture. For more guidance on choosing and preparing forms, see this glass fusing molds guide.
Prepare the bowl blank
Your blank can be a clean sheet of compatible glass or a fused design with a few restrained accents. Keep the surface even so it rests securely on the mold. Consider these beginner-friendly options:
- Two layers of clear or translucent glass for a clean, modern bowl.
- A solid-color base with a few compatible frit accents.
- A simple geometric arrangement of pre-cut pieces, fused flat before slumping.
Compatibility matters even when the finished piece will be shaped later. Glasses with different Coefficients of Expansion, or COE, can respond differently as they heat and cool, leaving stress that may cause cracks. The Coefficient of Expansion reference from FusedGlass.org explains why expansion behavior, viscosity, and temperature are connected.
Understand the slump firing
Fire the blank flat first if your design needs to be fused together. Then place the cooled piece over the prepared mold and run a separate slump firing at a lower temperature than the initial fuse. At slump temperatures, the glass reaches a softer, more fluid state. Its viscosity falls enough for gravity to draw it into the mold, but it does not fully melt into a puddle. The exact schedule depends on the glass, kiln, mold, and desired depth, so follow the manufacturer’s firing guidance and use a controlled anneal afterward.
As you plan the project, the glass fusing techniques guide provides useful context for firing stages and studio workflow. A bowl rewards patience: inspect the mold, keep the design compatible, and let the kiln complete the controlled cooling cycle before handling the finished piece.
Beginner Project 5: Glass Night Light Panels
Night light panels are a playful way to explore how fused glass handles transmitted light. Instead of designing only for a piece to look attractive on a table. You can build a small composition that changes when a gentle light source shines behind it. This makes the project a useful exercise in color, opacity, layering, and restraint.
Start with a thin base of compatible clear or translucent glass. Add a layer of opal glass for softer, diffused color, then place a few small accent pieces on top. Translucent glass lets some light pass through, while opal glass scatters it and creates a more even glow. Small accents in contrasting colors can become bright focal points without blocking the entire panel. Keep the design relatively open, since dense stacks may appear much darker when backlit.
Compatibility matters even in a small project. Use glass with a matching Coefficient of Expansion, or COE, so the layers expand and contract together during firing and cooling. As temperature rises, glass viscosity and softening behavior change, allowing the layers to fuse, but incompatible materials can leave the finished panel under stress. For a broader explanation of heat, compatibility, and firing behavior, review this glass fusing techniques guide.
Keep the surface clear
Watch for devitrification, the cloudy or dull surface that can develop during firing. Before loading the kiln, apply an anti-devitrification spray according to its directions, and do not exceed the planned peak temperature. A conservative schedule and a clean working surface can help preserve the clarity and color you designed into the panel. Avoid opening the kiln during the hot phase, and let the piece cool through a controlled annealing cycle. The fused glass annealing tutorial explains why gradual cooling relieves internal stress and helps reduce the risk of breakage.
Once fired, place the panel in front of a low-watt light source designed for the fixture, not directly against an exposed hot bulb. Test the arrangement in a dim room, where subtle differences between clear, translucent, and opal layers become easiest to see. This project rewards experimentation, so try a simple geometric pattern first and save more intricate imagery for a later firing.
Six Simple Projects to Keep You Inspired (Projects 6-10)
Once you have tried a few flat pieces, these smaller designs give you fresh ways to explore color, shape, and surface. They are practical glass fusing project ideas for beginners because each uses a manageable amount of glass while building one focused skill.
- 6. Frit dishes in a small mold. Layer compatible frit in a shallow kiln-safe mold to make a tiny dish for rings, beads, or other small treasures. This project builds confidence with controlled layering and mold placement. Key tip: Keep the glass level and check that every component shares the same COE, or Coefficient of Expansion, so the piece is less likely to crack as it cools.
- 7. Fused glass suncatchers. Arrange transparent scraps, stringers, or small color accents into a simple circle, diamond, or abstract shape, then add a hanging hole or hardware after firing. Suncatchers build your understanding of light transmission and balanced composition. Key tip: Leave generous space around the edge and avoid making the design too heavy on one side.
- 8. Glass cabochons for jewelry. Fuse small stacks of compatible glass into rounded cabochons, then set them into simple pendants, earrings, or rings once they are finished and inspected. This exercise builds precision in cutting, alignment, and small-scale design. Key tip: Make several pieces in one firing, but keep each stack consistent so you can compare how thickness affects the result.
- 9. Decorated pre-fired tiles. Add compatible glass accents, frit, or stringers to a pre-fired glass tile for a quick surface-design project. You will practice restraint, spacing, and how color changes when layers are heated together. Key tip: Test a small sample first when using an unfamiliar combination, since viscosity and softening behavior change as glass heats.
- 10. Small fused garden art or stakes. Turn a compact fused panel into a garden accent by attaching it to a stake or mounting it where it can catch sunlight. This project builds planning skills, especially designing for viewing distance and outdoor display. Key tip: Keep the piece modest in size and use a secure, heat-safe mounting method rather than relying on an improvised adhesive.
For more variations, browse these 40 great glass fusing projects, then review the types of glass fusing before combining materials. Matching COE is not just a label choice: it helps different pieces respond more predictably through heating, softening, and cooling.
Scaling Up: What to Try After Your First Projects
Once coasters, pendants, and small tiles feel familiar, let your glass fusing project ideas for beginners grow with your skill level. The next step does not have to be a dramatic leap. Try a slightly larger serving piece, such as a shallow bowl or plate, while keeping the design simple enough to evaluate after firing.
Larger work changes the planning, even when the technique remains familiar. Sketch the finished dimensions before cutting, then check that the piece fits comfortably on your kiln shelf with room around it. A bigger project may also require a mold, more shelf primer, and additional firing time. If you are slumping a bowl or plate, choose a mold designed for the shape and confirm that the glass and mold dimensions work together. Our glass fusing molds guide can help you compare mold styles before you buy.
Plan the load before you fill the kiln
A larger kiln load is an opportunity to work efficiently, but do not pack pieces together simply to use every inch of shelf space. Keep compatible glass grouped by COE, leave adequate spacing, and account for the final size of each project. As glass heats, its viscosity and softening point change, so pieces need a firing schedule suited to their thickness and shape. Continue to follow a controlled annealing cycle rather than treating a larger load like a faster project.
Budgeting becomes easier when you treat fusing materials as replenishable studio supplies. Glass, frit, stringers, molds, shelf paper, and kiln wash will be used at different rates. Restock the items you reach for most, then add specialty colors or textures as a project requires instead of buying an oversized assortment all at once. Browse the fusing supplies category when you are ready to plan your next load, and use the 40 great glass fusing projects collection for ideas that stretch your technique without abandoning the fundamentals.
Browse the fusing supplies category for compatible glass, molds, and kiln essentials
Frequently Asked Questions
What is the best beginner glass fusing project?
Fused glass coasters are an excellent first project because they use a small, manageable surface and let you practice cutting, arranging, firing, and annealing. A simple 4-inch square base with decorative frit or stringers gives you room to experiment without committing to a large piece.
Is glass fusing an expensive hobby?
It can require a meaningful initial investment for a kiln and basic tools, but you can control ongoing costs by starting with small projects. Coasters, pendants, and decorative tiles use less glass than large panels or sculptural work, so you can build skills and supplies gradually.
What supplies do beginners need for glass fusing?
Start with a kiln suitable for fusing, glass that is compatible by Coefficient of Expansion, a glass cutter, and safety gear such as goggles and heat-resistant gloves. COE compatibility matters because glass expands and contracts as it heats and cools, while its viscosity changes near the softening point. Mixing incompatible glass can lead to cracking during cooling. Learn more about glass compatibility.
How hot does a glass kiln need to be for fusing?
Many fusing projects reach a peak near 1450 degrees F (790 degrees C), followed by a controlled hold and annealing schedule. The exact schedule depends on the glass, thickness, and desired result, so follow the manufacturer’s firing guidance rather than treating one temperature as universal.
How do you prevent surface cloudiness in fused glass?
Surface cloudiness, called devitrification, can be reduced by thoroughly cleaning the glass, using an anti-devitrification product when appropriate, and avoiding an unnecessarily high peak temperature. Test your firing schedule on a small piece first, because glass composition and kiln behavior can affect the result.
Ready to Start Your First Fused Glass Project?
A small, well-planned project is a practical way to build confidence with compatible glass, kiln firing, and annealing. Shop the fusing supplies category for glass, beginner kits, molds, and kiln supplies, or call Art Glass Supplies at 888-213-8588 to discuss what you need for your first project.