
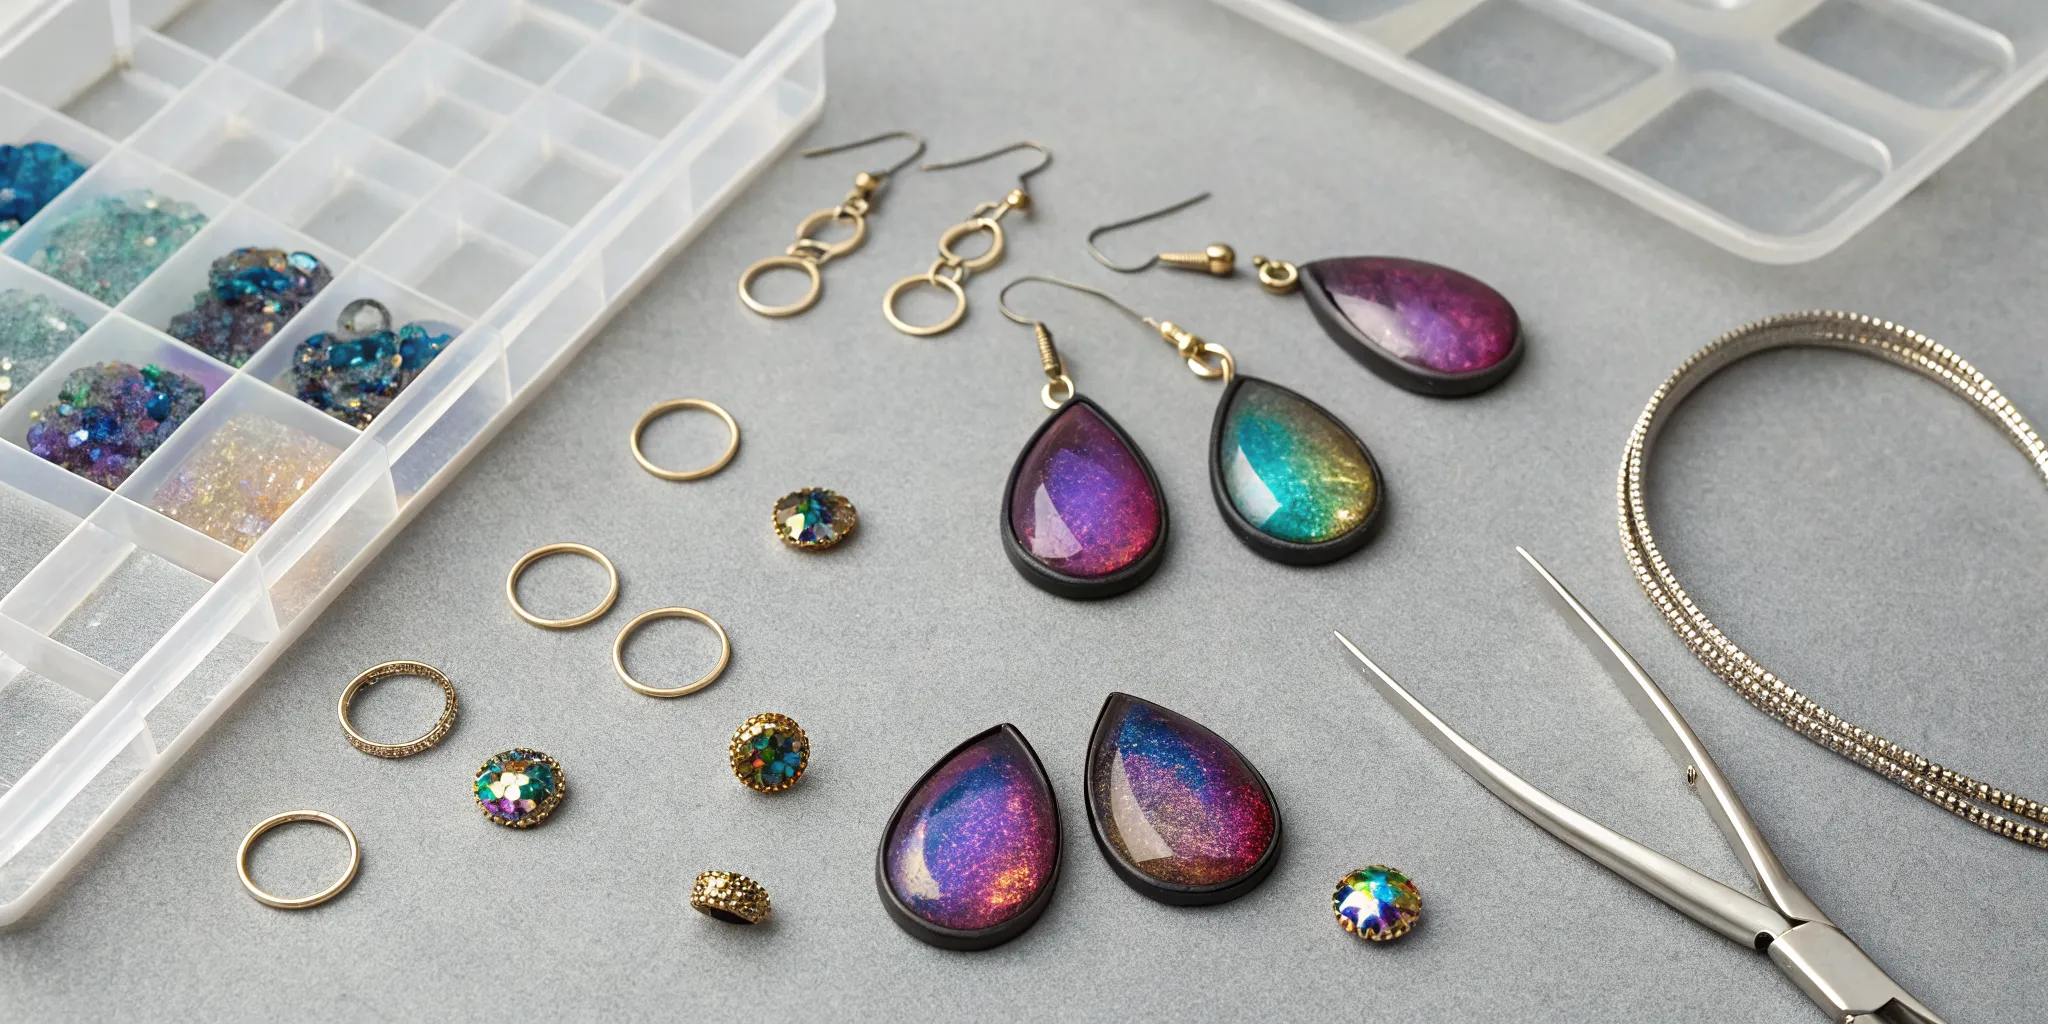
Starting a new craft can feel like trying a new recipe. You could buy every single ingredient separately, or you could use a meal kit with everything perfectly portioned. When you’re ready to create your own dichroic glass jewelry, a specialized kit is that perfect meal kit. They provide a curated selection of shimmering glass and essential supplies, removing the guesswork so you can get straight to the fun part. This guide will help you pick the right one. We’ll cover everything from understanding COE compatibility to the basic fusing and layering techniques for your first successful project.
Key Takeaways
- Stick to One COE System: The most important rule in glass fusing is to never mix glass with different Coefficients of Expansion (COE). Choose either COE 90 or COE 96 for a project and use it exclusively to prevent your finished jewelry from cracking.
- Gather Your Essential Equipment: A jewelry kit is the perfect starting point, but you will also need a few key tools to bring your designs to life, including a glass kiln, safety glasses, and basic cutting tools.
- Develop Good Fusing Habits: Consistently creating beautiful jewelry comes down to technique. Always clean your glass thoroughly, use layering to create depth, and follow the correct firing schedule for your specific materials.
What Exactly Is Dichroic Glass?
If you’ve ever seen a piece of glass that seems to magically change colors as you turn it in the light, you’ve likely encountered dichroic glass. It’s a favorite among glass artists for its vibrant, shimmering appearance that adds a touch of personality to any project. This unique material gets its name from the Greek words “di” (meaning two) and “khoros” (meaning color), which perfectly describes its ability to display multiple colors at once. But this stunning effect isn’t magic; it’s a fascinating blend of art and science that you can use to create beautiful jewelry.
The Science Behind That Signature Sparkle
The secret to dichroic glass lies in a high-tech manufacturing process. In a vacuum chamber, multiple ultra-thin layers of metallic oxides, like titanium and magnesium, are vaporized and fused to the surface of the glass. These micro-layers are what give the glass its signature properties. The coating is designed to reflect certain wavelengths of light while allowing others to pass right through. This is why you see one color when light reflects off the surface and a completely different color when you look through the glass. It’s a modern technique, but the concept of creating jewel-like glass has been around for centuries.
The High-Tech Manufacturing Process
The incredible look of dichroic glass comes from a process that sounds like it’s straight out of a sci-fi movie. It all happens inside a high-tech vacuum chamber where multiple, ultra-thin layers of metallic oxides—like titanium and magnesium—are vaporized by an electron beam. These vaporized metals then fuse to the surface of the glass in microscopic layers. It’s this advanced technique that creates the glass’s signature color-shifting effect and allows for precise control over the final appearance. This results in the stunning and consistent sheets of dichroic glass that artists love for their reliability and dazzling beauty.
Properties: More Than Just a Pretty Surface
So, what do those metallic layers actually do? They create a surface that plays with light in a very specific way. The coating is engineered to reflect certain wavelengths of light while letting others pass straight through. This is the magic behind the two-color effect. When you look at the glass, you see one color from the reflected light, but when you hold it up and look through it, you see a completely different, transmitted color. This unique property is what makes working with COE90 dichroic glass so exciting, giving your jewelry pieces a dynamic quality and depth that changes with every angle.
The Color-Shifting Magic of Dichroic Glass Jewelry
That incredible color-shifting quality is exactly what makes dichroic glass so prized for jewelry making. A single pendant or pair of earrings can flash with brilliant blues, purples, and golds all at once, changing with every movement and shift in lighting. This dynamic effect ensures every piece is truly one-of-a-kind. When you fuse layers of CBS dichroic glass together, you can create even more depth and complexity, turning a simple design into a captivating work of art. The meticulous process of coating each sheet makes it a special material that brings a professional, eye-catching finish to your creations.
### Why Is Dichroic Glass More Expensive?
When you first start shopping for supplies, you might notice that dichroic glass comes with a higher price tag than standard art glass. There’s a good reason for this. As Glass Magazine notes, “Due to the intricate manufacturing process, dichroic glass can be more expensive than traditional glass.” This isn’t just a simple coloring process; it’s a highly technical procedure that takes place in a vacuum chamber where multiple microscopic layers of metallic oxides are bonded to the glass surface. This complex method is what creates the brilliant, color-shifting effects that make each sheet so unique. Think of it as an investment in a premium material that gives your finished jewelry a professional, high-end look that’s difficult to replicate with other materials.
The Growing Popularity of Dichroic Glass
Dichroic glass isn’t just a niche material for hobbyists; its appeal has gone mainstream. According to Glass Magazine, “Dichroic glass captivates architects, designers, and artists and introduces a unique and dynamic element to architectural and interior designs.” This growing appreciation in high-end design has trickled down, creating a strong demand for dichroic art and jewelry. For artists, this popularity is fantastic news. It means there is an active and growing market of customers who recognize the value of dichroic glass and are actively searching for unique, handcrafted pieces. The inherent “wow” factor of a pendant that shifts from brilliant blue to fiery gold in the light makes it an easy sell. Every piece you create is a one-of-a-kind work of art, and in a world of mass-produced goods, that uniqueness is exactly what buyers are looking for.
Market Growth and Opportunity for Artists
If you’re wondering whether now is a good time to turn your glass fusing hobby into a business, the numbers are on your side. The market for dichroic glass is not just stable; it’s expanding rapidly. One industry report found that the market was valued at over $100 million in 2023 and is “expected to grow to $234 million by 2032.” While much of that growth is in architecture, it signals a massive increase in awareness and demand for the material overall. This creates a perfect opportunity for independent artists. As more people become familiar with the beauty of dichroic glass, they’ll be looking for accessible ways to own it. Handcrafted jewelry is the perfect entry point, allowing you to tap into a growing market of enthusiastic buyers.
Where Artists Sell Finished Jewelry
Once you’ve created a collection of beautiful jewelry, the next step is getting it in front of customers. Many artists find success by selling through a mix of online and in-person channels. Online, you can set up your own website, create an Etsy shop, or use social media platforms like Instagram to showcase your work. For a great example, the brand Fusion In Glass notes that you can buy their jewelry online through their website or “in person at the famous Pike Place Market in Seattle, WA.” This hybrid approach is very effective. In-person events like local craft fairs, art markets, and farmers’ markets are excellent for making direct connections with customers who can see the stunning color-shifting effects of your jewelry firsthand.
Established Jewelry Brands and Independent Artists
The path to selling your work can look different depending on your goals. Independent artists often start on platforms like Etsy or at local markets, which offer low barriers to entry and a direct line to customers who appreciate handcrafted goods. As your brand grows, you might transition to your own dedicated website to have more control over your branding and customer experience. Established jewelry brands might take a different route, focusing on selling through art galleries, high-end boutiques, or juried art shows. Regardless of the path, the foundation of a successful business is the same: creating high-quality, beautiful work. Using premium materials, like COE 90 or COE 96 dichroic glass, ensures your pieces are not only stunning but also durable, building a reputation that supports long-term growth.
How to Price Finished Dichroic Glass Jewelry
Pricing your art can feel tricky, but a simple formula can help you get started: Materials + Labor + Overhead + Profit = Price. First, calculate the cost of your materials. This includes the dichroic glass, the base glass, any jewelry findings like bails and earring hooks, and kiln supplies. Next, pay yourself for your time and skill. Decide on an hourly rate that reflects your expertise and track how long it takes to make each piece, from cutting and cleaning to final assembly. Don’t forget to factor in overhead costs, like the electricity to run your kiln and studio rent. Finally, add a profit margin. A good starting point is to research what artists with similar styles and skill levels are charging on sites like Etsy to ensure your prices are competitive yet fair to you.
Popular Dichroic Glass Jewelry Styles and Trends
One of the best parts about working with dichroic glass is the endless creative possibility. While your unique artistic voice should always be the star of the show, it can be helpful to know what styles and trends are currently resonating with buyers. From simple, elegant shapes that let the glass do all the talking to complex, layered designs, there are countless ways to craft beautiful jewelry. Trends often focus on specific color combinations, unique shapes, and the types of metal settings used to finish the piece. Paying attention to these trends can give you a great starting point for new collections, but always remember to add your personal touch to make each piece distinctly yours. Experimenting with different techniques is the key to developing a signature style that stands out.
Common Jewelry Types and Shapes
When it comes to dichroic glass jewelry, some forms are timeless classics for a reason. As one overview notes, “Common jewelry types include earrings (dangles, studs), pendants, and necklaces, often in geometric shapes or teardrops.” These simple shapes are incredibly effective because they provide a perfect canvas to showcase the dynamic colors of the glass without distraction. For beginners, starting with squares, circles, and rectangles is a great way to practice your cutting and fusing skills. If you want to save time or ensure perfect uniformity, you can also work with precut glass shapes. These allow you to jump right into the fun part—designing and layering—and are perfect for creating consistent collections for your shop.
Trending Colors and Unique Layering Effects
While all dichroic glass is stunning, certain color palettes tend to be especially popular. Vibrant combinations like “Rainbow Red, Rainbow Blue, Rainbow Purple, and teal green” are consistent bestsellers because of their eye-catching brilliance. You can achieve incredible depth and unique effects by layering different types of glass. For example, placing a clear, textured cap over a sheet of smooth dichroic glass can create a beautiful, magnified look. You can also experiment by layering a patterned dichroic sheet over a solid color base glass. Brands like CBS Dichroic are famous for their intense colors and patterns, giving you a rich palette to play with as you develop your own unique layering techniques.
Metal Settings and Nickel-Free Options
The final step in creating your jewelry is choosing the right metal setting, which can completely change the look and feel of a piece. Jewelry is “frequently set in Sterling Silver, gold-filled metals, or stainless steel.” Sterling silver offers a classic, bright finish, while gold-filled findings add a touch of warmth and luxury. Stainless steel is a durable and affordable option that’s also hypoallergenic. It’s always a good idea to offer nickel-free options, as many customers have metal sensitivities. Clearly labeling your jewelry as nickel-free can be a major selling point. The bails, earring hooks, and chains you choose are the finishing touches that complete your artistic vision and turn a beautiful piece of fused glass into wearable art.
How to Choose Your First Dichroic Glass Jewelry Kit
Picking your first dichroic glass jewelry kit is an exciting step. With so many options out there, it’s easy to feel a little overwhelmed. But finding the right one comes down to knowing what to look for. A great kit gives you everything you need to start creating beautiful pieces right away, without the guesswork of buying supplies one by one. Think of it as your creative launchpad.
The best kits balance quality, variety, and the right tools to get the job done. You’ll want to pay close attention to the type of glass included, ensuring it’s compatible with any other glass you might already have or plan to buy. It’s also smart to check for essential tools and a good assortment of glass pieces that will let you experiment with different designs. A little bit of research now will help you choose a kit that matches your creative goals and sets you up for a fun, successful jewelry-making experience.
Always Check for COE Compatibility (90 vs. 96)
Before you fall in love with a kit, the first thing you need to check is the COE, or Coefficient of Expansion. This number tells you how much the glass will expand and contract when heated and cooled. For pieces to fuse together properly without cracking, all the glass in your project must have the same COE. The most common types you’ll see are COE 90 and COE 96. A kit will typically contain one or the other, so be sure to pick one and stick with it for your projects. Mixing COEs is a recipe for heartbreak, as your beautiful creation could break apart during the cooling process.
What Tools Should Your Kit Include?
A comprehensive kit should include the basic tools you need to get started. While you’ll eventually build up your own collection, a good starter kit will often provide essentials like a glass cutter and running pliers for shaping your pieces. Some may also include kiln paper or a small mold. Having the right equipment from the beginning makes the whole process smoother and more enjoyable. It allows you to focus on learning the techniques of glass fusing instead of worrying about whether you have the necessary gear. When you have the right tools, you can bring your creative ideas to life more easily.
Look for a Kit with a Great Glass Variety
The magic of dichroic glass is its incredible variety of colors and patterns. A great jewelry kit will give you a diverse selection to play with. Look for kits that offer an assortment of dichroic scrap glass in different textures and on both clear and black bases. This variety is what will spark your creativity and allow you to experiment with layering and design. Having a wide range of options on hand means you can create truly unique jewelry pieces right from your very first project. It’s the best way to discover what styles and color combinations you love working with the most.
Don’t Forget Your Safety Gear
Working with glass is incredibly rewarding, but safety should always be your top priority. While most kits focus on the creative supplies, they don’t always include safety gear. You will absolutely need a pair of safety glasses to protect your eyes from any small shards of glass that can fly up during cutting or handling. It’s also a good idea to have gloves to protect your hands from sharp edges. Before you start your first project, make sure you have these items ready. Setting up a safe workspace is the most important first step in your glass fusing journey.
A Look at Popular Dichroic Glass Kits
Once you know what to look for, you can start exploring the different kits available. Many trusted brands offer fantastic options, each with its own unique appeal. Whether you want a wide variety of glass to experiment with or a simple, budget-friendly pack to get started, there’s a kit out there for you. Let’s look at some of the most popular choices to help you find the perfect fit for your first jewelry project.
Kit Spotlight: ArtGlassSupplies.com Collections
Dichroic glass gets its signature shimmer from micro-thin layers of metallic oxides fused to the surface, creating a stunning color-shifting effect that changes with the light. This dynamic quality is what makes it a favorite among jewelry artists. Our collections at ArtGlassSupplies.com are curated to give you a versatile range of options for your projects. You can find everything from vibrant, patterned sheets to subtle textures, making it easy to find the perfect pieces for your creative vision. We offer a huge selection of both COE 90 and COE 96 glass, so you can always find compatible materials for your studio.
Kit Spotlight: CBS Dichroic Glass
If you love variety, CBS Dichroic Glass is a brand you’ll want to check out. They are well-known for their jewelry packs, which often include a half-pound assortment of different dichroic glass pieces. These packs are an excellent way to build your collection with a range of colors and patterns without committing to full sheets. Many of their offerings feature a thin, clear base, which is ideal for fusing and layering to create intricate, multi-dimensional designs. Getting a pre-selected assortment like this takes the guesswork out of choosing your first pieces and lets you dive right into experimenting with different styles in your jewelry.
Kit Spotlight: Bullseye Glass Selections
Bullseye Glass is another top name in the industry, and for good reason. They offer an incredible selection of high-quality dichroic glass that artists love. You can find their glass in various forms, including full sheets, smaller slides, and even scrap packs. This variety is great because it caters to different project needs and budgets. If you’re just starting, grabbing a Bullseye Glass scrap pack is a cost-effective way to get a feel for the material. As you grow more confident, you can move on to larger pieces for more ambitious designs. Their consistent quality ensures you get beautiful results every time.
How to Find Budget-Friendly Options
You don’t have to spend a lot of money to start making beautiful dichroic glass jewelry. Many suppliers offer beginner-friendly kits that are both affordable and comprehensive. These kits are designed to give you the essentials without a huge financial commitment, making them perfect for anyone new to the craft. They often bundle a small selection of glass with basic tools, so you have everything you need for your first few projects. Starting with a budget-friendly kit is a smart way to explore your new hobby before investing in more specialized equipment like your own kiln or a larger collection of glass.
What Should You Expect to Pay for a Jewelry Kit?
Figuring out your budget is a great first step before you start shopping for a dichroic glass jewelry kit. Prices can vary quite a bit depending on the quantity and quality of the glass, the tools included, and the overall scope of the kit. Knowing the typical price points will help you find the perfect starting place for your creative goals and your wallet. Let’s break down what you can generally expect to find at different budget levels.
Beginner Kits: What You Get for $50–$75
If you’re just getting started and want to try your hand at dichroic jewelry without a major investment, a starter kit is your best friend. In this price range, you’ll typically find a modest collection of essential supplies. Expect a small assortment of dichroic glass scraps, a few jewelry bails, and maybe some glue. These kits are designed to give you a feel for the process and help you create your first few pendants or earrings. They’re a low-risk way to see if glass fusing is the right craft for you before you commit to buying more specialized tools or a larger kiln.
Mid-Range Kits: Upgrading for $75–$100
Ready to move beyond the basics? Mid-range kits offer more creative freedom. For this price, you can expect a larger and more curated selection of glass. Instead of just random scraps, you might get bigger pieces, coordinated color palettes, or a mix of textures and patterns. Some kits in this range may also include a few basic tools, like a glass cutter or running pliers. This is a great option if you’ve already made a piece or two and you’re excited to experiment with more complex designs and different types of COE96 glass.
Premium Kits: Investing $100+ in Your Craft
For artists who are ready to dive in headfirst or want to stock their studio with high-quality materials, premium kits are the way to go. These kits, priced at $100 or more, often contain a generous amount of top-tier dichroic glass, such as specific CBS or Bullseye Glass products. You might also find a wider variety of glass forms, like stringers or frit, included. Premium kits are an investment in your craft, providing you with enough high-quality COE90 glass and supplies to create a substantial collection of beautiful, professional-looking jewelry.
How to Find the Best Deals on Kits
Everyone loves a good deal, and a little savvy shopping can help you get more sparkle for your buck. A fantastic way to build your glass collection affordably is to look for scrap or sample packs. These bundles offer a variety of colors and patterns at a lower price than full sheets. It’s also a good idea to sign up for newsletters from your favorite suppliers to get alerts about sales and special promotions. You can often find great discounts on everything from glass to molds, allowing you to stretch your budget further and experiment with new materials.
Real Talk: What Artists Say About Their Kits
One of the best ways to get a feel for a new craft is to hear from people who are already doing it. When it comes to dichroic glass jewelry, artists have a lot to say about what works, what doesn’t, and what they wish they’d known when they started. Listening to their experiences can help you choose the right kit and sidestep some common frustrations. Let’s get into what fellow creators are saying about their journey with dichroic glass.
What Are the Most Common Beginner Challenges?
Every new skill has a learning curve, and glass fusing is no exception. Many beginners run into similar issues, but knowing about them ahead of time can save you a lot of trouble. A frequent mistake is mixing incompatible glass, like trying to fuse COE 90 glass with COE 96 glass. This can cause your beautiful piece to crack as it cools. Artists also stress the importance of cleaning your glass thoroughly before firing. Skipping this step can prevent the layers from fusing properly. Other common hurdles include firing the kiln too quickly, stacking glass layers too thick, and placing pieces too close together, all of which can affect your final result.
Which Kit Features Do Artists Love Most?
So, what makes a kit truly great? Artists consistently praise kits that give them a solid foundation to build on. A good kit should feel like a mini-workshop in a box, providing a thoughtful variety of fusible and dichroic glass to experiment with. Crafters love when a kit includes all the essential supplies and tools needed to get started right away, taking the guesswork out of gathering materials. This comprehensive approach helps you focus on learning the techniques instead of hunting for supplies. When you have everything you need, you can more effectively apply your new knowledge and start creating beautiful jewelry from your very first project.
How Do These Kits Hold Up? Quality & Durability
When you’re creating jewelry, you want it to last. Quality is a huge topic of conversation among glass artists, especially when it comes to dichroic glass. The stunning, color-shifting glow of this glass comes from a complex manufacturing process involving micro-thin layers of metallic oxides fused to the glass in a vacuum chamber. This process is what makes high-quality dichroic glass so special and worth the investment. Artists appreciate that the jewelry they create is often one-of-a-kind. Using durable, specialty glass and quality findings ensures that each unique piece can be cherished for years to come.
What Else Do You Need Besides a Kit?
Opening a new dichroic glass kit feels like Christmas morning, doesn’t it? All those shimmering pieces of glass are full of potential, just waiting for you to turn them into something beautiful. While a good kit gives you the core materials to get started, it’s really just the first step. To truly bring your jewelry designs to life, you’ll need a few key pieces of equipment and a proper workspace. Think of your kit as the paint and your other tools as the brushes and easel.
The most significant item you’ll need is a kiln. This is the magic box where your carefully arranged glass pieces transform into a single, solid, sparkling creation. It’s a non-negotiable for glass fusing, and choosing the right one is a big decision. Beyond the
Finally, where you do your work matters just as much as what you work with. Setting up a dedicated, safe, and organized workspace is crucial. It not only protects you and your home but also helps your creative process flow more freely. Having everything in its place means you can focus on your art instead of searching for a tool or worrying about making a mess. Let’s walk through what you’ll need to create a functional and safe home studio.
Do You Need a Kiln? Fusing Requirements Explained
You can’t just use a kitchen oven for fusing glass. You need a kiln specifically designed for glasswork. These special kilns are built to heat from the top and sides, ensuring your glass heats evenly to prevent it from cracking under stress. Glass fusing happens at lower temperatures than pottery, typically below 1700°F, so you need a kiln with precise temperature control.
When you’re ready to buy, consider the kiln’s size and electrical needs. Smaller kilns, usually under 15 inches, can often plug into a standard 120V household outlet. Larger models almost always require a more powerful 240V connection, like the kind used for an electric stove. For the best results, look for a model with a digital controller. This allows you to program the exact heating and cooling cycles your glass needs to fuse perfectly.
Your Essential Cutting and Finishing Tools
While many kits come with precut glass, you’ll eventually want to cut your own custom shapes. That’s where a good set of hand tools comes in. The specific tools you need can vary, but a few basics will get you far. At the top of the list is a quality carbide-wheel glass cutter for scoring your glass. You’ll also need breaking and grozing pliers to snap the glass along your score line and nibble away small bits for a perfect fit.
Running pliers are another must-have, as they apply even pressure to help you get clean breaks on straight cuts. As you advance, you might also invest in a glass grinder to smooth and shape sharp edges before firing. Having your own set of glass cutting tools gives you complete creative control over your jewelry designs.
How to Set Up Your Workspace Safely
Safety and organization are the keys to a great workspace. Your kiln needs breathing room, so make sure you have at least 18 inches of clear space around all sides for proper ventilation. The best place for a kiln is in a garage, workshop, or utility room with good airflow and a concrete floor. Always keep flammable materials like paper, fabric, and chemicals far away from the kiln while it’s in use.
Your assembly area should have a sturdy, flat table where you can cut and arrange your glass. Good lighting is also essential for seeing your intricate designs clearly. To work more efficiently, try to fire a full kiln whenever possible. Planning your projects to fill the space saves energy and time, letting you create more beautiful jewelry with every firing.
COE 90 vs. COE 96: Which Should You Choose?
When you start exploring glass fusing, you’ll see the term “COE” everywhere. It stands for Coefficient of Expansion, and it’s one of the most important concepts to understand before you fire up a kiln. Think of it as the glass’s personality: it describes how much it expands when hot and shrinks when cool. The two most common types you’ll work with are COE 90 and COE 96. While they might look similar, they behave differently under heat. Choosing one system and sticking with it, at least at first, is the key to creating strong, beautiful jewelry that lasts. Let’s walk through what makes them different so you can pick the right one for your studio.
Why Glass Compatibility Is So Important
The golden rule of glass fusing is simple: never mix glass with different COEs in the same project. All the glass in your piece, from the base to the dichroic accents, must have the same COE number. When different types of glass are fused together, they cool and shrink at different rates. This creates internal stress that can cause your beautiful creation to crack or even shatter, sometimes long after it has cooled. It’s a frustrating experience that’s completely avoidable. By keeping your COE90 glass separate from your COE96 glass, you ensure every piece is compatible and will fuse into a single, stable work of art.
Fusing Temperatures: The Key Differences
While both COE 90 and COE 96 glass are fused at very high temperatures inside a kiln, their specific melting and cooling behaviors are distinct. COE 96 glass is often described as having a slightly wider working range and being a bit more fluid when molten. COE 90, on the other hand, is known for being a little stiffer at fusing temperatures. This doesn’t mean one is better than the other, just that they require slightly different firing schedules to get the best results. The critical takeaway is that their expansion rates are incompatible. Fusing them together guarantees a weak final product because one glass will be pulling away from the other as it cools.
Which COE Is Best for Beginners?
Honestly, there’s no wrong answer here. Both COE 90 and COE 96 are excellent choices for making dichroic glass jewelry. Many artists find that COE 96 is slightly more forgiving and easier to work with when they are just starting out. However, COE90 glass, particularly from Bullseye Glass, is famous for its incredible range of colors and artistic options. My best advice is to pick one and commit to it for your first several projects. This helps you avoid accidental mixing and allows you to really learn the characteristics of your chosen glass. Browse the colors available in both systems and see which one sparks your creativity the most.
Techniques to Master with Your Jewelry Kit
Once you’ve unboxed your jewelry kit, it’s time to start creating. Dichroic glass is incredibly versatile, and mastering a few core techniques will help you make pieces that look polished and professional right from the start. Think of these skills as the foundation for all your future projects. From learning how your glass behaves in the heat to adding dimension with layers, each step is a chance to get more comfortable with the material.
Don’t worry about getting everything perfect on your first try. Glass art is all about experimentation and discovering what works for you. These techniques are your starting point for bringing your creative ideas to life. As you practice, you’ll develop your own style and find new ways to make the glass sparkle. Ready to get started? Let’s walk through the three essential skills you’ll want to focus on first.
Learn Basic Fusing
Fusing is the magic that happens inside the kiln, where separate pieces of glass melt together to become one. Your jewelry kit will likely come with a variety of fusible and dichroic glass, and your first goal is to understand how they interact. Basic fusing involves arranging your glass pieces on a kiln shelf and firing them according to a specific schedule. The temperature and timing will determine whether the glass pieces just stick together (tack fuse) or melt into a smooth, flat surface (full fuse). Getting comfortable with your kiln is the most important step, so start with simple projects to see how your glass responds.
How to Create Depth by Layering Glass
The best part about dichroic glass is its incredible, color-shifting shimmer, which comes from a special metallic coating. Layering is how you make that effect truly stand out. By placing a piece of dichroic glass on top of a solid-colored base, you give the colors a background to pop against. You can also stack multiple pieces of dichroic glass to create intricate patterns and a stunning sense of depth. Every sheet of COE90 glass with a dichroic coating has gone through a meticulous process, making it a prized material for artists who love to play with light and color in their work.
How to Properly Cap with Clear Glass
While you don’t have to cap every single piece, it’s a highly recommended technique for jewelry making. Capping means placing a layer of clear glass over your design before firing. This simple step does a few important things: it protects the delicate dichroic coating from scratches or burning off in the kiln, it magnifies the colors underneath, and it gives your finished piece a smooth, glossy surface that looks professionally finished. Just make sure your clear cap and your base glass are the same COE, like COE96 glass, to ensure they fuse together perfectly without cracking.
Cutting, Shaping, and Polishing Cabochons
While your kit’s precut pieces are a great starting point, you’ll soon want to create your own custom shapes. This is where you get to be the designer. To start, you’ll need a quality glass cutter to score your design onto the glass. From there, a pair of breaking pliers will help you snap the glass along your score line, while grozing pliers let you nibble away tiny bits to refine the shape. For cleaner, straighter breaks, running pliers are a lifesaver. To get those perfectly smooth, rounded edges on your cabochons before they even hit the kiln, a glass grinder is an invaluable tool. It lets you smooth away any sharpness, ensuring your final piece has a professional feel. The final polish comes from the heat of the kiln during a full fuse, which melts the surface into a glossy, smooth finish.
Common Mistakes to Avoid (And How to Fix Them)
When you’re just starting with dichroic glass, it’s easy to get so caught up in the creative flow that you overlook a few technical details. Trust me, we’ve all been there. But learning to sidestep a few common pitfalls early on will save you a lot of heartache and materials. Think of these as the foundational habits that lead to consistently beautiful, professional-looking jewelry. Getting these right from the start will make your entire glass fusing experience smoother and more rewarding.
The three biggest areas where beginners often run into trouble are glass compatibility, preparation, and firing. It might sound a bit technical, but these are the pillars of a successful fuse. Mixing the wrong types of glass can cause your piece to self-destruct, skipping a simple cleaning step can ruin a perfect design, and firing your piece with the wrong settings can lead to a warped or broken result. By paying a little extra attention to these steps, you ensure that the vision you have in your head is the one that comes out of the kiln. Let’s walk through each of these common mistakes so you know exactly what to watch for in your own studio.
Mistake #1: Mixing Incompatible Glass Types
This is the golden rule of glass fusing: always use glass with the same Coefficient of Expansion (COE). The COE is just a number that tells you how much a specific type of glass will expand when heated and shrink when cooled. If you try to fuse a piece of COE 90 glass to a piece of COE 96 glass, they will shrink at different rates. This creates immense internal stress, and your beautiful creation will likely crack or even shatter during the cooling process or long after. To avoid this, simply check the COE of all your glass before you start a project and stick to one type. It’s the most important step for creating durable, lasting jewelry.
Mistake #2: Skipping the All-Important Cleaning Step
It’s tempting to jump right into designing, but skipping the cleaning step is a recipe for disappointment. Your glass might look clean, but it’s covered in oils from your fingers, dust, and residue from the cutting process. These contaminants can prevent the glass layers from fusing together properly, leaving you with cloudy spots, bubbles, or a weak bond. Before you assemble your piece, give every bit of glass a thorough wipe-down with a lint-free cloth and a glass cleaner or a simple solution of dish soap and water. A clean surface is essential for a strong, crystal-clear fuse. It’s a small step that makes a huge difference in the final quality of your jewelry.
Mistake #3: Firing at the Wrong Speed or Temp
Every type of glass has a perfect recipe for firing, known as a firing schedule. This schedule dictates not just the top temperature but also how quickly the kiln heats up and cools down. Firing too fast can cause thermal shock, leading to cracks, while firing too slowly or at the wrong temperature can result in a warped, under-fused, or over-fired piece. Always follow the manufacturer’s recommended firing schedule for the specific glass you are using. If your kit came with instructions, start there. As you gain more experience, you can experiment, but sticking to the recommended schedule is the surest way to get great results every time.
Let’s Make Your First Piece of Dichroic Glass Jewelry
Alright, you have your kit and you’re ready to make something beautiful. Your first project is all about learning the process and seeing how the glass transforms in the heat. Don’t focus on creating a masterpiece right away. Instead, get comfortable with the tools and materials. The goal is to create a piece you can be proud of while building skills for more complex designs later. Let’s walk through the steps to create your first piece of dichroic glass jewelry, from setting up your space to pulling your finished creation from the kiln.
First, Set Up Your Workspace for Safety
Before you start cutting glass, get your area ready. A dedicated, well-lit workspace is key. Make sure your surface is flat and easy to clean, since tiny glass shards can get everywhere. Always wear safety glasses to protect your eyes. It’s also a good idea to work in a well-ventilated space, especially when the kiln is running. Speaking of kilns, they are the biggest investment in glass fusing. If you’re not ready to buy one, look for local art studios that offer kiln rentals. This is a great way to try the craft without a huge upfront cost.
Next, Choose a Beginner-Friendly Design
For your first project, think simple. Pendants and earrings are perfect starting points because they are small and don’t require complex cuts. A simple two-layer pendant, with a dichroic base and a clear cap, is a classic for a reason. It lets you see the magic of the dichroic effect without getting overwhelmed. You can experiment with a few different shapes using precut glass or by scoring and breaking your own. Starting with a manageable project like this helps you learn the fundamentals of fusing COE 90 glass and builds your confidence.
A Step-by-Step Guide to Your First Piece
Ready to fuse? Here’s a simple process. First, clean your glass pieces thoroughly with a lint-free cloth and alcohol to remove any oils or dirt. Next, arrange your design on a piece of kiln-washed shelf paper or a prepared mold. Place your clear cap directly on top of the dichroic layer. Carefully transfer your project into the kiln. You’ll need to follow a specific firing schedule, but a basic full fuse is a great start. Once the firing is complete, let the kiln cool down completely to room temperature before opening it. This slow cooling prevents thermal shock and cracking.
Beyond Jewelry: Other Applications of Dichroic Glass
While we love seeing that signature shimmer in a pair of earrings, the magic of dichroic glass extends far beyond the jewelry box. Its unique ability to shift colors and play with light has captured the imagination of creators in fields like architecture and interior design. Understanding how this incredible material is used on a larger scale can spark new ideas for your own work, whether you’re creating home decor, sculptural pieces, or just looking for fresh inspiration. It’s a great reminder that the principles of light and color that you apply to a small pendant can also be used to transform an entire building.
Architectural and Interior Design
Imagine walking past a building where the windows seem to change color with every step you take. That’s the power of dichroic glass in architecture. Designers use large panels of it to create stunning, modern facades that feel alive and dynamic. The glass introduces a unique and captivating element to buildings, making them instantly eye-catching. But it’s not just about looks. This type of architectural glass can also be practical, helping to save energy by reflecting the sun’s heat. Seeing these large-scale applications can inspire you to think about how you can incorporate similar dynamic elements into fused glass panels or decorative pieces for the home.
Dichroic Film as a Versatile Alternative
What if you could get that incredible dichroic effect without commissioning a massive, custom-made pane of glass? That’s where dichroic film comes in. This special adhesive film has the same color-shifting properties as the glass itself but offers much more flexibility. It can be applied directly to existing glass surfaces, making it a versatile and often more affordable option for various projects. You can find it used on everything from office partitions to shower doors. For an artist, this film opens up new possibilities for larger installations or even for adding a touch of magic to your own studio windows without a permanent commitment.
Related Articles
- Precut Dichroic Glass Circles Rainbow 2 Clear Glass COE96
- Precut Dichroic Glass Circles Rainbow 2 on Clear Glass COE90
- Precut Dichroic Glass Circles Candy Apple Red on Clear Glass COE96
- Precut Dichroic Glass Circles – Candy Apple Red on Black Glass COE90
- Innovative Techniques: Dichroic Glass & Metallic Paints
Frequently Asked Questions
Do I really need a special kiln for this? Yes, a kiln designed for glass is essential. A standard kitchen oven doesn’t get nearly hot enough, and you need precise temperature control to properly fuse the glass without causing stress or cracks. Look for a small kiln that can plug into a regular household outlet; it’s a great starting point and a worthwhile investment for making quality jewelry.
My finished piece cracked. What’s the most likely reason? Cracking is almost always caused by one of two things: incompatibility or thermal shock. The most common mistake is accidentally mixing glass with different COEs, like COE 90 and COE 96, which shrink at different rates and pull each other apart as they cool. The other culprit is cooling the kiln down too quickly, which shocks the glass. Always let your kiln cool completely to room temperature before you even think about peeking inside.
What’s the real difference between a “tack fuse” and a “full fuse”? These terms just describe how much the glass melts. A tack fuse heats the glass just enough for the pieces to stick together, so your design will still have some texture and dimension. A full fuse uses a higher temperature to melt the glass until it becomes a single, smooth, and flat piece. For jewelry, a full fuse is often preferred because it creates that polished, glossy look.
Why is it so important to stick to either COE 90 or COE 96? Think of the COE number as the glass’s “language.” All the glass in a single project must speak the same language to fuse together successfully. If you mix them, they expand and contract at different rates when heated and cooled. This creates a huge amount of internal stress that will cause your piece to break, sometimes hours or even days after it comes out of the kiln.
Do I have to put a clear cap on every piece of jewelry? You don’t have to, but it’s a great habit to get into. Capping your design with a layer of clear glass protects the delicate dichroic coating from getting scratched or burning off in the kiln. It also acts like a magnifying glass, making the colors underneath look more vibrant and giving the finished piece a beautiful, professional depth and shine.