
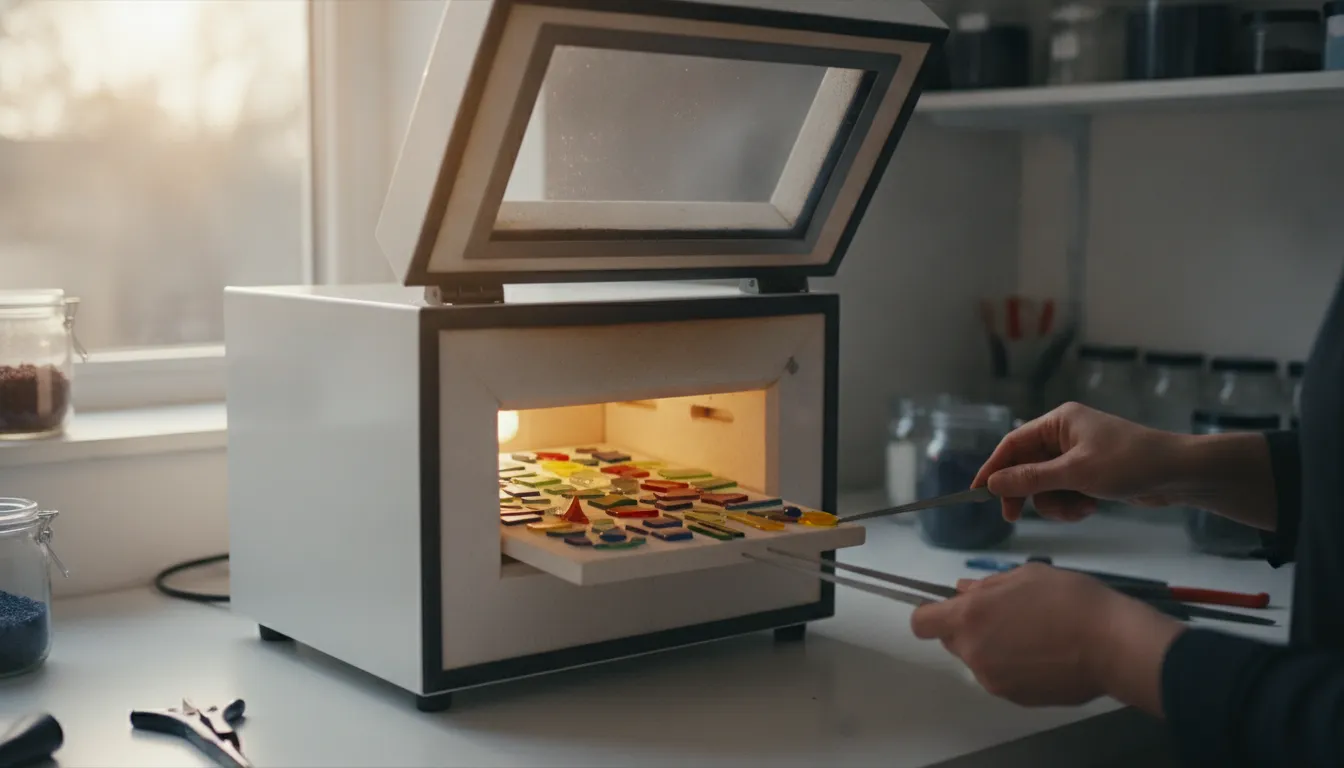
Choosing a kiln for glass fusing is less about finding the smallest chamber and more about matching the equipment to the work you actually plan to make. A compact electric kiln can be a practical fit for jewelry, small panels, and samples in a home studio. Capacity, electrical planning, controller behavior, ventilation, and compatible glass all matter before you buy.
A small kiln is a good choice when its chamber fits your largest planned projects. It should also suit your electrical setup, and its controller should support the ramps, holds, and annealing your glass requires. Always verify current model specifications and follow the manufacturer’s installation guidance.
Start by treating the purchase as a studio-readiness decision, not simply a size comparison. Your project plans, firing habits, available space, and growth expectations will help clarify what to check first.
What Should You Check Before Buying a Small Kiln?
The right choice starts with your projects, not a product label. Before comparing features, write down what you plan to fire, how often you expect to use the kiln, where it will live, and what you may want to make six months from now. A compact kiln can be an excellent fit for small pieces, but limited capacity becomes frustrating when every project must be divided into multiple firings.
Match the chamber to your actual projects
Think about the largest finished piece you expect to make, then account for the shelf space needed around it. Jewelry, pendants, brooches, and similar small projects can suit a small work area. One Oklahoma State glass-fusing class, for example, assigned each student a 5-by-5-inch shelf for projects such as earrings and cuff links. That is useful context, not a universal definition of small-kiln capacity. Measure your planned molds, tiles, and assembled designs rather than assuming a kiln will accommodate them because the exterior looks compact.
Consider how often you will fire
Occasional makers may value a smaller chamber because it can align with modest project batches and a home-studio workflow. Frequent users should consider whether the shelf area and loading pattern will create unnecessary repeat firings. Also think about the materials and processes you expect to add later. If your interests may expand from small jewelry to larger panels, slumped forms, or production batches, choose based on your likely next stage rather than today’s first project.
Check the workspace before checking out
A kiln needs more than an open spot on a workbench. Confirm that the intended location can meet the current manufacturer’s placement, clearance, ventilation, and electrical instructions. Specifications are model-dependent. For perspective, a university FabLab describes one Paragon Home Artist 120 example as using a standard household outlet, with a 12-inch-wide, 12-inch-deep chamber and a 0.78-cubic-foot volume. Those figures describe that example only, not every small kiln. Verify the exact product page and installation guidance before purchase, and ask a qualified electrician about electrical questions.
Finally, separate capacity from compatibility. A piece fitting inside the chamber does not establish that the glass is compatible. COE, or Coefficient of Expansion, and the manufacturer’s material guidance remain separate checks for later in the buying process.
How Small Kiln Size Fits Your Projects and Workspace
A small kiln should fit the work you actually make and the space where you will use it. Start with the shelf area and chamber dimensions, then consider how you will load pieces, reach the controls, and move safely around the equipment. A kiln that fits on paper may still be awkward if its lid, door, or controller conflicts with a wall, worktable, or storage area.
Match shelf area to the pieces you fire
Think in terms of the largest finished piece, not just the average project. Measure the footprint of your molds, tiles, jewelry layouts, and any separators or supports that must share the shelf. Leave room for the actual loading arrangement rather than assuming the advertised chamber volume is usable surface area. A university glass-fusing class, for example, assigned each student a 5-by-5-inch shelf for small projects such as earrings, pendants, brooches, and cuff links. That is a useful illustration of project scale, not a universal definition of a small kiln.
Also check chamber depth and height. A shallow chamber may suit flat work but limit taller molds or stacked setups. Confirm the usable interior dimensions in the current product specifications, since shelf size, chamber shape, and accessories vary by model.
Plan the footprint and access before delivery
Measure the intended location, including the space needed to open the lid or door and handle shelves without twisting or bumping nearby equipment. Keep the controller visible and accessible. Plan the route from delivery to the workspace as well, especially if the kiln must pass through a doorway or be carried up stairs. Product specifications should also be checked for electrical requirements, installation instructions, and model-specific clearances. General guidance cannot replace the manufacturer’s directions or a qualified electrician’s assessment.
| Project type | Fit question | Buying implication |
|---|---|---|
| Jewelry and small components | Can the shelf hold several layouts without crowding? | A compact chamber may be practical if the loading area matches your batch size. |
| Small tiles or panels | What is the largest flat piece, including mold or separator space? | Prioritize usable shelf dimensions over the outside footprint alone. |
| Molds or shaped work | Will the chamber height and access accommodate the mold safely? | Check interior height, opening clearance, and loading angle in the specifications. |
| Growing studio practice | Will future projects exceed today’s shelf area? | Compare the cost and workspace impact of moving up a size before choosing the smallest option. |
For current dimensions and electrical details, review the relevant kiln electrical requirements and verify the exact model documentation before ordering.
Power, Placement, and Ventilation Come Before the First Firing
A small kiln still creates a high-temperature work area, so setup deserves the same care as the buying decision. Electrical requirements, airflow, clearances, and everyday movement around the kiln are model- and site-dependent. Confirm the current product specifications, then follow the installation instructions supplied by the manufacturer. General advice cannot replace a qualified electrician or the manual for your specific kiln.
- Verify the electrical requirements before moving the kiln. Check the product page and manual for the required voltage, amperage, plug, and circuit guidance. Do not assume that a small kiln uses a standard household outlet or that an existing studio circuit is suitable. If the circuit, receptacle, wiring, or load is uncertain, have a qualified electrician evaluate it. Never alter a plug or circuit as a workaround.
- Choose a stable location with manufacturer-specific clearance. Place the kiln on the support and surface specified by its instructions, with the required clearance from walls, shelving, curtains, paper, wood, solvents, and other combustible materials. Clearances are not universal. Keep access to the controls and loading area practical, and do not crowd the kiln with storage simply because its footprint is compact.
- Plan ventilation for the actual room. Confirm how the manufacturer expects the kiln to be ventilated and make sure the system is working before firing. The University of Memphis Environmental Health and Safety procedure advises verifying that ventilation is working properly and keeping it on while the kiln is in use: review the academic kiln-safety procedure. A home studio with limited airflow may need a different placement or a professional assessment.
- Remove cord, trip, and combustible-material hazards. Route the power cord away from walkways, heat, and pinch points. Keep the surrounding area free of flammable or combustible storage, and identify the location and use of an appropriate fire extinguisher. The same Memphis procedure advises removing tripping hazards, keeping the power cord out of the way, and not storing combustible materials in the kiln area.
- Set a safe operating boundary. Load only when the kiln is off, keep hands and tools away from heating elements, and do not leave a firing unattended. If the manual, building conditions, or electrical inspection raises a question, stop and ask the manufacturer or an electrician rather than improvising.
For a practical next step, compare current equipment requirements with your workspace before choosing a model.
Why Controller and Annealing Capability Matter for Glass
A glass kiln does more than reach a high temperature. It must move through a firing schedule at controlled rates, pause when the glass needs time to react, and cool in a way that reduces stress. That is why the controller and annealing capability deserve as much attention as the chamber size when you compare a small kiln.
Programmable ramps and holds create a repeatable firing schedule
A programmable controller can coordinate ramps, which are the rates at which the kiln heats or cools, and holds, which are planned periods at a selected temperature. Those steps help the glass respond predictably instead of exposing it to abrupt, uncontrolled changes. A schedule may include different stages for heating, fusing, and cooling, depending on the project, the glass manufacturer, and the desired result.
Controller functions vary by model, so do not assume that every small kiln stores the same number of programs or offers the same level of editing. Check the current product specifications and operating manual before buying. For broader context on how these stages fit into glass work, review these glass-fusing kiln fundamentals.
Annealing is controlled cooling, not simply turning the kiln off
Annealing gives the glass time to equalize internal stress during the cooling portion of a firing. The controller follows the selected cooling schedule rather than treating the end of the peak-temperature hold as the end of the process. Skipping or shortening the appropriate annealing stage can leave a piece vulnerable to cracking, even when it looked successful when removed from the kiln.
The correct schedule depends on the glass type, thickness, shape, and manufacturer guidance. A controller does not make incompatible glass compatible, and it cannot replace a sound firing schedule. It gives you a more consistent way to follow one.
Glass firing is different from generic high-temperature heating
A kiln designed for glass work must support the controlled sequence your projects require, not merely produce heat. A basic high-temperature chamber may be unsuitable if its controls do not provide the needed ramps, holds, or cooling behavior. When evaluating a small kiln, match the controller’s documented functions to your intended work. Then verify the current specifications rather than relying on a product’s size or name alone.
COE Compatibility Is Separate From Kiln Size
A glass piece fitting inside a small kiln only answers a size question. It does not tell you whether the materials can be fused together successfully. Compatibility depends on the glass system, the firing schedule, and the guidance provided by the manufacturer.
What COE means for fused glass
COE stands for Coefficient of Expansion. In glasswork, it is a compatibility designation that describes how a glass family responds to temperature changes. When you fuse pieces together, they need to behave compatibly as they heat and cool. If they do not, the finished project may develop stress or fail, even when the pieces looked correct during the firing.
COE90 and COE96 are distinct compatibility families, not two size or performance levels of a kiln. Keep glass, frit, stringers, dichroic elements, and other components within a compatible system unless the material manufacturer specifically provides guidance for combining them. You can review the differences through the COE90 glass options and COE96 glass options pages before assembling a project.
Why chamber fit does not prove compatibility
A larger chamber does not make incompatible glass compatible, and a small kiln does not automatically limit you to one COE family. The kiln supplies a controlled heating environment; it does not change the compatibility designation of the materials you place inside it. Similarly, a programmable controller can help manage ramps, holds, and cooling, but controller capability is separate from the glass system.
Before firing, check the label and technical information for every component, including materials that look similar but come from different product lines. Follow the manufacturer’s compatibility and firing guidance rather than assuming that matching color, thickness, or physical fit is enough. If you are still learning how the equipment and materials work together, the customer’s glass-fusing kiln fundamentals guide can provide broader context. Treat COE selection as a materials decision first, then choose a small kiln whose chamber and controls suit the compatible projects you plan to make.
Small Kiln Setup: Shelves, Separation, and a Final Checklist
A careful setup protects the kiln, the shelf, and the project before the first firing. Start with the shelf preparation recommended by the kiln and accessory manufacturers. Depending on the materials and process, that may mean applying kiln wash correctly or using compatible shelf paper. Let any coating dry as directed, and avoid placing glass directly on an unprepared shelf when the instructions call for a release layer.
Load the shelf with room to work
Keep pieces separated according to the project plan, especially when working with multiple components or forms that could move as they heat. Do not let glass, molds, or other materials contact the kiln walls or heating elements. Loading should happen with the kiln turned off, and the shelf should sit level and stable. The University of Memphis kiln safety procedure also advises keeping the power cord out of the way and removing tripping hazards from the work area: review the kiln safety procedure before operating equipment.
Review the manual before firing
The manual is the final authority for shelf placement, lid or door operation, controller settings, electrical requirements, clearances, and maintenance. These details vary by model, so do not transfer assumptions from another small kiln. If you are still comparing equipment, check the current kiln electrical requirements and the product documentation. General setup advice is not a substitute for the manufacturer’s instructions or a qualified electrician.
Before starting a firing, confirm that ventilation is working and on, combustible materials are away from the kiln, and you know where the fire extinguisher is located. Do not leave the kiln unattended while firing, and never touch heating elements or attempt electrical repairs. Keep a simple checklist near the controller:
- Shelf and release layer prepared for the project.
- Glass and molds positioned securely with appropriate separation.
- Kiln area clear, ventilated, and free of combustible storage.
- Power connection, cord path, and model instructions reviewed.
- Firing schedule checked before the kiln is started.
See small kiln options and confirm the current setup requirements.
Frequently Asked Questions
What is the best small kiln for glass fusing?
The best choice is the one whose chamber fits your usual projects, whose controller supports the ramps and holds you need, and whose electrical requirements suit your workspace. Also consider how often you fire, whether you need room to grow, and how easily you can load the shelf. Compare those factors before comparing brands or model names.
Do small kilns use a lot of electricity?
Electricity use depends on the kiln’s rated power, firing schedule, insulation, and local utility rate, so size alone does not answer the question. Check the manufacturer’s current electrical specifications before buying. Confirm that your circuit, outlet, cord routing, and installation plan are appropriate, and ask a qualified electrician about changes to household wiring.
Do mini kilns work for glass fusing?
Yes, a mini kiln can work well for small projects such as jewelry components, pendants, small embellishments, and test pieces. Its limitations are shelf area, chamber height, loading access, and the number of pieces you can fire at once. Measure your largest planned project, including its firing surface, rather than choosing by the word mini.
What is the difference between a small electric kiln and a microwave kiln?
A small electric studio kiln uses powered heating elements and a controller to manage a programmed firing schedule. A microwave kiln is a different, compact firing system designed for microwave use and should be treated as a separate tool category. They differ in capacity, process control, setup, and the kinds of projects they suit, so do not assume that one is a direct substitute for the other.
What should I check before using a small kiln?
Read the manufacturer’s instructions, verify the electrical setup, provide suitable ventilation, keep combustible materials away, remove trip hazards, and plan how the firing area will be monitored. The University of Memphis kiln safety procedure also advises keeping ventilation on and not leaving a kiln unattended while firing: kiln safety guidance.
Ready to Compare Small Kiln Options?
The right kiln depends on your projects, available workspace, and the specifications that matter most for your setup. Review current product details side by side so you can choose equipment that fits your glass-fusing plans.
Browse small glass-fusing kiln options and compare specifications for your workspace.