
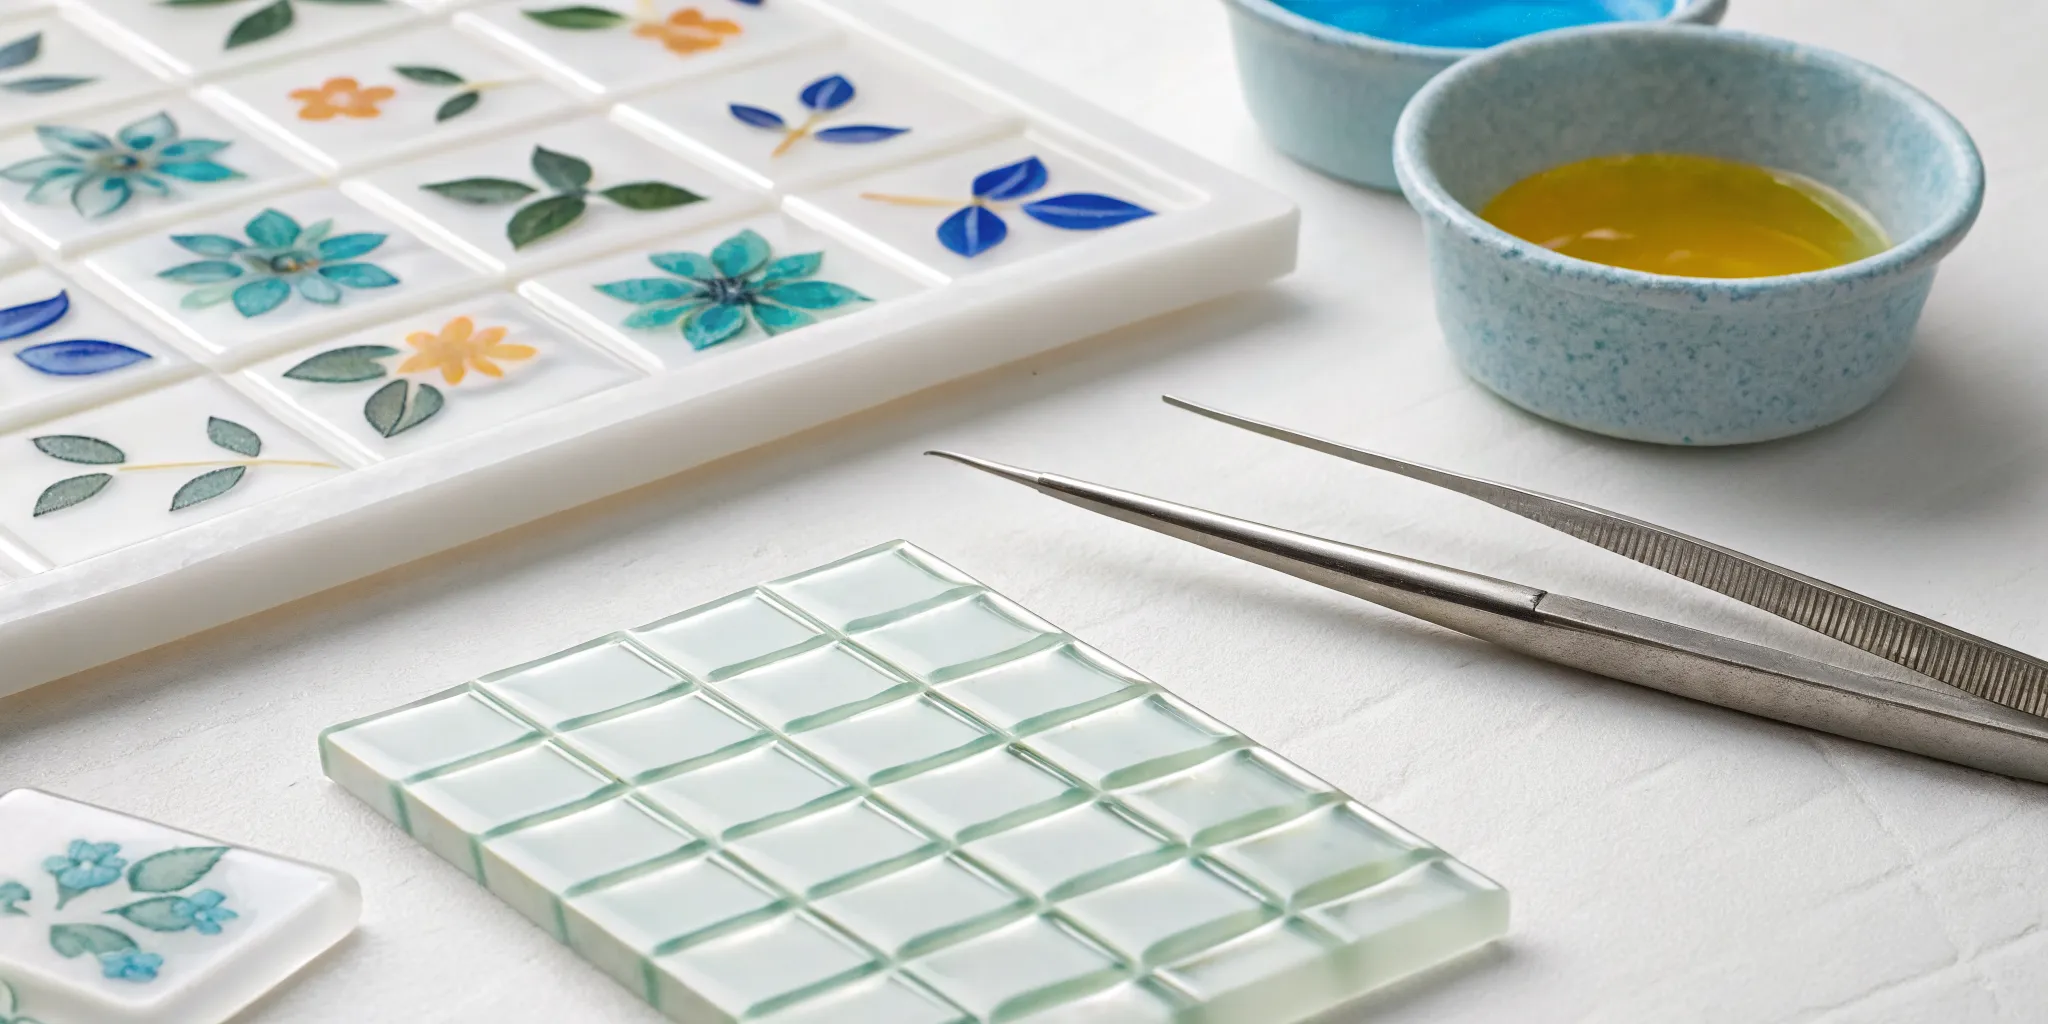
Adding complex, detailed imagery to your glass art can feel like a huge challenge, especially if you’re not a painter. But what if you could apply crisp lines, photorealistic pictures, or even shimmering metallic accents with perfect precision every time? That’s the magic of using transfers for glass. These special enamel decals open up a whole new world of creative possibilities, allowing you to give your work a truly professional and polished look. Whether you want to create a set of coasters with a repeating pattern or a platter with a delicate floral motif, this guide will show you how to master the technique.
Key Takeaways
- Always Match Your COE: For a durable, crack-free piece, the decal’s Coefficient of Expansion (COE) must match your glass. This ensures both materials expand and contract together in the kiln, preventing stress fractures.
- Clean and Smooth for a Perfect Bond: A pristine, fingerprint-free glass surface is non-negotiable for a good transfer. After placing the decal, squeegee out all water and air bubbles to guarantee the design fuses completely and evenly.
- Trust the Manufacturer’s Firing Schedule: Every decal has a specific temperature range for success. Firing too hot can erase your design, while firing too cool prevents it from becoming permanent, so always use the recommended schedule for crisp, lasting results.
So, What Are Fused Glass Decals?
If you’ve ever wanted to add intricate, detailed images to your glasswork without spending hours on detailed painting, fused glass decals are about to become your new best friend. Think of them as sophisticated temporary tattoos for your glass that become permanent in the kiln. These are not your average stickers. Fusible glass decals are high-quality waterslide transfers printed with special glass-compatible enamels. They allow you to apply everything from delicate floral patterns to bold geometric shapes onto your glass projects with precision and ease.
Fusible decals are specifically designed to perform under heat, so your choice will depend on your glass, your project, and the firing temperatures you plan to use. They offer a fantastic way to add a professional, polished layer of complexity to your art, whether you’re making jewelry, plates, or decorative panels.
How Do These Glass Transfers Actually Work?
The magic behind fused glass decals lies in their composition. Each decal is a thin layer of enamel design held on a special paper backing. When you apply the decal to your glass and fire it in a kiln, the paper and adhesive burn away completely. As the temperature rises, the enamel design melts and sinks directly into the surface of the glass, creating a permanent bond. This process ensures the image won’t scratch off, fade, or peel over time.
It’s crucial to use decals specifically made for kiln firing. These are formulated to be compatible with the expansion and contraction of glass, like COE90 glass, ensuring your final piece is stable and beautiful.
How Firing Makes Your Decal Permanent
Applying the decal is just the first step; the real transformation happens inside the kiln. Firing decals requires a careful approach because the temperatures needed to melt glass are often too high for the delicate enamel designs. Firing too hot can cause the image to burn away entirely, leaving you with a blank piece. Because of this, decals are typically applied after your glass has already been fused and shaped, usually in a separate, lower-temperature firing.
A successful firing schedule ensures your decal melts smoothly into the glass without burning, cracking, or losing its vibrant color. Your kiln is the tool that turns a simple decal into a permanent, integrated piece of art, so getting the temperature and timing right is key to a flawless finish.
What Types of Fused Glass Decals Can You Use?
Once you start looking, you’ll find a whole world of fused glass decals. They come in different styles, colors, and application types, each offering a unique way to add detail to your work. Understanding the main categories will help you pick the perfect decal for your next project, whether you’re aiming for a subtle accent or a bold centerpiece. From the firing temperature to the printing method, these details make a big difference in your final piece. Let’s look at the most common types you’ll encounter.
High-Fire vs. Low-Fire: Which Decal Do You Need?
The most important distinction to understand is between high-fire and low-fire decals. For glass fusing, you’ll almost always want to use high-fire decals. When you fire a piece of glass with one of these, the enamel design melts and fuses permanently into the glass surface. This creates a durable, seamless finish that won’t scratch or wear off. Low-fire decals, often used for ceramics, are designed for much lower temperatures and won’t survive the heat of a glass kiln. Always check that your decals are specifically made for the high temperatures of glass fusing to ensure your beautiful designs become a permanent part of your art.
Silkscreen, Digital, or Metallic: Finding Your Finish
Decals are created using different printing methods, which affects their final look. Silkscreen decals are made by pushing ink through a mesh screen, resulting in crisp, vibrant colors. Digital decals are printed, which allows for more complex, photo-realistic images with intricate details and gradients. Beyond the printing method, you can also find decals with stunning metallic finishes. These special decals use materials like 23K gold, copper, or platinum to add a brilliant, reflective shimmer to your glass pieces. Choosing between these options depends entirely on the artistic style you want to achieve in your work.
How to Apply Waterslide Decals
Most fusible decals you’ll work with are waterslide decals. The name gives a great hint about how they work: you soak them in water to release the design from its paper backing. Applying them is a straightforward process, but precision is key. Before you begin, it’s essential to clean your glass surface thoroughly, as any dust or oils can prevent the decal from adhering properly. Once the glass is clean, you slide the decal from the backing paper onto the glass, carefully smoothing it out to remove any air bubbles or wrinkles. This step ensures the design makes full contact with the glass, which is critical for a successful firing.
How to Pick the Perfect Transfers for Your Glass Art
With so many beautiful decals available, it’s easy to get carried away. But choosing the right one is about more than just a pretty design. The best decal for your project works in harmony with your glass, both technically and artistically. A little planning at this stage can save you from disappointment after firing. For a successful piece, you need to consider three key things: technical compatibility (COE), visual harmony (design and color), and intended use (food safety and durability). Getting these details right is the first step toward creating a piece you’ll be proud of.
Why Matching the COE Is Non-Negotiable
This is the most important technical rule in glass fusing. For a successful firing, you must make sure the decal’s Coefficient of Expansion (COE) matches your glass. COE is a measure of how much glass expands and contracts when heated and cooled. If your decal and glass expand at different rates, the stress can cause the decal to crack or peel. Always check the product description for both your glass and the decal to confirm they are compatible. For example, if you are working with COE90 glass, you need COE 90 decals. The same goes for projects using COE96 glass.
Finding the Right Look: Design, Size, and Color
Now for the fun part: the artistry. Think about the story you want your piece to tell. Is the decal the star of the show or a subtle accent? The size of the decal should be proportional to your glass piece. A tiny design might get lost on a large platter, while a bold pattern could overwhelm a small pendant. Consider how the decal’s colors will interact with your base glass. A vibrant decal will pop on clear or white glass, but it might look muddy on a dark background. Remember that some decal colors can shift during firing, so check the product details for the fired appearance.
Is It Food-Safe? Checking for Durability and Safety
If you’re creating functional pieces like plates or mugs, you need to think about safety. Not all decals are food-safe, as some contain materials that shouldn’t touch food. Always check the decal’s specifications to see if it’s labeled “Food Safe.” If it’s not, you can still use it on the underside of a plate or the exterior of a mug. Durability is another factor for functional ware. Pieces that will be handled and washed often need decals that can withstand regular use without scratching or fading. Look for decals designed for durability to ensure your artwork lasts.
How to Apply Fused Glass Decals: Step by Step
Ready to bring your design to life? Applying fused glass decals is a straightforward process that adds incredible detail to your work. It’s all about careful preparation and following a few key steps for a flawless finish. Getting the application right prevents common issues like bubbles or incomplete transfers, so it’s worth taking your time. Whether you’re adding a delicate floral pattern or a bold graphic, this method helps you achieve crisp, permanent results. Let’s walk through each step.
Start with a Clean Slate: Prepping Your Glass
First things first, you need a perfectly clean surface. Any residue left on the glass, like dust or oils from your fingers, can prevent the decal from adhering properly. Start by washing your glass piece gently with warm, soapy water and rinsing it thoroughly. Dry it completely with a clean, lint-free cloth. From this point on, try to handle the glass only by its edges to keep fingerprints off the application area. A clean slate is the foundation for a beautiful, professional-looking result.
How to Place and Smooth Your Decal Perfectly
Once your glass is clean and dry, it’s time to apply the decal. Cut your design from the sheet, leaving a small border. Submerge the decal in a shallow dish of lukewarm water for about 30 seconds, or until it slides freely from the paper backing. Gently slide the decal onto your glass and position it. Then, use a soft squeegee or a damp paper towel to smooth it down, working from the center out to push out any air bubbles or excess water. This step ensures the decal makes full contact with the glass, which is essential for a successful firing.
Firing 101: Understanding Schedules and Temperatures
With your decal perfectly placed, the magic happens in the kiln. When you fire the piece, the enamel design melts and fuses directly into the glass surface. Before you start, make sure your decal’s COE matches your glass, whether you’re working with COE90 or COE96 glass. This is non-negotiable for preventing cracks. Always follow the decal manufacturer’s recommended firing schedule, as temperatures and times can vary. A slow, steady firing helps the decal bond smoothly without imperfections.
Avoid These Common Fused Glass Decal Mistakes
Working with fused glass decals is incredibly rewarding, but like any new skill, there’s a bit of a learning curve. It’s completely normal to hit a few bumps along the way. The good news is that most common issues are easy to avoid once you know what to look for. Getting ahead of these simple mistakes will save you time, materials, and a lot of frustration.
Think of it this way: a little preparation goes a long way in ensuring your final piece looks exactly as you imagined. From matching your materials correctly to getting the firing schedule just right, paying attention to the details is what separates a good piece from a great one. Let’s walk through the three most common pitfalls beginners face and how you can sidestep them to create beautiful, lasting art every time.
What Happens When Your COE Doesn’t Match?
One of the most important rules in glass fusing is making sure your materials are compatible. This comes down to the Coefficient of Expansion, or COE. In simple terms, COE measures how much glass expands when heated and shrinks when cooled. If your decal and glass have different COEs, they’ll shrink at different rates, which can cause the decal to crack, peel, or even break the glass. Always check the product details to match the decal’s COE to your glass. For example, if you’re using COE90 glass, you need a decal specifically made for COE 90. This simple check is the foundation of a successful project.
Why a Clean Surface and Smooth Application Matter
Imagine trying to put a sticker on a dusty or greasy surface; it just won’t stick properly. The same principle applies to fused glass decals. Any fingerprints, oils, or dust on your glass can create a barrier that prevents the decal from adhering correctly, leading to bubbles, peeling, or an incomplete transfer after firing. Before you even think about applying your decal, give your glass a thorough cleaning with isopropyl alcohol and a lint-free cloth. A pristine surface ensures a strong, seamless bond between the decal and the glass, giving you that professional, painted-on look you’re aiming for. It’s a quick step that makes a huge difference.
Getting the Firing Schedule Wrong
Your kiln is where the magic happens, but the wrong firing schedule can quickly turn a dream project into a disappointment. Every decal has an ideal temperature range for firing. If the temperature is too low, the decal’s enamel won’t melt and fuse to the glass, leaving it dull or flaky. If it’s too high, the design can burn out, fade, or blur. Always follow the manufacturer’s recommended firing schedule for your specific decal. It’s a great idea to keep a small notebook near your kiln to jot down schedules that work well for you. This helps you repeat your successes and learn from any less-than-perfect outcomes.
Caring for Your Creations: Safety and Handling Tips
Creating beautiful fused glass art is just the beginning. To make sure your pieces last a lifetime and are safe to use, you need to think about safety from the start and practice proper care after firing. Whether you’re making a decorative suncatcher or a set of dinner plates, these simple guidelines will help you protect your work and enjoy it for years to come. Following these steps ensures your art is not only stunning but also functional and durable. It’s all about giving your creations the attention they deserve, both in the studio and in their new home.
Is It Safe to Eat Off Of? Food Safety 101
If you’re creating pieces that will come into contact with food, like bowls, platters, or coasters, it’s essential to use the right materials. When shopping for decals, always check if they are labeled as “Food Safe.” Some decals are specifically made for this purpose, containing non-toxic materials that are safe for dinnerware, while others might contain elements that aren’t suitable for consumption. Always read the product description carefully before applying a decal to any item you plan to eat or drink from. This small step ensures your functional art is safe for everyone at the table to enjoy.
Kiln Safety: Handling High Temperatures with Care
Not all decals can handle the heat of a kiln. Using a decal that isn’t designed for high temperatures can lead to it burning away completely, leaving you with a disappointing result. High-fire decals are made to permanently fuse into the glass, creating intricate and lasting designs. Before you begin, confirm that your decal is suitable for your project’s firing schedule. This means matching it to your glass, whether you’re working with COE90 glass or COE96, and ensuring your kiln settings are correct. Choosing the right decal for your firing process is key to a successful outcome.
Long-Term Care for Your Finished Pieces
Once your beautiful piece is out of the kiln and fully cooled, you’ll want to keep it looking its best. Fused glass art should never go in the dishwasher. The high heat and harsh detergents can damage the glass surface and cause the decal design to fade or wear away over time. To maintain the strength and vibrancy of your fused glass creations, always hand wash them. A little mild soap and warm water are all you need. Gently wash and dry your piece by hand to preserve its beauty and ensure it remains a treasured item for years.
Exploring Non-Fusible Glass Transfers (No Kiln Needed)
While fusing decals in a kiln creates a permanent, integrated design, not every project calls for one. What if you want to decorate everyday glassware, create temporary designs for an event, or simply don’t have access to a kiln? That’s where non-fusible transfers come in. These modern application methods allow you to add crisp, detailed images to glass using pressure, low heat, or simple adhesion. They open up a world of possibilities for crafters who want to personalize items like drinking glasses, windows, or mirrors without the need for firing. Let’s look at some of the most popular options available.
UV DTF (Direct to Film) Transfers
One of the newest and most exciting options for decorating glass is the UV DTF transfer. Think of these as next-level rub-on stickers that create a durable, slightly raised 3D effect. They are printed with UV-cured ink onto a special film, resulting in a vibrant, professional-looking design that is both waterproof and scratch-resistant. These transfers are especially popular for creating custom 16oz Libbey glass cans, but they work beautifully on any smooth glass surface. The application is simple—just peel, stick, and rub firmly before removing the top film—making them a fantastic choice for achieving a high-quality finish with no special equipment.
Adhesive Vinyl Decals
If you own a Cricut or another cutting machine, you’re likely already familiar with adhesive vinyl. This versatile material is perfect for creating custom designs for glass. Vinyl comes in a huge array of colors, finishes, and patterns, giving you endless creative freedom. It’s available in two main types: removable and permanent. For any glass project you want to last, such as personalized mugs or kitchen canisters, you’ll want to use permanent adhesive vinyl. It creates a much stronger bond that can withstand gentle use and washing, ensuring your design stays put.
Using Permanent Adhesive Vinyl for Durability
When choosing between vinyl types, the intended use of your project is the deciding factor. Removable vinyl is great for temporary decorations, like labeling dishes for a party or creating seasonal window clings that you plan to take off later. However, for any design you want to make last, you should always use permanent vinyl on glass. Its stronger adhesive is formulated to create a long-lasting bond that can hold up to the challenges of everyday use. While it’s still best to hand wash these items, permanent vinyl gives your project the durability it needs to look great for a long time.
Heat Transfer Vinyl (HTV)
It might sound surprising, but you can absolutely use iron-on vinyl, also known as Heat Transfer Vinyl (HTV), on glass. While it requires heat, you can apply it with a standard craft heat press or even a household iron—no kiln needed. Many crafters find HTV easier to work with than adhesive vinyl because the weeding process (removing the excess vinyl around your design) is often simpler. Once applied, HTV creates a permanent, durable finish that is securely bonded to the glass surface. It’s a fantastic alternative if you find adhesive vinyl tricky to handle or just want to try a different technique.
Printable Waterslide Decal Paper
For those who want to create truly custom, full-color designs without a cutting machine, printable waterslide decal paper is an excellent choice. This special paper allows you to print any image from your computer using a standard inkjet or laser printer. Just like the fusible versions, these decals are activated with water. After printing, you soak the decal until it separates from its paper backing, then slide it onto your glass surface. For non-fusible projects, it’s a good idea to apply a clear spray sealant over the decal after it’s dry to add durability and water resistance.
Applying Non-Fusible Transfers: A Guide
Now that you know about the different types of non-fusible transfers, let’s get into the practical side of things. The key to a professional, long-lasting design isn’t just the material you choose—it’s how you apply it. Proper preparation and a careful application process will prevent frustrating issues like peeling, bubbling, or misalignment. Taking your time with these steps ensures your transfer adheres smoothly and securely, giving you a finished piece you can be proud of. Let’s walk through the essential steps for a flawless finish.
Essential Prep: Cleaning Your Glass Surface
No matter which type of transfer you’re using, this first step is non-negotiable. Your glass surface must be perfectly clean for the decal to adhere properly. Any dust, smudges, or oils from your fingertips can create a barrier that weakens the bond. The best way to prep your glass is to wipe it down thoroughly with isopropyl alcohol on a lint-free cloth. This removes any residue and ensures the surface is ready for application. Starting with a pristine slate is the single most important thing you can do to guarantee your design sticks securely and looks seamless.
Application Techniques for a Flawless Finish
Once your glass is clean, it’s time to apply your transfer. The specific technique will vary slightly depending on the type you’re using, but the main goal is always the same: to create a smooth, bubble-free bond. For adhesive vinyl and UV DTF transfers, you’ll typically use a squeegee or burnishing tool to apply firm, even pressure across the entire design. You’ll want to rub the transfer firmly from the center outward to push out any trapped air bubbles before you carefully peel away the top carrier sheet. This ensures every part of the design makes full contact with the glass.
Tools for a Perfect Application
Having the right tools on hand can make the application process much smoother and more successful. A small plastic squeegee is your best friend for applying most non-fusible transfers. It helps you apply even pressure to adhere the design and work out stubborn air bubbles without scratching the transfer or your glass. Many companies that sell UV DTF transfers even include a free squeegee with your order. For vinyl projects, a burnishing tool or an old gift card can work just as well. These simple tools are essential for achieving that professional, painted-on look.
Tips for Alignment and Positioning
Here’s a crucial tip to remember: most rub-on and UV DTF transfers cannot be repositioned. Once they touch the glass, they are stuck for good. This means you have to get the placement right on the first try. Before you peel off the backing, take a moment to plan your alignment. You can use a ruler to find the center of your glass or use small pieces of painter’s tape to create guidelines. For larger vinyl decals, using the “hinge method” with masking tape can help you lay the design down perfectly straight without any bubbles or wrinkles.
Caring for Your Non-Fusible Designs
You’ve successfully applied your design, and your glass piece looks amazing. Now, how do you keep it that way? Even though materials like permanent vinyl and UV DTF transfers are designed for durability, they still require a bit of care to ensure they last. Unlike kiln-fused pieces where the design becomes part of the glass, these transfers sit on the surface. Proper handling and cleaning will protect the design from peeling, scratching, or fading over time, allowing you to enjoy your custom creation for years to come.
Hand Washing and Sealants for Longevity
To make your non-fusible designs last as long as possible, you should always hand wash them. The combination of high water pressure, intense heat, and harsh detergents in a dishwasher is too aggressive and will quickly ruin your transfer. A gentle wash with mild soap and warm water is all you need. For certain types of transfers, like printable waterslide decals, you can add an extra layer of protection by applying a clear, waterproof spray sealant over the finished design. This helps shield it from moisture and minor scratches, further extending its life.
Shopping for Glass Transfers: Where to Look
Once you’re ready to add decals to your fused glass art, the next step is finding the right ones for your project. The good news is there are tons of amazing designs out there. Knowing where to look and what to look for will help you find high-quality decals that bring your creative vision to life.
Why Do Decal Prices Vary?
Budgeting for your projects is always smart, and decals are a pretty affordable way to add intricate details. Most decals cost between $8.95 and $17.95 per sheet, depending on a few factors. The size of the sheet, the complexity of the design, and the type of finish all play a role in the final price. For example, decals with metallic or dichroic effects are often priced a bit higher than standard black or sepia-toned ones. Keep an eye out for multi-sheet packs or variety sets, which can be a great way to build your collection without breaking the bank.
Comparing Fusible and Custom UV DTF Costs
When you compare the cost of pre-made fusible decals to custom options like UV DTF transfers, you’re looking at two different value propositions. A sheet of high-quality, fusible decal is an affordable, ready-to-use product designed to permanently bond with your glass in the kiln. On the other hand, custom UV DTF transfers are a service. While they offer unlimited design freedom, the price often includes setup fees and minimum order quantities, which can make them more expensive, especially for a single project. For artists who want reliable, beautiful results without the overhead of custom printing, fusible decals provide a cost-effective way to incorporate intricate designs that are guaranteed to be compatible with your COE90 glass.
Find Your Next Design at ArtGlassSupplies.com
When you start shopping, you’ll see just how many options are available. Fusible decals are designed to perform differently under heat, so your choice will depend on your glass, your project, and the firing temperatures you plan to use. Our collection of fusible decals includes everything from delicate floral patterns to bold geometric shapes. Whether you’re working with COE90 glass or COE96, you can find decals specifically formulated to mature beautifully in your kiln. We’re always adding new designs to help you keep your work fresh and exciting.
What Makes a Great Decal Supplier?
The quality of your decals matters just as much as the quality of your glass. Always use decals specifically made for kiln firing when creating fused glass art. These fusible decals are made with special enamels that permanently bond with the glass during firing, ensuring your design is crisp and permanent. A reliable supplier will provide clear information about firing schedules and COE compatibility. Look for a shop that not only has a great selection but also offers the resources you need to feel confident, from detailed product descriptions to helpful customer support for all your glass fusing projects.
Sourcing Custom and Non-Fusible Transfers
While fusible decals are perfect for kiln-fired projects, sometimes you want to add a design to glass without the heat, or you have a very specific custom image in mind. This is where the world of custom and non-fusible transfers comes in. These options are fantastic for decorating everyday glass items like tumblers and jars, or for artists who want to create their own unique branding or artwork. Sourcing custom transfers allows you to turn your personal digital designs into a physical decal, giving you complete creative control. It’s a great way to produce a series of items with consistent branding or to create a truly one-of-a-kind piece that isn’t possible with off-the-shelf designs.
The Popularity of Ready-to-Apply Transfers
If you’re looking to decorate glass without firing it, you have several durable, ready-to-apply options. Popular transfers for glass include UV DTF (Direct to Film) cup wraps, rub-on transfers, and permanent vinyl. These are designed to be waterproof and long-lasting, making them perfect for decorating items like tumblers, jars, and even windows. UV DTF transfers, for example, are printed with a special UV-cured ink and adhesive, creating a vibrant, slightly raised design that feels similar to a high-quality sticker but with much greater durability. Permanent vinyl is another excellent choice that you can cut with a machine like a Cricut or Silhouette for endless custom shapes.
Artwork Specifications for Custom Prints
When you’re ready to order custom transfers with your own artwork, getting the file right is the most important step for a professional result. Most printing companies will ask you to use vector files for your designs, like an AI, EPS, or SVG file. Vector graphics are made from mathematical equations, which means they can be scaled to any size without losing quality. If you must use an image file like a JPG or PNG (known as raster artwork), make sure it is saved at a high resolution—at least 300 DPI (dots per inch). This ensures your final printed transfer will be crisp and clear, not pixelated or blurry.
Available Finishes Beyond Standard Color
Just like with fusible decals, custom non-fusible transfers come in a variety of finishes that can add another layer of personality to your work. Beyond standard colors, you can often choose from options like glossy, matte, or even eye-catching special effects. Many companies offer holographic finishes that create a rainbow shimmer, or metallic options like gold, silver, and rose gold for a touch of elegance. The finish you choose can dramatically change the look and feel of your design, so consider how it will interact with the glass. A matte finish can offer a subtle, modern look, while a glossy or metallic finish will make your design pop.
Fused Glass Decal Ideas and Inspiration
Once you get the hang of applying decals, you can really start having fun. Decals open up a whole new world of design possibilities, allowing you to add intricate details and personal touches to your fused glass art. Think of them as the perfect way to add that final flourish or even as the starting point for your entire piece. You can combine different decal styles, layer them with glass powders and frits, or use them to create detailed scenes that would be difficult to achieve by hand.
Whether you’re making functional art like plates and coasters or purely decorative pieces, decals can help you bring your vision to life. You can create beautiful, complex designs without needing expert-level painting skills. The key is to let your creativity guide you. Experiment with different placements and combinations on various glass shapes and molds to see what you can create. Don’t be afraid to try something new; the most unexpected ideas often lead to the most beautiful results. For example, you could cut a large floral decal into smaller pieces and scatter them across a platter, or use thin, metallic lines to create a border on a set of custom coasters. The possibilities are truly endless, and playing with different layouts is part of the creative process.
Bring the Outdoors In with Floral & Nature Decals
Bringing elements of the natural world into your art is a timeless way to create beautiful pieces. With decals, you can easily add delicate flowers, intricate leaves, and graceful animals to your work. Imagine a set of coasters adorned with elegant ferns or a suncatcher featuring a vibrant dragonfly. Decorative items like these are popular projects, and many artists find that nature-themed decals, especially metallic gold ones, add a touch of magic. You can use these designs on everything from small jewelry pendants to larger decorative plates, making it simple to capture the beauty of the outdoors in glass.
Go Modern with Geometric and Abstract Designs
If your style leans more contemporary, decals are a fantastic tool for creating clean, modern designs. Some of the most stunning fused glass pieces come from simple patterns. You can use decals with straight lines, circles, and other shapes to build striking visual effects with bold color contrasts. Try cutting up larger decals to create your own unique abstract patterns or arrange geometric shapes into a repeating motif. This approach works wonderfully for creating sleek coasters, minimalist wall art, and stylish jewelry. It’s a great way to make a statement with COE96 glass and a few well-placed decals.
Get Personal with Seasonal and Custom Text Decals
Decals are perfect for creating seasonal decorations and personalized gifts. You can find designs for every holiday, from spooky ghosts for Halloween to festive snowflakes for Christmas ornaments. Alphabet and number decals also let you add names, dates, or meaningful quotes to your pieces, making them ideal for wedding gifts, anniversary plates, or custom awards. Applying these fusible decals before firing is a straightforward way to enhance your designs and make them truly one-of-a-kind. With the right decals and a reliable kiln, you can create memorable pieces for any occasion.
Related Articles
- A Beginner’s Guide to Using Glass Decals – ArtGlassSupplies
- Friezes Decal Sheet | Art Glass Supplies – Decals
- Colorful Hummingbirds Decal Sheet | Art Glass Supplies – Decals
Frequently Asked Questions
Why can’t I just use a regular sticker on my glass project? Regular stickers are made of materials like paper or vinyl that will simply burn away in the kiln, often leaving behind a messy residue. Fusible decals are entirely different; they are printed with special glass enamels. During firing, these enamels melt and permanently bond with the glass surface, making the design a durable and lasting part of your artwork.
You mentioned COE a lot. What actually happens if I use the wrong one? Matching the Coefficient of Expansion (COE) is the most important technical rule in glass fusing. If your decal and glass have different COEs, they will expand and shrink at different rates when heated and cooled. This creates stress that can cause the decal to crack and peel off, or in a worst-case scenario, it could even cause your entire glass piece to break.
Can I fire my decal at the same time I fuse my glass layers together? It’s generally best to fire them separately. The high temperatures required for a full fuse are often too hot for the delicate enamels in a decal, which can cause the design to fade or burn away. For the sharpest results, apply the decal after your glass has been fused and shaped, then fire it again at a lower temperature just to set the decal into the surface.
How can I be sure a decal is safe to use on a dinner plate? The most reliable way is to check the product description before you buy. Reputable suppliers will clearly state if a decal is “Food Safe,” meaning it’s made with non-toxic materials. If a design you love isn’t food-safe, you can still use it on functional ware by placing it on the underside of a plate or the outside of a mug where it won’t touch food.
What should I do if I see a tiny air bubble under my decal after applying it? You’ll want to get that bubble out before firing. Trapped air can prevent that part of the design from fusing correctly to the glass. While the decal is still wet on the glass, use a soft squeegee or a damp paper towel to gently push the bubble from the center out toward the nearest edge. A perfectly smooth application is key to a flawless finish.