
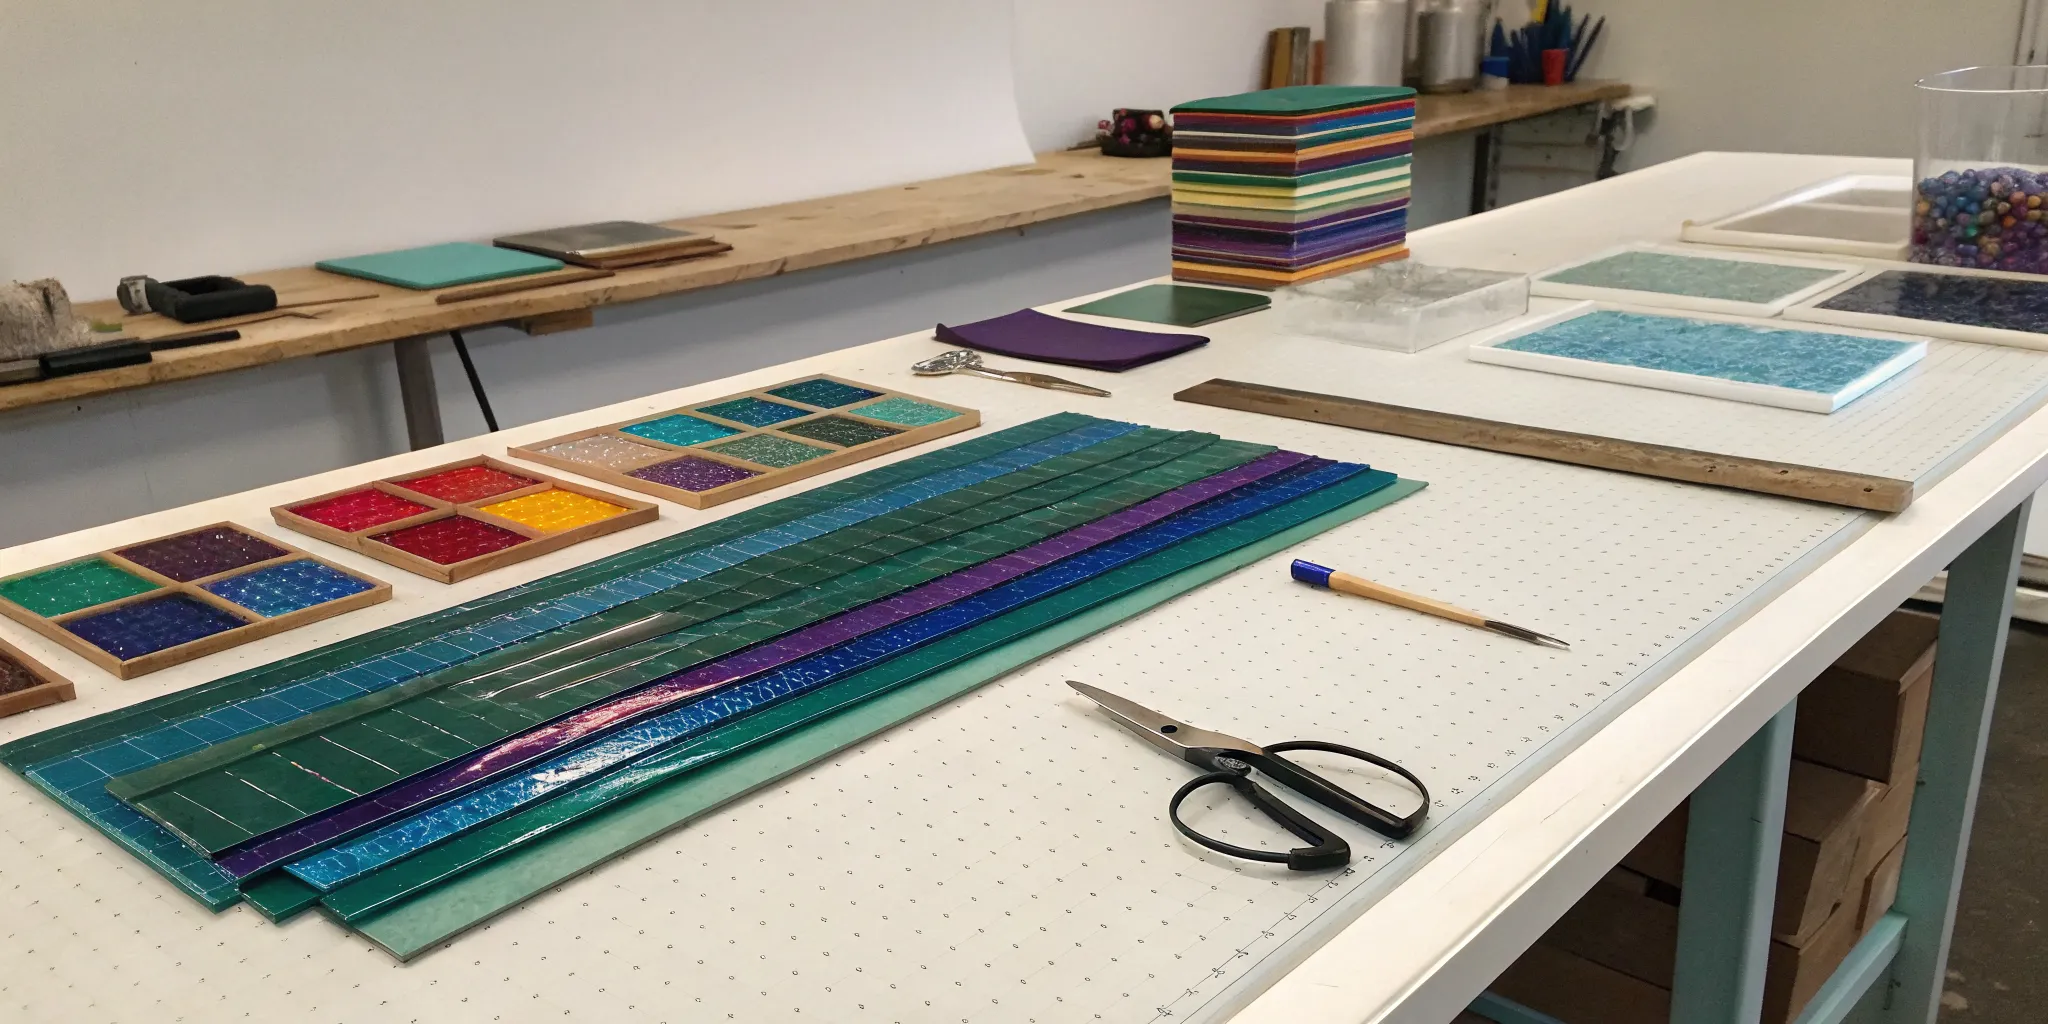
Transforming a flat sheet of shimmering glass into a three-dimensional piece of jewelry is an incredibly satisfying process. With its mesmerizing play of light and color, dichroic glass is the perfect medium for creating unique, eye-catching accessories. But getting those professional results requires a solid understanding of the process. Here, we’ll cover everything you need to know to fuse dichroic glass successfully. You’ll learn how to cut and layer your glass for maximum visual impact, what to look for in a kiln, and why a proper annealing cycle is critical for making your beautiful creations last.
Key Takeaways
- Master the fundamentals before you fuse: Your success depends on three key steps: using glass with a matching COE to prevent cracks, cleaning every piece thoroughly to avoid blemishes, and layering your dichroic glass coated-side down under a clear cap for the best color.
- Control your kiln for consistent results: A successful firing requires a precise schedule. Protect the dichroic shimmer by keeping the temperature below 1500°F, and always complete the slow annealing phase to create strong, durable jewelry that won’t crack later.
- Prioritize safety and professional finishing: Always wear safety glasses and heat-resistant gloves when working. After firing, take the time to smooth the edges of your glass and securely attach jewelry findings to transform your fused piece into high-quality, wearable art.
What Is Dichroic Glass?
If you’ve ever seen a piece of glass that shimmers with a rainbow of colors, changing as you turn it in the light, you’ve likely encountered dichroic glass. The name itself means “two-colored,” and that’s a perfect description. This special glass has the unique ability to reflect one color while letting a completely different color pass through it. It’s a bit like a magic trick captured in glass.
This captivating material isn’t new; ancient Romans used a similar technique to create jewel-like effects. Today, artists and jewelers use it to create stunning, one-of-a-kind pieces that seem to glow from within. Whether you’re making pendants, earrings, or decorative tiles, dichroic glass adds a layer of depth and brilliance that’s hard to achieve with anything else. It comes in a huge variety of patterns and colors, often on a black or clear base, giving you endless creative possibilities. Before you start fusing, it’s crucial to understand how it works with other types of glass, like the popular COE90 glass used in many fusing projects.
The Science Behind the Sparkle
So, what gives dichroic glass its mesmerizing, color-shifting quality? It’s all thanks to a high-tech coating process. During manufacturing, incredibly thin layers of metallic oxides, like titanium and magnesium, are vaporized onto the surface of the glass in a vacuum chamber. These micro-layers are what create the dazzling optical effects. Depending on the angle of the light, some light waves are reflected while others pass through, resulting in a brilliant display of shifting colors. It’s the same principle that gives a dragonfly’s wing or a soap bubble its iridescent shimmer. This metallic coating is surprisingly durable, allowing you to cut, fuse, and shape the glass into beautiful designs.
From Aerospace to Art Studio: A Brief History
It might surprise you to learn that the beautiful dichroic glass in your studio has its roots in the aerospace industry. The technology wasn’t originally developed for artists. Instead, it was created for high-tech applications like coating satellite mirrors and astronaut helmet visors to protect them from cosmic radiation and the sun’s glare. The same process that creates that protective, reflective surface is what gives our glass its shimmer. It wasn’t long before artists discovered this unique material and saw its creative potential. What started as a functional coating for space exploration has since become a staple in the world of art glass, allowing us to add a touch of otherworldly sparkle to our own creations right here on Earth.
The Micro-Thin Layers of Metal Oxides
Dichroic glass gets its signature look from an advanced manufacturing process. It’s made by applying an incredibly thin, multi-layered coating to a base sheet of glass. Inside a vacuum chamber, tiny bits of quartz crystal and metal oxides are vaporized and then bonded to the glass surface. We’re talking about 30 to 50 layers, each one only about 30 millionths of an inch thick. These micro-thin layers are the key to the color-shifting effect. They work by selectively reflecting and transmitting different wavelengths of light, which is why the glass appears to be one color when light reflects off it and another when light passes through it. This process is what makes each sheet of COE90 dichroic glass so vibrant and unique.
Why Dichroic Glass Is a Jeweler’s Dream
Dichroic glass is a jewelry maker’s dream because it packs so much visual punch into a small piece. The stunning, color-shifting effects can make a simple pendant or a pair of earrings the star of the show. Because you can layer different colors and textures of dichroic glass, the design possibilities are truly endless. You can create pieces with incredible depth and complexity, ensuring that everything you make is completely unique. Whether you’re aiming for a subtle shimmer or a bold, vibrant statement, dichroic glass gives you the tools to bring your vision to life and create professional-quality jewelry that will capture everyone’s attention.
Why Is It So Special (and Pricey)?
You’ve probably noticed that dichroic glass has a higher price point than standard sheet glass, and it all comes down to how it’s made. That incredible shimmer isn’t a natural feature; it’s created through a complex, high-tech manufacturing process. According to Glass Magazine, this involves placing glass inside a vacuum chamber and vaporizing micro-thin layers of quartz crystal and metal oxides onto its surface. This intricate procedure is what gives the glass its signature color-shifting properties, but it also explains the cost. When you purchase a sheet of COE90 or COE96 dichroic glass, you’re investing in the advanced science that makes its unique beauty possible.
Choosing Quality Brands to Prevent Foiling and Burnout
When you pour your time and creativity into a project, the last thing you want is for the dichroic coating to peel off (a problem called foiling) or lose its color during firing. This is where choosing a quality brand becomes essential. Reputable manufacturers like CBS (Coatings by Sandberg) have spent decades perfecting their coatings to be exceptionally durable. As experts at Warm Glass note, this reliability ensures the glass can withstand multiple firings while keeping its vibrant colors. While it can be tempting to opt for a less expensive alternative, sticking with a trusted brand for your dichroic projects is the best way to protect your work and achieve a professional, lasting finish without the frustration of a failed firing.
Your Dichroic Glass Fusing Supply List
Before you can create those beautiful, shimmering jewelry pieces, you need to gather the right tools. Setting up your workspace with the proper equipment not only makes the glass fusing process smoother but also ensures your safety and the quality of your final product. Think of this as your creative launchpad. Getting these essentials in order is the first, most important step toward bringing your sparkling dichroic glass designs to life. Let’s walk through exactly what you’ll need to get started.
Understanding Glass COE (and Why It’s a Big Deal)
First things first, let’s talk glass. When fusing, all the glass you use in a single project must have the same Coefficient of Expansion, or COE. This number tells you how much the glass will expand when heated and shrink when cooled. If you mix glass with different COEs, like COE90 and COE96, your finished piece will crack under the stress. It’s a fundamental rule of glass fusing. For dichroic jewelry, you’ll typically use a base layer of clear or black glass and top it with your dazzling dichroic pieces, ensuring they all share the same COE. This compatibility is non-negotiable for creating durable, beautiful jewelry that lasts.
Choosing a Kiln and Getting to Know Your Temps
Your kiln is where the magic happens. It’s the tool that melts your glass layers into a single, cohesive piece. For fusing dichroic glass, you need a kiln that offers precise temperature control. This is critical because the delicate metallic coating on dichroic glass can be easily damaged. To protect that beautiful, color-shifting surface, you should never heat your kiln above 1500°F (about 815°C). Any hotter, and you risk burning off the coating, leaving your glass with a dull, lackluster finish. There are many kilns available, from small, jewelry-focused models to larger units for bigger projects, so you can find one that fits your space and creative goals.
Must-Have Cutting Tools and Safety Gear
Working with glass requires a few specific tools and a serious commitment to safety. Always wear safety glasses when cutting or handling glass to protect your eyes from tiny shards. You’ll also need a good pair of heat-resistant gloves for safely handling hot items from the kiln. For your toolkit, start with a quality glass cutter and running pliers for scoring and breaking your glass cleanly. A small grinder is also helpful for smoothing sharp edges after firing. Finally, don’t forget kiln wash for your shelves to prevent the glass from sticking during firing. Having these items on hand will make your fusing sessions much more efficient and safe.
Beyond Sheets: Exploring Other Forms of Dichroic Glass
While working with sheets of dichroic glass is a fantastic starting point, the real fun begins when you start exploring its other forms. Moving beyond flat sheets allows you to add incredible texture, intricate details, and unique dimensions to your jewelry. Think of it as expanding your artistic vocabulary. Instead of just painting with a broad brush, you can now use fine-tipped pens and textured sponges. These different forms, like frit, stringers, and noodles, open up a whole new world of creative possibilities, letting you layer and experiment in ways that make your fused glass pieces truly stand out. It’s how you go from making nice jewelry to creating signature works of art.
Working with Frit, Stringers, and Noodles
Let’s break down these exciting materials. Dichroic frit is essentially tiny crushed pieces of dichroic-coated glass, like colorful, shimmering confetti for your art. Sprinkling frit onto your base glass can create a sparkling, textured surface or a dense field of color. Stringers are thin, spaghetti-like strands of glass, while noodles are their thicker, flatter cousins. You can use these to draw lines, create delicate patterns, or outline shapes in your designs. Imagine adding fine, shimmering veins to a leaf pendant or creating a swirling galaxy effect when you combine frit and stringers. These components allow for a level of detail that transforms a simple piece into a complex and captivating design.
COE-Independent Products for Ultimate Versatility
One of the strictest rules in glass fusing is matching your COE. But what if you could break that rule? Some specialty dichroic products are “COE-independent,” meaning you can use them with any type of glass without worrying about stress fractures. Products like Dichroic Extract, a paintable liquid, allow you to add shimmering effects to any glass surface. This gives you incredible artistic freedom. You can confidently add a touch of dichroic sparkle to your favorite COE90 base or experiment with it on a piece of COE96 glass you have in your studio. This versatility lets you incorporate that signature dichroic shimmer into a much broader range of projects, freeing you from the constraints of COE compatibility.
How to Prepare Dichroic Glass for Fusing
Before your beautiful dichroic glass ever meets the heat of the kiln, a little prep work goes a long way. Think of this as setting the stage for a flawless performance. Getting your glass cut, cleaned, and layered correctly is the secret to avoiding frustrating imperfections and achieving that brilliant, professional finish you’re aiming for. These steps are simple, but they make all the difference between a piece you’re proud of and one that leaves you wondering what went wrong. Taking the time to get these fundamentals right ensures your creative vision comes to life exactly as you imagined it.
How to Cut and Clean Your Glass Like a Pro
First things first, let’s talk about cutting. To protect the delicate metallic coating that gives dichroic glass its shimmer, always cut it from the uncoated side. After you’ve got your shapes, it’s time for a bath. Clean every piece thoroughly with a bit of mild soap and water, then dry it completely with a lint-free cloth. This step is non-negotiable. Any lingering fingerprints, dust, or even residue from your cutting marker can get permanently trapped between the layers during fusing, creating cloudy spots or bubbles in your finished piece. A clean start is a happy start.
Designing and Stacking Your Glass Layers
When you’re ready to assemble your design, here’s the golden rule: place the dichroic glass with its coated (shiny) side facing down onto your base glass. This orientation ensures the metallic coating is protected and reflects light correctly. For an extra touch of brilliance and durability, I always recommend adding a clear layer of glass on top. This is called a “cap,” and it does two amazing things: it shields the dichroic coating from the elements and adds incredible depth, making the colors appear brighter and more vibrant. You can use any compatible COE90 glass for your base and cap.
Choosing the Perfect Base Glass for Your Project
The color of your base glass has a huge impact on the final look of your jewelry. It’s the canvas that makes your dichroic design stand out. If you want those dichroic colors to really pop with intense, dramatic contrast, choose a dark or black base glass. On the other hand, if you’re aiming for a more subtle, transparent, or ethereal effect, a clear or light-colored base is the way to go. There’s no right or wrong answer here; it all depends on the aesthetic you want to achieve. Experimenting with different COE96 glass bases is a great way to see what you like best.
Dichroic Glass Firing Schedules That Actually Work
Think of a firing schedule as a recipe for your glass. It’s a detailed set of instructions that tells your kiln exactly how to heat up, how long to hold a certain temperature, and how to cool down. Just like in baking, the right recipe is essential for getting the results you want. A schedule that works perfectly for a small pair of earrings might not be right for a larger pendant. The thickness of your glass, the size of your project, and even the specific type of kiln you’re using can all influence the ideal firing schedule.
Finding the right schedule can feel like a bit of a science experiment at first, but don’t worry. Many glass manufacturers provide recommended schedules, and the glass art community is full of artists sharing what works for them. The key is to understand what you’re trying to achieve. Are you aiming for a smooth, blended surface or something with more texture and dimension? Your answer will guide you to the right type of firing schedule. Mastering these schedules is what separates good results from great ones, ensuring your finished pieces are not only beautiful but also structurally sound and free of flaws. Below, we’ll cover the main types of fuses and the critical steps in any firing process.
Full Fuse vs. Tack Fuse: What’s the Difference?
When you hear artists talk about firing schedules, two terms you’ll often encounter are “full fuse” and “tack fuse.” A full fuse happens at higher temperatures, typically around 1450°F to 1480°F. At this heat, the layers of glass melt completely into one another, creating a single, smooth piece with a glossy surface. This is perfect for creating sleek cabochons or pendants where you want the colors to blend seamlessly.
A tack fuse, on the other hand, uses lower temperatures, usually between 1350°F and 1400°F. The glass gets just hot enough for the layers to stick, or “tack,” together permanently. This technique preserves the texture and dimension of the individual glass pieces, so you can still see the distinct layers. It’s a great choice when you want to maintain a raised or textured design in your jewelry.
Your Step-by-Step Kiln Firing Checklist
Your kiln needs a precise firing schedule to work its magic. This isn’t just about reaching a top temperature; it’s a carefully controlled process with multiple stages. A typical schedule includes the ramp, which is the rate at which the temperature increases. It also includes one or more soaks, which are periods where the kiln holds a specific temperature to allow the heat to distribute evenly through the glass. Following a well-defined schedule is the best way to achieve consistent, repeatable results. It takes the guesswork out of the process and helps you understand how your COE90 glass behaves at different temperatures. When you find a schedule that works for your setup, keep it handy for future projects.
Pro Tip: Stacking for a Gem-Like Finish
To get that coveted, gem-like finish on your jewelry, it all comes down to strategic stacking. Building up three or four layers of glass is the key to creating a rounded, substantial piece where the dichroic colors truly shine. For maximum impact, I recommend starting with a dark or black base glass. This creates a stunning contrast that makes the dichroic shimmer pop. Next, place your dichroic piece on the base with its shiny, coated side facing down. This protects the coating and ensures the light reflects correctly. Finally, top it all off with a clear cap. This final layer acts as a protective lens, adding incredible depth and making the colors appear even more brilliant after firing in the kiln.
The Art of Cooling and Annealing Your Glass
What goes up must come down, and how your glass cools is just as important as how it heats. This controlled cooling stage is called annealing, and it’s absolutely critical for creating strong, durable glass. As glass cools, it can develop internal stress, and if it cools too quickly, that stress gets locked in, making the piece fragile and prone to cracking later. The annealing phase involves holding the glass at a specific temperature (usually around 950°F for COE96 glass) before cooling it very slowly. This allows the stress to relax, resulting in a strong, stable piece of jewelry. Don’t rush this step. Patience during annealing is your best insurance against heartbreak.
How to Fuse Dichroic Glass: A Step-by-Step Walkthrough
Alright, you’ve got your tools and your glass is ready to go. Now for the fun part: bringing your design to life. Fusing dichroic glass is a process of precision and patience, but it’s also incredibly rewarding. Following these steps will help you get consistent, beautiful results every time you fire up the kiln. Let’s walk through the process together, from setting up your space to the final firing cycle.
How to Set Up Your Fusing Workspace
A clean start is key to a flawless finish. Before you begin, make sure your workspace is tidy and all your tools are within reach. The most important prep step is cleaning your glass. Wash each piece with mild soap and water, then dry it completely with a lint-free cloth. This isn’t just about being neat; any fingerprints, dust, or even marker lines can get permanently trapped inside your glass during firing. Also, prepare your kiln shelf by applying a fresh coat of kiln wash or laying down a new piece of shelf paper. This creates a barrier that prevents your beautiful creation from sticking to the shelf.
From Stacking Glass to Loading the Kiln
This is where your artistic vision starts to take shape. When assembling your piece, always place the dichroic glass with its coated, shiny side facing down onto your base glass. This protects the delicate metallic coating. For a professional look and vibrant color, I always recommend adding a clear glass layer on top, known as a “cap.” This simple step protects the dichroic coating from the heat and makes the colors appear deeper and more brilliant. Once you’re happy with your design, carefully place it on your prepared shelf and load it into the kiln.
What to Watch for During the Firing Cycle
Think of your kiln as an oven that needs a recipe. This recipe is called a firing schedule, and it tells the kiln exactly how fast to heat up, how long to hold at the target temperature, and how to cool down. Following a tested firing schedule is the best way to get predictable results with your COE90 glass. The most critical part of this process is the final step: annealing. Never rush or skip this slow, controlled cooling period. It’s what relieves stress in the glass, making your finished piece strong and durable. Skipping this step is the number one reason for cracks appearing later on.
Anticipating the Post-Firing Color Shift
One of the most fascinating, and sometimes surprising, aspects of working with dichroic glass is the color shift that occurs during firing. The vibrant blue and gold piece you put into the kiln might come out with a beautiful lime green shimmer. This isn’t a mistake; it’s a predictable and essential part of the process. The intense heat alters the thin metallic layers on the glass, causing the reflected colors to shift, often toward the cooler end of the spectrum. The key is to learn how to anticipate this change. The best way to get a feel for it is to run a few small test firings with scraps of your COE90 glass. This will help you understand how specific colors react in your kiln, allowing you to choose your pre-fired glass with the final, brilliant result in mind.
Designing Eye-Catching Dichroic Glass Jewelry
Once you’ve mastered the basics of cutting and firing, the real fun begins. Dichroic glass is all about playing with light and color, and a few simple techniques can transform your pieces from pretty to absolutely breathtaking. These tips will help you explore the creative potential of dichroic glass and develop your unique artistic style. Let’s get started.
Using Color and Contrast to Make Your Designs Pop
The color of your base glass is one of the most powerful tools you have. A simple swap can completely change the personality of your dichroic design. As a general rule, a dark or black base makes the dichroic colors appear bold and vibrant, really showing off that metallic shimmer. On the other hand, using a clear or light-colored base will give your piece a softer, more translucent quality. Think about the mood you want to create. Do you want a dramatic, eye-catching pendant or a delicate, ethereal earring? Don’t be afraid to experiment with different colors of COE90 glass to see what you like best.
How to Create Depth with Strategic Layering
Layering is your secret weapon for creating designs with incredible depth and complexity. Instead of using a single piece of dichroic glass, try stacking smaller cut pieces on top of your base. You can overlap different colors and patterns to build intricate, multi-dimensional effects. This is also a fantastic way to use up every last bit of your precious dichroic scraps. For an even more advanced look, you can place a small piece of clear glass between your base and your dichroic layer to make it appear as if it’s floating within the finished piece. The possibilities are truly endless once you start playing with layers.
Try Clear Caps and Textured Surfaces
Placing a layer of clear glass on top of your dichroic design, known as a “clear cap,” is a game-changer. This simple step does two important things: it protects the delicate metallic coating from the heat of the kiln, and it acts as a magnifier, making the colors look deeper and glossier. The cap gives your finished piece a smooth, professional finish that looks and feels amazing. Once you’re comfortable with capping, you can also play with textured dichroic glass or use different slumping molds to add shape and contour to your jewelry. These details are what will make your work stand out.
Creating a Matte or Metallic Uncapped Finish
While a clear cap gives you that glossy, magnified look, sometimes you want something different. For a beautiful matte or metallic finish, you can fire your dichroic glass without a cap. The process is simple: instead of placing the coated side down, you’ll place it facing up in the kiln. This exposes the metallic layer directly to the heat, creating a soft, velvety surface that still shows off the glass’s unique color shifts. To make sure you have the right side up, just hold the glass at an angle to the light; the coated side is the one where the color goes all the way to the edge. Using high-quality materials like CBS dichroic glass is especially important here, as it’s designed to withstand the direct heat without burning out. This technique is perfect for achieving a more organic, textured look in your jewelry.
Common Fusing Mistakes (and How to Avoid Them)
Every glass artist has a few “learning pieces” that didn’t turn out as planned. It’s all part of the process! The good news is that most beginner slip-ups are easy to avoid once you know what to look for. From cracked glass to cloudy surfaces, these issues usually come down to a few key details. Let’s walk through the most common problems and the simple fixes that will help you create beautiful jewelry every time.
Fixing Temperature and Glass Compatibility Issues
One of the first rules of glass fusing is ensuring all your glass is compatible. Every piece must have the same Coefficient of Expansion (COE), which tells you how much it expands and shrinks when heated. If you mix different types, like COE90 glass with COE96, they’ll fight each other as they cool, and your piece will crack. Always check the COE before you start. Temperature control is also key. To protect that gorgeous, shimmery coating on dichroic glass, never fire your kiln above 1500°F. Too much heat can burn off the metallic layer, leaving your glass looking dull.
How to Prevent Cracks, Bubbles, and Blemishes
A perfect finish starts with perfectly clean glass. Before loading the kiln, wash your glass pieces with mild soap and water, then dry them completely with a lint-free cloth. Why the fuss? Tiny specks of dust, oils from your fingerprints, or leftover marker lines can get permanently trapped between the layers during fusing, creating bubbles or cloudy spots. This simple step ensures that the only thing that shines is your design, not a stray fingerprint. A little cleaning goes a long way in making your final piece look professional and polished.
Dealing with Devitrification
Ever pulled a piece from the kiln only to find a disappointing cloudy or scummy film on the surface? That’s devitrification, or “devit,” and it happens when the glass surface crystallizes during firing. To keep your glass crystal clear, prevention is your best strategy. Start with impeccably clean glass, as we’ve mentioned. For extra insurance, you can use a special anti-devit spray or apply a very thin dusting of clear glass powder over the surface before firing. Most importantly, stick to your firing schedule and avoid overheating the glass. A proper annealing cycle in your kiln is also crucial for maintaining the integrity and clarity of your beautiful dichroic pieces.
Preventing Bubbles from Trapped Air
Another common frustration is finding unwanted bubbles trapped between your glass layers. These are usually caused by air that couldn’t escape as the glass melted together. To avoid this, make sure your kiln shelf is perfectly flat and level before you start. When you stack your glass, try to avoid creating a completely sealed pocket; leaving a tiny, unnoticeable gap along one edge can give the air a path to escape. You can also adjust your firing schedule. Heating the glass more slowly and adding a longer hold time at a lower temperature gives that trapped air a chance to work its way out before your COE96 glass fully fuses, resulting in a crystal-clear finish.
A Quick Guide to Troubleshooting Firing Problems
Think of a firing schedule as a recipe for your kiln. It tells the kiln how quickly to heat up, how long to hold the top temperature, and how to cool down. Following a tested schedule is the best way to get predictable results. The most critical step is annealing, the slow, controlled cooling period. Rushing this step is a recipe for disaster, as it relieves internal stress in the glass. Proper annealing is what makes your finished jewelry strong and durable, preventing it from cracking days or even weeks later.
Understanding and Preventing Thermal Shock Cracks
There’s nothing more disheartening than opening your kiln to find a beautiful piece ruined by a crack. This is often caused by thermal shock, which happens when different parts of your glass heat up or cool down at different speeds, causing it to stretch and shrink unevenly. To prevent this, slow down your firing schedule, especially during the initial heating and final cooling phases. This gives the temperature time to even out across the entire piece. Using modern kilns that heat evenly from multiple sides can also make a huge difference. Patience is your best friend here; a slower, more controlled process is the key to ensuring your glass survives the journey from solid to molten and back again without any stress fractures.
How to Avoid Warping and Sagging
Warping or sagging happens when glass gets too hot and soft without enough support, causing it to bend or droop in unwanted ways. While this is exactly what you want when slumping glass into a form, it’s a problem when you intended to create a flat piece. The fix is twofold: first, stick to your firing schedule and avoid overheating the glass. Second, make sure your piece is well-supported. For flat pieces, a level kiln shelf is all you need. For dimensional work like bracelets or draped pendants, you must use molds or forms designed to hold the glass in the correct shape as it softens. Proper support ensures your glass only moves in the ways you want it to.
Staying Safe While Fusing Glass
Before we get lost in the fun of creating beautiful jewelry, let’s talk about something super important: safety. Working with glass and high heat is exciting, but setting up a safe workspace is the first step to making sure you can enjoy your craft for years to come. These aren’t complicated rules, just smart habits that will quickly become second nature. By taking a few simple precautions, you can focus all your energy on designing and firing your next masterpiece with total peace of mind. Taking these steps ensures you can safely handle everything from COE90 glass to intricate molds.
Don’t Skip the PPE: What to Wear
Think of your personal protective equipment, or PPE, as your studio uniform. It’s non-negotiable. Always wear safety glasses to shield your eyes from tiny glass shards that can fly up during cutting or handling. When it’s time to work with your kiln, a good pair of heat-resistant gloves is essential for handling hot items and preventing burns. If you’re working with powders like kiln wash, wear a dust mask to avoid breathing in fine particles. Keeping your safety supplies handy and making them a habit will protect you and let you create with confidence.
Kiln Safety and Why Ventilation Is Non-Negotiable
Your kiln is the heart of your fusing studio, so treating it with respect is key. First, make sure your workspace has good ventilation to clear away any fumes produced during firing. Always place your kiln on a stable, fire-proof surface, far from anything flammable. Following a precise firing schedule is also critical for success. This includes the slow cooling phase, known as annealing, which strengthens the glass and prevents it from cracking later on. It might be tempting to peek, but always let your kiln cool down completely before opening it. This protects you from burns and prevents thermal shock from cracking your beautiful new piece.
Advanced Techniques: Slumping and Shaping
Once you’ve mastered creating beautiful, flat fused pieces, you might start wondering what’s next. The answer is adding dimension. Slumping is a technique that takes your flat, fused glass and transforms it into a three-dimensional object like a bowl, a plate, or a curved sculpture. It’s a second firing process that happens at a much lower temperature than your initial fuse. Instead of melting the glass layers together, you’re just gently softening your already-fused piece so that gravity can pull it down into or over a form. This is where your creations really start to take on a life of their own.
The process is surprisingly straightforward. After your dichroic piece has been fully fused and cooled, you place it on top of a ceramic or stainless steel mold. Then, you run it through another, shorter firing cycle at a lower temperature, typically between 1200°F and 1250°F. At this heat, the glass becomes pliable enough to bend and take the shape of the mold without losing its fused design. This technique opens up a whole new world of functional art. Suddenly, you’re not just making pendants; you’re creating custom dishes, unique soap holders, or elegant candle votives, all with that signature dichroic shimmer.
Using Molds to Create Bowls, Plates, and 3D Shapes
The key to successful slumping lies in choosing the right mold and preparing it properly. There are countless molds available, from simple bowl and plate shapes to more complex forms for creating sculptural waves or abstract art. Before you begin, you must apply a few coats of kiln wash to your mold and let it dry completely. This acts as a release agent, creating a barrier that prevents the glass from sticking to the mold during firing. Once your mold is prepped, you simply center your fused glass piece on top of it and load it into the kiln. The lower-temperature firing schedule will do the rest, gently coaxing your flat design into a beautiful, functional 3D object.
Beyond Jewelry: Other Applications for Dichroic Glass
While dichroic glass is a natural star in the world of jewelry, its potential extends far beyond pendants and earrings. The same qualities that make it so captivating on a small scale—its durability, vibrant color, and mesmerizing interaction with light—also make it an incredible material for larger works of art. Artists and designers use it to create everything from decorative tiles and wall panels to intricate mosaic pieces and freestanding sculptures. Its ability to shift colors depending on the viewing angle adds a dynamic, interactive element that few other materials can match, making it a favorite for creating statement pieces that command attention.
Thinking bigger doesn’t have to be intimidating. You can start by incorporating small dichroic elements into larger stained glass panels or creating a set of custom fused tiles for a kitchen backsplash or bathroom accent. Because the metallic coating is fused into the glass, it’s incredibly durable and resistant to scratching, making it suitable for both decorative and functional applications. As you grow more confident, you can explore creating larger fused art pieces that can be displayed on a stand or mounted on a wall. The principles are the same as with jewelry, just on a grander scale.
Architectural and Outdoor Art Installations
On the largest scale, dichroic glass has captured the imagination of architects and public artists. Its unique ability to play with natural light makes it a perfect material for architectural features. You can see it used in modern buildings as decorative windows that cast shifting patterns of colored light into a room, or as panels in outdoor fountains where the water enhances its reflective qualities. Because it’s so durable, it holds up beautifully in outdoor installations, creating dynamic public art that changes throughout the day with the moving sun. These large-scale applications show the true power of dichroic glass to transform a space and create an unforgettable visual experience.
Finishing Touches and Caring for Your Jewelry
Once your beautiful dichroic glass pieces have cooled, the final steps are all about transforming them into polished, wearable art. This is where you refine the shape, add the necessary hardware, and learn how to care for your creations so they last a lifetime. Taking a little extra time here makes a huge difference in the quality and durability of your finished jewelry. It’s the final creative push that brings your vision to life, turning a fused cabochon into a stunning pendant or a pair of sparkling earrings. These finishing touches ensure your work is not only beautiful but also professional and ready to be worn or shared.
How to Inspect and Coldwork Your Fused Glass
After the kiln has worked its magic, it’s time to inspect your pieces. Once they are completely cool, examine them under good light. You’re looking for a smooth, glossy finish and checking the edges for any sharpness. Even with a perfect fuse, the edges can sometimes be a bit rough. Coldworking is the process of grinding and smoothing these edges to give your jewelry a professional feel and make it safe to handle. Using a glass grinder, you can gently shape the edges until they are perfectly smooth. This step is crucial for creating high-quality pieces that feel as good as they look.
Turning Your Glass into Wearable Art
Now it’s time to turn your glass creations into actual jewelry. This involves attaching findings, like bails for pendants, posts for earrings, or bases for rings. For a strong bond, you’ll want a flat surface on the back of your glass piece. This is why many artists fire their dichroic designs face down, which protects the coating and creates a flat surface. Use a strong, jewelry-grade adhesive to attach your findings. Apply a small amount, press the finding firmly in place, and be sure to let the glue cure completely according to the manufacturer’s instructions before you wear your new piece.
How to Care for Your Finished Jewelry
Your dichroic glass jewelry is a piece of art, and it deserves proper care. To keep it clean and sparkling, simply wipe it with a soft, lint-free cloth. If it needs a deeper clean, use a little mild soap and water, then dry it thoroughly. Avoid harsh chemicals or abrasive cleaners, as they can scratch the glass or damage the delicate dichroic surface. When you’re not wearing your jewelry, store it in a soft pouch or a separate compartment in a jewelry box. This prevents it from getting scratched by other pieces. The beautiful COE90 glass you started with is strong, but it’s still glass, so handle it with care to prevent chips or breaks.
Related Articles
- How to Make Glass Jewellery in 7 Simple Steps – ArtGlassSupplies
- Innovative Techniques: Dichroic Glass & Metallic Paints
- A Complete Guide on, How to Prepare for Glass Fusing?
- Dichroic Glass in Contemporary Architecture
Frequently Asked Questions
Why did my finished glass piece crack? This is the most common heartbreak in glass fusing, and it usually points to one of two issues: glass incompatibility or improper cooling. All the glass in a single project must have the same COE (like COE90) so it all expands and shrinks at the same rate. If you mix COEs, the glass will pull itself apart as it cools. The other likely cause is rushing the annealing stage. That slow, controlled cooling process is essential for relieving internal stress and making your piece strong and stable.
What’s the difference between COE90 and COE96 glass? The main difference is simply how much each type of glass expands when heated and shrinks when cooled. Think of them as two different languages; they are both wonderful, but they don’t work together. You must choose one COE for your entire project, from the base glass to the dichroic accents and the clear cap on top. Sticking to one family, whether it’s COE90 or COE96, is the golden rule for preventing stress cracks.
My fused glass looks cloudy or has bubbles. What did I do wrong? A cloudy finish or tiny, trapped bubbles almost always comes down to cleanliness. Before you even think about layering your design, every single piece of glass needs a good wash with mild soap and water, followed by a thorough drying with a lint-free cloth. Any speck of dust, oil from your fingerprints, or residue from a cutting marker can get permanently sealed inside during firing, creating those frustrating flaws.
Do I really need a special kiln for this? Yes, a kiln designed for glass is an essential piece of equipment. A conventional home oven can’t reach the high temperatures required to melt glass, and more importantly, it can’t manage the precise heating and cooling rates needed for a successful fuse. A proper kiln allows you to follow a specific firing schedule, which is the recipe for melting your glass smoothly and annealing it correctly for strength.
What happens if I don’t put a clear cap on my dichroic glass? You can technically fire dichroic glass without a clear layer on top, but adding a cap makes a huge difference in the final quality. The cap acts as a protective shield for the delicate metallic coating, preventing it from burning off or developing a dull finish in the kiln’s intense heat. It also works like a magnifying glass, adding incredible depth and making the colors appear much richer and more vibrant. It’s the key to achieving that glossy, professional look.
How to Best Display Your Finished Pieces
You’ve put so much care into creating your beautiful dichroic jewelry, so it deserves a presentation that does it justice. Think about how you can make those incredible colors truly sing. Just as a dark base glass makes the dichroic shimmer pop, a dark display background—like black velvet or a rich wood—can create a stunning contrast that draws the eye. Keep your display area clean and uncluttered; you want the focus to be on your art, not on a messy table. Good lighting is also your best friend. Position your pieces where they can catch the light, showing off their magical color-shifting properties. Finally, consider how you can protect your work. Using simple stands, frames, or even a glass-front case keeps your jewelry safe from dust and damage while highlighting the craftsmanship, like the incredible depth you achieved through layering.