

Stained Glass Supplies for Beginners: What to Buy
Buying your first stained glass supplies can feel harder than choosing your first pattern. A useful beginner setup should cover the actual workflow, from selecting glass and scoring it to smoothing edges, foiling seams, soldering joints, and cleaning the finished piece. The best approach is to match each purchase to a small first project instead of buying every tool at once.
Shop stained glass supplies and tools for your first project
For broader technique guidance, use the stained glass techniques, tools, and supplies reference. It provides useful context for how the items below fit together. This guide focuses on the buying decisions that matter most when you are building a home setup.
How to Choose Stained Glass Supplies for Beginners
The best stained glass supplies for beginners are compatible sheet glass, a carbide-wheel cutter, running pliers, grozing pliers, eye protection, and copper foil, flux, solder, and a temperature-controlled soldering iron with a stand. Start with those essentials, then add a grinder and specialty glass when your projects require them.
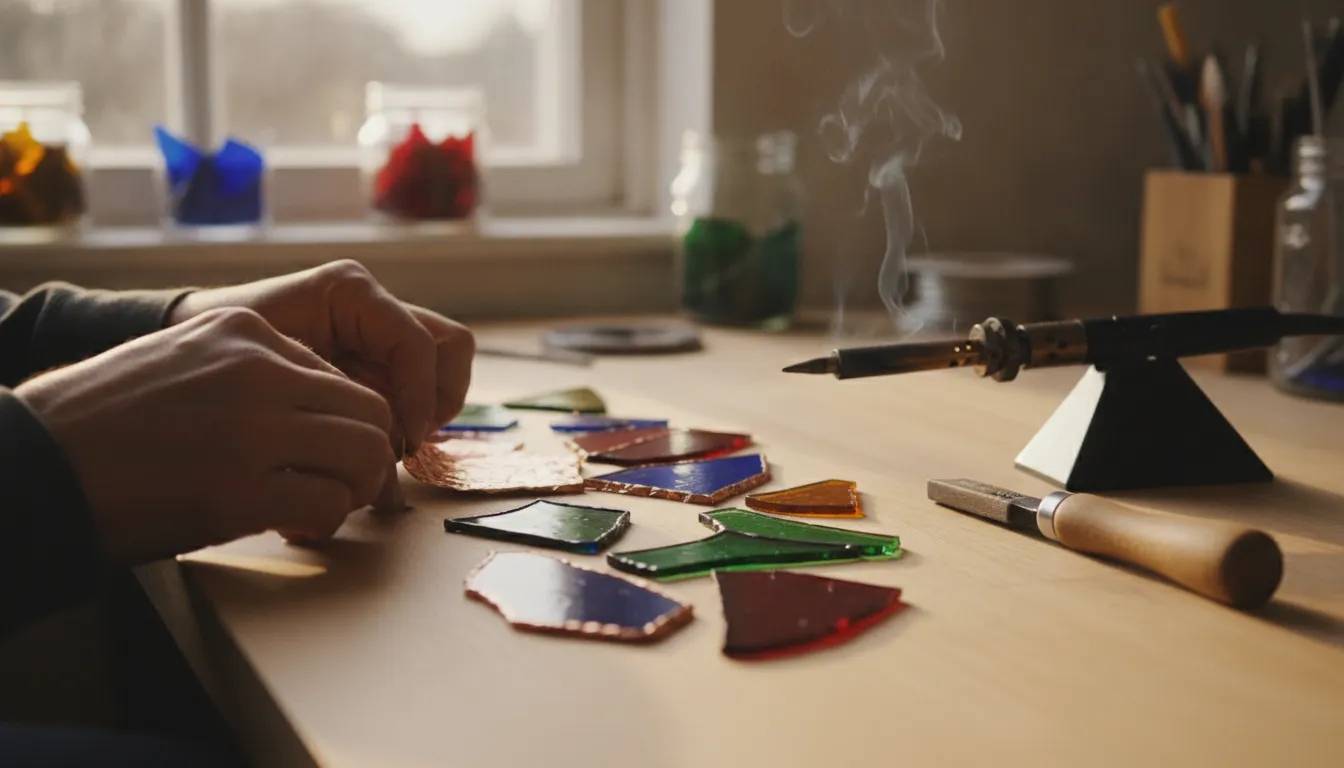
Your first kit should support a repeatable sequence rather than a vague collection of accessories. You will score the glass, separate the pieces, refine the edges, wrap them with foil, fit the pieces, and solder the seams. Each tool below has a specific job in that sequence.
- Choose a manageable pattern: Start with a small design that has a limited number of pieces and gentle curves.
- Select the glass: Choose a coordinated palette and check whether the project is cold-constructed or fused in a kiln.
- Cut and refine: Use a cutter, running pliers, grozing pliers, and eye protection to shape the pieces safely.
- Foil and burnish: Wrap each edge with copper foil, then use a fid to press the foil firmly into place.
- Flux and solder: Apply appropriate flux and use a controlled soldering iron to join the seams.
This sequence also prevents common overspending. You do not need a kiln for a cold copper-foil panel. You also do not need every texture or specialty tool before you have made a few clean cuts. Set aside room for a stable work surface, safe storage for sharp glass, and ventilation appropriate for the products you use.
When shopping at Art Glass Supplies’ glass working tools collection, compare the job each product performs, not just the number of pieces in a bundle. A smaller, purposeful kit is easier to learn with and easier to expand.
Which Glass Types Are Easiest for Beginners?
Cathedral, opalescent, and textured sheet glass can all work for a beginner panel. Cathedral glass transmits more light, opalescent glass has greater visual body, and textured glass adds surface movement. Choose a small palette that cuts predictably and suits your pattern, then keep notes about each sheet for later projects.
Appearance is only one part of choosing glass. First decide whether you are making a cold-constructed stained glass panel or a kiln-heated project. For fused or otherwise heat-worked glass, use one compatible Coefficient of Expansion, or COE, system unless the manufacturer confirms another combination is compatible. COE describes how glass expands and contracts as temperature changes. Different expansion behavior can create stress during heating and cooling.
COE is less important for a cold copper-foil panel because the glass pieces are not fused together. In that case, focus on color, texture, thickness, cutting behavior, and the way the pieces fit. Still record the glass type and COE on the packaging or in your project notes. That habit prevents accidental mixing if you later use scraps in a kiln project.
Cathedral glass
Cathedral glass is translucent and lets light pass through clearly. It works well for windows, leaves, open backgrounds, and designs where the changing light should remain part of the finished piece. Hold a sample near a window before buying a larger amount so you can see how the color changes with backlighting.
Opalescent glass
Opalescent glass is semi-translucent or opaque and usually gives a design more color density. It can make a focal shape stand out when there is little direct light behind the panel. Some opalescent sheets still glow near a window, while others read as substantially solid, so previewing a sample is useful.
Textured glass
Artique, hammered, seedy, and waterglass textures can add movement without introducing another color. Texture is useful for water, foliage, borders, and backgrounds. It can also make tracing and cutting less straightforward. Plan the texture direction before marking the pattern, especially when neighboring pieces need a consistent visual flow.
For a first order, choose two or three colors and one or two surface types. Browse stained glass sheets by the project effect you want, and keep the first palette small enough to understand how each sheet behaves.
What Should You Look for in a Beginner Glass Cutter?
Look for a comfortable carbide-wheel glass cutter with a stable handle and, if useful for your practice, an oil reservoir. The right cutter lets you make one controlled score without forcing your wrist or repeating the line. Comfort and consistent control matter more for a beginner than collecting several specialized cutter shapes.
A glass cutter does not saw through the sheet. Its wheel creates a controlled score that weakens the surface so the glass can separate along the intended path. Place the sheet on a clean, stable work surface and guide the wheel in one deliberate motion. A clear, even sound usually indicates a consistent score.
Features worth comparing
- Carbide wheel: A common durable choice for scoring stained glass sheets.
- Balanced handle: A comfortable grip helps maintain steady pressure and reduces hand fatigue.
- Oil reservoir: Some cutters feed cutting oil to the wheel for smoother movement.
- Replacement parts: A replaceable wheel or head can extend the useful life of the tool.
Running pliers apply controlled pressure along a score line so a larger piece breaks where intended. Grozing pliers nibble away small amounts and help refine edges that are slightly outside the pattern. Neither tool replaces a good score. Avoid tracing a line twice because multiple passes can create a rough break or an unintended fracture.
Eye protection belongs beside the cutter, not in a drawer across the room. Clear loose shards as you work, keep hands away from the breaking path, and store cut pieces so edges cannot damage other supplies. The glass working tools selection is a practical place to compare cutters, pliers, and related equipment together.
Should You Start With Copper Foil or Lead Came?
Copper foil is usually the more approachable first method for small stained glass projects because each piece is wrapped individually before soldering. Lead came creates a traditional channel framework and can suit larger, structured panels. Choose copper foil for detailed curves and ornaments, or explore lead came when you are ready for its fitting and assembly process.
Copper foil uses adhesive-backed copper tape around the edge of each cut piece. After the foil is pressed firmly into place, flux helps solder flow across the prepared metal surface. Lead came uses H-shaped strips that hold the glass in channels before joints are soldered. The two methods produce different construction experiences and visual line work.
| Consideration | Copper foil | Lead came |
|---|---|---|
| Good first use | Small panels and detailed patterns | Traditional and structured panels |
| How it holds glass | Foil wraps each edge | Lead channels hold the edges |
| Fine detail | Flexible foil supports narrow lines | Channel width creates a substantial line |
| Learning curve | Accessible starting point | Requires fitting and shaping practice |
| COE concern | Not a fusing requirement when cold-constructed | Not a fusing requirement when cold-constructed |
Because both methods are cold construction, matching COE is not the same compatibility requirement it is for kiln-fused work. The important beginner decisions are accurate cuts, clean edges, properly fitted joints, and safe soldering. If you later use the same glass in a kiln, reassess compatibility before heating it.
For most first projects, copper foil keeps the process visible and manageable. It lets you practice the skills that carry into other methods: reading a pattern, cutting carefully, fitting pieces, protecting the work area, and making clean solder joints. The stained glass techniques reference can help you compare methods as your projects become more ambitious.
How Do You Choose a Soldering Iron for Stained Glass?
Choose a temperature-controlled stained glass soldering iron with enough power to recover heat across a seam, commonly around 80 to 100 watts for many beginner projects. Pair it with a stable stand and tip cleaner. Consistent temperature control is more useful than chasing the highest possible wattage.
Soldering joins the prepared foil seams, so the iron affects both the appearance and the stability of the panel. A controlled iron helps you repeat a working temperature instead of compensating for changing heat by pressing harder or holding the tip in one place too long.
Traditional stained glass solder is commonly a 60/40 tin-and-lead alloy. It melts at approximately 160 to 170 degrees Celsius, while the iron tip must be hotter to transfer heat effectively. Purdue’s stained glass materials guide provides background on the alloy and soldering temperature considerations. Follow the product instructions and use appropriate ventilation and protective practices.
What to include with the iron
- Stable stand: Gives the hot iron a secure resting place between passes.
- Tip cleaner: Helps remove residue and maintain a tinned working surface.
- Appropriate tips: A tip suited to your seam size can make heat transfer easier to control.
- Flux and solder: These materials work with the iron as a system, so review their product instructions together.
Too little heat can leave a lumpy seam because solder cools before it flows. Excessive heat or lingering in one spot can lift foil adhesive, overheat an area, or stress the glass. Practice on scrap before beginning a finished panel, and keep the iron in its stand whenever you are not actively soldering.

What Belongs in a First Stained Glass Starter Kit?
A practical first stained glass starter kit includes a small pattern, compatible sheet glass for that design, a carbide-wheel cutter, running pliers, grozing pliers, and eye protection, copper foil, a fid, flux, solder, a temperature-controlled iron, and a stand. Add a grinder when precise edge fitting becomes part of your projects.
Buy the kit as a working system. A cutter without pliers makes separating scored pieces harder. Foil without a fid makes consistent burnishing more difficult. An iron without a stand creates an avoidable safety problem. Thinking through the workflow before checkout helps you spend on tools that will be used immediately.
Essentials for a cold copper-foil project
- Small beginner pattern and a stable, protected work surface.
- Coordinated stained glass sheets in a manageable palette.
- Carbide-wheel cutter, running pliers, and grozing pliers.
- Eye protection and a container for glass scraps.
- Copper foil in a width suited to the glass and pattern.
- Fid or other burnishing tool.
- Flux, 60/40 solder, controlled soldering iron, stand, and tip cleaner.
- Optional grinder for tighter fits and smoother edges.
A grinder is helpful, but it is not mandatory for every first panel. Careful scoring, breaking, and hand refinement can be enough for a simple design. Add a grinder when curved pieces or repeated fitting work begins to slow you down. If a grinder is already part of your plan, leave room for its water and cleanup requirements.
For a broader checklist, see the stained glass start-up kit guide. You can also compare glass tools and supplies by function. If you plan to fuse pieces in a kiln rather than construct a cold panel, browse COE90 glass or COE96 glass and confirm the compatibility requirements for the project.
How Can You Buy Only What Your First Project Needs?
Choose supplies by project sequence, not by the size of a preassembled bundle. Select the pattern first, then buy enough glass for the pattern plus a reasonable cutting margin, followed by the tools and consumables that support scoring, fitting, foiling, and soldering. This keeps the first purchase useful without overloading a new workspace.
Before ordering, write down the pattern size, glass colors, construction method, and tools you already own. Confirm that the glass is intended for your chosen process. For cold copper foil, prioritize cut quality and appearance. For kiln work, treat COE and the manufacturer’s compatibility guidance as essential. Viscosity and softening behavior also affect how glass moves during heating, so do not assume that a color match means a firing match.
Keep new supplies organized by task. Store cutters and pliers together, keep foil and burnishing tools near the fitting area, and keep soldering materials away from the cutting zone. Clear labeling is especially useful when you have both cold-work and kiln-compatible materials in the same studio.
Compare the stained glass supplies for beginners you need for your first project
Frequently Asked Questions
What are the essential supplies for a first stained glass project?
Start with a small pattern, sheet glass, a carbide-wheel cutter, running pliers, grozing pliers, eye protection, copper foil, a fid, flux, solder, a temperature-controlled soldering iron, and a stable stand. Add a grinder later if your designs need more precise edge fitting.
Do I need a grinder to make stained glass?
No. A simple pattern can be completed with careful scoring, breaking, and hand refinement. A grinder becomes useful when you work with tight curves, detailed patterns, or edges that need repeated fitting. Treat it as a helpful upgrade rather than a required first purchase.
What kind of soldering iron is best for a beginner?
Choose a temperature-controlled iron designed for stained glass, commonly around 80 to 100 watts for many beginner projects. Pair it with a stable stand and tip cleaner. Temperature regulation helps solder flow consistently without unnecessary heat on the foil or glass.
How do I choose glass that will work together?
For fused or kiln-heated work, check the COE and follow the manufacturer’s compatibility guidance before combining pieces. For a cold copper-foil panel, COE matching is not a fusing requirement. Choose sheets that cut and fit cleanly, then record the glass information for future projects.
Is copper foil easier than lead came for beginners?
Copper foil is often the easier starting method for small decorative projects because each piece is wrapped individually before soldering. Lead came creates a traditional channel framework and can be a good choice for structured panels. The best method depends on the pattern and the construction style you want to learn.
Get Started With Your First Stained Glass Supplies
A focused first order gives you room to learn without filling your workspace with tools you do not yet need. Match the supplies to one manageable project, confirm the difference between cold construction and kiln heating, and add equipment as your technique develops. Art Glass Supplies offers a broad selection of glass working tools and materials for that next step.