
You have the glass, the tools, and a notebook full of ideas for beautiful fused pendants and colorful suncatchers. Now, you just need the one piece of equipment that makes it all possible: a kiln. For artists working from a home studio or garage, a compact, user-friendly model is the perfect starting point. But how do you choose? This guide will help you navigate the key decisions, like whether you need digital controls and how much space is enough for your dream projects. We’ll give you a clear roadmap for selecting a reliable and affordable tabletop glass fusing kiln for beginners that will serve as your trusted creative partner for years to come.
Key Takeaways
- Focus on Features, Not Just Size: Your first kiln needs a digital controller for precision and should run on a standard household outlet for convenience. This setup is perfect for creating a wide range of projects without needing an electrician.
- Establish a Safe Firing Zone: Your kiln requires its own dedicated space with at least 18 inches of clearance and good ventilation. Always use personal protective equipment, including heat-resistant gloves and safety glasses, to protect yourself during every project.
- Stick to One COE Per Project: Glass compatibility is the golden rule of fusing. To avoid cracks and breaks, never mix glass with different Coefficients of Expansion (COE), such as COE90 and COE96, in the same piece.
What is a Tabletop Glass Fusing Kiln?
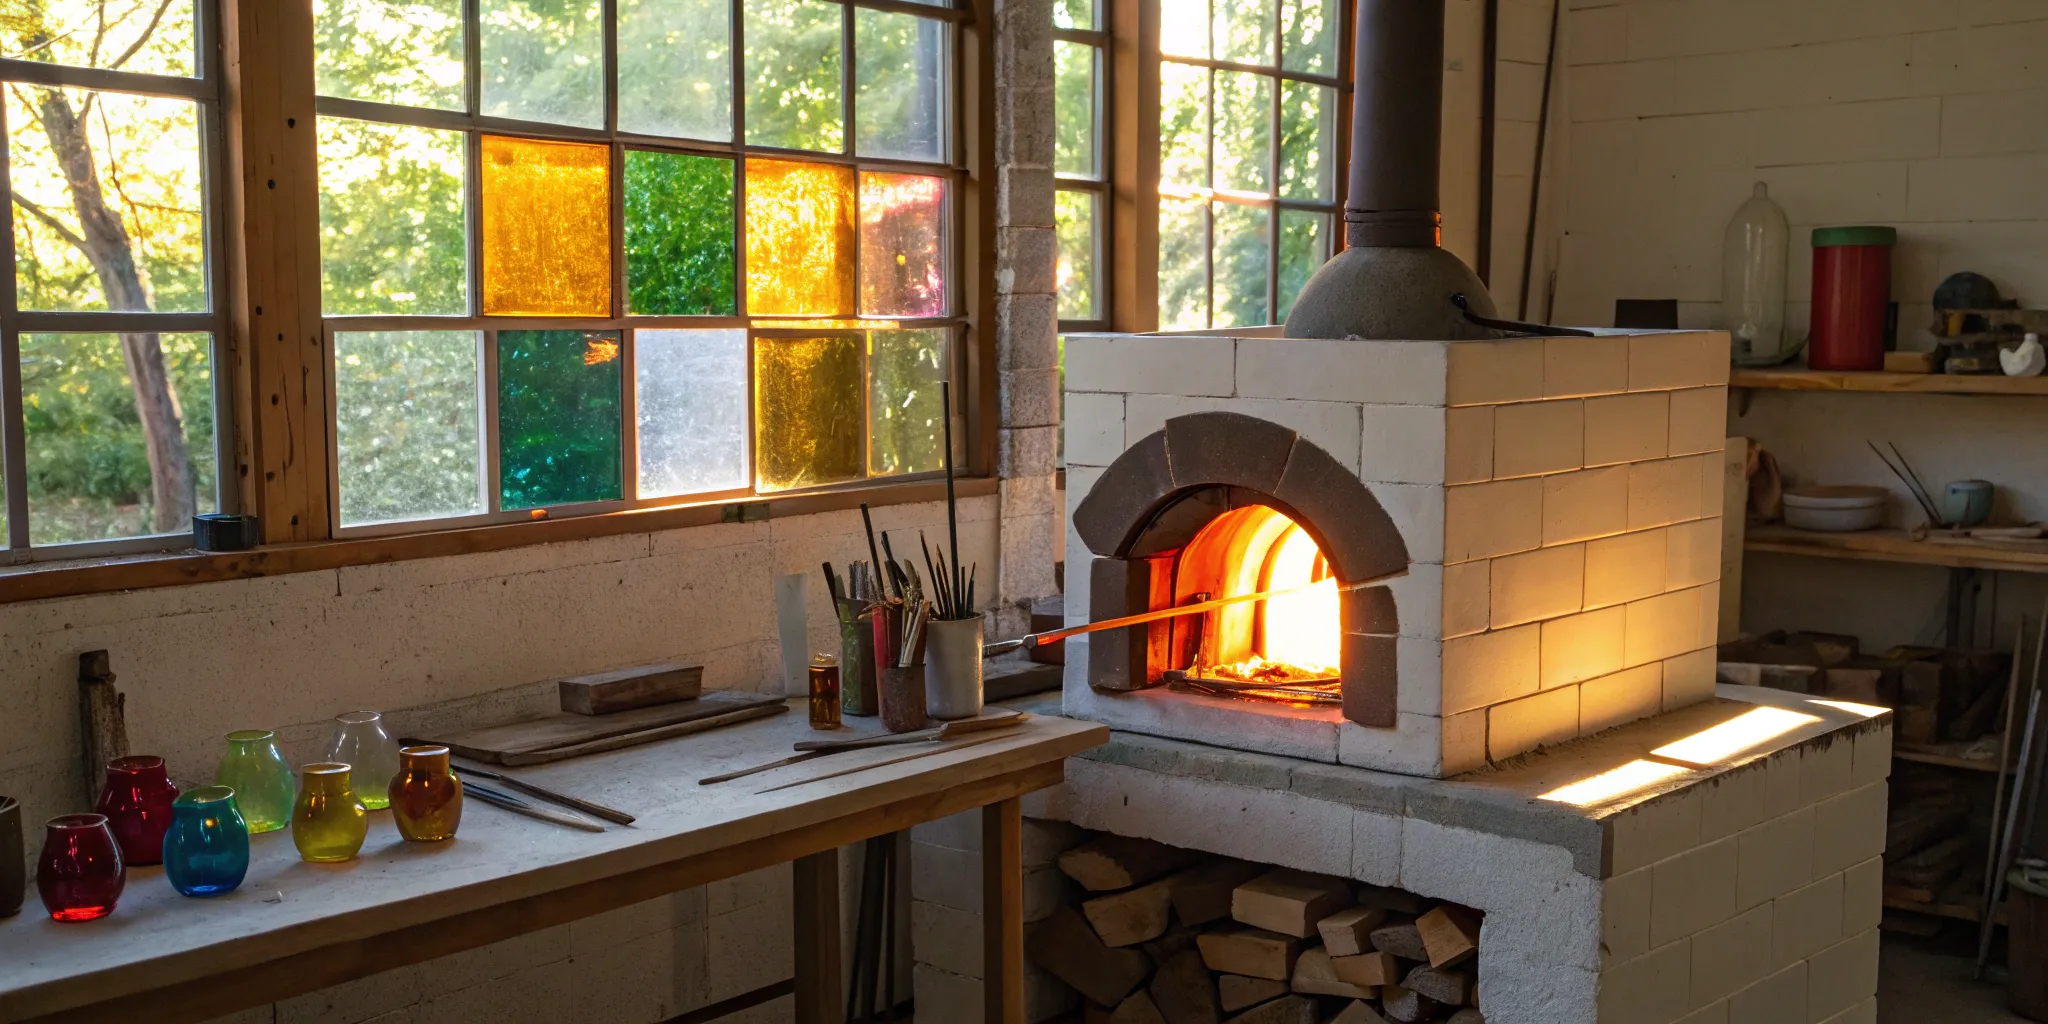
If you’re dreaming of melting colorful glass into beautiful, one-of-a-kind art, a tabletop kiln is your perfect starting point. Think of it as a compact, high-powered oven specifically designed for glass. These kilns are ideal for beginners and hobbyists because they’re smaller, more affordable, and typically plug right into a standard household outlet—no complicated wiring needed. They give you the power to fuse, slump, and shape glass for jewelry, coasters, and small decorative pieces, all from the comfort of your home studio or garage. It’s the best way to get started without committing to a massive, industrial-sized piece of equipment.
How Much Space Do You Need?
You don’t need a giant workshop to house a tabletop kiln, but you do need a dedicated, safe space. A garage, basement, or a well-ventilated utility room is often the best choice because these areas usually have concrete floors and better airflow. The most important rule is to give your kiln some breathing room. You’ll want to keep at least 18 inches of clear space on all sides to allow for proper air circulation and prevent any fire hazards. Make sure the area is free of flammable materials like paper, fabric, or chemicals. Setting up a safe, organized workspace is the first step to bringing your creative glass projects to life.
What Can It Do? (And What Glass Can It Fuse?)
A tabletop kiln is surprisingly versatile. It operates at lower temperatures than a pottery kiln, typically under 1700°F, which is the sweet spot for manipulating glass. With a programmable controller, you can achieve several different effects. You can “slump” glass over molds to create bowls and plates, “tack fuse” pieces so they stick together but keep their texture, or go for a “full fuse” to melt glass into a single, smooth surface. These kilns work beautifully with fusible glass like COE90 and COE96, allowing you to create everything from sparkling dichroic pendants to colorful suncatchers and custom tiles. It’s your go-to tool for small-scale, intricate glass art.
How a Tabletop Kiln Works
At its core, a kiln is an insulated box with heating elements that carefully raise and lower the temperature. When you start a project, you’ll program a firing schedule—this tells the kiln how quickly to heat up, how long to hold a specific temperature (called “soaking”), and how slowly to cool down. This controlled cooling process, known as annealing, is critical for making your glass strong and preventing it from cracking. Modern tabletop kilns with digital controllers make this process incredibly simple. You just select a pre-set program or enter your own, press start, and let the kiln work its magic.
Must-Have Features for Your First Kiln
Choosing your first kiln can feel like a huge decision, but it doesn’t have to be overwhelming. When you know what to look for, you can confidently pick a model that will serve you well as you start your glass fusing journey. Think of your kiln as your most important studio partner—it needs to be reliable, precise, and safe. Let’s walk through the key features that separate a great beginner kiln from one that will cause you headaches down the road. Focusing on these four areas will help you find the perfect match for your creative goals.
Digital vs. Manual Controls: Which is Better?
When it comes to kiln controls, this is an easy decision: always go with a digital controller. Some older or very basic kilns use manual controls, like an “infinity switch” with simple low, medium, and high settings. While they might seem simpler, they lack the precision needed for glass fusing. A digital controller allows you to program specific firing schedules—telling the kiln exactly how hot to get and for how long. This precision is what gives you consistent, repeatable results, whether you’re slumping, tack fusing, or going for a full fuse. It takes the guesswork out of the process, letting you focus on your art instead of babysitting your kiln.
Getting the Temperature Just Right
Glass fusing is a science of temperature. Unlike pottery, which requires extremely high heat, glass projects are fused at lower temperatures, typically below 1700°F. Different effects require different heat levels; for example, a slumping project might only need to reach 1250°F, while a full fuse that melts the glass smooth happens closer to 1475°F. Your kiln must be able to reach and hold these specific temperatures accurately. This is another reason a digital controller is so important. It ensures your COE90 glass pieces fuse exactly as you planned, giving you control over the final texture and shape of your artwork every single time.
Kiln Size and Heating Elements Explained
For your first kiln, think practical. A small or medium-sized model that plugs into a standard household outlet is usually the best choice. This saves you the hassle and expense of hiring an electrician to install a special circuit. When looking at size, consider the interior dimensions. What kinds of projects do you want to make? Make sure the kiln shelf is large enough for the molds and glass pieces you envision creating. Also, pay attention to the kiln’s depth. Shallower kilns often provide more even heating across the glass surface, which is a huge advantage for getting clean, consistent results without hot spots.
Key Safety Features to Look For
Safety should always be your top priority. Before you even buy a kiln, check your home’s breaker box to make sure the circuit you plan to use has enough amperage to support it. A kiln that constantly trips the breaker is both frustrating and unsafe. Your workspace also needs excellent ventilation to clear any fumes released during firing. When looking at the kiln itself, ensure it’s well-insulated with a sturdy body and a secure lid or door. While not part of the kiln, always plan to use proper safety gear, including heat-resistant gloves and safety glasses, whenever you’re operating it.
Top Kiln Brands for Beginners
When you start shopping for your first kiln, the number of brands can feel a little overwhelming. The good news is that a few names consistently stand out for their quality, reliability, and user-friendly designs, making them perfect for artists who are new to glass fusing. Brands like Evenheat, Paragon, Fuseworks, and Hot Shot have built strong reputations by creating kilns that are both powerful and accessible.
Each brand offers something a little different. Some focus on compact, plug-and-play models that are perfect for a small home studio, while others provide more room to grow with larger chambers and advanced features. Thinking about the kinds of projects you want to create will help you narrow down which brand is the right fit for you. We’ll walk through some of the most popular choices to give you a clear idea of what to look for.
Our Favorite Kilns at ArtGlassSupplies.com
Here at ArtGlassSupplies.com, we’ve seen our fair share of kilns, and we have a soft spot for models that deliver consistent results without a steep learning curve. Glass fusing kilns can range from a few hundred dollars to several thousand, but you don’t need to break the bank to get started. There are fantastic, reliable options available for under $1,000 that are perfect for beginners. We prioritize kilns with intuitive digital controllers, solid construction, and excellent safety features. Our curated selection is designed to help you get firing with confidence, whether you’re making small jewelry pieces or larger decorative plates.
Evenheat Studio Pro Series
Evenheat is a trusted name in the industry, and their Studio Pro series is a testament to their quality. Models like the Studio Pro 17 are popular because they offer one of the largest firing chambers you can get that still runs on a standard 120V household outlet. This means you can create bigger pieces without needing to hire an electrician for special wiring. The design often includes top-firing elements and a special lid construction for efficient, even heating across your glass. Evenheat kilns are built to last, making them a wonderful investment for a serious hobbyist who wants a kiln that will support their artistic growth for years to come.
Fuseworks Craft Kilns
If you’re looking for the absolute easiest entry into glass fusing, the Fuseworks Craft Kiln is designed just for you. It’s incredibly simple to use and plugs into any standard wall outlet, making it perfect for crafters who don’t have a dedicated studio space. This compact kiln is ideal for small projects like pendants, earrings, and magnets. While it doesn’t have the digital precision of more advanced models, its straightforward operation lets you start melting glass within minutes of unboxing it. It’s a fun, affordable way to test the waters of glass fusing and see if it’s the right craft for you before committing to more expensive equipment.
Paragon Caldera Models
Paragon is another powerhouse brand, and their Caldera models are fantastic for artists working in smaller spaces. These compact, durable kilns are workhorses for creating jewelry, beads, small tiles, and test pieces. Most models, like the Caldera Digital, plug into a regular 120V outlet and feature a precise digital controller. This gives you the ability to program custom firing schedules, which is a huge advantage for achieving specific results with your glass. A Paragon kiln is a great choice if you value precision and want a reliable machine for crafting intricate, smaller-scale glass art.
Hot Shot Clamshell Designs
Hot Shot ovens and kilns are known for their smart, practical features, and their clamshell models are especially popular. The clamshell design allows the entire top of the kiln to lift up, giving you unobstructed access to the firing chamber. This makes it much easier to load your delicate glass projects without accidentally bumping or shifting your design. Many Hot Shot kilns also include features like covered heating elements to prevent dust from flaking onto your artwork and a removable floor for easy cleaning. These thoughtful details make the firing process smoother and are great for beginners who want a user-friendly experience.
How Much Does a Beginner Kiln Cost?
Let’s talk about the investment. Buying your first kiln is a big step, and it’s smart to know what to expect financially. The good news is that there are fantastic options available for just about every budget. The price of a kiln is mainly determined by its size, features (like digital controllers), and brand reputation. As you might guess, a larger kiln with more advanced programming capabilities will cost more than a small, basic model.
Think about what you want to create and how serious you are about glass fusing. Are you just testing the waters to see if you enjoy it? Or are you already dreaming of making larger plates and platters? Being honest about your goals will help you find the sweet spot between getting the features you need and staying within your budget. We’ll break down the typical price ranges so you can see what your money gets you at each level.
Entry-Level Kilns ($300-$600)
If you’re just starting out and want to explore glass fusing without a huge upfront cost, an entry-level kiln is the perfect choice. These compact models are ideal for making jewelry, small ornaments, coasters, and other little treasures. They are simple to operate and don’t take up much space, making them great for a corner of your garage or a dedicated craft room. While they won’t have all the bells and whistles of more expensive kilns, they have everything you need to learn the fundamentals and discover if glass art is your new passion.
Mid-Range Options ($600-$1,200)
For hobbyists who are ready to commit a bit more to their craft, the mid-range category offers a significant step up. In this price bracket, you’ll find larger kilns with more interior space, allowing you to create bigger pieces like small bowls or decorative tiles. These models almost always come with reliable digital controllers, giving you more precise command over your firing schedules. This is the ideal range for artists who have mastered the basics and are eager to experiment with more complex projects and techniques without yet investing in a professional-grade setup.
Premium Models ($1,200-$1,500)
When you’re ready to get serious about your glass art, premium tabletop kilns offer the power and precision you need. These models are built for artists who fire frequently and want consistent, professional results. You can expect top-of-the-line digital controllers with extensive programming options, superior insulation for energy efficiency, and durable construction that’s built to last. While it’s a bigger investment, a premium kiln is perfect for the dedicated artist who might be considering selling their work or simply wants the best tools to bring their creative visions to life.
Don’t Forget These Additional Costs
Remember, the kiln is just the beginning of your glass fusing adventure! Before you can fire your first piece, you’ll need to stock up on some essential supplies. The biggest additional cost will be the glass itself. You’ll want to start a collection of COE90 glass or COE96 sheets, frit, and stringers. You’ll also need kiln shelves, shelf paper or primer, safety glasses, and basic glass-cutting tools. If you plan on slumping or draping, you’ll need to invest in some quality molds, too. Budgeting for these items from the start will ensure you have everything you need for a successful first firing.
How to Choose the Right Kiln Size for Your Art
Picking the right kiln size can feel like a huge decision, but it really comes down to one thing: what you want to create. It’s about finding that sweet spot between the projects you’re dreaming of today and the masterpieces you’ll be making tomorrow. Let’s break down how to choose a size that fits your space, budget, and artistic vision without feeling overwhelmed.
What Do You Want to Make?
Before you even look at kiln specs, grab a notebook and jot down the projects you’re most excited about. Are you picturing delicate dichroic glass jewelry, colorful coasters, and small suncatchers? Or are you dreaming bigger, with plans for fused glass plates, shallow bowls, or larger art panels? The size of your intended projects is the single most important factor in choosing a kiln. A small kiln is perfect for jewelry and components, while creating a dinner plate will require a kiln with a shelf large enough to accommodate the full piece as it lays flat. Thinking about using molds for slumping or draping? Check their dimensions and make sure your kiln can fit them.
A Quick Guide to Kiln Shelf Dimensions
When you browse for kilns, pay close attention to the shelf dimensions, not just the exterior size. The shelf is your usable firing area. For most beginners, a kiln with a shelf that’s around 13 to 15 inches square or round is a fantastic starting point. This size is versatile enough to handle a wide variety of projects, from a batch of pendants to a medium-sized decorative bowl. It’s also a practical size for a home studio, as many of these models can plug into a standard household outlet. This allows you to get started without needing to hire an electrician, making your entry into glass fusing that much smoother.
Planning for Future (and Bigger) Projects
It’s natural to worry about outgrowing your first kiln, but try not to overbuy for projects you might do years from now. The truth is, even artists who upgrade to larger kilns almost always keep their smaller ones. A tabletop kiln is incredibly useful for firing small test pieces, creating individual components for a larger mosaic, or quickly firing a single piece of jewelry without having to heat up a massive chamber. Starting with a manageable kiln keeps your initial investment in tools and materials lower. You can always invest in a larger kiln later as your skills and ambitions grow, and your trusty first kiln will continue to be a valuable studio asset.
What Kind of Glass Can You Use in a Tabletop Kiln?
Once you have your kiln, the next exciting step is choosing your glass. But before you start collecting every color of the rainbow, it’s important to know that not all glass can be fused together. For a successful, crack-free project, all the glass you use in a single piece must be compatible, meaning it expands and contracts at the same rate when heated and cooled. This is where you’ll start hearing a lot about something called COE.
COE90 vs. COE96: What’s the Difference?
COE stands for Coefficient of Expansion, which is just a technical way of describing how much glass expands and contracts with temperature changes. The two most common types you’ll find for fusing are COE90 and COE96. Think of them as two different languages; they don’t mix well.
COE90 glass is known for being a bit stronger and is excellent for projects where you want to maintain fine details. On the other hand, COE96 glass is a little softer and melts at lower temperatures. This makes it more fluid in the kiln, allowing colors to blend beautifully and making it more forgiving for artists.
Our Go-To Glass for Tabletop Kilns
If you’re just starting out with a tabletop kiln, I highly recommend beginning with COE96 glass. Its forgiving nature and softer melting point make it incredibly versatile and much easier to work with when you’re learning the ropes. Because it gets more fluid, it’s perfect for creating smooth, blended designs without much fuss. You’ll find that it’s a reliable and user-friendly choice for everything from jewelry pendants to small dishes. Sticking with one COE will simplify your supply shopping and guarantee that all your pieces are compatible, setting you up for success from your very first firing.
Fusing Bullseye and CBS Dichroic Glass
You might be tempted to mix different brands of glass, especially when you see all the beautiful options out there. A common question is whether you can fuse Bullseye glass with CBS dichroic glass. Here’s the deal: Bullseye glass is COE90, while most CBS dichroic glass is COE96. As we just covered, mixing these two different COEs is a recipe for disaster. Because they expand and contract at different rates, your finished piece will almost certainly crack or break under the stress. To avoid disappointment and wasted materials, always stick to one COE for a single project. It’s the golden rule of glass fusing.
Your Essential Kiln Safety Checklist
Working with a kiln is incredibly exciting, but it’s also a serious piece of equipment. Before you fire up your first project, let’s walk through some simple but crucial safety steps. Think of this as your pre-flight checklist for every fusing session. Getting these habits down from the start will keep you, your art, and your studio safe, so you can focus on the fun part: creating beautiful glass pieces. Let’s make sure every project is a safe and successful one.
Must-Have Personal Protective Equipment (PPE)
First things first, let’s talk about protecting yourself. You’ll want two key pieces of personal protective equipment (PPE) on hand at all times: heat-resistant gloves and safety glasses. The gloves are a must for handling hot items or the kiln itself, protecting your hands from serious burns. Safety glasses shield your eyes from any potential glass shards that could fly during the process. It’s also really important to work in a well-ventilated area. As the glass heats, it can release fumes, so having good airflow keeps your workspace fresh and safe for you to breathe.
Setting Up a Safe Workspace
Your kiln needs its own dedicated, safe space to work its magic. A good rule of thumb is to keep at least 18 inches of clear space around all sides of the kiln. This isn’t just for convenience; it ensures proper airflow and prevents anything nearby from getting too hot. The ideal spot for your kiln is on a non-flammable surface, like a concrete floor. If that’s not an option, make sure the surface it’s on is protected. And it probably goes without saying, but always keep flammable materials like paper, chemicals, or fabric far away from your collection of kilns and their hot zones.
How to Safely Operate and Cool Your Kiln
Patience is a virtue, especially when it comes to cooling your kiln. I know how tempting it is to peek at your creation, but opening the kiln too early is a recipe for disaster. The rapid temperature change can cause thermal shock, leading to cracked or even shattered glass. The best practice is to let the kiln cool down completely to room temperature before you even think about opening the lid. This protects the beautiful COE90 glass pieces you’ve worked so hard on. Similarly, hold off on cleaning your finished project with water until it has fully cooled. This simple step ensures your art comes out of the kiln as perfect as you imagined it.
A Note on Kiln Safety for Young Artists
Glass art is a wonderful activity for people of all ages, but it’s important to remember that kilns are powerful tools, not toys. If you have young artists in your home, please make sure anyone under the age of 16 is closely supervised by an adult whenever the kiln is in use. An adult’s presence ensures that all safety rules are followed and that everyone understands the potential hazards. This helps create a safe and positive environment where creativity can flourish without any unnecessary risks. Fostering a respect for the equipment is one of the first and most important lessons in any art form.
How to Set Up Your First Fusing Studio
Creating your own studio space is one of the most exciting parts of starting your glass fusing journey. You don’t need a massive workshop to make beautiful art; a dedicated, well-organized corner is all it takes. Setting up your space thoughtfully from the beginning will make your creative process safer, more efficient, and much more enjoyable. Think of it as building your personal sanctuary for glass art. Here’s how to get everything in its right place.
Where to Put Your Kiln
Choosing the right spot for your kiln is the most important decision you’ll make when setting up your studio. Safety comes first, so look for a location with good ventilation and minimal flammable materials. A garage, basement, or utility room with a concrete floor is often the perfect choice. Wherever you place it, make sure to leave at least 18 inches of clear space around all sides of the kiln. This gap is essential for proper air circulation and prevents heat from building up against walls or other objects. Before you plug it in, check your kiln’s manual for its specific electrical requirements to ensure your outlet can handle the power draw.
Your Tool and Safety Equipment Checklist
With your kiln in place, it’s time to gather your tools and safety gear. At a minimum, you’ll need a pair of heat-resistant gloves for handling warm glass or kiln shelves and a pair of safety glasses to protect your eyes from any small glass shards. Good airflow is also critical, so work in a well-ventilated area or use a fan to keep the air moving. For working with the glass itself, you’ll want a basic toolkit that includes a glass cutter, running pliers for clean breaks, and grozing pliers for nipping away small pieces. Many of the essential hand tools can be found among general stained glass supplies.
How to Organize Your Glass and Supplies
An organized studio is a happy studio. Start by creating a system for your glass. It’s crucial to keep your glass separated by its COE (Coefficient of Expansion) to prevent your projects from cracking. Designate separate, clearly labeled containers or shelf space for your COE90 and COE96 glass. Storing sheets vertically in a sturdy box or rack makes them easy to see and access. You’ll also want a small cleaning station with a shallow tub, soap, and a soft cloth to wash your glass before firing. Finally, dedicate a shelf for your molds and a small bin with a brush and dustpan for sweeping up glass scraps safely.
Where to Find Your First Kiln
Once you’ve decided on the features you need, the next step is finding the right place to buy your kiln. This is a significant purchase, so you want to be sure you’re getting a quality piece of equipment from a source you can rely on. A good supplier won’t just sell you a box; they’ll offer support and expertise to help you get started on the right foot. Think of it as the beginning of a relationship that will support your creative projects for years to come. When you buy from people who are passionate about glass art, you get more than just a kiln—you get a partner in your craft.
Finding a Trusted Retailer
When you’re ready to invest in a kiln, it’s best to purchase from a specialized retailer that understands the unique needs of glass artists. A trusted supplier will offer a curated selection of reliable kilns, provide solid warranties, and have a knowledgeable team ready to answer your questions. Unlike big-box stores, a dedicated art glass supplier can guide you toward a model that truly fits your artistic goals. They can also help you troubleshoot issues down the road. Buying from an expert source ensures your kiln is a dependable tool for your studio, not a source of frustration.
Look for Starter Kits and Special Offers
If you’re feeling a bit overwhelmed by all the accessories you need, look for a starter kit. These bundles are a fantastic way to get everything you need in one go and often at a better price. A good kit will typically include the kiln, a shelf, posts, and sometimes even a small assortment of glass and fiber paper to get you firing right away. Keep an eye out for special offers and sales, especially around the holidays. These deals can make a brand-new, high-quality kiln much more accessible, leaving you with more budget for beautiful COE90 glass for your first projects.
Should You Buy a Used Kiln?
Buying a used kiln can seem like a great way to save money, but it comes with risks. You might find a great deal, but you could also inherit someone else’s problems. Used kilns rarely come with a warranty, and you won’t know its history—how often it was fired, if elements are wearing out, or if the controller is still accurate. If you decide to go this route, inspect it carefully in person and ask to see it run. A safer alternative for starting on a budget is to take a class at a local studio. You can learn the fundamentals and make sure you love glass fusing before making a big investment.
Related Articles
- Petite Microwave Kiln | Art Glass Supplies – Microwave Kiln
- Olympic Kiln 309GFE | Art Glass Supplies – Olympic Kilns
- Harvest Textured Fusing Tile | Art Glass Supplies – Slumping & Draping Mol
- 8″ Mini Square Casting Mold| Art Glass Supplies – Pot & Screen Melts
- Succulent Texture Fusing Tile | Art Glass Supplies – Slumping & Draping Mo
Frequently Asked Questions
Do I really need special wiring for a beginner kiln? For most tabletop models designed for hobbyists, the answer is no. The majority of these kilns are built to plug directly into a standard 120V household outlet, just like any other appliance. This is one of their biggest advantages for home artists. However, it’s always a good idea to check the specific amperage requirements of the kiln you’re interested in and make sure the circuit you plan to use can handle it without tripping the breaker.
What’s the difference between a ‘full fuse’ and ‘slumping’? Think of it as the difference between melting chocolate chips into a smooth puddle versus just softening them on top of a cookie. A “full fuse” heats the glass to a higher temperature, around 1475°F, causing separate pieces to melt completely into one flat, seamless surface. “Slumping” happens at a much lower temperature, typically around 1250°F. At this heat, a flat piece of fused glass will soften and bend, or “slump,” over a mold to take on a new shape, like a bowl or a plate, without losing its original form entirely.
How long does it take to fire a project from start to finish? This can vary quite a bit depending on the size of your project and the specific firing schedule, but you should plan for it to be an all-day process. A typical schedule for a small project might involve a few hours to heat up to the target temperature, a short hold (or “soak”) at that temperature, and then several more hours to cool down slowly and safely. The controlled cooling, or annealing, is the longest and most critical part. Rushing this step is the surest way to end up with cracked glass.
Is it safe to have a kiln running in my home? Yes, it is perfectly safe as long as you follow the proper precautions. The most important rules are to place your kiln in a well-ventilated area and to keep it on a non-flammable surface with at least 18 inches of clear space on all sides. This prevents heat buildup and clears any fumes. As long as you treat it with the same respect you would any high-heat appliance, like an oven, you can operate it in a home studio or garage without any issues.
Why can’t I just mix different types of glass I have lying around? All glass expands when heated and shrinks when cooled, but different types of glass do so at different rates. This rate is measured as its COE, or Coefficient of Expansion. If you fuse two incompatible types of glass, like a COE90 and a COE96, they will fight against each other as they cool. The stress created by one shrinking faster than the other will almost always cause your beautiful finished piece to crack. Sticking to one COE per project is the golden rule for ensuring your artwork survives the firing process.