
So, you’ve carefully gathered your materials, making sure every piece is labeled COE 96 glass. That’s a great first step, but it doesn’t guarantee a crack-free piece. The truth is, compatibility goes way beyond the number on the sticker. Tiny variations between brands, colors, and even the thickness of your layers can introduce stress. To get consistently beautiful results, you need a solid understanding of what is COE glass and how it really works. This guide will show you how to test your glass, manage your firing schedules, and account for those tricky variables that make all the difference.
Key Takeaways
- Stick to a Single COE System: The most important rule in fusing is to use glass with the same COE for your entire project. Mixing different COEs, like 96 and 90, creates internal stress as the glass cools, which is the number one cause of cracks.
- Test New Glass to Fuse with Confidence: Even glass with the same COE label can have slight variations. Before starting a big project, run a simple compatibility test with a stringer or chip to check for stress, ensuring your materials will fuse together perfectly.
- Master the Entire Fusing Process: A matching COE is just the start. Achieving strong, beautiful results also depends on using the right firing schedule for your project’s thickness, building balanced designs, and keeping your glass scraps meticulously organized to prevent mix-ups.
What is COE in Glass?
If you’ve spent any time in the world of glass fusing, you’ve definitely heard the term “COE.” It sounds technical, but the concept is pretty straightforward. COE stands for Coefficient of Expansion, which is just a fancy way of measuring how much a piece of glass will expand when it gets hot and shrink as it cools down. Think of it as the glass’s unique personality when it comes to temperature changes. Every type of glass has its own COE rating, a number that tells you exactly how much it will move.
Understanding this number is absolutely essential for anyone working with a kiln. It’s the key to making sure your beautiful, layered creations don’t crack under pressure—literally. The most important rule in fusing is that every piece of glass you plan to melt together must have the same COE to be compatible. This isn’t just a suggestion; it’s the foundation of successful fusing. Following this simple rule will save you from a lot of heartache and wasted material, ensuring your finished pieces are strong, stable, and beautiful for years to come.
How Glass Expands and Contracts with Heat
Everything expands when heated and contracts when cooled, and glass is no exception. When you place glass in a kiln, its molecules get excited and spread out, causing the piece to grow slightly. As it cools, the molecules calm down and move closer together, and the glass shrinks back. This is thermal expansion. The problem arises when you try to fuse two pieces of glass that expand and contract at different rates. One piece might be growing a lot while the other is only growing a little. This creates a tug-of-war inside your project, leading to immense internal stress and, ultimately, a cracked or broken piece.
Why COE is Crucial for Glass Fusing
This is where that golden rule of glass fusing comes in: always, always use glass with the same COE in a single project. When you fuse glass with different COEs, like mixing COE 90 glass with COE 96, they fight against each other during the cooling process. One will shrink faster or more than the other, creating stress points that your project just can’t handle. The result? Cracks that can appear right out of the kiln or, even more frustratingly, days or weeks later. Sticking to a single COE, like the versatile COE 96, ensures every piece in your project expands and contracts in harmony, creating a single, solid, and stable piece of art.
A Look at Other Common COE Values
While the world of kiln-fusing largely centers on COE 90 and COE 96, it’s helpful to know about other types of glass you might encounter. Different glass disciplines require different properties, which results in a wide spectrum of COE values. You might find glass with a very low COE designed to withstand thermal shock, or glass with a higher COE created for lampworking. Understanding these other ratings is important for one key reason: to make sure you never accidentally mix them into your fusing projects. Even a tiny, stray chip of incompatible glass can introduce enough stress to ruin your work, so knowing what to look out for is a critical part of keeping your studio organized and your projects successful.
Borosilicate and Lampworking Glass
If you’ve ever seen someone melting glass rods in a torch flame to make beads or sculptures, you’ve seen lampworking. This technique often uses soft glass like Effetre (also known as Moretti), which has a COE of 104. On the other end of the spectrum is borosilicate glass, a hard glass with a very low COE of 32, famous for its use in scientific lab equipment and durable kitchenware like Pyrex. The massive difference in these expansion rates is why you can’t mix them with standard fusing glass. An attempt to fuse a piece of COE 104 glass with your COE 96 project would create extreme stress, guaranteeing a crack. Knowing these numbers helps you identify materials that belong in a torch or a lab, not in your fusing kiln.
Float Glass and Repurposed Bottles
It’s tempting to get creative with recycled materials, but using glass from old windows or bottles in your fusing projects is a risky endeavor. Standard window glass, called “float” glass, typically has a COE between 84 and 87. Bottles are even more unpredictable, with COEs that can range anywhere from 83 to 90. The biggest issue is the lack of consistency. As some experts point out, even bottles from the same company can have different COEs if they were made in different factories. Without a reliable COE, you’re essentially gambling with your artwork. While experimenting can be fun, sticking with professionally tested art glass ensures that the only surprises you get from the kiln are happy ones.
What Does COE 96 Mean for Glass?
When you start working with fusible glass, you’ll see the term “COE” everywhere. It stands for Coefficient of Expansion, which is just a technical way of describing how much glass expands when it gets hot and shrinks when it cools down. Think of it like a personality trait for glass—some types are more expansive than others. For glass fusers, understanding COE isn’t just helpful; it’s essential. Using glass with the same COE is the secret to creating strong, stable pieces that won’t crack under pressure. It ensures all the different pieces in your project get along and fuse together beautifully in the kiln.
Decoding the COE 96 Rating
So, what does the number 96 actually tell you? A COE 96 rating means the glass expands at a rate of 96 parts per million for every one-degree Celsius rise in temperature. While you don’t need to memorize the physics, you do need to know that this specific number is a standard. All glass labeled as COE 96 is designed to expand and contract at this same, predictable rate. This compatibility is what allows you to fuse different colors and forms of COE 96 glass—from sheets to frit—without worrying about creating internal stress in your finished piece. It’s the shared language that lets all your glass pieces work together in harmony.
COE 96 vs. COE 90: What’s the Difference?
You’ll often see two main players in the fusing world: COE 96 and COE 90. The only difference between them is their rate of expansion. COE 90 glass expands slightly less than COE 96 glass when heated. While the numerical difference seems tiny, it has a huge impact inside the kiln. Mixing these two types is a recipe for disaster. As the mixed piece cools, the two different glasses will shrink at different rates, creating immense stress that almost always leads to cracks. The golden rule of glass fusing is simple: never mix COEs. Stick to one or the other for your entire project to ensure it survives the firing process.
When Does COE Not Matter?
After focusing so much on the critical importance of matching COEs, you might be relieved to hear there are times when you can set this rule aside. If your work doesn’t involve a kiln, you have much more flexibility. The key factor is heat. When glass isn’t being melted and fused together, the rate at which it expands and contracts becomes irrelevant. This opens up creative avenues for specific types of glass art where the pieces are assembled rather than fused, allowing you to focus entirely on color, texture, and design without worrying about thermal compatibility. This is especially true for traditional stained glass and mosaic projects.
Stained Glass and Mosaics
For artists working in traditional stained glass, COE is not a primary concern. In this technique, you are cutting and fitting pieces of glass together using materials like lead came or copper foil, not melting them into a single piece. Because the glass is never heated to fusing temperatures, there is no risk of the internal stress that causes cracking. This means you can confidently mix glass from different manufacturers and with different COE ratings to get the exact color or texture you want for your project. The focus shifts from scientific compatibility to pure artistic arrangement, giving you the freedom to use our entire collection of stained glass based on what looks best for your design.
The same principle applies directly to mosaic art. Since mosaic pieces are typically adhered to a base and grouted, not fired in a kiln, their expansion rates don’t need to match. This freedom allows you to incorporate a wide variety of materials, from different types of art glass to repurposed bottle glass, without fear of the project self-destructing. You can choose your pieces based on their aesthetic qualities alone. While COE is the golden rule for fusing, it happily takes a backseat in the worlds of stained glass and mosaics, letting your creativity lead the way without technical constraints.
Why Glass Compatibility is a Big Deal
Think of glass compatibility as the golden rule of fusing. Getting it right is the foundation of every successful project, while getting it wrong can lead to disappointment and wasted materials. When you fuse glass, you’re asking separate pieces to become one solid object. For that to happen, they need to be able to expand and contract in harmony. If they can’t, the internal stress will eventually cause your beautiful creation to crack or even break apart. Understanding why this happens is the first step to making sure every piece you pull from the kiln is strong, stable, and just as you envisioned it.
How to Prevent Cracks in Your Fused Glass
The most common result of mixing incompatible glass is stress fractures. When you fuse glasses with different COEs, you’re creating a piece with built-in tension. As one glass expands or contracts more than its neighbor, it creates an internal tug-of-war. This phenomenon is known as “incompatibility,” and it’s the primary cause of cracks. These fractures might appear as fine, hairline cracks or as large, piece-ruining breaks. They can show up right after firing or, even more frustratingly, days or weeks later. Sticking to a single COE eliminates this internal conflict, giving your fused glass the structural integrity it needs to last.
Why Temperature Swings Can Ruin Your Project
Every time you run a firing schedule, your glass goes on a journey of extreme temperature changes. Glass expands when heated and contracts when cooled. If you fuse glass pieces with different COEs, they will cool and shrink at different speeds inside the kiln. Imagine two friends holding hands, but one starts walking faster than the other—eventually, something has to give. In glass, this “giving” is a crack. The annealing phase of your firing schedule is designed to relieve internal stress, but it can only work if all the glass in the piece is contracting at the same rate.
Work Smarter: Save Time, Money, and Glass
There’s nothing more disheartening than investing hours of creative energy and beautiful materials into a project, only to have it fail. Fusing a piece of glass with a different COE can result in cracks, either immediately in the kiln or later on. This highlights the most crucial rule in glass fusing: never mix glass with different COE values in a single project. By committing to one system, like working exclusively with COE 96 glass, you protect your investment. You save yourself the cost of wasted glass, the expense of running your kiln for a failed piece, and the invaluable time you could be spending on your next creation.
How to Test COE 96 Glass Compatibility
Relying on a COE 96 label is a great start, but it isn’t a guarantee of perfect compatibility. Think of the COE rating as a guideline. Slight variations can happen between different brands, colors, and even production runs from the same manufacturer. This is why testing is a non-negotiable step for any glass fuser who wants to avoid the heartbreak of a cracked project. Taking a little time to test upfront can save you hours of work and precious materials down the line.
Fortunately, you don’t need a science lab to run a reliable compatibility test. The methods artists use are straightforward and can be done with small scraps of glass and a standard firing schedule in your kiln. By making testing a regular part of your process, especially when introducing a new brand or color into your studio, you can fuse with confidence. It’s the best insurance policy for ensuring your finished pieces are strong, stable, and last a lifetime. Let’s walk through a few of the most common and effective ways to check if your glass will play nicely together.
The Stringer and Shard Test Method
One of the simplest ways to check for compatibility is with a testing card and stringers. The idea is to fuse a small piece of your test glass onto a piece of your known base glass and then check the result for stress. Start with a small square (about 1×1 inch) of your trusted COE 96 glass. Then, lay a thin stringer of the glass you want to test across the middle of the square.
Fire the test card using a basic full-fuse schedule. Once it has cooled completely, it’s time to investigate. Hold the fused piece up to a light source and view it through a pair of polarizing filters. If the glasses are compatible, you’ll see nothing out of the ordinary. If they’re incompatible, you’ll see a tell-tale “halo” or stress line in the glass around the stringer.
Performing the Base Glass Test
The base glass test, sometimes called the chip test, is another excellent and efficient method. It’s especially useful if you want to test several different colors or types of glass at once. To do this, cut a rectangular strip of your known base glass—something like 1 inch wide by 4 or 5 inches long. Then, cut small squares (about ½ x ½ inch) of the various glasses you want to test.
Evenly space the small squares along the top of the base strip and fire the whole thing in your kiln. After the firing schedule is complete and the glass has annealed and cooled, you can examine the results. Just like with the stringer test, you’ll use a light source and polarizing filters to look for stress halos around each of the squares. This test gives you a clear, side-by-side comparison of how different glasses react with your base glass.
Reading Your Test Results
Knowing what to look for after the test is just as important as the test itself. A successful, compatible fuse will show no signs of stress. When you look at it through polarizing filters, the area where the two glasses meet will be clear. An incompatible fuse, however, will reveal stress in the glass. This usually appears as a bright, glowing line or halo right around the edge of the test glass.
Another sign of trouble is if the fused strip bends or curves. If the test glass has a higher COE, it will shrink more on cooling and pull the strip into a “C” shape with the test glass on the inside of the curve. If it has a lower COE, the strip will bend the other way. This is why a physical test is more reliable than just trusting the COE number—it shows you exactly how the glasses behave together through the entire heating and cooling process.
Your Guide to COE 96 Glass Brands
When you start shopping for glass, you’ll quickly notice a few key players in the industry. Understanding who makes what is a huge help in keeping your projects compatible and stress-free. While there are many fantastic manufacturers out there, a couple of names come up again and again. Knowing the difference between them, especially their standard COE, is one of the most important things you can learn as a glass artist. Let’s walk through the brands and glass types you’re most likely to encounter when working with COE 96.
Getting to Know Bullseye Glass
You can’t talk about fusible glass without mentioning Bullseye Glass. They were the first company to create a line of glass specifically tested for fusing, and they’ve contributed so much to glass art education. However, here’s the crucial thing to remember: Bullseye glass is almost always COE 90. While they are a top-tier brand, their glass is not compatible with your COE 96 supplies. It’s important to keep this in mind so you don’t accidentally mix them. If you ever decide to work on projects with a different coefficient, you’ll find their COE 90 glass offers an incredible range of colors and styles.
What About Oceanside Glass & Tile?
For artists dedicated to COE 96, Oceanside Glass & Tile (OGT) is your go-to brand. OGT is a powerhouse in the fusible world, and they have focused their efforts on producing beautiful, reliable COE 96 glass. They are known for making their products compatible with the authentic System 96 brand, which was an industry standard for years. This is great news for fusers because it means you can confidently mix new Oceanside sheets with any older System 96 glass you might have in your studio. Their commitment to compatibility makes them a trusted choice for everything from beginner projects to professional pieces.
Practical Differences for Artists
Choosing between COE 90 and COE 96 isn’t just about picking a number and sticking with it. The brand of glass you work with will have a real impact on your creative process, from the colors you can choose to how the glass feels under your cutter. While both Bullseye and Oceanside produce exceptional glass, they have distinct characteristics that might make one a better fit for your style or skill level. Understanding these practical differences will help you decide which system to build your studio around, ensuring your materials support your artistic vision every step of the way.
Color Selection
Your color palette is one of the most expressive tools you have as an artist, and this is where you’ll see a notable difference between the two main systems. Bullseye, the primary manufacturer of COE 90 glass, is known for its incredibly vast and diverse range of colors. For artists whose work depends on subtle gradations or very specific hues, this extensive selection can be a significant draw. On the other hand, Oceanside Glass & Tile has perfected a rich and beautiful palette for its COE 96 supplies. While the total number of colors may be smaller, the range is comprehensive, reliable, and designed for compatibility, giving you plenty of creative freedom within a trusted system.
Ease of Cutting
If you’re just starting your journey with glass, the physical act of cutting can be one of the biggest hurdles. This is an area where many artists find a practical advantage with COE 96 glass. Oceanside glass is often described as being flatter and smoother than other types of art glass. This consistency can make a big difference when you’re learning, as it allows your cutter to glide more easily and create a more even score line. A clean score is the key to a clean break, which means less frustration and less wasted glass. While experienced artists can adapt to any glass, beginners often appreciate the forgiving nature of COE 96 glass as they build their skills and confidence.
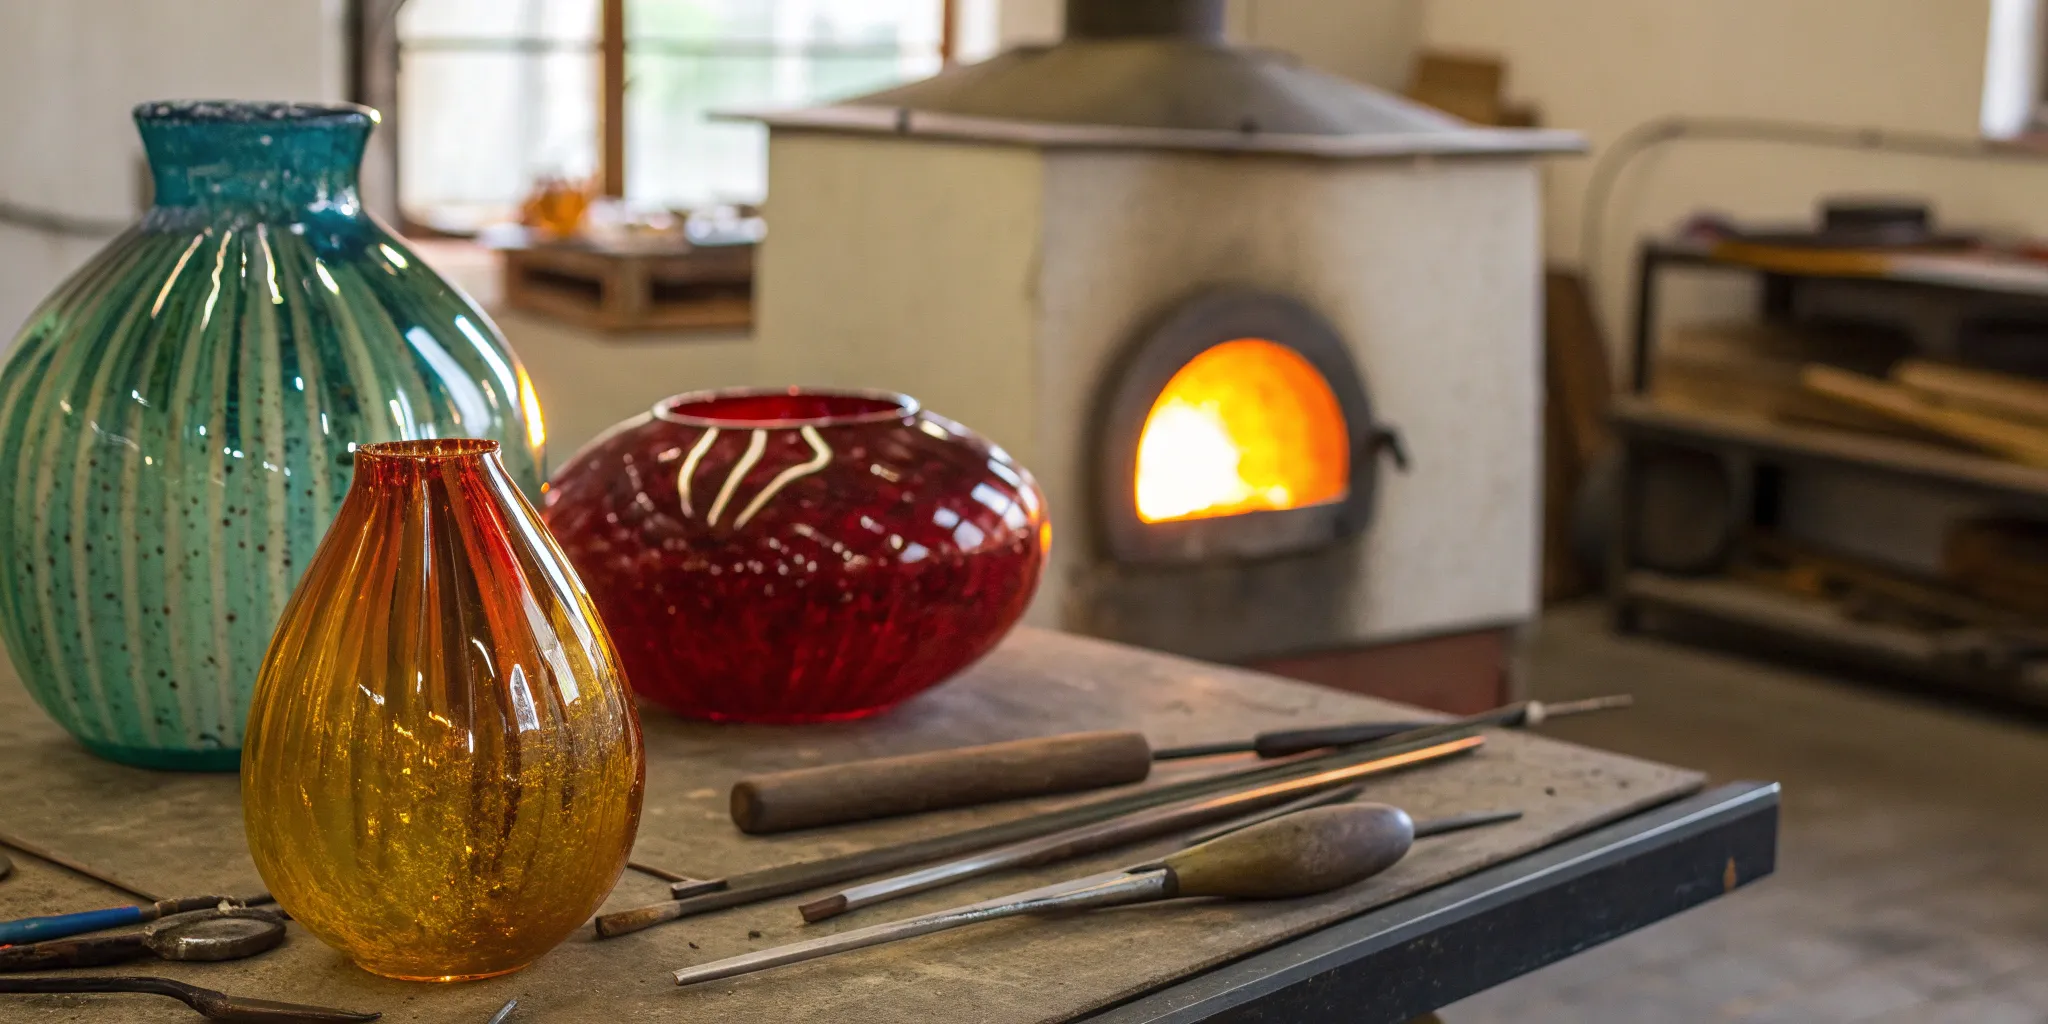
Choosing the Right Form: Sheets, Frit, or Stringers?
COE 96 glass comes in more than just big, beautiful sheets. To add detail, texture, and dimension to your work, you’ll want to get familiar with its other forms. Frit, which is crushed glass ranging from fine powder to chunky bits, is perfect for creating painterly effects or filling casting molds. Stringers are thin, spaghetti-like rods of glass that allow you to draw fine lines and add delicate details. Whether you’re layering sheets, sprinkling on frit, or placing stringers, the golden rule is the same: every single piece must be COE 96 to ensure your finished artwork comes out of the kiln in one solid, crack-free piece.
What Happens When You Mix Incompatible Glass?
So, what’s the worst that can happen if you mix glasses with different COEs? Unfortunately, it’s a guaranteed way to ruin your project. When you fuse incompatible glasses, you’re creating a tiny, invisible battle inside your art. As the piece cools, the different rates of contraction build up immense internal stress. Eventually, that stress has to go somewhere, and the result is almost always a cracked or shattered piece. Let’s look at what this means for your work and how you can avoid it.
Immediate vs. Delayed Cracking: The Two Big Risks
The main risk of fusing incompatible glass is stress fractures. Because the glasses shrink at different rates during the cooling process, they pull and push against each other. This internal tension can cause your piece to crack right in the kiln. But the real heartbreaker is delayed cracking. Your project might look perfect when you take it out, only to develop a crack hours, days, or even weeks later. This happens because the internal stress is still there, waiting for a small temperature change or a slight vibration to release its energy. It’s a frustrating experience that wastes both your time and beautiful materials.
Are You Making These Common Mixing Mistakes?
The golden rule of glass fusing is simple: do not mix COEs. Fusing a piece of COE 90 glass with your COE 96 glass project is the most common mistake and will lead to breakage. This often happens by accident, especially if your studio has scrap glass from different projects. To avoid this, keep your glass organized and clearly labeled by COE. Be extra careful with clear glass, as it’s impossible to tell the COE just by looking at it. A little bit of studio organization goes a long way in preventing a beautiful project from falling apart.
The Risks of Using Repurposed Glass
It can be tempting to get creative with repurposed glass from old bottles, jars, or window panes, but this is one area where you should proceed with caution. The biggest issue is that you have no idea what the COE is. Most of this everyday glass is “float glass,” which has a COE around 82-87 and is not designed for fusing. When you try to fuse it with your art glass, you’re introducing a completely incompatible material into your kiln. This creates a massive amount of internal stress as the pieces cool at drastically different rates, making cracks and breaks almost inevitable. Beyond the COE problem, repurposed glass can also have chemical coatings or impurities that can cause discoloration or devitrification. For predictable, beautiful results, sticking with tested, compatible materials like COE 96 glass is the best way to guarantee your project’s success.
Spotting the Telltale Signs of Incompatibility
While sticking to a single COE is the best practice, what if you have a piece of glass with an unknown COE? You can test it. The COE number is a great guide, but a physical test is the only way to be 100% certain two glasses are compatible. A popular method is the stringer test, where you fuse a thin stringer of the unknown glass onto a strip of your known base glass. After firing, you can examine the test strip through a polarizer. Any stress halos or lines around the stringer indicate incompatibility. This simple compatibility test can save you from ruining a much larger and more complex piece.
Your Checklist for a Perfect COE 96 Fuse
Working with COE 96 glass is incredibly rewarding, but a beautiful finished piece starts long before you turn on the kiln. Success comes from a combination of thoughtful planning, precise firing, and careful handling of your materials. By focusing on a few key details throughout your process, you can avoid common frustrations like cracking and achieve consistently stunning results. Let’s walk through some practical tips to help you get the most out of your glass.
Start with a Plan and the Right Glass
Before you make your first cut, map out your project. This helps you select the right glass for the job. When you’re browsing for COE 96 glass, consider what colors and textures will bring your vision to life. Also, think about how easy the glass is to work with. Some sheets are perfectly flat and simple to cut, while others have a bit of texture that might be better for a different application. While price and availability are factors, choosing the glass that best fits your project’s needs is the surest path to a piece you’ll love. It sets you up for success from the very beginning.
Nailing Your Firing and Annealing Schedule
Your kiln is where the magic happens, but a successful firing depends on a solid schedule. There’s no universal formula; the right temperature and timing are tied directly to your project’s thickness. The goal of annealing—the slow cooling process—is to relieve internal stress, which is essential for preventing cracks. A piece that looks perfect coming out of the kiln can fracture days later if it wasn’t annealed properly. I recommend keeping a detailed firing log. Note the glass type, thickness, and schedule you used. This record will become an invaluable resource for replicating your successes and troubleshooting any issues.
Understanding Key Fusing Stages
The journey your glass takes inside the kiln is a carefully controlled process with distinct stages. As the temperature climbs, your glass will first slump, or soften and bend, which is perfect for shaping it over molds. Go a little hotter, and you’ll reach a tack fuse, where separate pieces stick together but keep their individual texture. At the highest temperatures, you achieve a full fuse, where the layers melt into one smooth surface. But the cooling journey is just as critical. The annealing phase—a slow, steady cool-down—is where the glass stabilizes. This stage is designed to relieve internal stress, but it can only work if every piece of glass in your project is contracting at the same rate, which brings us right back to the importance of COE compatibility.
Proper Storage and Handling for Your Glass
Keeping your glass organized is one of the most important habits you can develop. Because different COEs expand and contract at different rates, even a tiny scrap of incompatible glass can cause your project to crack. To prevent this, create a clear separation system in your studio. Dedicate specific shelves or bins for your COE 96 glass and keep it completely separate from any other type. Be extra diligent with your scrap bin—label it clearly! This simple step saves you from the heartache of a ruined piece and ensures your materials stay pure and ready for your next creation. A little organization goes a long way.
What Else Affects COE 96 Compatibility?
You’ve done everything right: you’ve carefully selected beautiful sheets of COE 96 glass, planned your design, and are ready to fire. But wait—there’s more to compatibility than just the number on the sticker. While sticking to a single COE is the most important rule, other factors like glass thickness, layering techniques, and even your kiln’s firing schedule can introduce stress into your project.
Think of it like baking a cake. You can have all the right ingredients, but if you mix them incorrectly or bake at the wrong temperature, you won’t get the result you want. The same principle applies to glass fusing. Understanding these extra variables is what separates good results from great ones, helping you create strong, stable, and stunning fused glass art every single time. These details might seem small, but they have a big impact on whether your piece survives the kiln without cracks or unexpected breaks. Paying attention to them will save you from the frustration of a failed project and wasted materials. Let’s look at the key factors you need to manage for a successful firing.
Viscosity: The Other Half of the Story
While the Coefficient of Expansion is the first thing we learn about compatibility, it’s not the only factor in play. There’s another property you need to know about: viscosity. In simple terms, viscosity is a measure of how “runny” or “stiff” glass becomes when it’s heated in the kiln. As experts note, even if two glasses share the same COE, their differing viscosities can cause issues. Think of it like honey versus molasses—both are sweet, but they flow very differently. When you heat two pieces of glass, if one becomes significantly runnier than the other at the same temperature, it can create a new kind of internal stress. The more fluid glass might try to move and settle differently than the stiffer glass it’s fused to, leading to cracks even when you’ve followed the COE rule perfectly. Understanding this extra variable is what separates good results from great ones, helping you create strong, stable, and stunning fused glass art every single time.
Does Glass Thickness and Layering Matter?
When you stack multiple layers of glass, you’re not just adding to the design—you’re changing the physical mass that needs to heat and cool evenly. Even if all your layers are COE 96, a very thick section fused to a thin base can create internal stress. The different masses will heat and cool at slightly different rates, which can lead to cracking. When glasses with different properties are fused, they can create stress that leads to fractures, sometimes weeks later. Aim for a balanced construction where the thickness is relatively consistent across the piece to ensure a stable final product.
How Colors and Coatings Affect Compatibility
Did you know that different colors and coatings can affect compatibility? While all COE 96 glass is designed to work together, some heavily saturated opaque colors or glasses with special coatings like dichroic can have slightly different viscosity and expansion rates. This doesn’t mean you can’t use them, but it’s something to be aware of, especially in complex designs. If you’re creating a piece with many different colors or types of COE 96 glass, it’s always a good idea to run a small test firing first to see how they interact before committing to a large project.
Why Kiln Loading and Temperature Matter
Your kiln is where the magic happens, but improper use can quickly turn a masterpiece into a mess. Temperature control is crucial, and using the right firing schedule for your project’s thickness is non-negotiable. The correct annealing temperature and time depend directly on the glass’s COE and the total thickness of your piece. Loading your kiln properly also plays a huge role. Placing your project too close to the elements can cause uneven heating, introducing stress. A slow, controlled firing and a thorough annealing soak are your best friends for creating strong, crack-free glass art.
Frequently Asked Questions
Is it ever okay to mix COE 90 and COE 96 glass? The short and simple answer is no. Think of it as trying to build something with two different types of materials that shrink at different rates—it’s just not going to hold together. The internal stress created when one glass shrinks more than the other during cooling is too much for the piece to handle, and it will almost certainly crack. The best practice is to choose one COE system for your studio and stick with it.
What should I do with scrap glass if I don’t know its COE? This is a common problem, especially when you inherit glass or forget to label your scraps. The safest approach is to keep that glass separate and use it for projects that don’t require fusing, like mosaics. If you’re determined to use it in a fused piece, you must perform a compatibility test by fusing a small piece of it to a piece of glass with a known COE. Without a successful test, you risk ruining your entire project.
Is COE 96 better than COE 90? Neither one is inherently better; they are simply two different, incompatible systems. Both COE 90 and COE 96 glass are high-quality and offer a beautiful range of colors and options. Most artists choose one system and build their entire glass collection around it. The most important thing is consistency. Your choice will likely depend on which brands you prefer or what is most readily available to you.
My project cracked even though I used all COE 96 glass. What else could be the problem? While using a single COE is the most important rule, other factors can introduce stress. The most common culprit is an incorrect annealing schedule for the thickness of your piece; the glass needs to cool down slowly enough to relax. Another possibility is uneven construction, where a very thick area is fused to a much thinner one. This can cause the different masses to cool at different rates, creating tension even when the COE is the same.
Do I really need to test compatibility if all my glass is from the same brand? For most projects, you can trust that glass from a reliable manufacturer labeled COE 96 will be compatible. However, slight variations can sometimes occur between different colors or production runs. If you’re working on a large, complex piece that represents a significant investment of time and materials, running a small test firing is a smart insurance policy. It’s a professional habit that gives you complete confidence before you commit to the final project.