
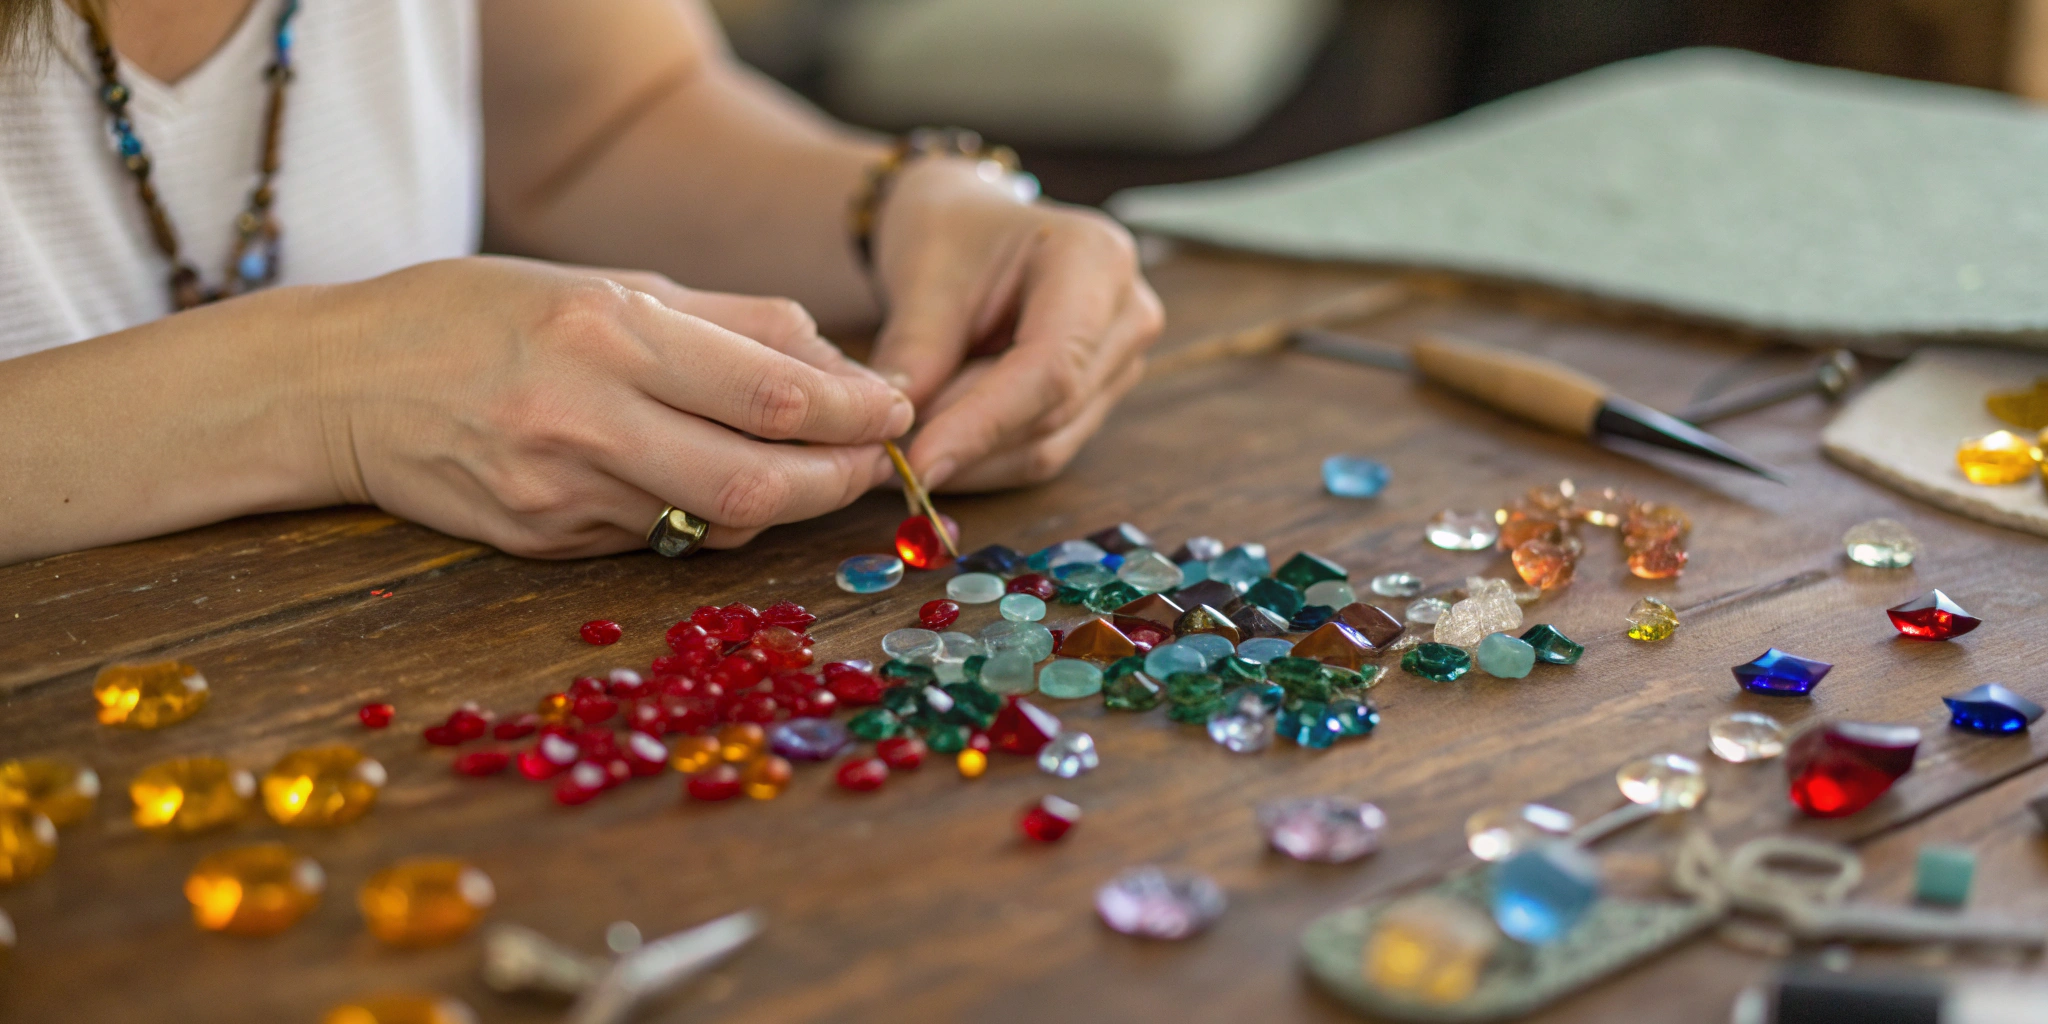
Your studio is brimming with creative potential. Jars of colorful frit, delicate stringers, and dazzling dichroic glass are all waiting to become beautiful jewelry. But mixing them isn’t always straightforward. How do you know which materials will play nicely together in the kiln? This is where understanding fusible glass is key. Think of this guide as your map to combining these elements with confidence. We’ll explore the essential glass types, like COE 96 frit, and help you choose the best fusible glass for jewelry. You’ll learn how to build a versatile toolkit that ensures every piece you create is as strong as it is stunning.
Key Takeaways
- Always Match Your COE: The most important rule in glass fusing is to use glass with the same Coefficient of Expansion (COE). Mixing different COEs, like 90 and 96, will create stress as the piece cools, causing it to crack.
- Choose a COE Based on Your Desired Look: Use COE 90 glass when you want crisp lines and fine, detailed patterns in your jewelry. Opt for the more forgiving COE 96 glass to create soft, blended colors and organic, fluid shapes.
- Combine Specialty Glass and Clean Prep for a Pro Finish: Add unique character to your work by incorporating decorative elements like shimmering dichroic glass, textured frit, and linear stringers. For a flawless result, always start with meticulously cleaned glass to prevent bubbles and haze.
What Exactly is Fusible Glass?
So, what exactly makes a piece of glass “fusible”? In short, fusible glass is specifically manufactured to be melted in a kiln and joined with other pieces of glass without cracking. Unlike the glass in your windows or drinking cups, it’s been carefully formulated and tested to ensure it behaves predictably under extreme heat. This reliability is what allows you to create beautiful, durable fused art.
The most important factor that makes glass fusible is its Coefficient of Expansion, or COE. This is a number that tells you how much the glass will expand when heated and shrink when cooled. For a fused piece to be successful, every single piece of glass in your project must have the same COE. If you mix glass with different COEs, they will shrink at different rates as they cool, creating stress that will eventually cause your beautiful creation to crack or even shatter. It’s the golden rule of glass fusing: always match your COE.
The two most common types you’ll work with are COE 90 and COE 96 glass. Neither is inherently better than the other; they just expand and contract at different rates and cannot be mixed. Fusible glass is designed to melt at very high temperatures, typically between 1,292°F and 1,510°F, which is why you’ll need a dedicated kiln to work with it. When you fuse layers together, the glass naturally wants to settle at about 6 millimeters (or about ¼ inch) thick. If your stack is thinner, it may pull inward as it melts; if it’s thicker, it will likely spread out. Understanding these basic properties is the first step to creating stunning fused glass jewelry.
How Art Glass Gets Its Color
Ever wonder how art glass gets those incredible, rich colors? It’s not paint or a surface dye. The color is actually baked right into the glass itself during its creation. Glass manufacturers mix specific metals and minerals into the molten glass, which results in vibrant, permanent hues that run all the way through. For example, adding a small amount of gold creates a beautiful range of pinks and reds, while cobalt produces deep, brilliant blues. This integral coloring process is what gives your jewelry depth and ensures the color will never fade or scratch off. It allows light to pass through the piece, creating that signature glow that makes glass art so captivating.
Fusible Glass vs. Stained Glass: What’s the Difference?
It’s a common question: can I just use any pretty piece of glass for fusing? The short answer is no, and it all comes down to the difference between fusible glass and traditional stained glass. While they might look similar, they are engineered for completely different purposes. Stained glass is designed to be cut and assembled using copper foil or lead came, not to be melted in a kiln. Fusible glass, on the other hand, is specifically made to be heated and fused together. The most critical distinction is its tested Coefficient of Expansion (COE). As we covered, all the glass in a fusing project must have a matching COE, like COE 90, to prevent cracking. Stained glass doesn’t have a tested COE, so mixing it with fusible glass is a recipe for disaster once you start the cooling process.
COE 90 vs. COE 96: Which is Best for Jewelry?
When you start fusing glass, one of the first terms you’ll encounter is “COE.” It stands for Coefficient of Expansion, which is just a technical way of describing how much glass expands when it gets hot and shrinks as it cools. Getting this right is the secret to creating beautiful pieces that last. The two most common types you’ll work with are COE 90 and COE 96. It’s best to think of them not as competitors, but as two different toolkits for your creativity. Your choice will really depend on the look you want to achieve and the materials you already have on hand.
The Lowdown on COE 90 Glass
COE 90 glass is your go-to for projects that need precision and fine detail. It’s a bit “stiffer” at fusing temperatures, so it holds its shape exceptionally well. This makes it perfect for creating jewelry with crisp lines, detailed patterns, or intricate layered designs that stay put in the kiln. If you’re working with detailed imprints or want to build strong, structured fused constructions, COE 90 glass is an excellent choice. Many artists who love the vibrant and consistent color palette of Bullseye Glass work almost exclusively in COE 90, as it’s their specialty.
A Note on Bullseye Glass Compatibility
If you’ve spent any time in the glass fusing world, you’ve definitely heard of Bullseye Glass. It’s a favorite among artists for its incredible range of rich, consistent colors, and it’s important to know that all Bullseye glass is manufactured to be COE 90. This means that if you’re building a piece with Bullseye sheets, you must use other COE 90 components—like frit, stringers, or powders—to ensure your project is stable. Mixing it with COE 96 glass is a recipe for disaster, as the different rates of expansion and contraction will cause stress fractures and cracks as your piece cools. So, when you’re stocking your studio, think of Bullseye as its own complete system. Committing to it for a project means you’ll be working entirely within the COE 90 family to get those beautiful, reliable results.
Getting to Know COE 96 Glass
If you love soft, blended colors and more organic shapes, you’ll feel right at home with COE 96. This glass is a little “softer” when molten, allowing colors to flow and meld together beautifully. This quality makes it incredibly forgiving and a popular choice for beginners. The 96 COE is compatible with a huge range of products, and buying an assorted pack means you never know what gorgeous colors you’ll get to work with. Brands like System 96 and Oceanside offer a stunning variety of COE 96 glass, perfect for creating swirled pendants and rounded cabochons.
Making the Call: How to Pick Your COE
Here’s the most important rule in glass fusing: never mix different COEs in the same project. Because they expand and contract at different rates, your piece will crack or even shatter as it cools. To avoid this heartbreak, always use compatible glass. So, how do you choose? First, think about your artistic goal. Do you want sharp details (go for 90) or a blended, fluid look (96 is your friend)? Second, check your current glass stash. It’s most cost-effective to build a collection around one COE. Finally, sometimes it just comes down to the specific colors you fall in love with from a particular brand.
Top Fusible Glass Brands for Jewelry Makers
Once you’ve decided on a COE, you can start exploring the fun part: the glass itself! Different brands offer unique colors, textures, and special effects that can define your artistic style. While many artists develop a loyalty to one or two brands, I always encourage experimenting. You might discover a new favorite or find that one brand’s red is just the perfect shade for your next pendant. Think of these brands as your palette—each offers a distinct set of tools to bring your vision to life. Below are some of the most trusted and beloved brands in the glass fusing community, all of which are perfect for creating beautiful jewelry.
ArtGlassSupplies.com Collection
We pride ourselves on offering a fantastic selection of fusible glass, making it simple to find exactly what you need for your jewelry projects. Our collection includes a huge variety of both COE 90 and COE 96 glass, so you can easily find compatible sheets, frits, and stringers. Whether you’re stocking up on basic clear glass for bases or searching for that one-of-a-kind color, our curated options ensure you get high-quality materials every time. It’s the perfect place to start because you can compare different types of glass side-by-side and get everything you need shipped from one place, which is a huge time-saver.
Bullseye Glass
If you work with COE 90 glass, you’re probably already familiar with Bullseye. This brand is a giant in the industry for a reason. Known for its exceptionally high quality and stunningly vibrant colors, Bullseye glass is a favorite among professional artists, especially for detailed jewelry work. Their glass is incredibly consistent, which means you can count on reliable results in the kiln. The color palette is expansive, offering subtle tones and bold hues that are perfect for creating intricate patterns and focal points in your pieces. When you want your jewelry to have that extra pop of color and a professional finish, Bullseye Glass is an outstanding choice.
Understanding “Striker” Glass
While exploring Bullseye’s color range, you’ll inevitably come across the term “striker.” Think of striker glass as a bit of kiln magic. It’s a type of glass that looks one color—often pale or even clear—when you buy it, but transforms into a completely different, vibrant hue after being fired. This isn’t a defect; it’s a deliberate and beautiful chemical reaction that happens at fusing temperatures. For example, a pale amber sheet might fire to a rich, deep red. It’s essential to know which of your glasses are strikers so you aren’t surprised by the final result. Bullseye labels their striker glass clearly, so you always know what to expect. Understanding how to work with strikers opens up a whole new world of color possibilities for your jewelry designs.
System 96 Glass
For artists who prefer COE 96, the System 96 family of glass is a go-to. The “system” part is key—it refers to a range of glass products from different manufacturers that are all tested and confirmed to be compatible. This makes mixing and matching colors and textures a breeze, giving you incredible creative freedom without worrying about compatibility issues. System 96 is known for its affordability and wide availability, making it a popular choice for both beginners and seasoned fusers. You can find a massive range of colors and styles, perfect for everything from simple earrings to complex, layered pendants.
Oceanside Glass
Oceanside Glass & Tile has become a major player in the art glass world, and their fusible glass is top-notch. They are now the official manufacturer of the beloved formulas formerly made by Spectrum Glass, so if you were a fan of System 96, you’ll feel right at home with Oceanside. Recognized for its consistent quality and brilliant colors, Oceanside offers a reliable and beautiful product for your jewelry-making needs. Their glass fires smoothly and predictably, which is a huge plus for any artist. Whether you’re a beginner looking for dependable materials or an expert creating a new collection, Oceanside fusible glass is a solid, trustworthy option.
CBS Dichroic Glass
Want to add some serious sparkle and magic to your jewelry? Look no further than CBS Dichroic Glass. This glass is coated with micro-layers of metals and oxides that give it a stunning, color-shifting appearance. Depending on the angle of light, a single piece of dichroic glass can shimmer with multiple colors, creating an effect that is truly mesmerizing. It’s the perfect way to make your jewelry stand out. CBS Dichroic is available on clear or black backing and in both COE 90 and COE 96, so you can easily incorporate it into your existing projects for an extra layer of depth and brilliance.
Your Checklist for Choosing the Best Fusible Glass
Picking the right glass is the first step to creating beautiful fused jewelry. With so many colors, textures, and types available, it can feel a little overwhelming. But don’t worry—it really comes down to three key factors: compatibility, color, and your project’s specific needs. Once you understand these basics, you’ll be able to confidently select the perfect glass for any piece you can imagine. Let’s walk through what you need to know to make the best choice every time.
Always Match Your COE and Glass Thickness
This is the golden rule of glass fusing: always use compatible glass. In the world of fusible glass, compatibility is measured by the Coefficient of Expansion, or COE. This number tells you how much the glass will expand and contract when heated and cooled. If you mix glasses with different COEs in one project, they will pull apart as they cool, causing stress fractures and breaks. The two most common types you’ll work with are COE90 glass and COE96 glass. You must stick to one COE per project—no exceptions! Similarly, try to keep the thickness of your glass layers consistent to ensure an even melt in the kiln.
Think About Color and Transparency
Now for the fun part! Your choice of color and transparency will define the look of your jewelry. Opaque glass blocks light, giving you solid, bold colors. Transparent glass lets light pass through, creating a delicate, gem-like quality. You can also find specialty glass, like iridescent or dichroic glass, which adds a stunning, metallic shimmer. Think about how you want your final piece to look. Layering different colors and transparencies is a great way to create depth and unique effects. Don’t be afraid to experiment with a variety of colors to see how they interact when fused.
Consider Different Textures and Effects
Beyond flat sheets of glass, a whole world of textures and special effects is waiting to bring your jewelry to life. Think of these as your artistic accents. You can sprinkle on fine, sand-like frit to create a speckled, textured surface or add delicate, linear patterns with thin glass stringers. These elements are fantastic for adding depth and a unique character that sets your work apart. For a truly show-stopping effect, incorporate shimmering dichroic glass. Coated with special metals and oxides, it shifts colors depending on the light, creating a mesmerizing, almost magical look. Experimenting with these different materials is how you develop your signature style and turn a simple design into a piece of wearable art.
Match the Glass to Your Skill and Project
Your experience level and the type of jewelry you want to make will also guide your glass choices. If you’re just starting, COE96 glass is often recommended because it’s a bit more forgiving in the kiln. The great thing about glass fusing is that you arrange everything while the glass is cold, giving you plenty of control over your design. You don’t need to be a seasoned artist to create something beautiful. While you will eventually need a kiln to fire your pieces, many beginners start by renting time at a local glass studio to see if they enjoy the craft before making a big investment.
Essential Glass Types for Jewelry Makers
Once you’ve chosen your primary fusible glass sheets, it’s time for the fun part: adding personality and flair. Several specialty glass types can transform a simple piece into a wearable work of art. Think of these as your decorative palette—the elements you’ll use to create color, texture, and eye-catching detail. From shimmering surfaces to delicate lines, these materials are essential for any jewelry maker’s toolkit.
Most of these decorative elements are available in both COE 90 and COE 96 to ensure they are compatible with your base glass. Mixing and matching these different forms of glass is where your creativity can truly shine, allowing you to design unique pendants, earrings, and bracelets that stand out. Let’s look at the must-have glass types for your studio.
Clear Glass: The Foundation of Your Piece
Every great piece of jewelry starts with a solid foundation. In glass fusing, that foundation is often a piece of clear base glass. This transparent layer acts as your canvas, providing a stable structure upon which you can build your design with colored and decorative glass. Using a clear base allows the colors of your other glass elements to pop and gives the finished piece depth and a professional, polished look. It’s the unsung hero of many fused glass jewelry projects, ensuring your intricate designs are secure and beautifully displayed after firing in the kiln.
Add Some Sparkle with Dichroic Glass
If you want to create jewelry with a serious wow factor, look no further than dichroic glass. This amazing material is coated with micro-layers of metals, which causes it to reflect different colors depending on the angle of light. The result is a stunning, shimmering effect that can look like anything from a galaxy of stars to an iridescent oil slick. You can use small pieces of CBS Dichroic Glass as a cap layer to create a brilliant focal point on a pendant or earrings. It’s a surefire way to make your jewelry catch the light—and everyone’s attention.
Create Texture with Frit and Confetti
For adding texture, shading, and abstract patterns, frit and confetti are your best friends. Frit is simply crushed glass that comes in various sizes, from fine powder to coarse chunks. You can sprinkle it onto your base glass to create a speckled effect, blend colors, or add a sandy texture. Confetti, on the other hand, are paper-thin shards of glass that can be layered to create soft, watercolor-like designs. Both are incredibly versatile and allow you to add painterly details to your jewelry without having to cut intricate shapes from sheet glass.
Draw Fine Lines with Stringers
When your design calls for crisp lines or delicate details, stringers are the perfect tool for the job. These thin, spaghetti-like threads of glass are ideal for drawing patterns, outlining shapes, or creating intricate linework. You can lay them straight, bend them into gentle curves with a flame, or even nip them into tiny pieces to create dots or dashes. Stringers give you precise control over your design, making them essential for adding those fine, finishing touches that can define a piece of jewelry. They are a simple yet powerful way to add complexity and elegance to your work.
Your Glass Fusing Toolkit
Before you can melt glass into beautiful jewelry, you need to gather a few essential tools. Don’t worry, you don’t need a massive workshop to get started. A dedicated corner of a room with a sturdy table is plenty of space. Your toolkit will grow over time, but a few key items will get you cutting, shaping, and firing your first pieces. Think of these as your foundational supplies—the trusty gear that will help you turn your creative ideas into sparkling reality. Getting the right tools from the start makes the whole process smoother and much more enjoyable.
Essential Hand Tools for Cutting and Shaping
The first step in any project is cutting your glass to size. For this, you’ll need a quality glass cutter, which creates a “score” or a weak line on the glass surface. Once you’ve scored the glass, you’ll use running pliers to apply gentle, even pressure on both sides of the line, causing the glass to snap cleanly. For smaller adjustments and nipping away sharp edges, a pair of breaking/grozing pliers will be your best friend. Remember, every piece of glass in your project must be compatible, meaning it has the same COE. Whether you’re working with COE90 glass or COE96, these basic hand tools are non-negotiable for achieving clean cuts and precise shapes.
Choosing Your First Kiln
The kiln is the heart of your fusing studio and the biggest investment you’ll make. For jewelry making, you don’t need a huge, industrial model. A small tabletop kiln is perfect. Look for one with a shelf that’s between 6 and 12 inches, which gives you plenty of room for several pairs of earrings or a few pendants. The most important feature is a programmable digital controller. This allows you to set a precise firing schedule—the specific heating and cooling rates—which is critical for successful fusing. Your kiln should be able to reach at least 1,700°F. Investing in a reliable kiln with a controller takes the guesswork out of firing and gives you consistent, professional results every time.
Kiln Shelf Protection
When glass melts, it becomes sticky like honey and will permanently fuse to your kiln shelf if you don’t protect it. You have two main options for this: kiln wash or shelf paper. Kiln wash is a liquid mixture that you paint onto the shelf in several thin layers. It’s cost-effective but needs to be reapplied before each firing. Shelf paper, on the other hand, is a single-use paper that you simply cut to size and place on the shelf. It’s quicker and less messy, making it a popular choice for beginners. Whichever you choose, never fire directly on an unprotected shelf—it’s a costly mistake you only want to make once!
Helpful Secondary Tools
Beyond the absolute essentials, a few other tools will make your life much easier. A simple ruler and a permanent marker are great for planning your designs and making straight cuts. Safety glasses are a must-have to protect your eyes from tiny glass shards. As you get more advanced, you might want to invest in a glass grinder. This machine uses a diamond-coated bit to smooth sharp edges and refine your shapes with incredible precision, giving your jewelry a truly professional finish. While you don’t need a grinder to start, it’s a fantastic tool to add to your collection as you grow your skills.
Understanding the Firing Process
The magic of glass fusing happens inside the kiln, where heat transforms separate pieces of glass into a single, solid object. This isn’t as simple as just turning the heat on and off; it’s a controlled process with specific stages, temperatures, and timing. A firing schedule is like a recipe that tells your kiln how hot to get, how fast to get there, and how long to hold each temperature. Understanding the basic principles of what’s happening to your glass at each stage will help you troubleshoot any issues and give you the confidence to experiment with different effects and techniques.
Key Stages and Temperatures
A typical firing schedule has a few key stages. First is the “ramp up,” where the kiln slowly heats the glass to the fusing temperature, which is usually between 1350°F and 1500°F. This slow heating prevents thermal shock, which could crack the glass. Once it reaches the target temperature, the kiln “soaks” or holds that temperature for a short time to allow the glass to fully melt and fuse together. After the soak, the kiln begins to cool down to the annealing range, which is a critical holding period between 900°F and 1000°F. This carefully controlled process ensures your piece is strong and beautiful.
The Critical Annealing Stage
Annealing is arguably the most important part of the firing schedule. As glass cools, its outer surface shrinks faster than its interior, creating internal stress. If this stress isn’t properly relieved, your beautiful piece could crack hours, days, or even weeks after it comes out of the kiln. The annealing stage involves holding the glass at a specific temperature (usually around 950°F for COE 96) for a period of time, allowing the temperature throughout the glass to equalize. This process relaxes the internal stress, making the final piece strong and durable. Rushing this step is a recipe for heartbreak, so always follow a proper annealing schedule.
Creating Dimension with Slumping
Once you’ve mastered a basic full fuse, you can start playing with shape and dimension through slumping. Slumping is a second firing process where you take your already-fused flat piece, place it over or into a ceramic or stainless steel mold, and heat it again to a lower temperature. At this “slumping” temperature, the glass becomes soft enough to bend and take the shape of the mold, creating a bowl, a curved pendant, or a small dish. This technique opens up a whole new world of creative possibilities, allowing you to move beyond flat designs. Exploring different molds is a fun way to add three-dimensional forms to your jewelry and art.
Common Fusing Mistakes to Avoid
We’ve all felt that pang of disappointment when a piece comes out of the kiln with an unexpected crack or a cloudy blemish. While glass fusing is a beautiful art form, it’s also a science. A few small missteps in your process can lead to frustrating results. The good news is that most of these issues are completely preventable.
Learning to sidestep common fusing mistakes will save you time, materials, and a lot of creative heartache. By developing a few key habits—like keeping your glass organized, prepping your materials meticulously, and understanding your kiln’s settings—you can ensure your jewelry projects turn out exactly as you envisioned. Let’s walk through some of the most frequent errors and how you can easily fix them.
The Golden Rule: Never Mix COEs
This is the golden rule of glass fusing. Always use compatible glass, which is identified by its COE (Coefficient of Expansion). This number tells you how much the glass will expand and contract when heated and cooled. Mixing different COEs, like 90 and 96, is a recipe for disaster because they shrink at different rates. This creates stress within the piece, which can cause your beautiful glass art to crack or even shatter, sometimes days after it has cooled.
To avoid this, keep your glass scraps and sheets clearly labeled and stored separately. Whether you’re working with the broad range of COE 90 glass or the vibrant colors found in COE 96, sticking to one type per project is non-negotiable.
Forgetting to Clean Your Glass
It might seem like a minor step, but cleaning your glass is critical for a professional finish. Even if your glass looks clean, it’s likely covered in invisible oils from your fingers, dust, or residue from the cutting process. During firing, these contaminants can get trapped between layers, causing unwanted bubbles, hazy spots, or devitrification (a scummy, crystalline coating) in your finished piece.
Before you assemble your jewelry, thoroughly clean every piece of glass with a dedicated glass cleaner or a simple solution of soap and water. Make sure to rinse it well and dry it with a lint-free cloth. Taking just a few extra minutes to clean your glass ensures a crystal-clear result you can be proud of.
Not Double-Checking Your Firing Schedule
Think of a firing schedule as the recipe for your project. It dictates how fast your kiln heats up, how long it holds at specific temperatures (soaking), and how slowly it cools down (annealing). The right schedule is essential for a successful fuse and for creating strong, durable jewelry. Using the wrong one can lead to under-firing, over-firing, or thermal shock that cracks your glass.
The ideal schedule depends on the size of your project, the thickness of the glass, and the effect you want to achieve. Many modern kilns come with pre-programmed schedules, but it’s always a good idea to consult the glass manufacturer’s recommendations. Keep a log of what schedules work for your projects so you can replicate your successes.
Improve Your Fusing Technique for Better Jewelry
Once you have the right glass, the real fun begins. Creating beautiful, professional-looking glass jewelry is all about refining your technique. Small adjustments to your process can make a world of difference in the final outcome, turning a good piece into a great one. It’s about paying attention to the details, from how you prepare your glass to the final moments in the kiln.
Think of it like cooking a favorite recipe. The first time you make it, you follow the instructions exactly. But as you get more comfortable, you start adding your own flair—a little more of this, a little less of that. The same applies to glass fusing. Mastering the fundamentals of cutting, layering, and firing gives you the confidence to experiment and develop your unique artistic style. Let’s walk through a few key areas where you can sharpen your skills to create stunning jewelry every time.
It All Starts with a Clean Cut
A great piece of jewelry starts with a clean slate. Before you even think about the kiln, make sure your glass is spotless. Any fingerprints, dust, or oils can lead to tiny, unwanted bubbles trapped in your finished piece. A simple wash with soap and water or a wipe-down with isopropyl alcohol does the trick. When you’re stacking your layers, try making the bottom piece of glass just a little larger than the top one. This simple trick helps air escape during the firing process, giving you a clearer, more professional result. And remember the golden rule of fusing: always use glass with the same Coefficient of Expansion (COE). Mixing COE 90 with COE 96 glass will cause your beautiful creation to crack, sometimes days after it comes out of the kiln.
Experiment with Layers and Molds
This is where your artistic vision truly comes to life. Don’t be afraid to play with different forms of glass to add dimension and interest. Thin glass threads called stringers are perfect for creating sharp lines and intricate details, while confetti glass adds beautiful, random pops of color and texture. Layering these elements between sheets of glass can produce incredible depth. If you want to move beyond flat pendants, explore the world of molds. Slumping molds can help you create gently curved shapes for earrings or bracelet components, while casting molds allow for more detailed, three-dimensional designs. Experimenting with how you stack and shape your glass is key to developing a style that is all your own.
A Quick Word on Studio Safety
Your creativity is precious, and so is your health. Working with glass requires a commitment to safety, but the good news is that the precautions are simple. Always wear safety goggles when you’re cutting or grinding glass—no exceptions. Tiny shards can fly farther than you think. When working with fine glass powders or frit, a dust mask is a good idea to avoid inhaling small particles. And of course, a hot kiln demands respect. Keep a pair of heat-resistant gloves handy for handling kiln shelves or molds. Following these simple safety practices ensures that you can focus on your art and continue creating beautiful things for years to come.
Using the Right Protective Gear
Working with glass is an incredibly rewarding process, and keeping yourself safe is the most important part of the craft. Always wear safety goggles when you’re cutting or grinding glass—no exceptions. Tiny shards can fly farther than you think, and protecting your eyes is paramount. When you’re working with fine glass powders or frit, a dust mask is a good idea to avoid inhaling any small particles. And of course, a hot kiln demands respect. Keep a pair of heat-resistant gloves handy for handling kiln shelves or molds. These simple precautions aren’t meant to be intimidating; they’re just smart habits that allow you to focus on your creativity without worry.
Why Taking a Class is a Great Idea
If you’re new to glass fusing, one of the best things you can do is take a class. Learning from an experienced teacher is invaluable for understanding both safety and technique, helping you create high-quality art from the very beginning. It’s also a great way to try out the craft without a huge upfront investment. You’ll get to use professional-grade tools and kilns before deciding what you need for your own studio. Plus, an instructor can help you sidestep common fusing mistakes, which will save you time, materials, and a lot of creative heartache. Think of it as a shortcut to building a strong foundation for all your future projects.
Where to Buy Quality Fusible Glass
Once you know what kind of glass you need, the next step is finding a reliable place to buy it. The right supplier not only has the materials you want but also provides the support and selection to help your creativity flourish. A great supplier will have a wide variety of glass, tools, and accessories, making it easy to get everything you need in one place. Look for a partner who understands the art form and is committed to helping you succeed, whether you’re making your first pendant or stocking a professional studio.
Find Your Glass at ArtGlassSupplies.com
We’ve built our shop to be a trusted resource for glass artists of every skill level. When you’re making jewelry, choosing the right glass is everything. As a rule of thumb, COE90 glass is excellent for projects that require fine detail and strong fused bonds. On the other hand, COE96 glass is often more forgiving, making it a great choice for beginners or for larger pieces like plates and suncatchers. Understanding this difference is key to making sure your glass fuses correctly without unwanted cracks or stress. We carry a huge selection of both, so you can always find the perfect sheet for your next piece.
How to Spot a Great Glass Supplier
When you’re sourcing fusible glass, compatibility is non-negotiable. A good supplier makes it easy to find what you need by clearly labeling the COE of every piece of glass. Always use compatible glass—meaning glass with the same COE number—to ensure your project holds together perfectly when fired. A reliable supplier will also have a deep inventory of not just glass, but also the essential tools and accessories you need, from kilns to cutters. Look for a company with a solid reputation, clear product descriptions, and helpful customer service that can answer your technical questions.
Save Money with Deals and Bulk Buys
Building your glass collection can be an investment, but there are plenty of ways to get beautiful materials without overspending. Many suppliers offer scrap packs or variety packs, which are fantastic for jewelry makers. These assortments give you a wide range of colors and textures to experiment with at a lower cost. Buying in bulk is another great way to save, especially on foundational materials like clear or black base glass. Keep an eye out for sales and special promotions to stock up on your favorite stained glass and fusible sheets. This approach lets you play with new styles and colors freely.
Related Articles
- COE 90 vs 96: Which Glass Should You Choose?
- What Is COE 96 Fusing Glass? A Beginner’s Guide
- What Does COE Mean in Glass? A Fuser’s Guide
- COE 90 vs 96: How to Pick the Right Fusing Glass
- What is COE? Your Guide to Crack-Free Glass Art
Frequently Asked Questions
Is COE 90 or COE 96 better for a beginner? Neither one is technically better, but many artists find COE 96 glass to be a bit more forgiving when they’re just starting out. It tends to melt a little softer and smoother, which can make for beautiful, blended results. That said, the most important thing is to simply choose one COE and build your collection around it. Your choice might come down to a specific color you love that’s only available in one COE, and that’s a perfectly fine way to decide.
What happens if I accidentally mix COE 90 and COE 96 glass in a project? Unfortunately, mixing COEs is the one mistake that is almost guaranteed to ruin a piece. Because the two types of glass expand and shrink at different rates when heated and cooled, they create immense stress against each other. This will cause your finished jewelry to crack or even shatter. The crack might appear right out of the kiln or, even more frustratingly, days later. This is why keeping your glass scraps clearly labeled and separated is so important.
Do I need to buy a kiln to get started with glass fusing? While you will eventually need access to a kiln to fuse glass, you don’t have to buy one right away. Many local glass studios or community art centers offer kiln time for rent. This is a fantastic way to learn the process and make sure you enjoy the craft before you make a significant investment in your own equipment. It also gives you a chance to learn from other artists in a shared space.
Why did my glass get cloudy or hazy after firing? That cloudy or scummy look is usually something called devitrification, and the most common cause is surprisingly simple: the glass wasn’t perfectly clean. Even invisible oils from your fingerprints or tiny specks of dust can cause this haze to form on the surface during firing. To prevent it, get into the habit of thoroughly cleaning every piece of glass with a dedicated glass cleaner or soap and water right before you assemble your piece.
Can I use regular stained glass for fusing projects? No, you should never use glass intended for stained glass in a fusing project. Stained glass is not formulated to withstand the high temperatures inside a kiln, and more importantly, it is not tested for a consistent Coefficient of Expansion (COE). Attempting to fuse with it will lead to unpredictable results and almost certainly cause your piece to break from thermal shock. Always use glass that is specifically labeled as fusible for your kiln work.