
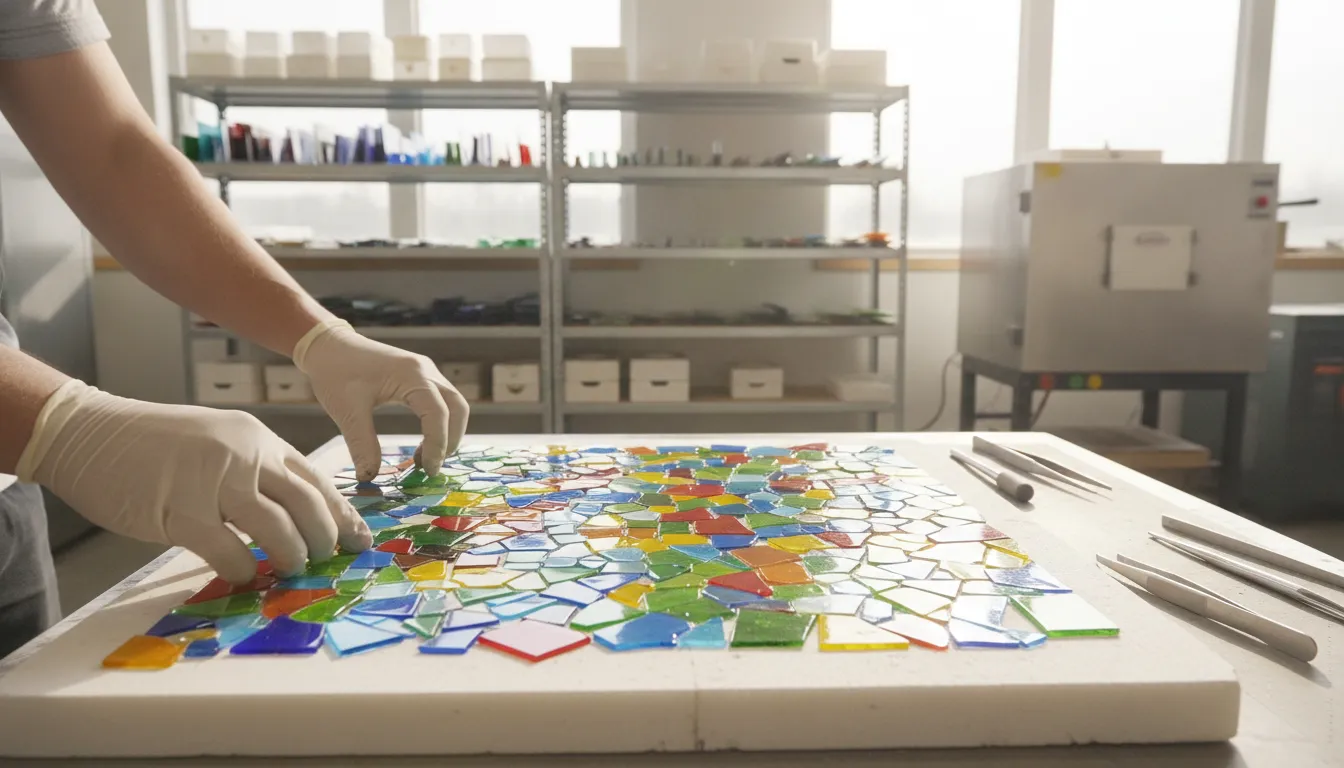
A first glass fusing studio succeeds or fails on preparation. The right glass, kiln, shelf materials, tools, and safety equipment must work together, especially when every layer shares a compatible Coefficient of Expansion (COE).
A glass fusing supplies list should cover compatible COE90 or COE96 glass, frit. A kiln with controlled firing and annealing, kiln furniture, shelf preparation materials, cutting tools, molds, and appropriate respiratory protection. Buying these essentials as a coordinated system helps prevent thermal stress, breakage, and costly restarts.
Start with the material system you intend to use, then build outward to the equipment and accessories that support it. This guide organizes the essentials by function and connects each category to practical glass fusing supplies, with further guidance in our glass fusing techniques resource.
Glass Fusing Supplies: The Essential Shopping List
A useful starter list separates materials, heatwork equipment, surface preparation, tools, and personal protection. That structure prevents a common mistake: buying attractive glass before confirming the kiln, shelf, and safety setup needed to use it properly. A complete list depends on your COE system, available workspace, and project goals, whether you plan to make jewelry, tiles, dishes, or sculptural work.
The Core Shopping Categories
- Fusible glass: Choose compatible sheet glass, frit, stringers, noodles, and specialty materials for your selected COE system. Frit is crushed glass available in different granular sizes, allowing you to add controlled color, texture, and pattern.
- Kiln: Select a kiln with reliable temperature control and enough chamber space for your intended projects. Firing schedules and annealing are part of the equipment decision, not an afterthought.
- Kiln furniture and shelf preparation: Plan for kiln wash or shelf primer, fiber paper, shelves, posts, dams, and molds. Kiln furniture, including shelves and posts, supports the work during firing and helps create a stable, level setup.
- Cutting and shaping tools: Start with a quality glass cutter, running pliers, grozing or breaking pliers, a ruler, and suitable hand or electric grinding equipment. Good tools improve control and reduce wasted material.
- Safety gear: Include eye protection, heat-resistant handling tools, suitable respiratory protection for dusty processes, and ventilation appropriate to your studio.
What Every List Has in Common
Every studio needs a compatible glass system, a kiln capable of controlled heating and cooling, and a prepared surface that will not contaminate or bond to the project. It also needs tools that support accurate cutting and safe handling. Review the fundamentals in this guide to glass fusing techniques before expanding into advanced forms such as tack fusing, full fusing, or slumping.
Why Your List Depends on COE and Project Goals
Coefficient of Expansion, or COE, describes how glass responds to temperature changes. Mixing glass with different COEs without verified compatibility can create internal stress and breakage. Art Glass Supplies stocks materials for both COE90 and COE96 systems, so choose one system first and keep your sheets, frit, and specialty glass within that compatible family.
Your project type then determines the quantity and format. Small jewelry pieces may require dichroic glass and fine frit, while larger plates need more sheet glass, kiln shelf area, dams, and molds. Build the core setup first, then add materials for specific designs.
Shop glass fusing supplies by material, equipment, tools, and studio accessory category.
What Glass Fusing Materials Should You Buy First?
The first buying decision is not color, pattern, or price. It is compatibility. Glass fusing materials must share a compatible Coefficient of Expansion (COE), the measure of how much glass expands and contracts as temperature changes. Mixing COEs without knowing their relationship can create internal stress, leading to cracks or breakage during firing or cooling.
Start With Sheet Glass in Your COE System
Choose one COE system and build your initial material collection around it. Art Glass Supplies stocks both COE 90 glass and COE 96 glass, so you can select the system that fits your preferred manufacturers, colors, and project plans.
Begin with compatible sheet glass in a few dependable colors. Transparent and opalescent sheets give you a practical foundation for layering, pattern work, and simple fused components. Thickness matters as well. Many beginner projects use two or three millimeter sheet glass, but the correct firing schedule still depends on the project design, kiln, glass thickness, and annealing requirements.
Keep each COE system physically organized and clearly labeled. Do not assume that two pieces are compatible because they look similar or come from the same color family. Compatibility involves more than appearance, and a polarizing filter test cannot replace verified manufacturer information.
Frit: Color and Texture in Granular Form
Frit is crushed glass sorted into different grain sizes. It adds color, texture, gradients, and controlled detail without requiring every design element to be cut from sheet glass. Fine frit can soften edges and fill small spaces, while larger grades create stronger visual texture and more distinct particles.
Buy frit that matches the COE system of your sheet glass. The frit collection can help you extend a compatible palette without introducing an unknown material into the kiln. Store colors in sealed, labeled containers to reduce dust and prevent accidental mixing between systems.
Dichroic Glass: A Specialty Accent
Dichroic glass has a multi-colored metallic coating that shifts in appearance as the viewing angle changes. It is especially effective for jewelry, small focal elements, and accents that need reflective color rather than broad areas of coverage. Because it is a specialty material, treat it as an accent purchase after establishing your compatible sheet-glass base.
For COE 90 projects, explore dichroic glass labeled for that system. Confirm the COE before combining it with your project materials, then follow the manufacturer’s handling and firing guidance. A focused collection of compatible sheet glass, frit, and specialty accents gives you more reliable results than a large assortment of unverified colors.
Kilns for Glass Fusing: What Size Do You Need?
A kiln is not simply a hot box. It is the equipment that controls the heating, cooling, and annealing stages that determine whether a fused piece remains stable after firing. Choose its size around the work you actually make, while allowing enough space for safe loading and future projects.
Kiln Types at a Glance
Top-loading kilns are common in small studios because the lid provides direct access to the firing chamber. They work well for jewelry, tiles, small bowls, and other projects loaded onto a shelf from above. Front-loading kilns can be easier to load when pieces are heavy, large, or arranged on multiple shelves, although they generally require more floor space.
Microwave kilns are compact options for very small experiments and jewelry-scale work. Their limited chamber size makes them unsuitable for platters or larger slumped forms. For a broader range of projects, compare the available glass fusing kilns by chamber dimensions, controller features, shelf capacity, and electrical requirements.
Sizing Your Kiln to Your Projects
Start with the largest sheet of glass you expect to fire, then compare its length and width with the usable shelf area. A shelf should provide clearance around the piece, rather than forcing the glass against the kiln wall. That space helps with loading, kiln wash, and consistent heat exposure.
- For jewelry and small components, a compact chamber may be sufficient.
- For tiles, panels, and small decorative dishes, choose a shelf that accommodates the full sheet or assembled design.
- For platters and larger slumped forms, prioritize chamber width, shelf diameter, and vertical clearance over minimal purchase price.
Do not size only for your first project. If your process may expand from pendants to plates, a slightly larger kiln can prevent an early replacement. The glass fusing kiln selection guide can help you compare dimensions and features before choosing.
Annealing and Firing Schedules
Temperature control matters as much as chamber size. Glass must be heated through a planned firing schedule, then cooled through the annealing range at a controlled rate. This relieves thermal stress that could otherwise cause cracking after the kiln appears to have finished.
Different projects may require different schedules for tack fusing, full fusing, or slumping. Your kiln choice should therefore include a programmable controller with enough flexibility for ramp, hold, and controlled cooling stages. Review the firing schedule alongside the project design, glass thickness, and compatible COE system. For the broader process, see these glass fusing techniques.
Kiln Furniture and Shelf Prep Supplies
Glass should never sit directly on an unprepared kiln surface. Shelf preparation and kiln furniture create a controlled barrier between the glass and kiln, allowing the piece to release cleanly while maintaining the intended shape. These supplies include kiln shelves, posts, kiln wash, fiber paper, dams, and molds.
Kiln Shelves and Posts
A kiln shelf provides the flat, heat-resistant surface that supports a project during firing. Use a shelf sized for the kiln chamber and large enough to keep the piece stable without crowding the walls. A level shelf also helps prevent uneven movement during a full fuse or slumping cycle.
Posts raise the shelf above the kiln floor and create space for heat circulation. They are also useful when stacking shelves for separate firing layers. Kiln furniture, including shelves and posts, supports glass pieces throughout the firing process. Inspect shelves for cracks, warping, or accumulated residue before each firing.
Kiln Wash and Fiber Paper
Kiln wash, also called shelf primer, forms a release coating between the glass and shelf. Without that barrier, softened glass can bond to the shelf, damaging both the project and the firing surface. Apply kiln wash in several thin, even coats rather than one heavy layer. Allow each coat to dry before applying the next, then follow the product directions for curing. This method helps the glass release cleanly and reduces flaking.
For a dependable shelf barrier, compare kiln wash and shelf primer. Fiber paper provides another practical separation method. Place it beneath designs, between layers, or inside selected molds when you need a clean release or controlled distance. Choose the paper thickness according to the intended detail and firing schedule, and avoid folding it beneath areas that must remain flat.
Molds for Slumping and Draping
Dams contain glass when a project must retain a defined perimeter during a full fuse. Use compatible dam material and leave appropriate clearance for the glass to expand as it heats. The dam should be stable, coated, and positioned squarely on the prepared shelf.
Molds shape glass during slumping and draping. A slumping mold supports a sheet as it bends into a shallow form, while a draping mold allows gravity to pull heated glass over or through a contour. Browse glass fusing molds for general forming projects, or select slumping and draping molds for shaped work. Always verify that the mold material and release method suit the firing temperature and glass system.
Glass Cutting and Shaping Tools
Accurate cutting begins with controlled scoring, not force. Choose tools that fit your hand and maintain a clean, predictable wheel or blade. Quality tools produce consistent breaks and reduce wasted compatible glass.
The Glass Cutter
A good glass cutter creates a continuous score rather than scratching randomly across the surface. Use a cutter with a comfortable handle and a wheel suited to your working style. Apply a small amount of compatible cutter lubricant to reduce friction and keep the score smooth.
For straight cuts, place the glass on a stable, clean surface. Guide the cutter along a straightedge or ruler in one deliberate pass. Use even pressure from edge to edge, and avoid retracing the score. A score that is too deep can create rough edges and unpredictable breaks. Practice on scrap before cutting an important sheet.
A sturdy straightedge or ruler is essential for repeatable layouts. Measure twice, mark lightly, and keep fingers away from the scoring path. Explore the glass cutting and shaping tools available for studio work.
Breaking and Smoothing Tools
Running pliers help open a score across a sheet when the break needs controlled pressure. Align the pliers with the score, then squeeze gradually rather than twisting the glass. Breaking pliers provide leverage for separating smaller scored pieces and handling cuts that are difficult to open by hand.
Glass nippers are useful for small adjustments, curved details, and removing limited amounts from an edge. They are not a substitute for a clean score when you need a precise dimension. Wear eye protection whenever glass may chip, and keep finished pieces separated from sharp scraps.
Grinders and Finishing
A water-fed glass grinder smooths sharp edges and refines shapes after cutting. Use the correct bit for the task, keep the work moving, and let the abrasive do the cutting. Do not press hard enough to stall the bit or create unnecessary thermal stress.
Rinse or wipe away glass residue according to your studio cleanup procedure, and inspect every edge before moving a piece to kiln assembly. A well-maintained grinder, fresh abrasive, and reliable hand tools make shaping more controlled than a collection of cheap alternatives.
Safety Gear Every Glass Fusionist Should Own
A safe studio protects your lungs, hands, eyes, and hearing while you cut, clean, arrange, and fire glass. Build safety equipment into your glass fusing supplies list before beginning regular production. Good controls reduce exposure without interfering with careful technique.
Respiratory Protection
Fine crystalline silica and toxic metal particulates can become airborne when you handle dry powders, frit, kiln wash, or other dusty materials. Repeated inhalation can contribute to serious respiratory disease. The CDC guidance on studio dust hazards describes the risks associated with fine particulates and dry-material preparation.
For dusty work, use a NIOSH-certified elastomeric half-mask respirator fitted with P100 particulate filter cartridges. A respirator is one part of a control strategy, not a substitute for reducing dust. Select a model that seals properly to your face, follow the manufacturer’s fit-testing guidance, and replace cartridges according to their service instructions.
Keep powders and chemical products organized in closed containers. Avoid sweeping dry residue, which can re-aerosolize particles. Use a method designed to capture dust, and consult the safety data sheet before using unfamiliar glass chemicals and adhesives.
Ventilation and Studio Air
General room ventilation helps dilute contaminants, but local exhaust ventilation is more effective because it captures dust at its source. Position a suitable hood or extraction point as close as practical to dusty preparation activities. Do not direct contaminated air toward another person or into a neighboring living space.
A kiln also requires intentional ventilation. Follow the kiln manufacturer’s instructions for clearance, room airflow, and vent operation. Keep combustible materials away from the kiln, and never assume that an open door is an adequate substitute for a designed venting system. If you smell unusual fumes or see smoke, stop and investigate after the kiln reaches a safe condition.
Handling and Firing Safety
Wear cut-resistant or well-fitting work gloves when moving sharp sheet glass, shelves, dams, and kiln furniture. Gloves do not replace deliberate handling. Inspect edges, carry large pieces with two hands, and keep broken shards in a rigid container rather than a soft waste bag.
Use safety glasses during cutting, grinding, and cleanup. Before firing, confirm that compatible glass, kiln wash, shelf paper, and supports are correctly positioned. Annealing is not optional: the firing schedule must manage temperature through the annealing range so internal thermal stress can relax. Stay aware of the kiln’s operating limits, and never leave an unfamiliar firing process unattended.
How Much Should You Budget for a Glass Fusing Starter Set?
A realistic starter budget depends less on buying every option and more on choosing compatible materials, dependable equipment, and safe studio infrastructure. Plan your purchases by category, then expand as your projects become more ambitious. A small jewelry setup has different requirements from a studio producing large slumped panels.
| Category | Budget tier | Mid-range tier | Investment tier |
|---|---|---|---|
| Glass | Small sheets in a limited color palette with basic frit satisfy most first projects. | Add more colors, sheet sizes, frit, and selected specialty glass as projects expand. | Build a broad color library with dichroic glass, powders, and regular replenishment. |
| Kiln | A compact starter kiln handles jewelry and small components reliably. | A larger kiln with more programming capacity supports tiles and panels. | A professional kiln sustains higher volume and larger finished work. |
| Kiln furniture | One shelf, basic posts, kiln wash, and fiber paper cover early firings. | Additional shelves, posts, dams, and molds enable more project variety. | Multiple setups support fusing, slumping, and repeat production at once. |
| Tools | A glass cutter, running pliers, nippers, and measuring tools form the core kit. | Improved hand tools and a grinder add precision and finish quality. | Specialized shaping equipment and duplicate studio tools speed workflow. |
| Safety gear | Eye protection, gloves, cleanup supplies, and basic dust control start you safely. | Dedicated ventilation and upgraded protective equipment reduce exposure. | Professional local exhaust ventilation and comprehensive PPE protect daily production. |
The most important cost-control decision is committing to one COE system. Mixing incompatible glass can create stress and breakage, so select COE90 or COE96 materials and keep them separated. Kiln furniture, including shelves and posts, supports glass during firing, while kiln wash and fiber paper protect surfaces and simplify cleanup.
Build Your Starter Set in Stages
Begin with one project scale, one compatible glass system, and the tools required for accurate cutting and safe handling. Add molds, extra shelves, and specialty materials after you understand your kiln’s firing schedules and annealing requirements. This staged approach prevents unused purchases while preserving room for experimentation.
Use the glass fusing books to strengthen your technique, and consult the guide to glass fusing techniques before expanding into new forms.
With the core equipment and materials planned, the FAQ below addresses compatibility, safety, and common first-project questions.
Frequently Asked Questions
Here are answers to the most common questions about building a glass fusing supplies list.
What supplies do you need for glass fusing?
Start with compatible sheet glass, frit, a kiln, kiln shelf, kiln wash, fiber paper, kiln furniture, basic cutting tools, and safety equipment. Add dams and slumping molds as your projects become more dimensional. Keep all glass within one compatible COE system to reduce stress and breakage.
How do you choose between COE 90 and COE 96 glass?
Choose one system based on the glass you plan to use, then keep every component compatible within that system. COE 90 and COE 96 are separate material systems, so do not combine them casually. A consistent COE supports predictable firing and helps prevent cracking.
Is glass fusing an expensive hobby?
The kiln is usually the largest initial purchase, but you can control costs by starting with a small kiln. Essential tools, one compatible glass system, and a limited color palette. Buy specialty frit, dichroic glass, molds, and additional kiln furniture as your projects require them.
Can you use Elmer’s glue to set glass for fusing?
Do not rely on ordinary craft glue as a permanent fusing material. It may help hold pieces temporarily during setup, but it burns away during firing and does not create a compatible glass bond. Use kiln-safe design methods and follow a tested firing schedule instead.
How do you make your own molds for glass fusing?
For a first studio, commercial kiln-safe molds are the more predictable option. Any mold must tolerate kiln temperatures, release cleanly, and support the glass during slumping. Prepare the surface with the appropriate kiln wash or shelf primer, and confirm the mold’s firing guidance before use.
- Select a mold rated for your firing temperature and COE system.
- Apply a thin, even coat of kiln wash and let it cure completely.
- Support the glass while it softens so the form slumps evenly.
Ready to Build Your First Fusing Studio?
A well-planned supply list helps you match compatible glass, kiln equipment, tools, and safety essentials to your projects. Start with the materials and equipment that support consistent, controlled firings, then expand your studio as your techniques develop.
Browse the full range of fusing glass, kilns, and tools to get started with your first studio setup.