
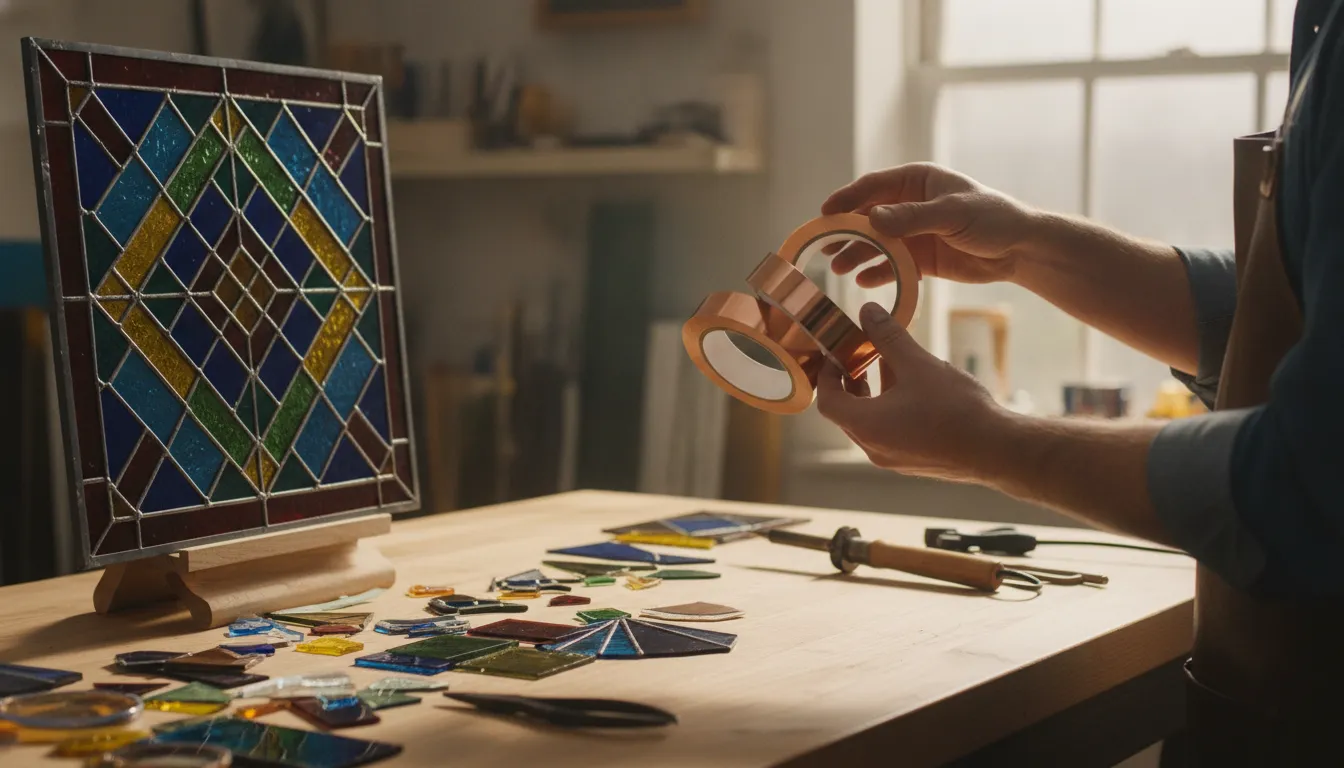
A copper-foil seam is more than a joining surface: it becomes part of the drawing your viewer sees. A narrow line can keep a small motif delicate, while a broader line can give a large panel a steadier, more deliberate rhythm.
The best stained glass foil width depends on the design, not on one universal default. Match the foil to the glass thickness, the visual weight you want, the tightness of curves, and the scale of borders. A common starting point may work for standard pieces, but thinner foil can suit fine details and thicker foil can support a bolder-looking seam.
Because copper foil is adhesive-backed tape, it gives solder a surface to bond to. Width affects both the visible joint and the amount of foil available on the glass faces. Start by looking at the line work in your pattern, then consider how each seam will read beside the glass it surrounds.
Shop stained-glass foil and solder materials
What Stained Glass Foil Width Changes in a Design
Stained glass foil width is both a fit decision and a visual decision. The foil wraps the glass edge and creates the surface that liquid solder bonds to. So its width determines how much material reaches across each face of the piece. It also influences how prominent the finished solder line appears.
A narrower foil generally leaves a finer-looking seam. That can help small motifs, narrow pieces, and delicate curves feel lighter instead of visually crowded. A wider foil creates more face coverage and usually reads as a broader, more noticeable line. That bolder line can suit larger shapes, strong geometric designs, or a composition where the seams are meant to contribute clearly to the pattern.
The key point is that width does not change the design in isolation. A line that looks balanced on a large panel may look heavy on a small ornament. Likewise, a very fine line can disappear among broad pieces or compete poorly with a substantial border. Look at the size of the individual glass pieces, the tightness of the curves, and the line weight you want viewers to notice before choosing a roll.
Width also affects your available soldering surface. More foil on the faces gives the solder more foil-covered area to bond with, while less width leaves a narrower working surface. That does not make the widest option automatically correct. The foil still needs to fit the glass edge and sit evenly on both faces. Treat the measurement as a starting point, then check whether the resulting seam supports the scale and character of the design.
What Are the Common Stained Glass Foil Widths?
Common copper foil choices include 3/16 inch, 7/32 inch, and 1/4 inch. These are useful starting points, not customer-certified specifications or universal rules. The right stained glass foil width depends on how much of the glass edge you need to cover and how prominent you want the finished solder line to look.
| Foil width. | Typical fit. | Visual result. |
|---|---|---|
| 3/16 inch. | Thinner glass, small pieces, and delicate details. | Fine, lighter-looking seams. |
| 7/32 inch. | A practical starting point for standard 1/8-inch (3 mm) glass. | Balanced coverage and a moderate solder line. |
| 1/4 inch. | Thicker or textured glass and designs calling for heavier lines. | More substantial, prominent seams. |
For many standard projects, 7/32 inch is a sensible default because it suits commonly used 1/8-inch glass and produces a balanced line. Start there when your glass is close to that thickness and your design does not depend on especially fine or bold seams.
Choose 3/16 inch when a wider strip would visually crowd small shapes, narrow curves, or delicate ornament details. A smaller piece can make a moderate-width foil line look surprisingly heavy. Move up to 1/4 inch when the glass is thicker, the surface is textured, or the design benefits from a stronger visual outline. The goal is even face coverage on the glass edge, not simply selecting the widest tape available.
How Do You Choose Foil Width for Glass Thickness?
For standard 1/8-inch, or approximately 3 mm, stained glass, 7/32-inch foil is a practical starting point. It gives the seam enough face coverage for a balanced solder line without making ordinary panels look unnecessarily heavy. Treat that size as a reference, not a rule. The best stained glass foil width depends on how the glass looks, how large the piece is, and how prominent you want each seam to be.
For thinner glass or a design built around delicate lines, step down to 3/16-inch foil. The narrower tape can keep small shapes, fine curves, and closely spaced details from appearing crowded. This is especially useful when a wide solder line would compete with the glass itself. On a small ornament, even 7/32-inch foil can look visually bulky, so a narrower width may produce a more graceful result.
Move up to 1/4-inch foil when the glass is thicker, strongly textured, or intended to support a more substantial-looking line. The extra width can help the seam read clearly against a busy surface. It is a design choice as much as a sizing choice: heavier lines can make a large panel feel deliberate, while they may overwhelm a tiny piece.
Texture deserves particular attention. Historic stained glass can include handblown glass with uneven texture, while machine-rolled or cathedral glass may have a more even surface, according to the National Park Service. Before choosing foil, look at the glass under the lighting where it will be displayed. A visually active texture may call for a stronger seam, while a smooth, quiet sheet may look best with finer lines.
When a project combines thicknesses, choose by the intended line weight rather than forcing every piece into one size. Test a short seam on representative scraps first. Compare the finished line from the viewing distance, then select the width that supports the composition without becoming its most noticeable feature.
How Does Foil Width Affect Fine Lines and Curves?
Foil width changes how much of each seam remains visible after soldering, so it becomes part of the design rather than a minor supply choice. Thinner foil creates daintier, subtler lines. Thicker foil produces a more robust-looking line that can give a bold motif or large panel greater visual presence.
Use narrower foil for small details
On small ornaments, miniature panels, and designs with tight curves, a wide seam can quickly look heavy. A 7/32-inch line may appear bulky on a very small piece, while 3/16-inch foil can keep the divisions lighter and let the glass remain the focus. This is especially useful when a pattern contains narrow petals, small leaves, lettering-like shapes, or several curved pieces close together.
Width cannot correct a poor fit, however. Before foiling, cut glass pieces to fit the pattern accurately. A clean edge gives the foil an even surface to follow, which matters more on a tight curve than on a broad, nearly straight edge. Follow the curve gradually rather than forcing a wide tape around a radius it cannot comfortably follow.
Let larger lines support the design
Thicker foil can suit broad shapes, larger sections, and motifs intended to read from a distance. It also makes the seam more noticeable, so use it deliberately where a stronger line supports the composition. For a design that combines delicate interior curves with a substantial outer border, narrower interior foil and a wider border foil can establish a clear visual hierarchy. The change should look intentional, not like an accidental mismatch.
For the complete application sequence and broader copper-foil workflow, see the broader copper-foil workflow. For width alone, judge the finished line against the scale of the glass: the smaller and more intricate the piece, the more carefully you should limit visual weight.
How Wide Should Foil Be for Borders and Edges?
For a border, stained glass foil width is mainly a design decision. The outside seams create a visual frame around the composition, so their line weight should support the artwork rather than compete with it. A wider foil can give a panel a deliberate, grounded edge, especially when the interior pieces have bold shapes, textured glass, or other strong visual movement.
That does not mean the widest foil is always the best choice. On a small ornament or a pattern with fine curves, a broad solder line can make the border look heavy and reduce the visual space inside the design. A narrow border often feels more balanced when the panel is delicate, the pieces are small, or the interior lines are intentionally subtle.
Match the border to the design scale
Use the interior line weight as your reference. If the main seams are fine, a modestly wider border can establish hierarchy without becoming distracting. If the design already uses broad, graphic divisions, a stronger border may help the eye read the panel as one finished composition. Textured glass can also make a seam appear more substantial, so assess the pattern and surface together rather than choosing width from glass thickness alone.
The frame itself is part of that visual structure. The National Park Service describes a stained-glass window frame as surrounding the whole window and holding the composition together. In practice, foil can contribute to that framed impression, but it is not a substitute for a separate framing method when the panel needs one. If you want to finish the panel with framing, consider how the final channel or border will relate to the foil line before you assemble the edge.
As a practical starting point, choose a border foil that is only visibly stronger than the interior seams, then compare the full pattern from a normal viewing distance. If the edge is the first feature you notice, it is probably too dominant for that design.
Can You Combine Foil Widths in One Project?
Yes. Using more than one stained glass foil width can help the seams support the design’s visual hierarchy. The goal is not to make every joint different, but to decide where the eye should see fine detail and where the composition needs a clearer, stronger-looking boundary.
For example, you might use 3/16-inch foil around small interior pieces, curves, or delicate accents, then use 7/32-inch or 1/4-inch foil around a broad outside border. The narrower interior lines can keep a small motif from looking crowded, while the wider border gives the edge a deliberate frame. Thinner foil is generally associated with daintier pieces and subtler solder lines; thicker foil creates a more robust-looking line.
Plan the transitions before foiling
Mixed widths look intentional when the change follows the design. A border, ring, repeated motif, or clear change in scale gives the viewer a reason for the seam to become heavier. Avoid switching widths halfway through an unrelated shape. Mark the transition on your pattern first, and check the assembled paper pieces from a short distance. If the change draws attention away from the focal glass, simplify it.
One consistent width is usually the better choice for a small, highly detailed project. A repeating geometric pattern, or a design where uniform line weight is part of its character. It also reduces decisions while you are learning. Common choices include 3/16, 7/32, and 1/4 inch, but the best combination depends on the glass. The scale of the pattern, and the line weight you want viewers to see. Mixed widths change appearance; they do not automatically make a project structurally stronger.
How to Make a Final Foil-Width Choice Before You Foil
- Check the design’s line weight. Look at the pattern as a whole and decide whether the seams should read as delicate details or confident graphic lines. A narrow choice can keep small motifs quiet, while a wider choice gives prominent divisions more visual presence. If the design depends on very fine interior lines, make sure your choice does not make those details look heavy.
- Compare the foil with the glass. Consider the actual thickness, texture, and unevenness of each piece, not just the pattern on paper. Standard 1/8-inch (3 mm) glass is commonly paired with 7/32-inch foil, while thinner glass or delicate work may suit 3/16-inch foil. Thicker or textured glass may call for 1/4-inch foil. These are useful starting points, not rigid rules.
- Trace the curves and small pieces. Tight curves, narrow points, and tiny pieces magnify visual weight. A width that looks balanced on a large straight edge may appear bulky around a small ornament. Review the most detailed area first, then check whether the same width still looks appropriate on broader sections. For cleaner results, also copper-foil seam soldering practices matter after the sizing decision.
- Evaluate borders separately. Ask whether the outside edge needs a stronger-looking visual frame than the interior. If so, a wider border treatment can create hierarchy without changing every interior seam. Keep the border choice consistent with the panel’s scale and planned framing.
- Make a small test fit. Apply a short piece to a scrap or an inconspicuous test edge. Center the foil on the glass edge so an equal amount covers both faces. If it is visibly uneven, peel it back and correct it promptly, but avoid repeated peel-and-reapply cycles because the adhesive can lose stickiness. Before final assembly, choose and apply stained-glass flux and choose copper foil supplies that fit the rest of your process.
Shop stained-glass foil and solder materials
Frequently Asked Questions
What is the best foil width for standard stained glass?
For standard 1/8-inch, or 3 mm, stained glass, 7/32-inch foil is a common starting point. Move to 3/16 inch when the design is delicate or the glass is thinner, and consider 1/4 inch for thicker glass, textured surfaces, or a deliberately heavier-looking seam. Your pattern scale and preferred line weight should make the final decision.
How does foil width change the look of a solder line?
Foil width affects how much soldering surface is available and changes the apparent weight of the finished seam. Narrower foil tends to support finer, quieter lines, while wider foil creates a more substantial visual line. Choose based on whether the seam should recede, balance the glass pieces, or become part of the design.
Which foil width works best for curves and small pieces?
Use a narrower width when small pieces, tight curves, or delicate motifs would look crowded with a broad seam. A 3/16-inch option can keep a tiny ornament or fine detail looking lighter, while a larger piece may have enough visual room for 7/32 inch or wider foil. Test the choice against a full-size pattern before committing.
How wide should foil be for stained glass borders?
A border can use a wider foil when you want a stronger visual frame around a detailed interior. Especially when the surrounding glass has a bold texture or scale. That choice creates hierarchy, not automatic structural reinforcement. Keep the border width consistent around the design unless an intentional transition is part of the pattern.
Can I combine different foil widths in one project?
Yes. A practical approach is to use a narrower width for interior details and a wider width for an outer border, creating a clear visual hierarchy. Use mixed widths only where the change looks intentional. If the project is small, highly geometric, or already visually busy, one consistent width may produce a cleaner result.
Ready to Choose Your Foil Width?
With your line weight, glass thickness, curves, and border style in mind, you can choose foil that supports the look you want without making the design feel crowded. Browse the available materials and compare options for your next project. Shop stained-glass foil and solder materials to get started.