
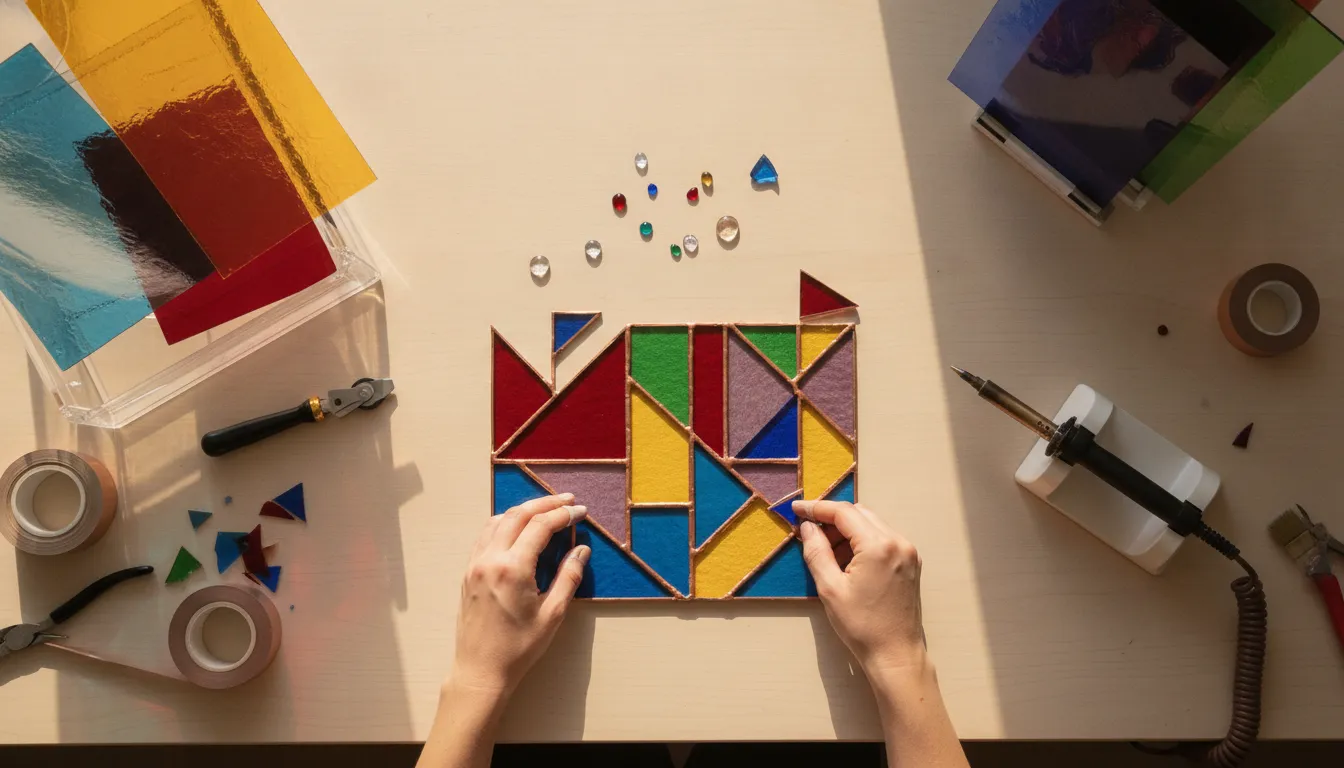
A stained glass panel becomes much easier to manage when you treat it as a sequence of small, testable steps rather than one complicated project. Start with a paper pattern, choose glass that suits the design, and plan every cut before reaching for the soldering iron.
To learn how to make a stained glass panel, prepare and number a pattern, score and break compatible sheet glass. Grind and fit the edges, wrap each piece in copper foil, then flux, solder, frame, clean, and finish the assembled panel.
This guide focuses on the copper-foil method for ordinary non-fusible stained glass. That is different from kiln-based fusing, where glass compatibility is considered through systems such as COE. For broader planning, see our complete stained glass techniques reference. Keep eye protection, ventilation, careful glass handling, and hot-tool safety in the plan from the beginning.
Browse stained glass supplies and tools
Before you begin cutting, gather the materials that support accurate work and a safe, controlled setup.
What You Need Before You Make a Stained Glass Panel
This project uses the copper-foil method, where each glass piece is wrapped with adhesive-backed copper foil before the pieces are fluxed and soldered together. A pattern is the starting point, followed by cutting, grinding, foiling, assembly, framing, and finishing. The checklist below keeps the first project focused on the materials that support that sequence.
Tools and materials for a copper-foil panel
| Supply | What it does |
|---|---|
| Pattern and marker | Provides the design, numbering, and guides for transferring pieces to glass. |
| Stained glass sheets | Supply the colors and textures selected for the design. Choose glass intended for ordinary stained glass, not a kiln-fusing project. |
| Glass cutter and running pliers | Score the sheet and help separate pieces along the score lines. |
| Glass grinder | Refines rough cut edges so pieces can be fitted accurately. |
| Copper foil and burnishing tool | Wrap and firmly smooth foil around each piece before soldering. |
| Soldering iron, solder, and flux | Join the foiled pieces. Flux helps prepare the joint for soldering. |
| Frame or channel and hanging hardware | Supports the finished panel and provides a way to display it. |
| Eye protection, gloves, cloths, and cleanup supplies | Support safer glass handling and a clean work area. |
For a broader checklist before shopping, see this stained glass tools and supplies guide. For the full technique sequence, use the stained glass techniques reference. You can also browse stained glass supplies by project need.
Keep glass systems separate
Ordinary non-fusible stained glass is cut, foiled, and soldered; it is not automatically suitable for kiln firing. Fusible glass is selected for a compatible Coefficient of Expansion, or COE, system, such as COE 90 or COE 96. It is designed for controlled heating and cooling in a kiln. Do not combine fusible COE systems or treat ordinary stained glass as kiln-compatible. Compatibility and the glassmaker’s product guidance matter when heat is part of the process.
Safety before the first cut
Set up a stable, uncluttered work surface, wear eye protection, and handle scored or broken glass deliberately. Plan ventilation before soldering. If using lead solder or rosin flux, local exhaust ventilation such as a capture hood or benchtop extractor is recommended by UNC soldering safety guidance. Never touch a hot soldering iron tip, let joints cool before handling them, and turn the iron off when it is not in use. Afterward, wash your hands and arms, and clean the work area with soapy water or an appropriate cleaning agent. Collect lead solder waste as required for hazardous waste disposal.
How to Make a Stained Glass Panel from Pattern to Glass
Pattern first, glass second
A successful panel starts with a workable design, not with a sheet of glass. For a first copper-foil project, choose a simple pattern with a manageable number of pieces, broad shapes, and no extremely narrow points. Stained glass uses individual pieces in a mosaic-like arrangement, so the pattern determines both the look and the difficulty of the finished panel.
- Choose a simple pattern and make two copies. Keep one copy intact as your master reference. Use the second copy as the working pattern that you can cut apart. If you need help preparing the pieces, see this guide to transfer stained glass patterns.
- Number every pattern piece. Mark each shape with a number before cutting the working copy apart. Add small orientation marks where useful, especially on pieces with directional texture. Numbering prevents you from reversing pieces or losing track of their position during cutting and fitting.
- Plan the glass selection. Select colors, transparencies, and textures that support the design. Cathedral, opalescent, translucent, streaky, and wispy glasses create different visual effects, while textures such as artique, baroque, hammered, seedy, and waterglass change how light moves across a surface. Choose glass for the pattern and intended appearance, rather than assuming every sheet behaves the same way.
- Confirm the compatibility boundary. This project is a copper-foil stained glass panel, not a kiln-fused project. COE, or coefficient of expansion, is essential when glass will be heated and fused together in a kiln. Do not combine different COE systems for fusing, and do not treat ordinary non-fusible stained glass as kiln-fusing material. For this panel, choose appropriate non-fusible stained glass and join the pieces later with copper foil and solder.
- Transfer the pattern pieces to the glass. Place each numbered template piece on the selected sheet, account for the cutting line and foil joints, then trace it clearly. Keep the grain, streaks, or direction of a textured sheet consistent with the design. Work with one piece at a time and return it to the master pattern as you go.
- Score each piece deliberately. Use a glass cutter to make one controlled score along the pattern line. A score is a deliberate line in the surface, not a deep groove. Plan the order of cuts so you are not forcing the cutter through fragile corners or removing more glass than the shape requires.
- Break and check the pieces. Use appropriate breaking tools to separate the glass along the score, with eye protection and careful handling. The basic construction process is scoring and breaking sheet glass, followed by grinding the edges to create a rough surface for fitting. Set aside any piece that does not match its template instead of forcing it into the design. For more detailed cutting guidance, read how to cut stained glass sheets.
Keep the numbered pieces organized until the full set is cut. The next stage is fitting and refining the edges so the panel can be foiled without gaps, stress points, or accidental changes to the pattern.
How Do You Fit and Foil the Glass Pieces?
Once the pieces are scored and broken, the goal is to turn a loose collection of shapes into a clean, stable assembly. Take your time here. Foil will not correct a piece that is badly shaped, and small gaps can make later soldering harder.
A clean first-pass fit
Start by grinding the edges of each piece to remove sharp points and refine the shape. A grinder creates the slightly rough edge needed for a more consistent fit, but use light pressure and check the pattern often. Keep the numbered paper pattern nearby, and return each piece to its outline as you work. The aim is not to force the glass into place. If a piece rocks, binds against its neighbors, or leaves an uneven opening, grind a little more and test it again.
Dry fit the entire section before applying foil. Lay the pieces together on the pattern like a puzzle, checking that the design lines remain readable and that the overall outside edge stays true. Small, even gaps are easier to manage than one tight joint beside one wide opening. If your pattern needs additional preparation, this guide to transferring stained glass patterns can help you keep the pieces organized.
When the fit is satisfactory, clean the glass edges and faces. Remove grinding residue, dust, oils, and moisture, then let the pieces dry completely. Clean surfaces help the adhesive-backed copper foil stay in place. Handle the pieces carefully after cleaning so you do not put fingerprints back along the foil line.
Center, fold, and burnish the copper foil
Choose foil that suits the glass thickness and center it along the edge of the piece. Press the adhesive side onto one face, then wrap it evenly around the perimeter. Try to keep the exposed foil width consistent on both faces. At corners, make neat relief cuts rather than allowing the foil to bunch or overlap heavily. Fold the foil over the faces and press it down with a burnishing tool. Work around the full edge until the foil is smooth, firmly attached, and free of lifted corners or wrinkles.
Repeat the process for every piece, then place the foiled pieces back on the pattern. Align the design lines and use temporary guides, pins, or a board edge to prevent the assembly from drifting. Keep the panel flat while you inspect the perimeter and joints. For a closer look at this stage, see the copper foil assembly technique guide. The next step is to flux and solder the aligned foil seams, so a careful fit now will make the panel easier to control later.
How Do You Solder a Stained Glass Panel Safely?
For beginners, the safe way to solder a stained glass panel is to prepare a stable, fluxed copper-foil assembly, use controlled heat, and follow deliberate workshop safety habits from setup through cleanup. Foiled pieces are fluxed and joined with a soldering iron and solder, but a sound result depends on patience rather than simply adding more heat.
- Prepare the work surface. Secure the foiled pieces so the panel cannot shift while you work. Check that the foil is centered, firmly burnished, and free of dirt. Apply a small amount of flux to the copper foil at the seam. Copper foil with adhesive backing holds the foil around each glass piece before soldering, creating the metal surface the solder can join. Review the manufacturer’s Safety Data Sheet (SDS) for every material before beginning.
- Tack-solder the assembly. Touch small solder points at key intersections first. Work across the panel so the pieces stay aligned, and let each joint cool before touching or repositioning it. Tack soldering is a way to stabilize the layout, not an opportunity to fill every seam.
- Build a steady bead. Once the assembly is secure, feed solder to the heated foil and move the iron smoothly along each seam. Aim for an even, continuous bead rather than a thick mound. Keep the iron moving and regulate its temperature. Solder temperatures must be controlled to create a proper bond, while excessive heat can stress glass or disturb nearby joints. The stained glass soldering workflow provides a focused reference for seam control and clean joints.
- Choose solder as a material decision. Traditional stained glass solder is commonly 60/40 tin/lead, which melts at approximately 160 to 170 degrees Celsius. Lead-free solder is also used in stained glass. It may behave differently at the iron, so select it according to your project requirements and the manufacturer’s instructions. Never assume that changing solder eliminates the need for ventilation, protective equipment, or careful cleanup.
- Inspect both sides. After the panel has cooled, look for gaps, thin spots, sharp protrusions, or areas where solder has bridged unintended surfaces. Reflux and correct a small defect only after the joint is cool and the panel is stable. Turn the soldering iron off or unplug it when it is not in use.
Safety before soldering
Wear safety glasses, appropriate gloves, and any additional PPE required by the SDS. Use local exhaust ventilation, such as a capture hood or suitable benchtop fume extractor, when working with lead solder or rosin flux. Rosin flux fumes can irritate the eyes and upper respiratory tract, and rosin may worsen existing asthma. Identify the nearest eyewash before starting.
Do not eat or drink in the soldering area. Do not touch the hot iron tip or element, and keep cords and tools arranged so they cannot catch the panel. Lead exposure can occur through contaminated hands and surfaces, so collect lead solder waste as required. Clean the work area with soapy water or an appropriate cleaning agent, and wash your hands and arms thoroughly after soldering.
How to Frame, Reinforce, and Prepare the Panel to Hang
Once the soldering is complete and the panel has cooled, inspect its shape before adding the finishing hardware. A frame gives the perimeter a protected edge and helps the finished piece hold its form during handling. For a small beginner panel, zinc channel, sometimes called zinc came, is a practical perimeter option. Its U-shaped channel receives the glass edge and creates a clean, firm border. You can also use lead came when its profile and traditional construction style suit the design.
Copper foil versus lead came
Copper foil wraps the edge of each individual glass piece, allowing the soldered seams to form the structure of the panel. Lead came uses channel-shaped strips between and around the glass, so it is a different assembly method rather than simply a decorative border added at the end. If you built this project with copper foil, add zinc channel or another suitable perimeter frame after the pieces are assembled. For a deeper look at the alternative construction method, see this guide to lead came panel assembly.
Check the perimeter before attaching hardware
Set the cooled panel on a flat, protected surface and check each corner. Measure the diagonals from opposite corners. If the measurements are close, the panel is likely sitting square; if they differ noticeably, gently adjust the frame and panel before the joints fully settle. The channel should sit evenly along the perimeter without forcing the glass or leaving a loose corner. Solder or secure the frame according to the construction method, giving particular attention to the corners and any areas where the border meets a seam.
For additional guidance on choosing and fitting this type of border, read the zinc channel panel framing article. It is especially useful when a panel needs a defined edge before display.
Attach hanging hardware with balanced support
Plan the hanging points near the upper left and upper right portions of the frame, rather than concentrating support at one center point. Place them at matching positions so the panel hangs level and the weight is distributed across the top edge. Attach the wire, rings, or other hardware to the frame or reinforced perimeter, not only to a single solder seam. Before displaying the piece, test that it hangs evenly and inspect every attachment for movement. A finished panel may include hanging wires as part of its final presentation, along with optional patina and cleanup after the hardware is secure.
How Do You Clean and Finish a Stained Glass Panel?
Finishing begins only after the soldered joints have cooled. Remove leftover flux and residue from the panel and work area before applying any optional surface treatment. Flux residue can dull the solder lines and leave a sticky film, while a clean surface makes it easier to judge the quality of the work.
Wash, dry, and choose the finish
Wash the panel gently with soapy water or an appropriate cleaning agent, then rinse away the residue and dry it completely. Clean the soldering area at the same time. If you used lead solder, wash your arms and hands thoroughly after the work, and collect lead solder waste according to your local hazardous-waste requirements. These cleanup steps help prevent surface contamination from spreading.
Patina is optional. It can change the appearance of exposed solder, so test the finish on a small, inconspicuous area first and follow the product instructions. Apply it only after the solder and glass are clean and dry. Whether you leave the solder bright or use patina, finish by polishing gently with a soft or microfiber cloth. Avoid pressing hard against the glass or pulling on the seams.
Final inspection before display
Turn the panel over and inspect both faces. Look for missed flux, sharp glass edges, loose foil, pinholes in solder, or seams that did not bond evenly. Check the perimeter frame and confirm that the hanging wires or rings are firmly attached and balanced. A zinc channel frame can provide a clean edge; see this zinc channel panel framing guide if you need help evaluating that step.
Hold the finished panel by its hardware before placing it in its final location. The panel should hang level without twisting, and no part of the glass should bear against a hard mounting surface. Once the support, edges, and finish all look secure, it is ready to display as a wall hanging or window panel.
Frequently Asked Questions
Can a beginner make a stained glass panel at home?
Yes. Start with a small copper-foil design that has a manageable number of pieces. Follow a deliberate sequence: prepare and number the pattern, score and break the glass, grind and fit the edges, apply copper foil, then solder and finish the panel. Practice scoring on scrap glass before cutting your project pieces.
What tools and materials do I need for a first panel?
You will need a pattern, compatible stained glass, a glass cutter, running or grozing pliers, a grinder or abrasive tool, copper foil, flux, solder, a soldering iron, and cleaning supplies. Add eye protection, a stable work surface, and suitable ventilation. Choose materials for copper-foil assembly rather than kiln-fusing unless your project specifically requires a compatible COE glass system.
How do I keep the glass pieces compatible?
Buy glass intended for the same process and follow the manufacturer guidance for compatibility. COE, or coefficient of expansion, is especially important in kiln-fusing systems. Do not assume that different glass types can be fused together simply because they look similar. For a standard copper-foil panel, the pieces are assembled mechanically with foil and solder instead of being kiln-fused.
How should I solder a stained glass panel safely?
Use eye protection, ventilation, and careful heat control. Flux and solder can produce irritating fumes, and rosin-containing flux can worsen asthma. Lead solder exposure primarily occurs through contaminated surfaces, so keep hands and the work area clean. The UNC soldering safety guidance recommends controls such as ventilation and good hygiene: review soldering safety guidance before starting.
Get started with supplies for your first panel
With the pattern, glass, and finishing steps mapped out, choosing the right supplies can make your first panel easier to organize and practice. Browse the tools and materials needed for a copper-foil project, then build your setup around the panel you want to create. Browse stained glass supplies to get started.