
For many glass artists, the most exciting part of a project is the design and composition, not the hours spent cutting and grinding. Using fusible precut glass shapes is a smart way to direct your energy where it matters most: your artistry. Think of them as a strategic shortcut that helps you work more efficiently and take on complex designs that might otherwise feel too time-consuming. This isn’t about skipping a skill; it’s about using a tool that frees you up to create more ambitious, polished work. Here, we’ll cover how to choose and use these shapes to improve your workflow.
Key Takeaways
- Focus on Design, Not Cutting: Precut shapes save you valuable time and reduce material waste by letting you skip the difficult process of cutting intricate designs. This allows you to jump straight into the creative part of your project, like perfecting your composition.
- Always Match Your Glass COE: For a successful fuse, all your glass must have the same Coefficient of Expansion. Always check that your precut shapes, sheet glass, and other elements are all either COE90 or COE96 to prevent your piece from cracking.
- Layer Elements for Added Depth: Use precut shapes as a starting point for more complex art. Create unique, textured pieces by combining them with other materials like frit for sparkle, stringers for fine details, and dichroic glass for a shimmering focal point.
What Are Fusible Precut Glass Shapes?
Think of fusible precut glass shapes as the ultimate creative shortcut for your glass art. They are precisely cut pieces of glass, ready to be placed in your design and fired in a kiln. These shapes are specifically designed to be “fusible,” meaning they are made from glass with a specific COE (Coefficient of Expansion). This is a crucial detail because it ensures all the glass in your project expands and contracts at the same rate when heated and cooled, preventing cracks and stress fractures. Most precuts you’ll find are made from compatible glass like COE90 or COE96, which is essential for successful fusing.
They come in a huge variety of designs, from simple circles and squares to intricate snowflakes, animals, and letters. Instead of spending hours scoring and breaking glass to get that one perfect shape, you can jump straight to the fun part: designing and creating your piece. It’s a fantastic way to add complex elements to your work without the frustration of cutting them yourself. This allows you to focus more on the overall composition and artistry of your project, letting you bring more ambitious ideas to life with ease. For anyone who has ever struggled to cut a perfect circle or a delicate curve, these shapes are a true game-changer.
How Are They Different From Hand-Cut Glass?
The biggest difference comes down to precision and convenience. While hand-cutting glass is a valuable skill, it can be tough to get perfect, repeatable shapes, especially for complex designs. Precut shapes are typically cut using high-tech waterjet machines. This process results in incredibly clean edges and exact, consistent sizing from one piece to the next. For you, this means no more time spent at the grinder smoothing out rough edges or trying to make two pieces match perfectly. You get a flawless shape every single time, which is a game-changer for creating professional-looking, polished art pieces.
How to Use Them in Your Art
This is where your creativity can really shine. You can use precut shapes in almost any kiln-fused project. They are fantastic for making jewelry, festive ornaments, and charming suncatchers. You can also arrange them on molds to create a decorative plate or a piece of wall art. Don’t be afraid to mix and match. Try layering different shapes to add depth, or combine them with other elements like frit and stringers for extra sparkle and texture. Because they are so easy to work with, they’re perfect for artists of all levels, whether you’re just starting out or you’re a seasoned pro looking to streamline your workflow.
What Kinds of Precut Shapes Can You Find?
One of the best things about working with precut glass is the sheer variety available. Whatever you can dream up, there’s a good chance a precut shape exists to help you bring it to life. This opens up so many creative doors, especially for designs that would be tricky or time-consuming to cut by hand. From whimsical animals to festive holiday icons and crisp geometric patterns, you can find shapes to fit any theme or style. Let’s look at some of the most popular categories you’ll come across.
Animals and Nature
If you love incorporating the natural world into your art, you’ll have a blast with animal and nature-themed precuts. You can find everything from cats and dogs to birds, deer, and fish. These are perfect for creating a focal point in a fused glass panel or making a special gift for an animal lover. Beyond animals, you can find leaves, trees, flowers, and celestial shapes like suns, moons, and stars. Using these precuts is a simple way to build a beautiful nature scene without spending hours on intricate cuts. You can easily pair them with different colors of stained glass to create a vibrant landscape.
Holidays and Seasons
Precut shapes make it incredibly easy to create seasonal decor and holiday gifts. For winter, you can find delicate snowflakes, snowmen, and Christmas trees that are perfect for making ornaments or festive platters. When autumn rolls around, look for pumpkins, acorns, and colorful leaves. For other holidays, you can find hearts for Valentine’s Day, shamrocks for St. Patrick’s Day, and bunnies for Easter. These shapes save you so much time during busy holiday seasons and ensure your projects look polished and professional. Many artists love using the wide color palette of COE96 glass to make their holiday creations pop.
Geometrics, Letters, and Numbers
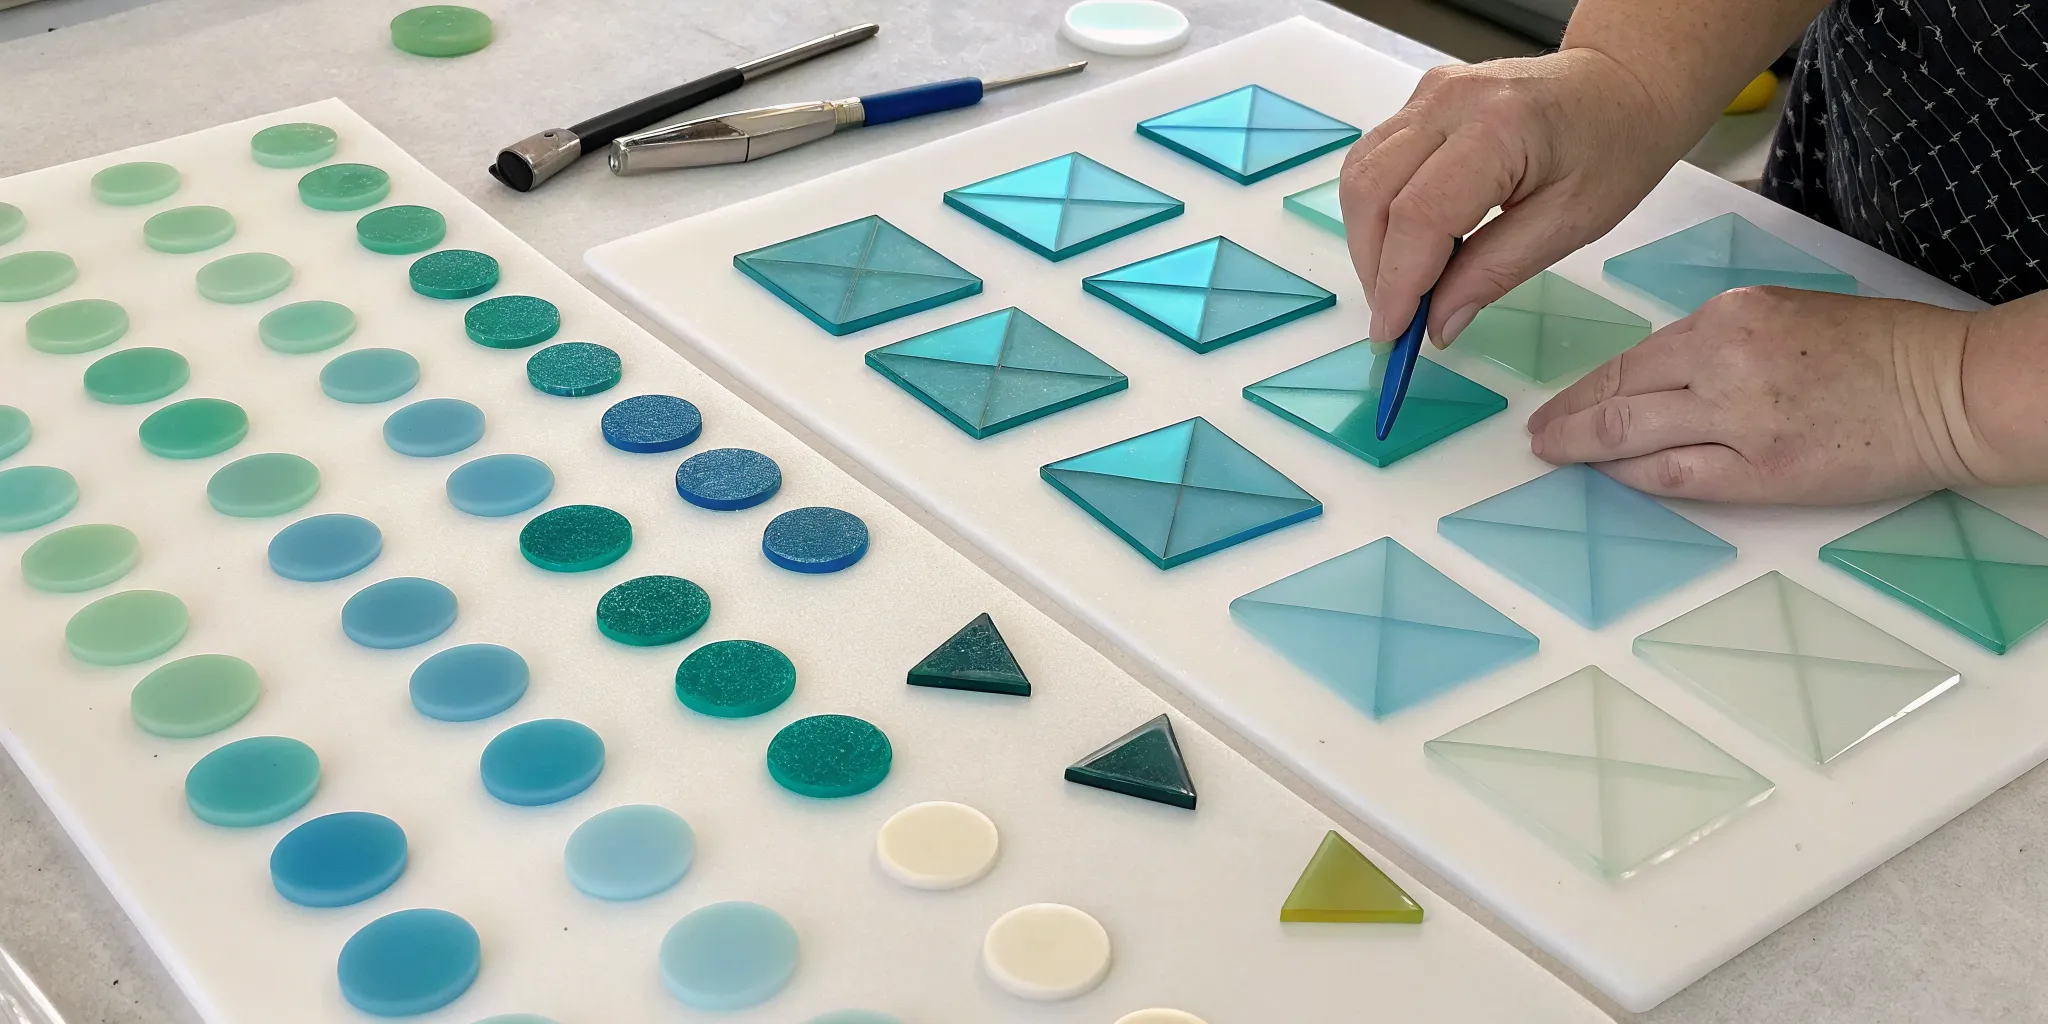
For artists who lean toward modern, abstract, or personalized designs, geometric shapes, letters, and numbers are essential. You can find perfect circles, squares, triangles, and rectangles that are ideal for creating patterns, mosaics, or structured compositions. Because these shapes are often cut with a waterjet, their edges are incredibly clean and consistent. This precision is hard to achieve by hand, especially when you need multiple identical pieces. Letters and numbers are fantastic for personalizing gifts with names, initials, or important dates. Using high-quality COE90 glass for these designs ensures your finished piece has a clean, professional look with reliable results.
Why Use Precut Shapes Instead of Cutting Your Own?
While cutting your own glass is a fundamental skill, it’s not always the most practical or enjoyable part of a project. Precut glass shapes offer a fantastic alternative that lets you focus on what you love most: designing and creating. Think of them as a shortcut to the fun part. They can help you work faster, reduce material waste, and achieve a level of precision that’s tough to replicate by hand. Whether you’re a seasoned artist working on a complex commission or a beginner just starting your glass journey, precut shapes have a place in your studio.
Using them isn’t about skipping a step; it’s about making a strategic choice to direct your energy where it matters most. By removing the technical hurdles of cutting, you open up more mental space for artistry. This allows you to experiment more freely and take on projects that might have seemed too daunting otherwise. It’s about working smarter, not harder, so you can produce beautiful, high-quality art more efficiently and with less frustration.
Save Time on Complex Designs
Let’s be honest, spending hours scoring and breaking glass for an intricate design can be tedious. A single wrong move can send you right back to the beginning. Precut shapes free you from the technical labor of cutting, especially for complex or repeating patterns. Instead of wrestling with a glass cutter, you can spend your valuable time arranging elements, playing with color combinations, and perfecting your composition. This allows you to take on more ambitious projects without the time-consuming prep work. You get to dive straight into the creative process, which is where the real magic happens.
Waste Less Glass
We’ve all felt the sting of a beautiful sheet of glass cracking in the wrong place, leaving you with a pile of unusable scraps. Using precut shapes significantly reduces leftover glass pieces. These shapes are cut with waterjet machines that maximize the use of every sheet, creating minimal waste. This efficiency is not only better for your budget, but it also means you get more usable art material out of every purchase. By starting with perfect shapes, you can plan your projects more accurately and use your precious sheets of COE 90 glass for larger background pieces or future creations.
Get Consistent, Perfect Results
When a design calls for symmetry or multiple identical components, consistency is key. Precut shapes are manufactured with incredible precision, ensuring every piece has clean edges and uniform dimensions. This level of consistency is nearly impossible to achieve by hand, especially across dozens of pieces. Using them gives your work a polished, professional look, whether you’re making a set of matching jewelry pendants or a mosaic with perfectly aligned tiles. You can trust that each shape will fit exactly as planned, helping you create flawless, repeatable designs that look amazing every time.
Build Your Confidence as a Beginner
The thought of cutting glass can be intimidating if you’re new to the craft. Precut shapes are a wonderful way to get started without the pressure. They allow you to experiment with fused glass art, mosaics, and even stained glass while building your confidence. You can learn about how glass behaves in the kiln and how colors interact without worrying about mastering cutting skills first. Plus, since they are made from high-quality, compatible glass like COE 96, you can feel secure knowing your materials will work together beautifully. It’s a fantastic way to get early wins and stay motivated on your artistic journey.
How to Spot High-Quality Precut Shapes
When you pour your time and creativity into a piece of glass art, the quality of your materials really matters. Using top-notch precut shapes can be the difference between a project you love and one that ends in frustration. It’s not just about how they look out of the package; it’s about how they perform in the kiln and contribute to the integrity of your final piece. Knowing a few key indicators of quality will help you choose shapes that fuse beautifully and bring your artistic vision to life. From the sharpness of the cut to the consistency of the glass itself, let’s walk through exactly what to look for when selecting your supplies.
Look for Precision Cuts and Clean Edges
The first thing to inspect on a precut shape is the quality of the cut itself. High-quality shapes are typically cut with a waterjet machine, which results in incredibly precise designs and clean, smooth edges. This precision means you won’t find any chipping or rough spots, allowing your pieces to fit together snugly without extra grinding. This is especially important for creating mosaics or intricate patterns where tight fits are essential. When the sizes are perfectly consistent, you can trust that every flower petal or geometric tile in your design will be identical, giving your work a professional, polished finish.
Check for Clear Glass and Consistent Color
Beyond the cut, examine the glass itself. Quality precut shapes are made from the same premium sheet glass you’d use for any other project. This means the glass should be free of unwanted bubbles, streaks, or blemishes that could detract from your design. The color should also be rich and consistent across the entire shape. Reputable suppliers use glass from trusted manufacturers, so you can be confident in the material’s performance. For example, many of our COE96 glass shapes are made from Oceanside glass, ensuring they integrate perfectly with other compatible sheets and frits in your studio.
Why COE Compatibility Is Crucial
This is one of the most important factors in glass fusing. Think of COE (Coefficient of Expansion) as the rate at which glass expands when heated and contracts when cooled. For different pieces of glass to fuse together successfully, they must all expand and contract at the same rate. If you mix COEs, like using a COE90 shape on a COE96 base, the resulting stress will almost certainly cause your project to crack as it cools. Any high-quality precut shape will have its COE clearly labeled, allowing you to confidently match it to the other glass supplies in your project.
Understand How Colors Change When Fired
Some glass colors don’t reveal their true beauty until after they’ve been fired in a kiln. These are often called “striking” colors, and they can transform dramatically during the firing process. For instance, a pale, milky pink might fire into a deep, rich red. High-quality glass from reliable manufacturers will produce predictable and consistent color results. If you’re working with a new color, it’s always a good idea to check the manufacturer’s notes or even run a small test fire. This little bit of prep work can help you avoid surprises and ensure the final colors are exactly what you envisioned for your artwork.
How to Choose the Right Precut Shapes for Your Project
With so many fun shapes available, it’s easy to want to grab them all. But taking a moment to think through your project will help you pick the perfect pieces for a successful design. Choosing the right precut shape involves more than just aesthetics; you also need to consider the technical aspects of your glass. Thinking about compatibility, size, and your final firing plan ahead of time ensures your finished piece comes out of the kiln looking exactly as you imagined.
Match Your COE: COE90 vs. COE96
This is the golden rule of glass fusing: always match your Coefficient of Expansion (COE). COE measures how much glass expands and contracts when heated and cooled. If you mix glass with different COEs, your project will crack, either in the kiln or long after. The two main types you’ll work with are COE90 and COE96. If your project base is made from COE90 glass, every other piece of glass you add, including precut shapes, frit, and stringers, must also be COE90. The same rule applies to COE96. Always check the COE before you buy to ensure all your materials are compatible.
Choose the Right Size and Thickness
Precut shapes are typically made in a standard 3mm thickness, which makes them easy to layer with sheet glass without creating dramatic differences in height. Because they are cut with precision waterjet machines, the edges are clean and uniform, saving you the time and effort of grinding. When selecting shapes, think about the scale of your final piece. A delicate pendant might use tiny, intricate shapes, while a large platter or wall hanging can support bigger, bolder designs. Consider how the shapes will fit together and the overall balance of your composition.
Pair Shapes with Frit, Stringers, and Dichroic Glass
Precut shapes are a fantastic starting point, but the real magic happens when you combine them with other glass elements. Think of your precut shape as the main subject and use other materials to add background, texture, and detail. You can place a shape on a bed of frit to create a sparkly or textured field of color. Use stringers to draw fine lines or add delicate details. For an extra pop, you can even layer smaller pieces of dichroic glass on top of a precut shape to create a focal point that shimmers and changes color. These combinations are what will make your stained glass art truly unique.
Consider Your Firing Schedule and Kiln Temperature
Finally, think about how your project will fire. Different glass manufacturers, like Bullseye and Wissmach, may have slightly different recommended firing schedules to get the best results. The thickness of your overall project also plays a big role. A project with multiple layers will need a different schedule than a single-layer piece. Before you start, it’s a good idea to have a basic firing plan in mind. Many glass suppliers provide helpful charts, and having your own kiln gives you the ultimate control to experiment and perfect your firing process for consistently beautiful results.
How Much Do Fusible Precut Shapes Cost?
Let’s talk about one of the most practical questions every artist has: how much does this actually cost? When it comes to fusible precut shapes, the price can vary quite a bit, so it helps to know what to expect. Think of it like buying any other art supply; a simple circle will cost less than an elaborate, multi-piece design. The final price tag depends on a few key things: the size of the shape, how intricate the design is, and the type of glass used. For example, a standard clear shape will be more affordable than one made from vibrant dichroic glass.
The specific COE of the glass, whether it’s COE90 or COE96, can also influence the cost, though usually not as much as the design’s complexity. While it might feel like an added expense at first, using precuts can actually save you money in the long run. You’ll waste less of your precious sheet glass on tricky cuts and spend less time at the grinder, which frees you up to focus on the fun part: creating. It’s all about finding a balance that works for your budget and your creative process. Understanding the price range helps you plan your projects and your purchases, so you can stock your studio with the shapes you need without any surprises at checkout. Let’s break down what you can expect to pay and how you can get the most value for your money.
Price Ranges by Shape and Complexity
So, what are the actual numbers? For basic geometric shapes like circles, squares, and ovals, you can expect to pay just a few dollars. Prices often start around $3.20 to $7.50, making it easy to stock up on fundamentals. As the designs get more complex, the price naturally goes up to reflect the extra machine time and detail. Intricate shapes like animals, flowers, or delicate snowflakes can range from about $15.90 to $19.95. For a particularly large or detailed specialty shape, you might see prices closer to $28. This range gives you plenty of options, whether you need a simple accent or a stunning focal point for your piece.
How to Save Money on Bulk Orders
If you find yourself using certain precut shapes over and over, buying in larger quantities is a smart move. Many suppliers offer incentives for bulk orders, which is a fantastic way to reduce your overall cost per piece. For example, you can often find deals like free shipping on orders over a certain amount, such as $250. This saves you money and is a great excuse to stock up on your favorite shapes, some extra frit, and other essentials all at once. Planning your projects ahead of time allows you to place one large order instead of several small ones, helping you hit that free shipping threshold and keep your studio well-supplied.
Where to Find the Best Fusible Precut Shapes
Finding a reliable source for your precut shapes is just as important as choosing the right design. The quality of your supplier directly impacts the quality of your finished piece. When you know what to look for, you can find a partner who provides consistent, beautiful glass that makes your projects shine. It saves you time, money, and the frustration of working with subpar materials. Let’s walk through what makes a great supplier and where you can find the shapes you need.
What to Look for in a Supplier
When you’re shopping for precut shapes, pay close attention to the precision of the cuts. The best suppliers use waterjet machines to create shapes with perfectly clean edges and consistent sizing from piece to piece. This precision is what allows you to create seamless, professional-looking designs without extra grinding. A great supplier will also offer a wide variety of shapes suitable for everything from fused glass art to mosaics and stained glass. This versatility means you can find everything you need for your projects, whether you’re making jewelry, ornaments, or a large panel. You’ll also want a supplier who clearly labels their glass, so you always know you’re getting the right COE for your work.
Explore Our Collection at ArtGlassSupplies.com
Here at ArtGlassSupplies.com, we pride ourselves on offering a huge selection of high-quality, fusible precut shapes to bring your ideas to life. You’ll find an extensive inventory of both COE90 glass and COE96 glass, so you can easily find shapes that are compatible with your existing materials. Our precuts are perfect for a wide range of projects, including detailed mosaics, custom jewelry, suncatchers, and unique dishes made with slumping molds. Because we focus on providing precisely cut shapes, you can spend less time at the grinder and more time designing. We’re artists and hobbyists ourselves, so we know how important it is to have reliable materials you can count on for every firing.
Get the Most From Your Precut Glass Shapes
Once you have your beautiful precut shapes, the real fun begins. Using them effectively is about more than just placing them on a kiln shelf. With a little planning and creativity, you can turn these simple pieces into stunning works of art. Here are a few tips to help you make the most of your precut glass collection.
Plan Your Design Before Firing
Think of your precut shapes as puzzle pieces for your next masterpiece. Because they are cut with a waterjet for incredible precision, you can plan intricate designs with confidence. Before you even think about turning on your kiln, lay out your shapes on a piece of paper or your kiln shelf. This lets you see exactly how the final piece will look, ensuring everything fits together perfectly. This simple step helps you avoid surprises and gives you the freedom to experiment with different arrangements until you find one you love.
Combine Shapes with Other Glass Elements
Don’t be afraid to mix and match! Precut shapes are designed to play well with other glass elements, as long as you stick to the same COE. You can create incredible depth and texture by combining your shapes with other materials. Try layering a precut animal shape on a base of COE96 glass sheets, then accenting it with colorful frit or delicate stringers. Combining different forms of glass is a fantastic way to add your personal touch and create a piece that is truly one of a kind.
Build a Versatile Collection Over Time
It’s tempting to buy every shape you see, but a more strategic approach is to build your collection over time. Start with a few versatile basics like circles, squares, and leaves. As you work on more projects, you can add specialty shapes that fit your artistic style, like holiday themes, letters, or specific animals. Having a curated collection on hand means you’ll always have the right piece ready when inspiration strikes. This method is not only budget-friendly but also ensures your stash is full of shapes you’ll actually use and love.
Related Articles
- 5 Creative Projects Using Precut Glass Shapes
- A Complete Guide on, How to Prepare for Glass Fusing?
- Fused Glass Circles: Trends, Techniques & Sustainable Art
- Guide to Stained Glass Circles: Buying, Precutting & Using
Frequently Asked Questions
Do I need to clean precut shapes before I fire them? Yes, absolutely. Just like with any other glass you use, it’s a good habit to give your precut shapes a quick cleaning before they go into the kiln. They can pick up dust or oils from handling, which can cause hazy spots or devitrification during firing. A simple wipe with a lint-free cloth and some isopropyl alcohol is usually all it takes. Starting with a clean surface ensures your final piece is as clear and vibrant as possible.
Can I use these shapes for stained glass projects, or are they only for fusing? While they are designed with fusing in mind, you can certainly incorporate them into your stained glass or mosaic projects. Because they have such clean, precise edges, they can save you a lot of time at the grinder. You can use them as a central element or as repeating accents in a panel. Just remember that you don’t need to worry about COE compatibility when you’re using the copper foil or lead came method, since the pieces aren’t being melted together.
What happens if I accidentally mix COE90 and COE96 glass? Mixing different COEs is a recipe for heartbreak, unfortunately. Because COE90 and COE96 glass expand and contract at different rates when heated, they create immense internal stress as your project cools. This almost always results in cracks, which can appear as soon as the piece is cool or even weeks later. To avoid this, it’s best to keep your COE90 and COE96 glass stored separately and always double-check that all your elements, including precuts and frit, are compatible before you start.
Can I cut or reshape a precut shape if I need to? You can, but it often defeats the purpose of using them. The main benefit of a precut shape is its perfect, waterjet-cut edge that saves you from cutting and grinding. If you need to alter a shape, you can certainly nip or score it just like any other piece of glass. Just be prepared to grind the new edge smooth to match the quality of the original cut. It’s usually easier to find a shape that fits your design from the start.
How does the final look change with different firing temperatures? Your firing schedule has a huge impact on the final texture of your piece. If you fire to a high temperature for a full fuse, the precut shape will melt completely into the base glass, creating a smooth, flat surface. If you use a lower temperature for a tack fuse, the shape will stick to the base but retain its dimension and defined edges. This is a great way to create texture and a layered look in your art. Experimenting with different temperatures gives you more creative control over the final result.