
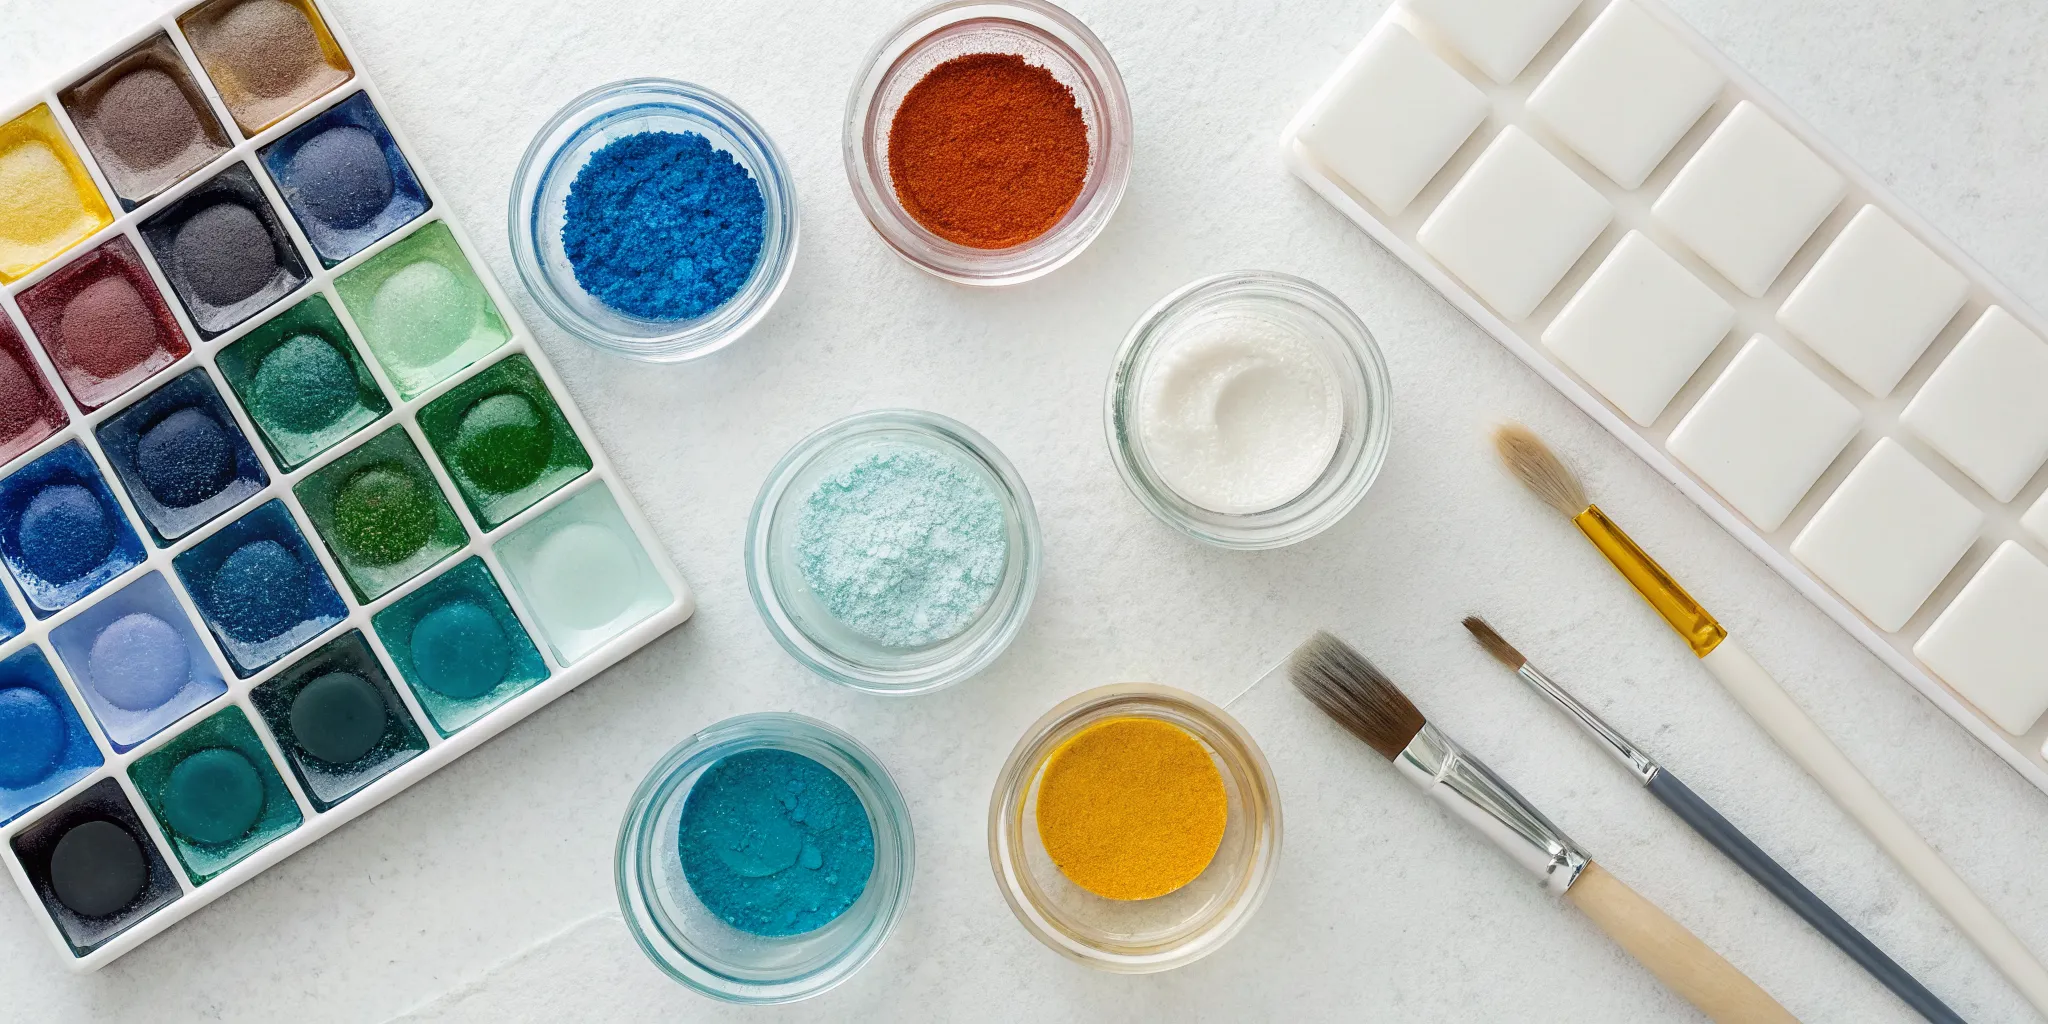
Adding fine details like a face or delicate script to your work can feel impossible with just cutting glass. That’s where glass fusing paint comes in. This technique opens up a whole new world, letting you draw and paint directly onto your glass to create everything from bold designs to soft, watercolor effects. But getting those permanent, beautiful results depends on using the right materials. This guide will help you confidently choose the best glass fusing paint supplies, covering COE compatibility, firing schedules, and top brands so you can start painting on glass with success.
Key Takeaways
- Set your project up for success: Always start with a perfectly clean glass surface and stick to a single COE (like COE90 or COE96) for all glass in your project to prevent cracks during firing.
- Choose paints strategically: Match your paint to your project by considering its firing temperature, opacity, and consistency. This ensures the paint behaves as you expect and is compatible with your glass and kiln schedule.
- Fire with confidence, not guesswork: Always test your paint colors on scrap glass first, since their appearance can change in the kiln, and follow the manufacturer’s recommended firing schedule for a flawless finish.
What Are Glass Fusing Paints?
If you’re looking to add intricate details, vibrant colors, or delicate lines to your glass art, fusing paints are a game-changer. Think of them as a special type of paint designed to become one with the glass after being fired in a kiln. Unlike cutting and placing tiny glass pieces, painting gives you the freedom to draw, write, and create complex imagery with a brush. This opens up a whole new world of creative possibilities for your fused glass projects. Let’s get into what makes these paints unique and how to choose the right ones for your art.
Fusing Paint vs. Regular Glass Paint: Know the Difference
The main difference between fusing paints and regular glass paints is heat. Fusing paints are specifically formulated with finely ground glass particles and pigments that are designed to be fired in a kiln at high temperatures. During firing, the paint melts and permanently fuses into the surface of your glass, creating a durable, long-lasting design. Regular craft store glass paints, on the other hand, are typically air-dried or cured at low oven temperatures. While they’re fine for decorative items that won’t be handled much, they aren’t meant for the intense heat of a kiln and won’t properly bond with fused glass art. Using fusing paints lets you add details that are as strong and permanent as the glass itself.
Powdered vs. Pre-Mixed: Which Is Right for You?
Glass fusing paints generally come in two forms: powdered and pre-mixed. Powdered paints are exactly what they sound like, a dry powder that you mix with a liquid medium, such as water or a special binder, to get your desired consistency. This gives you a lot of control, allowing you to make a thin wash for watercolor effects or a thicker paste for bold lines. Pre-mixed paints are ready to use right out of the bottle. They are incredibly convenient, especially for beginners, as you can skip the mixing step and get straight to painting. Your choice will likely come down to personal preference and how much you enjoy the process of preparing your materials.
Low Fire vs. Easy Fire Enamels
As you explore fusing paints, you’ll notice two common types: Low Fire and Easy Fire enamels. The key difference between them is the temperature they need to mature inside the kiln. Low fire enamels, true to their name, fuse at lower temperatures—usually between 1200-1300°F. This lower heat makes them ideal for achieving a tack fuse or preserving texture in your design. They’re also quite versatile, working well with both COE90 and COE96 glass. On the other hand, Easy Fire enamels need a bit more heat, around 1400°F, to produce those really vibrant, glossy colors you get with a full fuse. No matter which type you pick, always follow the manufacturer’s firing schedule. It’s the best way to make sure your finished piece looks exactly how you planned.
What Is COE and Why Does It Matter?
If you’ve worked with glass fusing, you know how important COE, or the Coefficient of Expansion, is. It measures how much glass expands and contracts when heated and cooled. Using glass with a matching COE is essential to prevent your project from cracking. Here’s the great news: most fusing paints are not COE-specific. This means you can use the same set of paints whether you’re working with COE90 glass or pieces of COE96. Because the paint layer is so thin, it doesn’t create the stress that fusing two incompatible sheets of glass would. This flexibility makes it easy to experiment with paints across all your different stained glass and fusing projects without needing to buy separate products.
Creative Applications: From Jewelry to Stained Glass
Once you start using fusing paints, you’ll see opportunities to add detail everywhere. These paints give you the freedom to add everything from crisp, graphic lines to soft, painterly washes of color on your glass projects. Imagine creating delicate floral patterns on a fused glass pendant or writing a personalized message on a handmade plate. Because the paint becomes a permanent part of the glass once fired, your designs will be durable and vibrant. This technique is also a fantastic way to add intricate details to traditional stained glass panels, allowing you to paint faces, textures, and other features onto the glass before you assemble the piece. The creative control is entirely in your hands.
Expanding Your Craft: Using Enamels on Other Materials
One of the best things about glass fusing paints and enamels is their incredible versatility. Since they aren’t COE-specific, you aren’t limited to using them on just your COE90 or COE96 fusing projects. You can confidently apply these same paints to any type of glass, including window glass, bottles you want to upcycle, or even pre-made glass ornaments. This means you can invest in one set of high-quality paints and use them across a wide range of artistic endeavors. This flexibility allows you to experiment freely and get the most out of your studio supplies without worrying about compatibility issues.
Working with Metals and Ceramics
Your creative journey with enamels doesn’t have to stop with glass. Many glass painting powders work beautifully on other materials that can withstand kiln temperatures, such as ceramics and certain metals. When applied to a glazed ceramic piece, the enamel powder will fuse to the surface during firing, creating a colorful, permanent design. The process of fusing glass enamel to metal is a classic art form in itself, allowing you to create stunning jewelry and decorative metalwork. While firing schedules and surface preparation may vary, the fundamental principle is the same: you’re melting glass to create a beautiful, durable finish on another surface.
Your Essential Glass Painting Supply List
Before you can bring your colorful ideas to life, you need to set up your workspace with the right tools. Having everything you need on hand before you start makes the creative process so much smoother and more enjoyable. Think of it as your artist’s toolkit for glass painting. Gathering these essentials will ensure you’re ready for inspiration to strike and can focus on your design instead of hunting for a missing item. Let’s walk through exactly what you’ll need to get started on the right foot.
Choosing Your Paints and Enamels
First up are the stars of the show: the paints. Glass fusing paints and enamels are specially made to permanently bond with glass when fired. Unlike regular craft paints, they contain fine glass particles that melt and fuse to your surface in the heat of a kiln. You’ll find them in two main forms: powders that you mix with a medium, and pre-mixed liquids that are ready to go right out of the bottle. Both allow you to add stunning details, vibrant colors, and unique effects to your glass art.
The Best Brushes and Applicators for the Job
To get that paint onto the glass, you’ll want a good selection of brushes. You don’t need the most expensive set, but having a variety of shapes and sizes is key. A few fine-tipped brushes are perfect for creating delicate lines and intricate details, while flat or rounded brushes work well for filling in larger areas. Don’t be afraid to experiment with other applicators, too. Sponges, styluses, and even palette knives can create interesting textures and effects that a standard brush can’t.
Specialty Tools: Sifters, Spatulas, and Paint Pens
Beyond brushes, a few specialty tools can open up new creative avenues with your fusing paints. These simple items give you more control over your application, allowing you to achieve specific textures and effects that are difficult to create with a brush alone. Think of them as your secret weapons for adding that extra layer of polish and detail to your work. Having sifters, spatulas, and paint pens in your toolkit means you’re prepared to tackle any design idea, from soft, blended backgrounds to sharp, intricate linework. Exploring these different applicators is a great way to expand your artistic range.
Sifters are your best friend when working with powdered paints. They help you sprinkle the powder evenly across your glass, which is key for getting a smooth, consistent color without any clumps or blotches. This is how you achieve those beautiful, soft gradients or solid fields of color that look so professional. A spatula is another versatile tool, perfect for mixing powdered paints with a medium to get that just-right consistency. You can also use its edge to apply thick lines of paint or even scrape away color to create interesting textures and patterns.
For anyone who loves fine detail, paint pens are a must-have. These pens come pre-filled with fusible paint, letting you draw directly onto the glass with incredible precision. They are perfect for adding signatures, intricate patterns, or crisp outlines without the setup and cleanup of a traditional brush. If you find your hands aren’t quite steady enough for super fine brushwork or you just want a quick and easy way to add detail, these pens are a fantastic solution for your studio. They offer a level of control that makes detailed work much more approachable and fun.
Must-Have Palettes and Mixing Tools
If you’re using powdered paints, a palette and some mixing tools are non-negotiable. A simple ceramic tile or a glass plate makes an excellent, easy-to-clean palette. You’ll need a small tool, like a palette knife or a dedicated mixing spatula, to combine the powdered paint with your liquid medium. This step is all about getting your paint to the perfect consistency. You’re aiming for a smooth, flowing texture that’s easy to apply without being too watery or too thick.
Supplies for Prepping Your Glass Surface
This might be the most important step that beginners skip, so listen up: you must start with perfectly clean glass. Any fingerprints, dust, or oils on the surface can prevent the paint from adhering properly and may cause imperfections in your final piece. All you need for this is a good glass cleaner or some isopropyl alcohol and a few lint-free cloths. A quick wipe-down before you start painting ensures your colors will fuse beautifully to your COE90 glass and look their best.
Essential Safety Gear for Glass Fusing
Working with glass and powdered materials requires a few safety precautions. Always protect your eyes. A comfortable pair of safety glasses will shield you from any accidental glass chips or splashes. If you are working with powdered paints or enamels, wearing a dust mask or a respirator is also a great idea. Inhaling fine glass or pigment particles is something to avoid, so it’s best to be cautious. Taking these simple steps ensures your studio time is both creative and safe.
Kiln Ventilation for Fume Safety
Let’s talk about something really important: kiln ventilation. While the glass itself is stable when fired, the paints and enamels you use contain binders and other materials that can release fumes. To keep your studio air clean and safe, you absolutely need to ventilate your kiln during firing. As artists on forums like WarmGlass.com often advise, proper ventilation helps clear out potentially harmful fumes that come from the paint’s binding agents. This isn’t a step you want to skip. A simple and effective solution is to install a kiln vent system or an exhaust hood that ducts the fumes directly outside. Making sure your kiln is properly ventilated is a critical part of a safe setup, protecting your health so you can focus on your art.
Choose the Right Glass for Your Project
Before you even think about paint, you need to select your canvas: the glass itself. The type of glass you choose is the foundation for your entire project, and in glass fusing, not all glass is created equal. The most important factor to understand is the Coefficient of Expansion, or COE. Think of COE as a compatibility rating. It measures how much glass expands when heated and shrinks when cooled. For a successful fusion, all the glass pieces in your project must have the same COE. If you mix different COEs, your beautiful creation will likely crack or even shatter in the kiln, which is a heartbreaking experience for any artist.
The golden rule of glass fusing is simple: stick to one COE per project. The two most common types you’ll encounter are COE90 and COE96. While the numbers seem close, they are not interchangeable. Each has its own unique characteristics and is suited for different kinds of projects. Choosing the right one isn’t about which is “better,” but which is better for what you want to create. Understanding the difference will help you pick the perfect glass for your artistic vision. Let’s look at what makes each one special and how to decide which is right for you.
Working with COE 90 Glass
If your project involves fine details or needs to be extra durable, COE90 glass is an excellent choice. This type of glass is known for its strength and stability, making it a favorite among artists creating intricate patterns, delicate jewelry, or functional pieces that will be handled often. Its slightly lower rate of expansion helps create crisp, detailed results without distortion. When you’re working on a piece that demands precision and a sturdy finish, reaching for COE90 is a smart move. It provides a reliable base that can support complex designs and multiple firings.
Working with COE 96 Glass
For projects where vibrant color and a smooth, glossy finish are the main goals, COE96 glass is a fantastic option. This glass is often described as more “forgiving” because its slightly higher expansion rate makes it less prone to trapping air bubbles during the fusing process. This results in a beautifully smooth and luminous surface that makes colors pop. Many beginners find this forgiving glass easier to work with, and its wide range of brilliant colors makes it perfect for creating eye-catching decorative pieces, suncatchers, and bold, colorful plates.
Using Precut and Specialty Glass Shapes
Feeling a little intimidated by the idea of cutting glass? You’re not alone. A great way to get started is by using precut and specialty shapes. These ready-to-use pieces let you skip the cutting process and jump straight into designing your project. You can find circles, squares, hearts, leaves, and all sorts of fun shapes that serve as a perfect base or as decorative elements. This approach saves time and allows you to focus on your creativity and painting techniques. Just be sure to check that the precut glass shapes you buy match the COE of your base glass.
How to Choose the Best Glass Fusing Paints
Walking down the aisle of fusing paints can feel a little overwhelming, but don’t worry. Choosing the right paint is all about matching the product to your project’s needs. Think of it like picking the perfect COE90 glass for your base; the paints you choose will define the character and final look of your piece. It’s not just about the color, but also about how the paint behaves on the glass and in the kiln. Getting this right is the difference between a piece you love and one that goes into the “learning experiences” pile.
Before you buy, it helps to consider a few key factors that will guide your decision. You’ll want to think about the color palette and opacity you’re aiming for, the paint’s required firing temperature, and its consistency for different application techniques. You should also consider how easy it is to work with, especially if you’re just starting out, and always prioritize safety by choosing non-toxic options. Taking a moment to understand these elements will make your shopping trip much more productive and your studio time more successful. Let’s break down what each of these means for you and your art.
Considering Color Range and Opacity
The most exciting part of choosing paints is exploring the colors. Fusing paints come in a huge spectrum, from vibrant primary colors to subtle, earthy tones. When you’re looking at colors, also pay attention to their opacity. Some paints are transparent, allowing light to pass through and creating a delicate, stained-glass effect. Others are opaque, providing solid coverage that’s perfect for bold designs or creating a background. You can find paints as ready-to-use liquids or as powders that you mix with a medium, giving you control over the final shade and consistency.
Example Color Palettes
Sometimes the hardest part is just deciding where to start with color. If you need a little inspiration, think in terms of a theme. For a coastal feel, you could combine deep transparent blues, sandy opaque tans, and a pop of seafoam green to create beautiful ocean-inspired plates or jewelry. For something warmer, try a sunset palette by layering vibrant opaque oranges and reds with a touch of transparent yellow for a stunning gradient effect. Don’t feel locked into these ideas, though. The best palettes often come from your own experimentation. A great way to find inspiration is to browse through different sheets of COE96 glass and see which colors naturally catch your eye. Ultimately, there are no wrong answers, and your favorite colors are always a great place to start.
Matching Paint to Your Firing Temperature
This is a big one. Every fusing paint has an ideal firing temperature range, which is the temperature it needs to reach in a kiln to mature and permanently bond to the glass. It’s essential to match the paint’s firing schedule with the one recommended for your glass. If the temperatures don’t align, you might end up with colors that are dull, cracked, or haven’t fused properly. Always check the manufacturer’s guidelines for both your paint and your glass to ensure they are compatible before you even think about turning on your kiln.
Key Temperature Ranges for Enamels
Let’s talk numbers. While every enamel is a little different, most follow a similar path inside the kiln. Think of it in two stages. The first key temperature is when the enamel powder begins to stick to the glass, which usually happens around 1250°F. At this point, it’s adhered, but it won’t have that finished, glossy look yet. To get that beautiful, shiny surface, you need to bring the temperature up higher, typically into the 1300°F to 1400°F range. This is where the enamel fully matures and fuses, creating a smooth, permanent design. Knowing these ranges helps you program your kiln with more confidence and predict how your colors will develop.
What to Look for in Paint Consistency and Flow
The consistency of your paint will determine how it feels to apply it. Some paints are thin and flowy, perfect for creating fine lines with a detail brush or a pen-like applicator. Others are thicker, with a more paste-like texture that’s great for stenciling, screen printing, or covering larger areas with a brush. Many powdered paints allow you to adjust the consistency by changing the paint-to-medium ratio, giving you the flexibility to create the exact flow you need for your specific design.
Finding Beginner-Friendly Paints
If you’re new to glass painting, look for paints that are beginner-friendly. One of the best features of many fusing paints is that they are forgiving. If you make a mistake while painting your design, you can often just scrape the paint off before firing and start over. Pre-mixed liquid paints are also a great choice for beginners because they eliminate the guesswork of mixing powders and mediums. They let you open the jar and get straight to the creative part, which is always a plus.
Choosing Safe, Non-Toxic Options
Safety should always be a priority in your studio. When shopping for paints, look for options that are labeled non-toxic. These paints are formulated to be safe to handle and use in their unfired state. However, remember that firing any material in a kiln can release fumes. It is absolutely essential to work in a well-ventilated area and follow all safety recommendations for your kiln. If you plan on making functional pieces like plates or bowls, you’ll also need to check if the paints are rated as food-safe after firing.
Our Favorite Glass Fusing Paint Brands
When you’re just starting, it helps to know which brands other artists trust. While there are many great paints out there, a few names consistently come up in studios and workshops because of their quality, reliability, and ease of use. Trying products from these established brands is a great way to set yourself up for success and learn what you like without worrying about poor-quality materials. Think of it as learning to cook with good, fresh ingredients; it just makes the whole process better. Here are a few top brands that are perfect for beginners and pros alike.
Bullseye Glass Co: A Trusted Choice
You’ve probably heard of Bullseye Glass, and for good reason. They are a giant in the glass world, known for their exceptionally high-quality products. Their line of glass enamels and fusible paints lives up to this reputation. Because Bullseye is a leading manufacturer of COE90 glass, their paints are formulated to work perfectly with it, taking the guesswork out of compatibility. This makes them a fantastic choice if you’re already working with Bullseye glass sheets. You can trust that the colors will fire beautifully and bond permanently, giving you consistent, professional results every time you open the kiln.
Fuse Master: For Vibrant Colors
If you’re looking to add fine lines, signatures, or intricate details to your work, Fuse Master should be on your radar. Their fusible paints are celebrated for being incredibly easy to use, which is a huge plus when you’re just starting. You don’t need to fight with the consistency to get a clean line. They offer a range of products that are perfect for detailed work, allowing you to draw on glass with precision. This makes them ideal for artists who want to incorporate illustrative elements into their fused glass pieces without a frustrating learning curve. It’s a straightforward way to add that personal, hand-drawn touch to your projects.
Glassline: Perfect for Detail Work
Glassline Paints are another favorite, especially for artists who love the feeling of drawing or writing on glass. These paints are specifically designed for glass and are made to be fired in a kiln, ensuring a permanent, vibrant finish. Many of their products come in bottles with fine-tipped applicators, which makes them feel like pens. This allows for a lot of control and makes detailed work feel intuitive and accessible, even for beginners. Their popularity comes from this user-friendly design combined with reliable, beautiful results. If you want to write text, create outlines, or doodle on your glass, Glassline is an excellent choice.
Unique Glass Colors: For Special Effects
Just as the name suggests, Unique Glass Colors offers a versatile range of fusing paints that give you plenty of creative freedom. One of their biggest advantages is that their paints can be used on any type of glass, regardless of the COE. This is a huge benefit for artists who work with both COE90 and COE96 glass or who simply want to experiment without buying multiple sets of paints. This flexibility allows you to focus more on your design and less on technical restrictions. For artists building a new studio or hobbyists wanting an all-in-one solution, their products are a smart and economical choice.
Thompson Enamel: For Versatility
Thompson Enamel is another fantastic brand to have in your studio, especially if you love versatility. They offer special enamel powders that are specifically designed for painting on glass. You simply mix the powder with a painting liquid to your preferred consistency and apply it to your glass surface. After firing in a kiln, the powder transforms into a durable, colorful design that becomes a permanent part of your art. This process gives you incredible control to add painterly details and enhance your artistic expression, whether you’re working on a small jewelry piece or a larger decorative panel. Their products are a great way to expand your creative toolkit beyond basic layering.
More Brands to Explore: EZ-Fuse, Color Line, and Milton Bridge
As you continue to explore glass painting, you’ll come across other trusted names like EZ-Fuse, Color Line, and Milton Bridge. These brands are well-regarded by artists for their quality and reliability. Each offers a unique variety of enamels and paints that cater to different artistic styles and project requirements. Whether you need a specific color, a particular consistency, or a paint that works well with certain techniques, exploring these brands can help you find the perfect match for your vision. Don’t be afraid to experiment with a few different products to see which ones you enjoy working with the most. Finding your favorite paint is part of the fun of the creative process.
Your Step-by-Step Guide to Painting on Glass
Ready to add beautiful, painted details to your glass projects? It’s a fantastic way to bring intricate designs to life. The process is simpler than you might think, and it all comes down to following a few key steps. From preparing your surface to the final firing, we’ll walk you through everything you need to know to get started with confidence. Let’s begin.
Step 1: How to Properly Prep Your Glass
Before a single drop of paint touches your glass, you need to make sure the surface is perfectly clean. Any fingerprints, dust, or oils can prevent the paint from adhering properly and can cause issues during the firing process. Start by washing your glass with warm, soapy water, then rinse it thoroughly. For a streak-free finish, you can wipe it down with a lint-free cloth and a bit of denatured alcohol. Taking a few extra minutes to prep your glass properly is one of the most important things you can do to ensure a beautiful, professional-looking final piece. A clean slate is the foundation of great glass art.
Step 2: Getting Your Paint Consistency Right
Now for the fun part: preparing your colors. If you’re using pre-mixed paints, you can often use them straight from the bottle, though you might want to give them a good shake first. For powdered paints, you’ll need to mix them with a medium. Water works, but a specialized fusing medium can give you better consistency and workability. Add the liquid a little at a time, mixing until you have a smooth paste, similar to the consistency of ink or heavy cream. You want it to flow from your brush without being watery. Getting the right mix is key for vibrant colors on your COE90 glass projects.
Choosing a Mixing Medium
When you’re working with powdered paints, you’ll need a liquid to turn them into a usable paint. This liquid is called a mixing medium. While you can use distilled water in a pinch, many artists prefer using a specialized medium designed for glass fusing. These binders help the paint flow smoothly, adhere better to the glass before firing, and can prevent the paint from flaking off as it dries. The key benefit of using a medium is the control it gives you. By adjusting the ratio of powder to liquid, you can create anything from a thin, watercolor-like wash to a thick, opaque paste perfect for creating bold lines or stenciling. This flexibility is one of the biggest advantages of working with powdered enamels.
Step 3: Painting Your Design on Glass
With your surface prepped and your paint mixed, it’s time to get creative. You can use a variety of tools to apply your design. Fine-tipped brushes and applicators are perfect for detailed lines and lettering, while sponges can create interesting textures. Don’t be afraid to experiment on a scrap piece of glass first to see how the paint behaves. You can layer colors, but be mindful not to apply the paint too thickly, as this can cause cracking or bubbling in the kiln. Remember, this is your chance to add a personal touch and create something truly unique. Let your imagination guide you.
Step 4: Firing Your Piece for a Perfect Finish
The final step is firing your piece to permanently set the paint. This is where the magic happens, as the heat fuses the paint to the glass. Every kiln and paint brand is different, so it’s essential to follow the recommended firing schedule. You can usually find this information on the paint manufacturer’s website or packaging. Always start with your kiln’s user manual to understand its specific settings and capabilities. A typical firing schedule involves a slow ramp-up in temperature, a hold at the target temperature, and a controlled cool-down. If you’re in the market for new equipment, you can find a range of kilns suitable for every project size.
Avoid These Common Beginner Mistakes
We’ve all been there. You spend hours on a piece, only to pull it from the kiln and find a crack, bubble, or color you didn’t expect. It’s part of the learning process, but many of the most common frustrations are completely avoidable. When you’re just starting with glass fusing paints, a little bit of knowledge can save you a lot of heartache. Think of these tips as your friendly guide to sidestepping those early pitfalls. By building good habits from the start, you can ensure more of your projects turn out exactly as you imagined. Let’s walk through some of the most frequent mistakes beginners make and how you can steer clear of them for beautiful, flawless results every time.
Mistake #1: Skipping the Prep Work
Think of clean glass as a perfect, blank canvas. Any fingerprints, dust, or oils left on the surface can create major problems during firing. This residue acts as a barrier, preventing the paint from bonding properly to the glass and stopping glass layers from fusing together completely. This can lead to weak spots, cloudiness, or bubbles in your finished piece. Before you even think about picking up a brush, take the time to thoroughly clean your glass. Use a lint-free cloth and a glass cleaner or simply soap and water. Just be sure to rinse it well and let it dry completely before you start painting.
Mistake #2: Applying Paint Too Thickly
It can be tempting to lay on a thick coat of paint for a bold, opaque look, but this often does more harm than good. A heavy layer of paint can trap moisture and air. When heated in the kiln, that trapped material expands and can cause your paint to bubble, blister, or even crack your glass. For best results, apply your paint in thin, even coats. If you want a more opaque color, it’s better to apply two thin layers, letting the first one dry completely before adding the second. This small bit of patience will give you a much smoother and more professional finish.
Mistake #3: Mixing Incompatible Paints or Glass
This is a crucial rule to remember. Mixing paints that aren’t designed to work together can lead to some seriously disappointing results, including cracking, discoloration, or a failed fuse. Always check the manufacturer’s guidelines before mixing different brands or even different lines of paint from the same brand. More importantly, you must always match the Coefficient of Expansion (COE) of your materials. Glass-based paints and accessories must have the same COE as your base glass. For example, you should only use COE90 accessories with COE90 glass to prevent stress fractures during cooling.
Mistake #4: Ignoring Firing Schedules
A firing schedule is your project’s recipe for success in the kiln. It’s a detailed plan that dictates how fast the kiln heats up, how long it holds at specific temperatures, and how slowly it cools down. Ignoring the recommended schedule for your specific paints and glass is a gamble. Firing too quickly can cause thermal shock and crack your piece, while improper cooling (annealing) can leave stress in the glass that causes it to break later. Always consult the paint manufacturer’s instructions and your kiln’s user manual to find the right firing schedule for your project.
Mistake #5: Forgetting to Test Your Colors
The color you see in the paint jar is often not the color you’ll see after it comes out of the kiln. Firing is a chemical process that can dramatically change a paint’s appearance, shifting its hue, shade, and opacity. To avoid unpleasant surprises on your final piece, get into the habit of testing your colors first. Create a small test tile using scraps of the same glass you’ll be using for your project. Apply a small swatch of each color and fire it using your planned schedule. This gives you a permanent, accurate color reference you can use for all your future projects.
Choosing the Right Kiln and Molds for Your Studio
Once you’ve painted your masterpiece, the kiln is where your design becomes a permanent part of the glass. This is the step that transforms your flat, painted piece into a durable work of art. If you want to add shape and dimension, molds come into play. Choosing the right equipment can feel like a big decision, but it’s all about matching the tools to the kind of art you want to create. Let’s walk through what you need to know to make a confident choice for your studio.
How to Choose a Kiln
I get it, picking your first kiln can feel like a huge decision, but you don’t have to be an expert to get started. The most important thing is to find one that fits the size of your projects and your budget. Think about the kinds of pieces you want to make. Are you creating small jewelry pendants or larger plates and bowls? This will help you determine the right size. Modern kilns with digital controllers make programming firing schedules much easier, which is a huge plus for beginners. Once you have your kiln, its user manual will become your best friend. It provides the essential firing schedules you’ll need to properly fuse your painted glass without any frustrating surprises.
How to Use Molds for Shape and Dimension
Molds are what give your fused glass projects their final form, turning a flat panel into a functional dish, a curved sculpture, or a decorative plate. The process, often called slumping, involves placing your painted glass over or into a mold and heating it in the kiln until it softens and takes the mold’s shape. For example, you can create a beautiful, shallow bowl by slumping your glass over a gently curved form. This is a fantastic way to add function to your art. There are countless molds available, from simple circles and squares to more complex shapes like leaves and fluted bowls, giving you endless creative possibilities.
My Go-To Tips for Flawless Results
Once you have the basics down, you can start refining your technique to create truly stunning pieces. Glass fusing is a delicate balance of art and science, where small details can make a huge difference in your final result. Even seasoned artists rely on a few key practices to ensure their work comes out of the kiln looking exactly as they envisioned. These tips will help you move past the beginner phase and start producing professional-quality fused glass art with confidence.
Always Test Your Colors and Techniques First
One of the biggest mistakes you can make is applying a new paint or color combination directly to your main project without testing it first. Colors can shift dramatically in the kiln, and what looks like a deep red in the jar might fire to a light orange. Create a small library of test tiles using scrap glass. On these, you can see how different paints look after firing, how they layer, and how thick or thin you should apply them. The great thing about glass paint is that before firing, you can usually just scrape the paint off if you make a mistake. Testing first saves you from wasting a beautiful piece of COE90 glass and a lot of frustration.
Have Fun Experimenting with Different Techniques
Don’t be afraid to play! Fusing glass is a creative process, and discovering your unique style comes from experimentation. Go beyond simple brushstrokes and try different application methods. Use a sponge to create texture, try stippling for a dotted effect, or apply a layer of paint and then gently scratch a design into it (a technique called sgraffito). You can also combine your painting with other elements. Try sprinkling fine frit over wet paint or laying glass stringers into your design before firing. Using molds can also add another layer of creativity, allowing you to paint on a piece that will become a bowl or a plate.
How to Properly Store and Maintain Your Supplies
Taking good care of your tools and materials is essential for getting clean, consistent results. Dirty glass is one of the biggest culprits behind fusing failures. Always clean your glass thoroughly with a lint-free cloth and a glass cleaner or alcohol to remove any fingerprints, dust, or oils before you start painting. These residues can prevent the paint from adhering properly and may cause bubbles or cloudiness. Be sure to store your paints with the lids sealed tightly to keep them from drying out. Clean your brushes immediately after use to maintain their shape and prevent colors from mixing unintentionally.
Where to Find More Tutorials and Inspiration
You don’t have to learn everything on your own. There is a huge community of glass artists and a wealth of information available to help you grow your skills. Look for online video classes that can walk you through specific projects and techniques. Many local art centers and paint-your-own-pottery studios now offer glass fusing classes, which are a great way to get hands-on experience with different tools and kilns. Joining online forums or social media groups for glass fusers is another fantastic way to ask questions, share your work, and get inspired by what other artists are creating.
Where to Buy Your Supplies
Once you have your shopping list ready, the next step is finding the right place to buy your supplies. The quality of your materials, especially your glass and paints, will have a big impact on your final piece. You have a few great options, from specialized online stores that cater specifically to glass artists to local studios where you can see the products firsthand. Let’s walk through where to look so you can find everything you need with confidence.
Why We Love ArtGlassSupplies.com
As a dedicated online retailer for glass artists, we’ve built our shop to be a comprehensive resource for everything you need. You can find a huge selection of both COE90 and COE96 glass, so you never have to worry about compatibility issues. We carry top paint brands alongside all the essential tools, from brushes to safety gear. The best part about shopping with a specialist is that we get it; we know the difference a quality product makes. Whether you’re looking for your first kiln or experimenting with intricate molds for adding dimension, you can find carefully selected products that we trust for our own projects. It’s like having an expert guide your shopping experience.
Finding Everything You Need in One Place
There’s nothing worse than being hit with a brilliant idea, only to realize you’re missing a key supply. We believe you should spend your time creating, not hunting for materials. That’s why we’ve made it our mission to be a one-stop shop where you can find everything from your base COE90 glass to the specific fusing paints you need to bring your design to life. Because these paints are designed to be fired in a kiln and become a permanent part of your art, quality matters. You can stock up on your favorite brushes, mixing tools, and even explore different molds to add shape and dimension to your work. Having all your essentials in one place means you’re always ready when inspiration strikes.
Other Reputable Online Retailers
While we’d love to be your one-stop shop, it’s always smart to know your options. Other large online retailers, like Delphi Glass, also offer a wide range of materials for glass artists. These stores often cater to many different types of glass art, not just fusing, so you might find supplies for stained glass or beadmaking all in one place. This can be convenient if you’re exploring multiple crafts. Many of these sites are reputable and have been serving the community for years. Just be sure to double-check the COE of any glass you buy to ensure it’s compatible with your existing supplies and the paints you plan to use. Exploring different suppliers can help you get a feel for the market.
Checking Your Local Craft Stores
There’s a definite advantage to seeing supplies in person, especially when it comes to the vibrant colors of glass and paints. While big-box craft stores may have a limited selection, your best bet for local shopping is a dedicated glass art studio. These specialty shops are run by fellow artists who can offer invaluable advice. Another great local resource can be paint-your-own-pottery (PYOP) studios. Since pottery and glass fusing often use the same type of kiln, many of these studios have expanded to offer glass fusing classes and may sell basic supplies. It’s a perfect way to connect with your local creative community and get hands-on help when you’re just starting out.
How to Find the Best Deals
Building your supply collection doesn’t have to break the bank. A great first step is to sign up for email newsletters from your favorite suppliers (including us!). This is the best way to get notified about exclusive promotions, new product arrivals, and seasonal sales. Many online stores also have a dedicated “Sale” or “Clearance” section where you can find great prices on discontinued items or overstocked supplies. As you get more comfortable, consider buying frequently used items like clear sheet glass or black paint in larger quantities to save money. Starter kits are another fantastic option for beginners, as they bundle all the essentials at a lower price than buying each item separately.
Understanding Product Costs and Sizes
When you start shopping, you’ll notice that fusing paints are often sold in small jars, typically around two ounces. Don’t let the small size fool you; a little bit goes a very long way. These paints come in two main forms: pre-mixed liquids and special enamel powders. The powders are designed to be mixed with a painting liquid and then fired in a kiln to create durable, colorful designs. While pre-mixed paints offer convenience, powdered enamels can be more economical over time since you only mix what you need for each session. The cost will vary by brand and color, with some specialty colors like reds and pinks often being a bit more expensive due to the raw materials used to create them.
Factoring in Shipping and Looking for Sales
Glass art supplies can be heavy, so shipping costs are something to keep in mind. To make your order more cost-effective, try to bundle your purchases. If you know you’ll need glass, paints, and a new mold, ordering them all at once can save you money on shipping fees. It’s also a great idea to keep an eye out for sales. Many online stores, including ours, run promotions like “Buy One Get One 50% Off” deals, which are perfect for stocking up. Signing up for email newsletters is the best way to get a heads-up on these bargains, ensuring you never miss a chance to save.
Using Customer Reviews to Guide Your Purchase
One of the best resources you have when shopping online is the experience of other artists. Many items have customer reviews, which show that people are actively buying and using these products. When you’re looking at a new paint color or brand, take a minute to read through the feedback. Look for comments on how true the color fired, how easy the paint was to apply, or if it worked well for a specific technique you want to try. These real-world insights can give you the confidence to try something new or help you choose between two different molds. It’s like getting a recommendation from a friend in your studio.
Related Articles
- Best Paints for Glass Art: From Windows to Decorative Pieces
- A Complete Guide on, How to Prepare for Glass Fusing?
- The Best Paint for Glass and How to Use It – ArtGlassSupplies
- How to Make Glass Jewellery in 7 Simple Steps – ArtGlassSupplies
- The Ultimate Glass Fusing Kiln Guide for Artists – ArtGlassSupplies
Frequently Asked Questions
Can I just use the glass paint from my local craft store in a kiln? No, you definitely can’t. Regular craft store glass paints are designed to air-dry or cure at very low oven temperatures. Fusing paints are completely different; they are made with fine glass particles and pigments that are formulated to melt and permanently bond with your glass at very high kiln temperatures. Using the wrong paint will, at best, result in the color burning away, and at worst, it could damage your project.
Do I need to buy different paints for my COE90 and COE96 glass? This is a great question, and the answer makes life much easier. For the most part, you do not need separate paints for different COEs. Because the layer of paint is so thin, it doesn’t create the stress that would cause cracking between incompatible sheets of glass. This means you can use one set of high-quality fusing paints across all your COE90 and COE96 projects, which is great for both your wallet and your studio space.
Why did my paint bubble or crack in the kiln? The most common reason for bubbles or cracks in your paint is applying it too thickly. It can be tempting to lay on a heavy coat for a solid color, but a thick layer can trap air and moisture. When the kiln heats up, that trapped material expands and has nowhere to go, causing it to blister or even pop. For a smooth, professional finish, it’s always better to apply two thin, even coats instead of one thick one.
The color of my fired piece looks nothing like the paint in the bottle. What happened? This is completely normal, so don’t worry. The color of unfired glass paint is often very different from its final, fired color. The intense heat of the kiln causes a chemical reaction that matures the pigments, bringing out their true, vibrant hue. This is precisely why testing your colors on a scrap piece of glass is so important. It allows you to create a reference palette so you know exactly what to expect from each color after firing.
I made a mistake while painting. Is there any way to fix it before firing? Yes, and this is one of the most forgiving aspects of glass painting. As long as the paint has not been fired, you can almost always fix a mistake. If the paint is still wet, you can simply wipe it away with a damp cloth. If it has already dried, you can typically use a small palette knife or a craft blade to gently scrape the paint off the glass surface. This lets you correct any errors and repaint the section without having to start the whole piece over.