
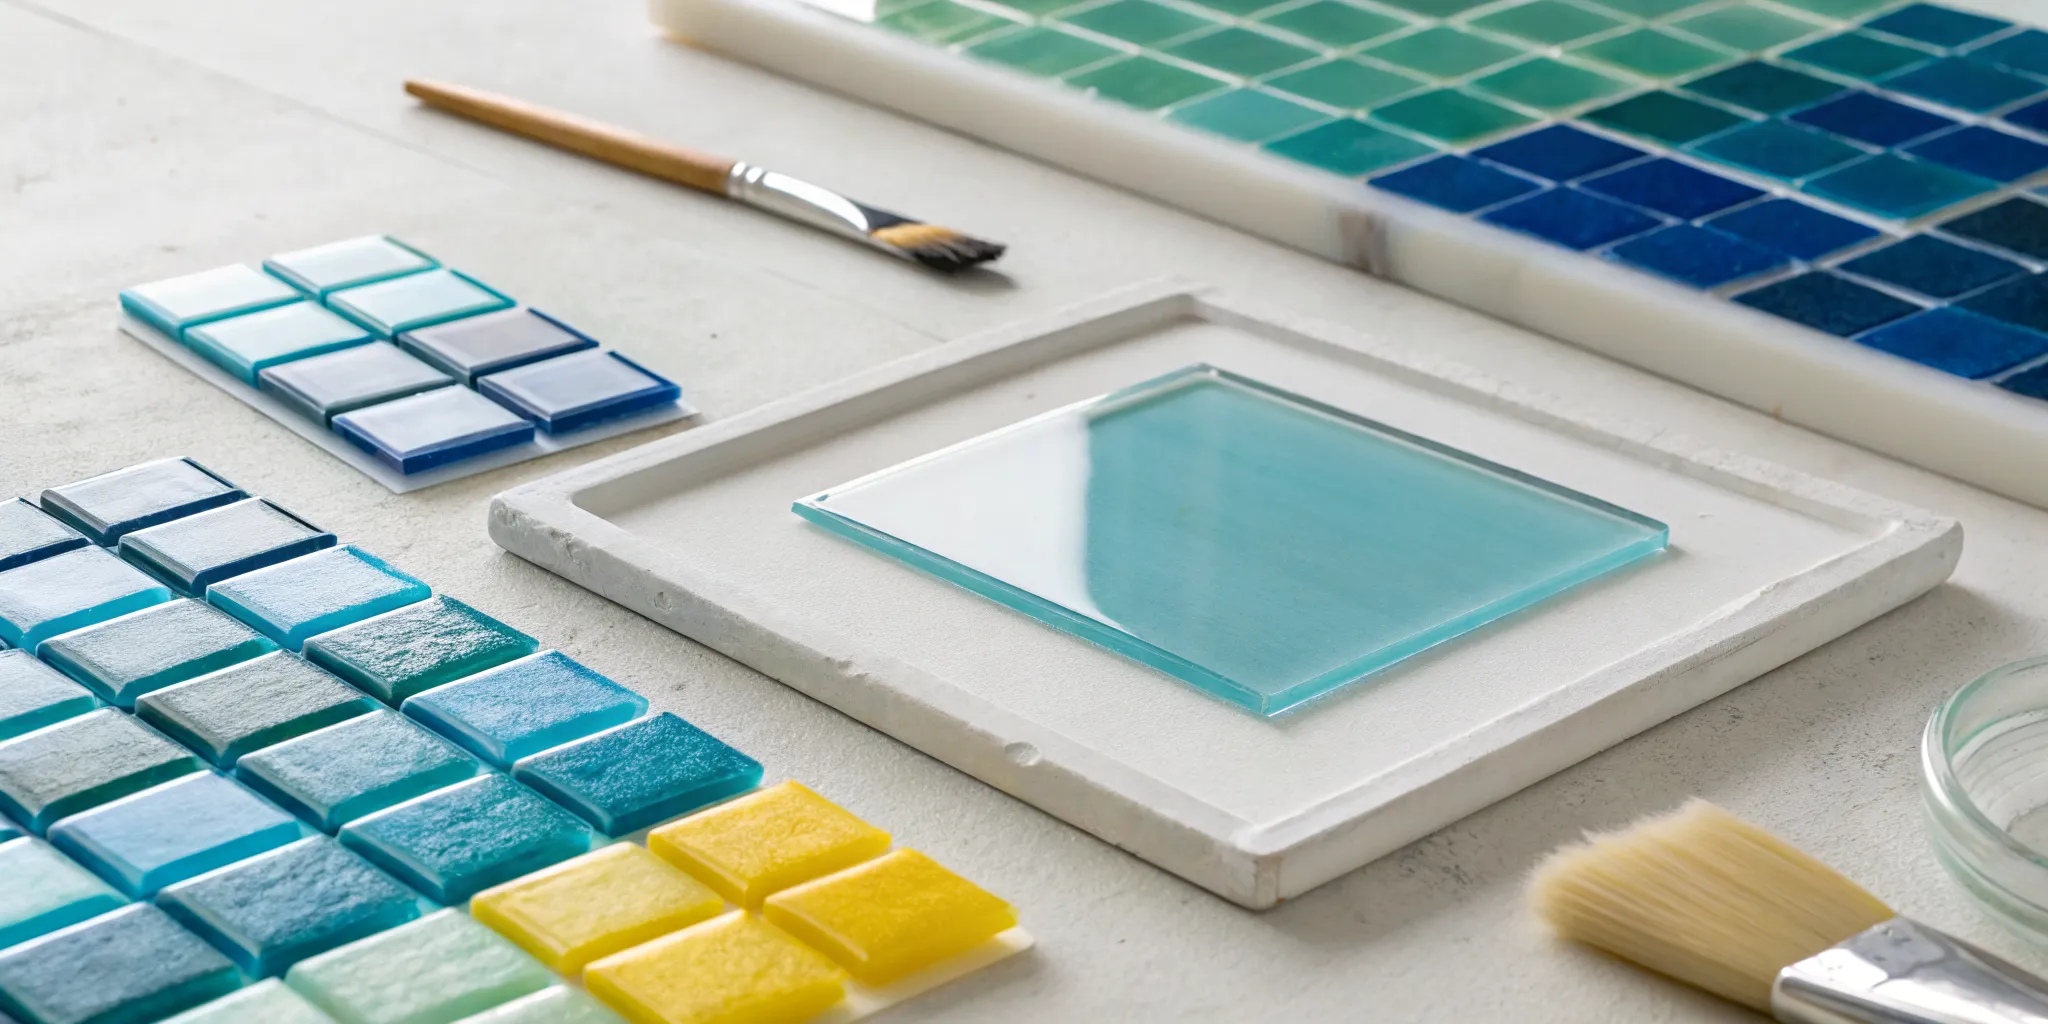
You’re skilled at cutting and shaping glass, but what if you could also paint on it? Glass fusing paints bridge the gap between the structural world of glass cutting and the fine art of painting. This special fused glass paint lets you add shading, fine lines, and painterly effects with the control of a brush, opening up a whole new dimension of creative freedom. This guide is your ultimate ‘glass fusing faq’ on the topic. We’ll cover the essential kiln fired glass painting techniques you need to start incorporating paints into your work, a perfect next step beyond basic glass fusing.
Key Takeaways
- Match Your COE for a Lasting Bond: Your project’s survival depends on this one rule. Always match the paint’s Coefficient of Expansion to your glass, for instance using COE90 paint on COE90 glass, to prevent cracks and create a single, durable piece of art.
- Add Details Beyond the Glass Cutter: Glass paints give you the freedom to add fine lines, text, and shading that are impossible with cutting alone. Experiment with brushes, pens, and stencils to bring a new level of personal detail to your work.
- Trust the Entire Process, Not Just the Paintbrush: Your success relies on more than just your artistic skill. A clean glass surface, a well-planned firing schedule, and a safe workspace are essential steps that ensure your painted design fuses perfectly and permanently.
What Are Glass Fusing Paints?
If you’ve ever wanted to add delicate lines, intricate text, or shaded details to your glass art, you know it can be tricky with larger pieces of glass or even fine frit. This is where glass fusing paints come in. Think of them as a special kind of paint made from finely ground glass particles suspended in a liquid medium. They give you the control of a paintbrush to create detailed designs directly on your glass surface, something that’s nearly impossible with other glass forms.
These paints are your go-to for adding a personal touch that’s difficult to achieve otherwise. You can paint flowers, write names, or create complex patterns with precision. Once you’ve applied your design, the piece is fired in a kiln. The heat works its magic, permanently fusing the paint to the base glass. This process transforms your painted details into a seamless, durable part of your final artwork. It opens up a whole new world of creative possibilities for your fused and stained glass projects, allowing you to combine bold shapes with fine, painterly elements. It’s the perfect way to sign your work or add that one-of-a-kind detail that makes a piece truly yours.
What Happens to Paint in the Kiln?
The kiln is where the real transformation happens. As the temperature rises, the paint doesn’t just dry; it melts and permanently bonds with the glass surface it’s on. This fusion process ensures your design won’t chip, fade, or wash away. It literally becomes one with the glass.
Once fired correctly, the painted elements add incredible depth and character to your piece. You’ll often notice the colors become richer and more vibrant after firing. The result is a smooth, professional finish that integrates your detailed brushwork into the glass itself, creating a truly unique and lasting piece of art.
How Are They Different From Regular Paints?
You can’t just grab a tube of acrylic or watercolor paint for your glass fusing projects. Regular craft paints would simply burn off in the intense heat of a kiln, leaving nothing behind but a messy residue. Glass fusing paints, on the other hand, are specifically designed to withstand these high temperatures because they are essentially made of glass.
These specialty paints also have a very high color density. This means a thin, even layer can produce a surprisingly bold and opaque color, unlike some frits or powders that require more bulk. While you can apply them to almost any glass surface, it’s crucial to use paints that are compatible with your glass’s COE (Coefficient of Expansion) for fusing. Using a mismatched paint and glass, like a COE96 paint on COE90 glass, can cause stress and cracking during cooling.
Understanding the Fundamentals of Glass Fusing
While glass paints offer incredible detail, they are just one part of the larger world of glass fusing. Fusing is the art of joining glass pieces together using heat, allowing you to build layered, colorful creations that are completely unique. Unlike stained glass, where you connect pieces with metal, fusing melts the glass itself into a single, solid object. This process requires a special oven called a kiln, which reaches extremely high temperatures to soften and bond the glass. Understanding the basics of fusing will help you control the outcome of your projects, whether you’re aiming for a smooth, glossy finish or a more textured, dimensional piece. It’s a foundational skill that opens the door to creating everything from jewelry and coasters to intricate wall art and sculptural forms.
Glass Fusing vs. Other Glass Art Forms
Glass fusing is distinct from other glass art forms, primarily in how the pieces are joined. In fusing, you stack or arrange pieces of compatible glass and heat them in a kiln until they melt and bond together permanently. The goal is to create a single, unified piece of glass. This differs significantly from traditional stained glass work, where individual glass pieces are cut and then connected using copper foil or lead came. In stained glass, the pieces remain separate and are held together by a metal framework, whereas fusing makes them one. This fundamental difference allows for smooth surfaces and blended colors that are characteristic of fused glass art.
Key Fusing Techniques: Full, Tack, and Contour Fusing
Not all fusing is the same. The temperature and timing of your firing schedule determine the final look and texture of your piece. A “full fuse” is when the glass is heated to a point where the separate pieces melt completely into one another, creating a smooth, flat surface with soft edges. On the other end of the spectrum is a “tack fuse,” which uses a lower temperature to just stick the glass pieces together. This technique preserves the individual shapes and textures of the glass, resulting in a more dimensional, layered look. In between these two is a “contour fuse,” where the pieces melt together but still retain some of their original form and defined edges, offering a perfect balance of fusion and texture.
Shaping Your Glass: An Introduction to Slumping
Once you have a flat, fused piece, you can give it a three-dimensional shape through a process called slumping. This involves placing your fused glass over a ceramic or stainless steel mold and heating it again in the kiln. As the glass softens, gravity pulls it down, causing it to “slump” into or over the shape of the mold. This is how artists create functional pieces like bowls, plates, and platters. You can find molds in countless shapes and sizes, from simple curves to intricate patterns. Slumping is technically a separate step from fusing, but the two are often used together to transform a flat design into a finished, functional object.
Essential Materials Beyond the Sheet
While sheet glass is the foundation of most fusing projects, there are many other materials you can use to add color, texture, and detail. The most important rule is to use glass with a compatible COE (Coefficient of Expansion). This ensures all the pieces expand and contract at the same rate, preventing cracks. For example, you should only fuse COE90 glass with other COE90 materials. You can’t mix it with COE96 glass in the same project. Beyond compatibility, you can find fusible glass in various forms that allow for more creative expression than just cutting up sheets.
Frit, Stringers, and Rods
To add painterly effects and fine details without using actual paints, you can turn to other forms of glass. Frit, which is crushed glass available in textures from fine powder to coarse chunks, is perfect for creating gradients, shading, and textured fields of color. Stringers are spaghetti-thin strands of glass that are ideal for drawing fine lines, creating outlines, or adding delicate linear details. Rods are a thicker version of stringers and can be used to create bolder lines or decorative elements. By layering these materials onto your base glass before firing, you can achieve intricate designs and add depth to your work.
Explore the Types of Glass Fusing Paints
Once you decide to paint on glass, you’ll find a few different types of paints to choose from. While they all work by fusing to the glass in a kiln, each has its own personality and works best for certain styles. Think of them like different kinds of artist’s paints, such as oil, acrylic, or watercolor. Some are great for bold, opaque coverage, while others are perfect for delicate, fine lines. Let’s walk through the most common types so you can find the perfect match for your next project.
Glass Enamels
Glass enamels are a fantastic, all-around choice for adding color to your work. Think of them as the versatile workhorses of glass painting. These specially formulated paints are essentially finely ground glass mixed with a binder and pigments. When fired, they melt and permanently fuse to your glass surface. They come in a huge spectrum of colors and can be opaque or transparent, giving you plenty of creative options. Because they are designed to be compatible with many types of glass, they are a reliable option for most fusing projects. You can apply them with a brush, sponge, or even through a silkscreen for more complex patterns.
Glassline Paints
If your design calls for crisp lines, intricate details, or even lettering, Glassline paints are your best friend. Their unique formulation makes them behave more like ink or a drawing medium than a thick paint. They are perfect for outlining shapes, adding delicate patterns, or writing on your glass pieces before firing. Available in applicator bottles with fine tips, they give you incredible control. You can draw directly onto the glass, creating designs with a precision that’s hard to achieve with a standard brush. Many artists use them in combination with other enamels, using Glassline for the details and other paints for filling in larger areas of color.
Fuse Master Enamels
For artists who want rich, consistent, and vibrant color, Fuse Master Enamels are a top-tier choice. This premium line is known for its excellent coverage and brilliant results after firing. These lead-free enamels are compatible with many types of glass, including popular choices like COE90 glass. They are incredibly versatile in their application; you can brush them on for a classic painted look or mix them for use in an airbrush to get a smooth, even finish. Whether you’re a seasoned artist looking for professional-grade materials or a beginner who wants reliable results, these enamels deliver beautiful, consistent color every time.
EZ Fuse Enamels
If you’re new to glass painting or just want a straightforward process, EZ Fuse Enamels are a wonderful place to start. As the name suggests, they are designed for ease of use. One of their biggest advantages is that they mature at a slightly lower temperature, which can be more forgiving for beginners still getting the hang of their kiln. Despite being easy to work with, they don’t compromise on quality, offering excellent, vibrant color payoff. They provide great coverage and can be applied with a brush or used for silkscreening. EZ Fuse Enamels help you get consistent, beautiful results without a steep learning curve.
Why Should You Use Glass Fusing Paints?
If you’ve ever felt limited by the shapes you can cut from a sheet of glass, fusing paints are about to become your new best friend. Think of them as a way to add a whole new layer of artistry to your work, giving you the power to draw, write, and shade directly onto your projects. They bridge the gap between glass cutting and fine art, allowing you to bring more of your unique style into every piece you create. Let’s look at a few reasons why incorporating paints into your process can be a game-changer.
Create Fine Details Without Using Frit
While glass frit is fantastic for creating texture and broad areas of color, it can be challenging to control for intricate work. Fusing paints give you the precision you need for those delicate details. You can easily paint fine lines, add crisp lettering, or draw complex patterns that would be nearly impossible with frit alone. This control allows you to add a signature, create detailed facial features on a character, or design delicate floral patterns with the ease of using a pen or brush. It’s the perfect way to add that final, personal touch that makes your work stand out.
Achieve Vibrant, Permanent Colors
One of the best things about glass fusing paints is their permanence. When you fire your painted glass correctly in a kiln, the paint doesn’t just sit on the surface; it chemically bonds with the glass. This process creates vibrant, lasting colors that won’t scratch off, chip, or fade over time. Your artwork becomes a single, solid piece with color that is just as durable as the glass itself. This adds a professional finish and incredible depth to your designs, ensuring your art can be enjoyed for years to come.
Create Depth by Layering
Paints offer a fantastic opportunity to play with dimension in your glass art. You can apply them to the top surface for a bold, graphic look, or you can get more creative by painting between layers of glass. When you paint on a base layer and then cap it with a piece of clear or transparent colored glass, the design appears suspended within the piece. This technique creates a beautiful sense of depth and can make your artwork feel more dynamic and three-dimensional. It’s an excellent method for creating scenes or abstract designs with multiple visual planes.
Expand Your Creative Possibilities
Ultimately, glass fusing paints give you more creative freedom. The sheer variety of available products, from enamels and paint pens to shimmering mica powders, means you can always find the right tool for your vision. You are no longer confined to just cutting and assembling glass. Now you can draw, shade, stencil, and blend colors to create effects that are entirely your own. This opens up a world of possibilities, allowing you to express your artistic style in more personal and detailed ways. It’s about turning a piece of glass into your personal canvas.
Kiln-Fired Glass Painting Techniques
Once you have your paints, it’s time to get creative. There are many ways to apply glass fusing paints, and each method gives you a different look and feel. Whether you’re aiming for fine, delicate lines or broad, sweeping colors, there’s a technique that’s perfect for your project. Let’s walk through some of the most popular and effective ways to bring your glass designs to life.
Essential Tools for Cutting and Shaping Glass
While painting adds a beautiful layer of detail, the foundation of most glass art lies in the shape of the glass itself. Getting those clean curves and crisp, straight lines all comes down to having the right tools for the job. Investing in quality equipment not only makes the process smoother and more enjoyable but also ensures your safety and the precision of your final piece. From the initial score with a glass cutter to the final shaping with a grinder, each tool has a specific and important role. Let’s break down the essential tools you’ll need to start cutting and shaping glass with confidence.
Glass Cutters and Pliers
The first step in shaping glass is creating a clean score line, and for that, you’ll need a reliable glass cutter. It’s a common misconception that these tools slice all the way through the glass; instead, a cutter’s wheel creates a precise fracture line on the surface that guides the break. You can find different styles, like pencil-grip cutters for fine control or pistol-grip cutters that help reduce hand fatigue. Once your glass is scored, you’ll use pliers to snap it. Running pliers are designed to apply even pressure on both sides of the score for a clean break on straight cuts. For curves and for tidying up rough edges, grozing pliers are indispensable, allowing you to nibble away small bits of glass with accuracy.
How to Prep Your Glass for Painting
Before you even think about opening a jar of paint, the first and most important step is to prepare your glass. A clean surface is essential for ensuring the paint adheres properly and fires without any blemishes. Start by thoroughly cleaning your COE90 glass with isopropyl alcohol and a lint-free cloth to remove any fingerprints, oils, or dust. Even tiny specks can cause big problems in the kiln. And remember, safety first. Always wear safety glasses when handling glass to protect your eyes from any sharp edges or tiny fragments that might break off. A clean and safe start is the foundation of a beautiful finished piece.
Using a Brush for Classic Application
Using a brush is the most traditional and versatile way to apply glass fusing paints. It gives you incredible control over your design, allowing you to create everything from wide, smooth washes of color to tiny, intricate details. You can use soft-bristled brushes for even strokes or stiffer brushes to create texture. Fuse Master Enamels, for example, can be painted directly onto the top of your glass. For a more dimensional effect, you can also paint a design on one piece of COE96 glass and then cap it with another clear piece before firing. This technique sandwiches the paint between layers, creating a sense of depth.
Airbrushing for a Smooth Finish
If you’re looking for a perfectly smooth, even coat of color, airbrushing is the technique for you. It’s ideal for creating soft gradients or covering large areas without any brushstrokes. To do this, you’ll mix your powdered enamel with an airbrush-specific medium until it reaches a sprayable consistency. For the best results, apply the paint in several thin coats, allowing each one to dry completely before spraying the next. A helpful tip is to prop your glass up at a slight angle while you spray. This method takes a little practice, but the professional, flawless finish is well worth the effort.
Creating Clean Designs with Stencils
Stencils are a lifesaver when you want to create crisp, clean lines or repeat a complex pattern. You don’t need the steadiest hand to get professional-looking results with this method. One popular technique is dry sifting. Simply place your stencil onto the glass and use a sifter to gently shake the powdered enamel over the design. When you lift the stencil, you’re left with a perfect shape. You can also use stencils with thinned paints, dabbing the color on with a brush or sponge. This is a fantastic way to add geometric patterns, lettering, or intricate motifs to your work, similar to how artists use molds to achieve precise shapes.
Adding Intricate Details with Paint Pens
For the finest lines, delicate details, and even writing, glass painting pens are your best friend. Brands like Glassline offer paints in a bottle with a fine-tipped applicator, giving you the control of a pen. You can draw directly onto the glass, making it easy to add signatures, intricate outlines, or whimsical doodles to your pieces. These details are often best reserved for the final firing stage to ensure they remain sharp and defined. Using a paint pen is one of the most straightforward ways to add a personal, hand-drawn touch to your fused glass art.
When and How to Use Binders
Many glass fusing paints, especially enamels, come in a powdered form. To transform them into a liquid paint you can work with, you need to mix them with a binder or medium. This liquid medium does two important jobs: it helps the paint stick to the glass before it goes into the kiln, and it burns off cleanly during firing, leaving only the vibrant, fused color behind. You can control the paint’s consistency by adjusting the powder-to-binder ratio. Create a thick paste for opaque coverage or a thin, watercolor-like wash for more transparent effects. This simple step gives you complete control over your paint’s behavior before it enters the kiln.
Layering Paint Between Glass Sheets
To create a stunning sense of depth and protect your painted designs, try layering your paint between sheets of glass. This technique involves applying your paint to one piece of glass and then placing a second piece, often clear, on top before firing. When fused, the design appears suspended within the glass, giving it a beautiful, three-dimensional quality. Most enamel colors work wonderfully for this method, but it’s wise to test your reds, as they can sometimes react unexpectedly when capped. This approach adds a layer of sophistication to your work, much like the layered colors you see in traditional stained glass.
How to Choose the Right Paint
Picking the right paint for your glass fusing project is just as important as selecting your glass. The wrong choice can lead to unexpected results or even a cracked piece after hours of work. But don’t worry, making the right decision is easy once you know what to look for. Think about it like baking: you need the right ingredients for your recipe to turn out perfectly. For glass painting, your key “ingredients” are the paint’s COE, its opacity, its compatibility with other materials, and whether it’s food-safe. Let’s walk through each of these points so you can feel confident every time you pick up a brush. By keeping these four factors in mind, you’ll be well on your way to creating beautiful, lasting fused glass art.
Why Matching Your Glass COE Matters
First things first, you need to match your paint to your glass’s Coefficient of Expansion, or COE. This is a non-negotiable rule in glass fusing. COE measures how much glass expands and contracts when heated and cooled. If your paint and glass have different COEs, they will expand and contract at different rates inside the kiln, which can cause stress, cracking, or crazing.
Most fusing paints are designed to be compatible with a specific COE, so always check the product description. Whether you’re working with COE90 glass or COE96, make sure your paints are formulated for it. Using a COE90 paint on COE96 glass is a recipe for disappointment. Matching the COE is the most critical step for ensuring your piece survives the firing process intact.
Opaque vs. Transparent: Which Should You Choose?
Next, think about the look you want to achieve. Do you want bold, solid colors, or do you prefer a more delicate, light-filled effect? Your answer will help you choose between opaque and transparent paints. Opaque paints will cover the glass underneath, creating solid blocks of color that don’t let light pass through. They are perfect for creating graphic designs or adding details that stand out.
Transparent paints, on the other hand, allow light to shine through, creating a look similar to stained glass. They are great for adding subtle color washes or creating intricate, layered designs where you want to maintain the glass’s translucency. Many artists use a combination of both to add depth and interest to their work. Fusing paints give you the flexibility to add fine details without relying solely on frit.
Checking Compatibility with Other Materials
Your paint doesn’t exist in a vacuum. It needs to play well with the glass and any other materials you’re using. Always read the manufacturer’s instructions to understand how a specific paint behaves. For example, some paints are designed to be applied to the surface of the glass, while others can be sandwiched between layers.
Pay close attention to any special considerations. Certain colors, particularly some reds and oranges, may have unique firing requirements or can’t be capped with another layer of glass. If you’re planning to use multiple colors or other elements like glass frit or stringers, it’s wise to check for compatibility to avoid unwanted chemical reactions in the kiln. A little reading upfront can save you a lot of trouble later.
Is Your Painted Glass Food Safe?
Are you planning to make a beautiful platter, a set of coasters, or a custom bowl? If your finished piece will come into contact with food, you must use paints that are certified as food-safe. Not all glass fusing paints are created equal in this regard, and many contain materials that are not safe for consumption.
Always check the product label or the manufacturer’s technical data sheet for information on food safety. If the packaging doesn’t explicitly state that it’s food-safe, assume it isn’t. For decorative items, this isn’t a concern. But for functional kitchenware, it’s a critical safety measure. A good practice is to verify the paint’s suitability before you even begin your project to ensure your art is both beautiful and safe.
Mastering Your Kiln Firing Schedule
Once your masterpiece is painted, the final and most crucial step is firing it in the kiln. This is where the magic happens, transforming your painted glass into a permanent, fused piece of art. But it’s not as simple as just turning the kiln on and off. The firing schedule, which controls how quickly your kiln heats up, how long it stays at a certain temperature, and how it cools down, is key to a successful outcome. Getting this right prevents cracks, ensures colors develop properly, and gives your work a professional finish.
How to Plan Your Firing Schedule
Think of a firing schedule as a recipe for your kiln. It has three main parts: the ramp (heating up), the soak (holding the temperature), and the anneal (controlled cooling). When you’re working with paints, your schedule needs to account for both the glass and the paint itself. For example, a quick fire polish might only need a brief soak around 1300°F. However, the thickness of your glass is a major factor. A thicker piece needs a slower initial ramp, maybe around 400°F per hour, to heat evenly and avoid the dreaded thermal shock that causes cracks. Always plan your schedule before you even think about pressing “start” on your kilns.
Understanding Fusing and Annealing Temperatures
Your firing schedule is all about hitting the right temperatures at the right time. The fusing temperature is the sweet spot where your glass becomes soft enough to melt and bond together, typically somewhere between 1350°F and 1500°F. Just as important is the annealing phase, which is the controlled cooling process. After the glass has fused, it needs to cool down slowly, usually holding at a temperature between 900°F and 1000°F. This step allows the glass to stabilize and relieves internal stress. Skipping or rushing the annealing phase is a common cause of cracked or broken projects, as the glass cools too quickly and unevenly. Think of it as giving your beautiful COE96 glass piece a chance to relax and settle into its final, durable form.
Tips for Preparing Your Kiln and Molds
A successful firing isn’t just about the glass and the schedule; it’s also about what your glass is sitting on. You need a barrier between your project and the kiln shelf to prevent them from fusing together permanently. The surface you choose not only protects your equipment but also affects the texture of your finished piece. Whether you’re firing a flat panel or slumping glass into a shape, proper preparation of your shelves and molds is a non-negotiable step. Let’s look at the most common options so you can decide what’s best for your studio and your specific project.
Kiln Shelves vs. Fiber Paper
Your two main choices for a flat firing surface are a primed kiln shelf or fiber paper. A ceramic kiln shelf is a reusable surface that, when coated with kiln primer, gives your glass a super smooth, glossy back. The downside is the maintenance. You’ll need to apply three fresh coats of primer before each firing, and if the old primer is cracked or flaking, you have to scrape it all off and start over. Fiber paper, on the other hand, is a convenient, single-use option. You just cut a piece to size and place it on your shelf. It’s porous, which helps prevent air bubbles from getting trapped, but it will leave a slight texture on the back of your glass. It’s a trade-off between the pristine finish of a shelf and the convenience of fiber paper.
Ceramic vs. Stainless Steel Molds
When you’re ready to add dimension to your work by slumping or draping, you’ll need a mold. Ceramic molds are a popular and affordable choice, available in countless shapes and sizes. They are quite durable, but they will break if dropped, and they also need to be coated with primer to prevent sticking. A big plus is that the primer tends to last for several firings. Stainless steel molds are a more expensive but extremely durable alternative. They are practically indestructible and cool faster than glass, which can be a benefit. However, their slick surface can make them more difficult to prime evenly. Your choice really comes down to your budget and how much you value durability over initial cost.
What to Expect as Colors Change
Don’t be surprised if the colors you see after firing are different from what you painted. Heat has a transformative effect on glass paints and enamels. Some colors will mature into richer, more vibrant hues, while others might soften or shift slightly. This is a normal and expected part of the process. Understanding how your specific paints react to heat is part of the fun and learning curve of glass art. Firing your painted COE90 glass is an exciting reveal, so embrace the small variations and learn which paints give you the results you love.
How to Avoid Common Firing Mistakes
A few common missteps can lead to disappointing results, but they are easy to avoid with a little care. One major error is rushing the process. If you don’t give your piece enough time to soak at the target temperature, the paint may not fuse completely to the glass. Another frequent mistake is allowing the temperature to change too quickly, especially during the cooling phase, which can cause your beautiful piece to crack. The best way to prevent these issues is to follow a well-structured firing schedule designed for your specific materials and project thickness. Patience is truly a virtue when it comes to kiln firing.
When Is It Safe to Open the Kiln?
I know how tempting it is to peek inside the kiln as soon as the firing is done. You’re excited to see how your colors developed! But this is where patience is your most important tool. Opening the kiln too early is one of the fastest ways to ruin a piece you’ve spent hours on. The sudden rush of cool air can cause thermal shock, a rapid temperature change that your glass can’t handle, leading to cracks or even a complete break. The golden rule is to wait until the kiln is close to room temperature, or at least well below 100°F, before you even think about cracking the lid. It might feel like an eternity, but waiting ensures your beautiful, painted glass art survives the journey and makes it out in one piece. Trust the process, and let it cool completely.
Firing Multiple Projects at Once
If you have a few smaller projects ready to go, you might wonder if you can fire them all at once to save time and energy. The answer is yes, but with a few important conditions. You can safely fire multiple pieces together as long as they are similar in thickness, have the same number of layers, and are relatively close in size. When you do this, always program your kiln using the firing schedule for the largest or thickest project in the load. The smaller pieces won’t be harmed by the slower, more cautious schedule, but trying to fire a large piece on a schedule meant for a small one is asking for trouble. It’s a great way to be more efficient in the studio, as long as you fire smart.
A Note on Stacking Kiln Shelves
While stacking shelves is common in pottery, it’s generally not recommended for glass fusing. The reason comes down to how glass heats. For a successful fuse, your entire piece needs to heat as evenly as possible. When you stack shelves, you create hot and cool spots inside your kiln. The lower shelf blocks direct heat from reaching the shelf above it, causing the top piece to heat unevenly. This often results in the edges of your glass melting and rounding long before the center has even reached temperature, leading to inconsistent and disappointing results. For the best outcome, stick to a single layer of projects in your kiln to ensure uniform heating from all sides.
Troubleshooting Common Fusing Problems
Even the most experienced glass artists run into issues now and then. Opening the kiln to find an unexpected result can be frustrating, but most common problems have simple solutions. Understanding what went wrong is the first step to fixing it and preventing it from happening again. From pesky bubbles to stubborn kiln wash, let’s walk through some of the most frequent fusing challenges and how you can tackle them head-on. Think of these as learning opportunities that will make you a more confident and skilled artist in the long run.
Why Are There Bubbles in My Glass?
Finding bubbles in your finished piece is a classic fusing problem, and the cause often depends on the size of the bubble. Tiny bubbles are usually just air that got trapped between your glass layers as they heated up. To prevent this, slow down your firing schedule, especially between 1000°F and 1465°F. This slower ramp gives the air time to escape before the edges of your glass seal shut. If you’re seeing larger, dome-shaped bubbles, it’s likely a sign that you fired too quickly on a very smooth surface, like a ceramic kiln shelf. According to glass artist Lisa J Vogt, you can fix this by slowing down the process and using shelf paper or a fiberboard shelf, which have more texture and allow air to vent out from underneath.
How to Handle Sharp Edges After Firing
Have you ever pulled a piece from the kiln only to find it has surprisingly sharp edges? This often happens when glass “drags” as it contracts on fiber paper during the cooling process, creating resistance that pulls the edges into a sharp point. While it’s not the finish you were hoping for, it’s completely fixable. Your first step is to carefully file or grind down those sharp edges until they are smooth. Once you’re happy with the shape, you can refire the piece. A quick fire polish will melt the surface just enough to restore a glossy, smooth finish to the ground edge, making it look perfect.
Avoiding Dark Spots and Debris from Glue
When you’re assembling a multi-layered piece, a little glue can feel like a necessity to hold everything in place. However, using too much can lead to dark, ashy spots or even small eruptions in your finished work. This happens because any excess glue between the layers of glass burns during firing and becomes trapped. The best practice is to avoid using glue altogether if you can. If you absolutely need it to secure small components, use it as sparingly as possible. A few tiny, well-placed dots are all you need. This “less is more” approach will help you achieve a clean, clear fuse without any unwanted debris.
Removing Stuck Kiln Wash from Your Piece
Kiln wash is essential for preventing your glass from sticking to your kiln shelf, but sometimes the kiln wash itself sticks to your glass. This usually happens for one of two reasons: the kiln wash was old and applied unevenly, or the piece was fired too hot or for too long, causing the glass to embed into the wash. To remove it, start with a gentle approach. Fine steel wool or a scraping tool can often take off the residue. If you’re dealing with a particularly stubborn spot, a bathroom cleaner designed for hard water stains can be surprisingly effective. Just be sure to rinse your piece thoroughly afterward.
How to Stay Safe When Using Glass Paints
Getting creative with glass paints is an incredibly rewarding process, but it’s important to make safety a natural part of your workflow. This isn’t about adding a bunch of restrictive rules; it’s about creating a studio environment where you can focus on your art without worry. A few simple, consistent habits can make a huge difference in keeping you safe and helping your projects turn out beautifully. When you feel secure in your space, you have the freedom to experiment and let your creativity flow. We’ll walk through the four key areas to pay attention to: ensuring good airflow, protecting yourself with the right gear, keeping your space tidy, and handling your materials correctly from start to finish. Think of these practices as the foundation for a long and happy journey in glass art. By integrating these steps into your routine, you’re not just protecting yourself, you’re also respecting your craft and setting yourself up for success on every single project. From the moment you unbox your beautiful sheets of stained glass to the final firing, these safety habits will become second nature, allowing you to concentrate on what truly matters: bringing your artistic vision to life.
Why Proper Ventilation Is Non-Negotiable
When you work with glass paints, especially those in powdered form, tiny particles can become airborne. Breathing these in is something you definitely want to avoid, so making sure your workspace has great ventilation is key. This can be as simple as opening a window and using a fan to direct air outside, or you might have a dedicated exhaust system in your studio. For an extra layer of protection when mixing dry powders, it’s wise to “wear a NIOSH-approved respirator … and use local ventilation.” This simple step ensures you’re breathing fresh, clean air, not fine dust from your materials.
Protect Your Skin and Eyes
Working with glass means handling potentially sharp edges, and some paints can contain ingredients that may irritate your skin. That’s why protecting your eyes and skin is non-negotiable. Before you even start cleaning a sheet of COE96 glass for a new project, make it a habit to put on your safety glasses. As one helpful guide notes, you should “always wear safety glasses to protect your eyes from sharp fragments.” Even a tiny sliver of glass can cause a serious problem. Wearing gloves is also a smart move to prevent small cuts and keep paints off your skin. It’s a quick, easy habit that prevents the most common studio mishaps.
General Kiln and Studio Safety Gear
Beyond your personal gear, think about the safety of your entire studio, especially the area around your kiln. These machines generate incredible heat, so treating them with respect is essential. Always keep the space around your kilns clear of flammable materials and ensure it’s in a well-ventilated spot. When it’s time to check on a piece or open the door after a firing cycle, never do so without proper protection. Burns are a serious risk. The best practice is to always use heat-resistant gloves and wear protective clothing, like long sleeves made from natural fibers. These simple precautions allow you to work confidently and safely around the most powerful tool in your studio.
Keeping Your Workspace Clean and Safe
A cluttered studio can be an accident waiting to happen. Keeping your creative space organized is one of the most effective safety measures you can take. A clean workspace reduces the risk of tripping over cords, knocking over a jar of paint, or accidentally breaking a piece of glass you’ve spent hours preparing. A simple rule to follow is to “keep a tidy work area. Tools in their place. Cords stowed. Glass safely stored.” When everything has a designated spot, you can move around freely and focus on your art. This is especially important around your kiln, where you need clear, unobstructed space to work safely.
How to Safely Store and Dispose of Paints
Your responsibility for safety continues even after the painting is done. Proper storage and disposal of your materials are just as important as how you use them. Keep your glass paints in clearly labeled, airtight containers, and store them somewhere cool and dry, safely out of reach of children and pets. When you’re mixing any powdered materials, like enamels or investment for molds, it’s crucial to “use local ventilation and wear a NIOSH-approved respirator.” When it’s time to dispose of unused paint or empty containers, check your local guidelines, as some materials may be considered household hazardous waste.
Pro Tips for a Flawless Finish
You’ve got your paints, your glass is clean, and your design is ready to go. Before you dive in, let’s talk about a few professional habits that can make a huge difference in your final piece. These tips will help you avoid common frustrations and get the beautiful, consistent results you’re aiming for. Think of them as your secret weapons for working with glass paints.
For Beginners: Why Taking a Class Is a Great Start
If you’re just starting out, the world of glass fusing can feel both exciting and a little intimidating. A great way to get started without feeling overwhelmed is by taking a local class. In a workshop setting, you get the benefit of hands-on learning with an experienced instructor right there to guide you. They can show you exactly how to cut glass safely, explain the basics of kiln programming, and answer all your questions in real-time. It’s a fantastic, low-pressure way to learn foundational skills. Plus, you get to connect with other new artists and see what they’re creating, which is always inspiring. A class provides a structured environment to build your confidence before you decide to invest in your own tools and materials.
The Golden Rule: Always Test Fire First
This might be the most important piece of advice I can give you: always, always do a test fire. Every paint, every color, and every kiln can behave a little differently. Creating a small test tile allows you to see exactly how your paints will look and react after firing without risking your main project. Colors can shift dramatically in the heat, and a test fire is your only way to preview that transformation.
Simply use a small piece of scrap glass that has the same COE as your project glass. Apply the paint just as you plan to on your final piece and run it through a full firing schedule. This small step saves so much potential heartache and material waste. It’s how you build a personal library of knowledge about your materials, turning you from a hobbyist into a confident artist who can predict your results.
The Art of Building Layers Gradually
One of the most exciting things about glass paints is the ability to create incredible depth. You can achieve this by building your design in gradual layers. Instead of applying one thick coat of paint, try working with several thin ones. This gives you more control and prevents colors from bleeding or looking muddy. For some designs, you might even fire the piece between layers to set the colors before adding more detail on top.
You can also layer paints between sheets of glass for a stunning, dimensional effect. Most colors work beautifully when capped with a clear layer of COE90 glass, though it’s wise to test this first. Just be mindful that some colors, particularly reds and oranges, can have unique reactions when capped, so a test fire is essential.
Tips for Mixing and Blending Your Colors
Don’t feel limited by the colors available straight out of the bottle. Mixing your own custom shades is one of the best ways to make your artwork truly unique. Whether you’re working with powders that you mix with a medium or blending pre-mixed liquid paints, the process is straightforward. Use a palette knife on a small glass palette to blend colors until you achieve the perfect hue.
Start by mixing small amounts to avoid waste. Once you create a color you love, make a note of your “recipe” so you can recreate it later. This practice gives you complete creative control over your palette, allowing you to perfectly match the colors in your design to your chosen sheet of COE96 glass or create a striking contrast.
How to Care for Your Finished Fused Glass
Once your piece comes out of the kiln and has cooled completely, the paint is permanently fused into the glass. It isn’t just sitting on the surface; it has become part of the glass itself. This creates a durable, scratch-resistant finish that will last a lifetime. Proper firing in your kiln is what makes this permanent bond possible, adding both color and character to your work.
For decorative pieces, a simple dusting is all that’s needed to keep them looking great. If you’ve created a functional item like a dish using food-safe paints, it’s best to hand wash it gently with mild soap and water. Avoid abrasive scrubbers or harsh chemicals to ensure the glass and the design stay pristine for years to come.
Related Articles
- Best Paints for Glass Art: From Windows to Decorative Pieces
- A Complete Guide on, How to Prepare for Glass Fusing?
- The Best Paint for Glass and How to Use It – ArtGlassSupplies
- How to Make Glass Jewellery in 7 Simple Steps – ArtGlassSupplies
- The Ultimate Glass Fusing Kiln Guide for Artists – ArtGlassSupplies
Frequently Asked Questions
What really happens if I use a COE90 paint on COE96 glass? Think of it as a fundamental incompatibility. Glass expands when heated and shrinks when cooled, and COE measures that rate of movement. If your paint and glass have different COEs, they will shrink at different speeds as your piece cools in the kiln. This creates immense stress within the glass, which almost always results in fine cracks, fractures, or the paint flaking off. It’s one of the few hard-and-fast rules in glass art, so matching the COE is the first step to a successful project.
How thick should my paint be when I mix it with a medium? The ideal consistency depends entirely on the effect you want. For bold, opaque coverage, you should aim for a texture similar to heavy cream or melted ice cream. This will give you a solid color that covers the glass underneath. If you’re looking for a more transparent, watercolor-like effect, you’ll want to thin the paint further, closer to the consistency of milk. The best way to get a feel for it is to experiment on a scrap piece of glass to see how different thicknesses look after firing.
Should I paint on the top layer of my glass or between layers? This choice depends on the final look you want to achieve. Painting on the top surface gives your design a crisp, graphic quality and is perfect for adding fine details or a signature after your main fusing is complete. When you paint between layers of glass and then fire them together, the design becomes suspended inside the piece. This creates a wonderful sense of depth and dimension, and it also completely protects the painted design.
Do I need a special firing schedule just for the paint? Not necessarily. Often, you can incorporate the paint into your main full fuse schedule. However, if you are adding very fine details, like writing or delicate lines with a Glassline pen, you might want to add them last and fire the piece at a lower temperature. A quick fire polish schedule will set the paint permanently without causing the lines to soften or spread, keeping your details sharp and clear.
Why did my paint colors look faded or blotchy after firing? This can happen for a few reasons. The most common cause is an unclean glass surface; any oil or residue can prevent the paint from fusing properly. Another possibility is that the paint was applied too thinly, resulting in a washed-out look. Conversely, applying it too thickly can sometimes cause it to bubble or flake. Finally, the firing temperature might not have been high enough for the paint to fully mature. This is why test firing a small sample is so valuable, as it helps you perfect your application and firing schedule before you commit to your main project.