
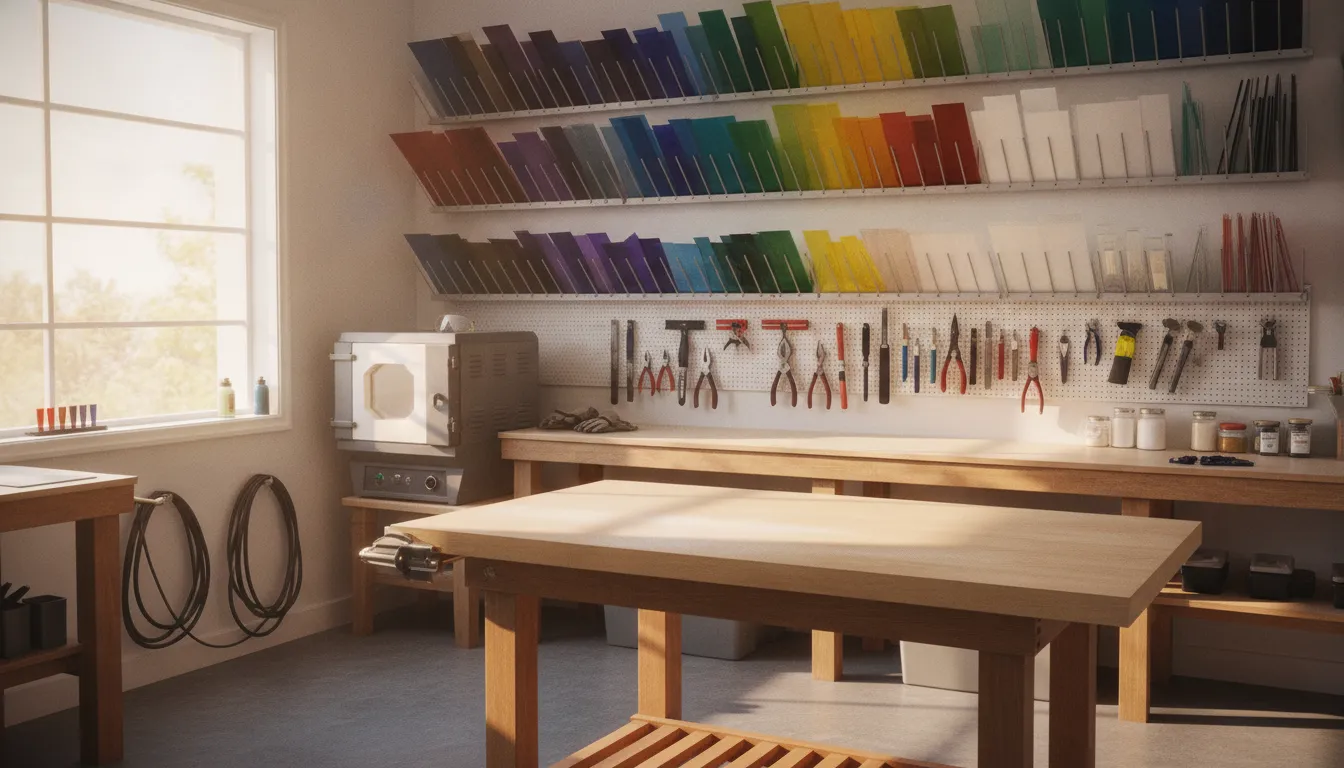
A home glass studio works best when each activity has a clear place. Cutting and grinding need a practical cold-shop area, while kiln firing requires planning for heat, electrical capacity, clearances, and safe airflow. Starting with the workflow prevents expensive equipment from becoming an obstacle.
A successful home glass studio setup matches your technique and project scale to the right kiln. Stable workbench, storage, cutting and grinding tools, kiln furniture, ventilation, and protective gear. Keep stained-glass cold-shop work separate from kiln-based fusing, and choose compatible glass, such as COE 90 or COE 96, without mixing systems.
Before buying a kiln or filling shelves with supplies, map how materials move from storage to cutting, preparation, firing, and cleanup. That simple planning step helps you identify the space, utilities, and equipment you actually need.
Explore kilns and glass studio equipment for your setup
What should you plan before buying studio equipment?
Start with the work you want to do, not with a shopping cart. Equipment requirements depend on both technique and project scale, and a cold-shop stained-glass workspace is not the same as a kiln-based fusing studio. Stained glass generally centers on cutting, fitting, grinding, and soldering. Fusing adds heat, firing schedules, kiln clearance, and a place to handle hot materials safely.
Match the room to the technique
Map the room before choosing a bench or kiln. Identify where glass will be cut, where wet grinding can take place, and where finished pieces can cool or be stored without being disturbed. If you plan to fuse, reserve a dedicated kiln area with suitable clearances and access to the electrical service required by the model. Confirm electrical capacity, ventilation needs, clearances, and local requirements with qualified professionals before installation. A kiln is not simply another tabletop tool.
Also decide whether the room needs to support one technique or several. Keeping cold-shop cutting and grinding separate from the kiln and warm-glass area helps you plan dust control, surfaces, storage, and cleanup more deliberately. Stained-glass work may involve sharp edges, glass dust, and soldering fumes, while kiln work introduces heat and firing-related ventilation considerations. Those differences should shape the room layout from the beginning.
Plan a workflow that fits your projects
Think through one typical project from raw material to finished piece. Place the cutter and layout surface near sheet-glass storage. Keep grinding equipment close enough that you do not carry fragile pieces across the room, while leaving room for water, slurry management, and cleanup. A compact sequence such as cut, grind, assemble, and inspect can reduce unnecessary movement without forcing every tool onto one crowded bench.
For fusing, add zones for compatible glass selection, kiln loading, kiln furniture, and cooling. Choose a material system before buying sheets or frit. COE 90 and COE 96 are distinct compatibility categories, so do not mix them casually in one project. A useful starting point is this guide to first glass fusing studio essentials, then adapt the list to your room, technique, and project size.
Finally, leave expansion space. Your first setup should support the projects you can realistically make now, while allowing safer storage and a clearer workflow as your skills develop.
How to Choose the Right Kiln for a Home Glass Studio Setup
A kiln is the part of a home glass studio setup that turns assembled glass into a controlled thermal process. Choose it around the work you actually plan to make, not simply the largest chamber or the lowest listed price. Small jewelry pieces, test tiles, ornaments, and occasional fused components may fit an entry-level chamber. Larger panels, multiple molds, production work, or teaching sessions may justify more capacity and more control.
Match the kiln to your projects
Start with the chamber dimensions, usable shelf area, and the height needed for molds or layered work. The chamber is typically lined with refractory material to withstand high temperatures, while the heating elements generate heat as electric current passes through them. The control panel manages temperature, timers, and operating settings. These basic components matter because a kiln is not just a heated box: its capacity and controller determine how consistently you can repeat a process. Choosing a home glass fusing kiln can help you compare those specifications in more detail.
Electrical planning belongs in the decision before purchase. Check the kiln’s voltage, amperage, plug or wiring requirements, and the capacity of the intended circuit against the manufacturer’s specifications. Have a qualified electrician evaluate the installation and follow local requirements. Do not assume a convenient outlet is suitable, and do not treat a kiln retailer as an installation or inspection service.
Understand the controller and firing schedule
Glass firing schedules are usually ramp-hold programs. A ramp raises the temperature at a selected rate, and a hold maintains a temperature for a defined time. Each ramp and hold forms a segment. A programmable controller makes these changes repeatable, but the correct schedule still depends on the glass, thickness, project design, and desired result. Use the kiln manual as the starting point for entering a schedule, then keep notes as you test and refine your work. Electric kilns are common in small studios partly because they offer precise control and are generally easier to operate and maintain than gas kilns. Sources: Texas Department of Insurance electric kiln guidance and The Art of Education firing guide.
Compare practical planning tiers
| Planning level | Best fit | What to prioritize | Illustrative anchor |
|---|---|---|---|
| Entry | Small projects, samples, and learning | Suitable chamber, reliable controller, and compatible electrical plan | Lower-cost entry point |
| Professional | Higher volume, larger work, or broader production needs | More chamber capacity, repeatable programming, and robust workflow planning | Higher-cost professional tier |
These tiers are planning categories. They are not current prices or complete studio budgets.
Listings, configurations, freight, and required electrical work can change the final cost. Check current specifications and pricing before committing. Art Glass Supplies carries multiple Skutt glass kilns and kiln models. Compare each model with your project scale.
Choose the finish you want
A tack fuse allows pieces to adhere while retaining more relief and defined edges. A full fuse produces a smoother, glossy surface with softer edges and rounded corners. Your intended finish affects the schedule, testing, and the amount of shelf space you need. Also confirm glass compatibility before firing. COE 90 and COE 96 are different systems, so do not mix them casually in one project. Finally, treat every firing as hot until proven otherwise: glass can retain heat long after the kiln cycle ends, so wait for complete cooling before handling the work.
Ventilation and safety essentials for a home glass studio
Safety planning should be part of the room layout, not an afterthought. Glassworking can involve sharp edges, burns, eye injury, fumes, and abrasive dust. A practical safe home glass studio practices plan separates cold-shop work, such as cutting and grinding, from kiln-based work and gives each process the controls it needs.
Control kiln heat, fumes, and dust at the source
For an electric kiln, discuss ventilation with a qualified professional before choosing a location or modifying a wall, window, or duct route. Local exhaust may be connected directly to the kiln to move fumes and heat outdoors. A general canopy hood may capture heat and some particles, but it can provide limited respiratory protection because it may miss contaminants released outside its capture area. The Washington State Department of Health recommends considering source control for glassworking hazards, including kiln ventilation and local exhaust: Washington State Department of Health glassworking guidance.
Cold-shop work deserves equal attention. Cutting, grinding, and sandblasting can generate crystalline silica, while stained-glass work may also create glass dust and soldering fumes. Use wet methods where appropriate. Wet slurry during cutting and grinding helps control silica and toxic metal dust, but the slurry still needs responsible handling. A small settling bucket can capture grinding water and debris. Do not allow wet-grinding residue to dry into airborne dust.
Choose PPE for the task
Wear eye protection suited to the work, protective gloves when handling hot or sharp glass, and clothing that covers vulnerable skin without creating a snag hazard. Tie back long hair and secure loose clothing before working near saws, grinding wheels, or a furnace. When viewing glowing materials or working around a hot furnace, use infrared-blocking goggles. The Washington guidance specifies lenses that block infrared wavelengths from 600 to 6,000 nanometers. Standard didymium glasses do not block infrared radiation, so do not treat them as a substitute for infrared protection.
Make cleanup part of the workflow
Keep dust from becoming a second exposure after the project is finished. Wet-mop floors and wet-wipe cold-shop surfaces rather than dry sweeping. Use a HEPA-filter-equipped vacuum for appropriate cleanup, and clean wet-grinding equipment before its slurry dries. Collected grinding and polishing dust may require careful hazardous-waste disposal. Follow the requirements that apply in your area instead of pouring concentrated residue down a drain.
Electrical capacity, kiln placement, clearances, ductwork, and makeup air are consequential decisions. Have qualified electrical and ventilation professionals evaluate those parts of your home glass studio setup and confirm applicable local requirements. Art Glass Supplies can help you compare equipment and materials, but installation and code decisions belong with the appropriate professionals.
Build a workbench and cold-shop workflow
A productive home glass studio setup does not require a large room. But it does require a work surface that stays stable while you score, break, grind, and assemble pieces. Choose a bench with enough depth for your layout board and enough clearance to work without balancing glass at the edge. Keep the cutter grid beside the grinder, place layout boards behind or beside the bench, and reserve shelves or bins below for sorted scrap. This arrangement lets you move through the workflow with fewer trips while keeping sharp offcuts contained.
Separate cutting, grinding, and soldering tasks
Cutting and grinding belong to the cold-shop side of the studio. Cutting shapes the sheet, while grinding refines edges and removes small inaccuracies. Soldering is a separate stained-glass process that introduces heat and lead-related fumes, so do not treat a soldering station as just another wet-tool area. Give it its own clear section of the bench, with soldering tools stored away from glass-cutting supplies and food or household surfaces. For technique-specific guidance, see these tools for cutting glass and the guide to choosing a glass grinder.
Plan wet work and cleanup before you start
Use water or wet slurry where appropriate during cutting and grinding to help control silica and toxic-metal dust. A grinder should sit where splash can be contained, and its basin, work area, and nearby surfaces should be easy to clean. Do not allow slurry to dry into airborne dust. Wet-wipe cold-shop surfaces and wet-mop the floor rather than sweeping. A HEPA-filter-equipped vacuum is preferable to a broom when dry dust does occur. Small settling buckets can help capture cutting and grinding slurry, but collected grinding or polishing dust still requires careful disposal as hazardous waste. These controls matter because stained-glass work can involve sharp edges, glass dust, eye hazards, and lead fumes from soldering. Follow the Washington State Department of Health guidance on glassworking hazards and controls.
Finally, keep frequently used tools within reach, but store blades, cutters, pliers, and scrap so they cannot slide into the active work area. A small, clearly marked scrap container near the bench makes reuse easier and keeps the floor free of dangerous fragments.
How to store glass, tools, and kiln furniture safely
Good storage keeps a home glass studio setup safer and makes the next project easier to start. Store sheet glass vertically in a rack with dividers, or use clearly separated bins for smaller pieces, frit, stringers, and rods. Dividers prevent sheets from leaning against one another and make it easier to see what you have without repeatedly handling sharp edges. Keep heavier pieces low, secure the rack against tipping, and label partial sheets with the color, product line, and compatibility system.
Label COE before you combine materials
COE, or coefficient of expansion, describes how a glass material expands and contracts as temperature changes. It is one part of determining compatibility, alongside the glass formulation and firing behavior. COE 90 and COE 96 are different compatibility systems, so do not combine them in one fused project simply because the colors or thicknesses look similar. Keep COE 90 glass and COE 96 glass in separate, prominently labeled areas. If a label is missing, set the piece aside until its specifications can be confirmed. Never rely on appearance alone.
Separate warm-glass supplies from cold-shop tools
Use different shelves, drawers, or zones for kiln-fusing materials and stained-glass supplies. Warm-glass storage can include compatible glass, frit, molds, kiln wash, shelf paper, and other firing consumables. Cold-shop storage can hold cutters, pliers, layout tools, grinders, and soldering supplies. This separation reduces mix-ups and keeps sharp tools from being buried under fragile glass. A wall-mounted holder or pegboard can keep pliers visible and within reach, while shallow drawers work well for small tools and measured accessories.
Give scrap its own labeled containers instead of allowing it to spread across the workbench. Separate scrap by compatibility system, then sort usable offcuts from shards and dusty waste. Store molds and kiln furniture where they will not be chipped, crushed, or contaminated. Shelves, dams, trivets, and supports should remain flat and dry when the manufacturer requires it. Before firing, inspect them for cracks, residue, or old kiln wash. Apply kiln wash and use shelf paper according to the product directions rather than treating either material as interchangeable. A dedicated bin for kiln shelf preparation supplies helps keep these small but important items organized.
Home glass studio budget tiers: basic, intermediate, and professional
A useful budget is less about buying every tool at once and more about matching equipment to your technique, project scale, and available workspace. The tiers below are planning frameworks, not fixed package prices. Prices change, and electrical capacity, circuit requirements, ventilation, clearances, and local requirements vary by kiln and building. Confirm those details with qualified professionals before installation.
| Tier | Kiln capability | Work zones and storage | Tools, ventilation, and consumables |
|---|---|---|---|
| Basic | A small entry kiln for modest projects and learning ramp-hold firing. As an illustrative planning anchor only, the brief references an entry kiln around a lower-cost entry point, not a current verified price or complete studio total. | One stable cold-shop bench, compact cutting area, and labeled shelving for glass, tools, and kiln furniture. Keep warm-glass materials separate from stained-glass work. | Essential cutting and shaping tools, basic PPE, kiln shelf preparation supplies, and a practical ventilation plan. Add wet methods and cleanup routines before expanding equipment. |
| Intermediate | A larger or more versatile kiln that supports broader project sizes and more frequent firing. Prioritize chamber dimensions, controller functions, and electrical needs over a tier label. | Dedicated zones for cutting, grinding, layout, and kiln loading, with more vertical or segmented storage for sheet glass, frit, molds, and tools. | A wet grinder, improved task lighting, organized kiln furniture, and a planned exhaust approach. Budget for replacement shelf paper, kiln wash, separators, and other recurring consumables. |
| Professional | Higher-capacity equipment suited to regular production, larger work, or multiple firing cycles. The brief cites a higher-cost professional kiln tier as an illustrative professional-kiln anchor only, not a current price or full setup cost. | Separate cold-shop and kiln zones, durable work surfaces, production staging, inventory storage, and clear movement paths around hot equipment. | Redundant or specialized tools, robust ventilation planning, larger consumables inventory, and workflow capacity that reduces setup and cleanup bottlenecks. Match glass by compatible COE, such as COE 90 or COE 96, rather than mixing systems casually. |
Start with the tier that supports your next year of projects, not an imagined final studio. It is usually easier to add storage, a grinder, or upgraded kiln furniture later than to correct an unsuitable electrical or ventilation plan.
A practical setup sequence before your first project
- Define the technique and the first project. Decide whether you are cutting and assembling stained glass, fusing compatible sheet glass, or combining both workflows. For a kiln project, choose a simple form and a clear finish. Such as a tack-fused piece that retains some relief or a full-fused piece with a smooth, glossy surface. This decision determines the glass, tools, shelf preparation, and firing plan you actually need.
- Prepare the room and utilities. Place the kiln on a suitable noncombustible surface with the clearances specified by its manufacturer. Before plugging it in, confirm that the electrical supply, circuit, ventilation, and room arrangement are appropriate for the model. Electric kilns use heating elements, a refractory-lined chamber, and a control panel for temperature and timing, so read the manual before operating the equipment. A qualified professional should assess electrical or ventilation work when needed.
- Establish separate work zones. Set up a clean layout and assembly area, a cold-shop area for cutting or grinding. And a kiln zone that is easy to monitor without becoming a storage shelf. Keep glass, tools, and projects organized so sharp scraps and warm materials do not migrate into the wrong workflow. A relevant starting point is this guide to safe home glass studio practices.
- Buy and stage protective equipment. Keep eye protection, suitable gloves for sharp or hot glass, fitted clothing, and any technique-specific protection within reach. Secure loose hair and clothing before using cutting, grinding, or kiln equipment. Do not treat PPE as a substitute for ventilation, careful handling, or a controlled workspace.
- Test compatible materials. Use glass intended to work together. Make a small test piece before committing a larger project, and record the glass combination, design, firing schedule, and result. Do not assume that similar-looking sheets have compatible COE specifications.
- Program cautiously, then clean up safely. Begin with the kiln manual and a conservative ramp-hold schedule. A ramp-hold firing uses programmed temperature increases and holds divided into segments, so change one variable at a time. After firing, do not touch the project merely because the displayed temperature has fallen. Glass can retain heat for a long time, and it should cool fully before handling. Finish by containing scraps, wiping work surfaces, and leaving the cold-shop area clean rather than sweeping dust into the air.
Frequently Asked Questions
Is glass fusing an expensive hobby?
It can be, but you do not need every tool at once. Start with the technique you plan to use, then budget for safe workspace basics, compatible glass, kiln furniture, and one appropriately sized kiln if you will fuse. Add molds, grinders, and larger storage as your projects grow. Treat budget tiers as planning frameworks, not fixed current totals.
Can you do fused glass without a kiln?
You can cut, arrange, and prepare glass without owning a kiln, but fusing itself requires a controlled heating process. A beginner can use a kiln service, class, or shared studio for firing while building a cold-shop workspace at home. Keep glass systems separate and confirm COE compatibility before combining pieces.
What are some DIY glass projects I can do?
Good first projects include small fused tiles, coasters, simple pendants, sun catchers, or a small stained-glass panel. Choose a project that matches your equipment: stained glass needs a cutting and assembly workflow. While kiln projects also require compatible glass, shelf preparation, and a tested firing schedule. Start small so you can evaluate each result.
What is the best software for stained glass design?
The best software is the one that lets you draw accurately at a usable scale, adjust lines easily, and print or export a pattern reliably. For simple projects, paper, a ruler, and a basic vector or drawing app may be enough. Prioritize accurate dimensions, clear color planning, and easy pattern revisions over a long feature list.
Ready to plan your home glass studio setup?
A well-planned equipment list can help you match your kiln, work surfaces, storage, and safety supplies to the projects you want to make. Browse Art Glass Supplies kilns and equipment to compare options and refine your setup. Get started by exploring kilns and studio equipment.